
Salesforce introduced the transform element in their winter ‘24 release. This feature simplifies data processing in flows by eliminating the need for loops and assignment elements.
With the Transform Element, you can seamlessly map source data to target data, making your flows more efficient and easier to maintain. Transform element is available for screen flows, auto-launched flows with no triggers, and record-triggered flows.
In this blog, we will walk you through the steps to use the Transform Element in salesforce flow.
Key features
- Enables seamless mapping between source data and target data which simplifies the data transformation process.
- Handle data collections and transform each item individually.
- Enables dynamic field mapping using formulas.
- Supports aggregate calculations like sum and count.
Transform Element Component
- Source Data: Data to transform which are available to the flow.
- Target Data: Data after transformation. Target data could either be a single record or a collection of records. You define the target structure using an Apex class, a data type (Apex-defined or Record), or an object.
- Formulas: Set a fixed value for the target data field or Reference up to two source collections that are nested within one another.
Business scenarios
Case 1: Clone records, such as Accounts, Opportunities, etc
Create a Screen Flow to clone Account records selected by the user on the screen.
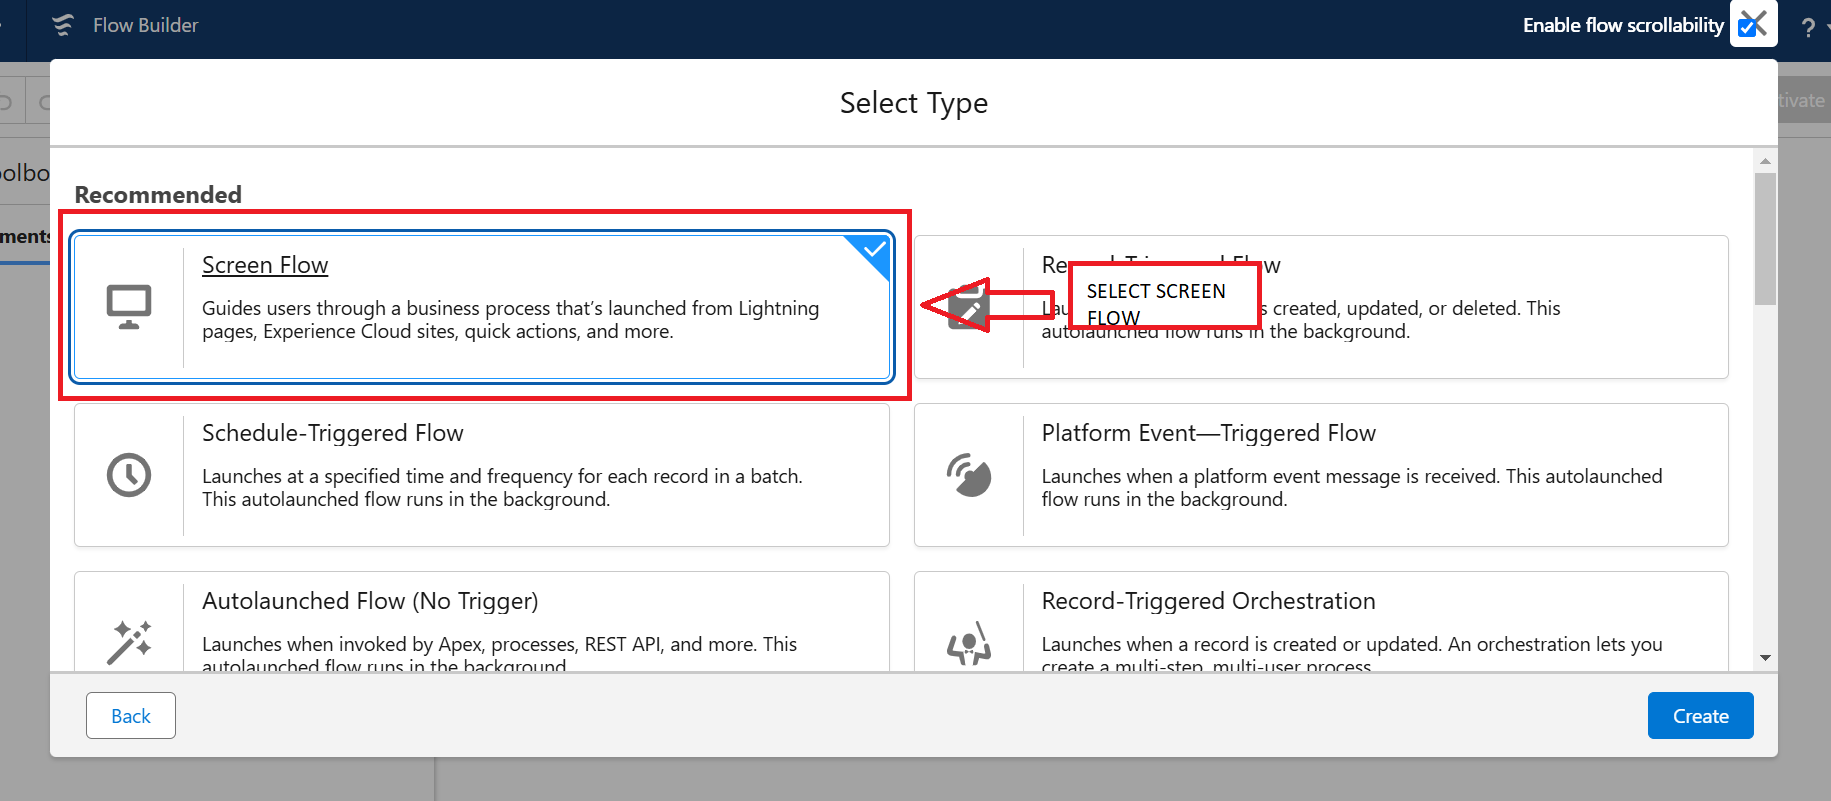
Step 1: Go to setup and create a Screen Flow.
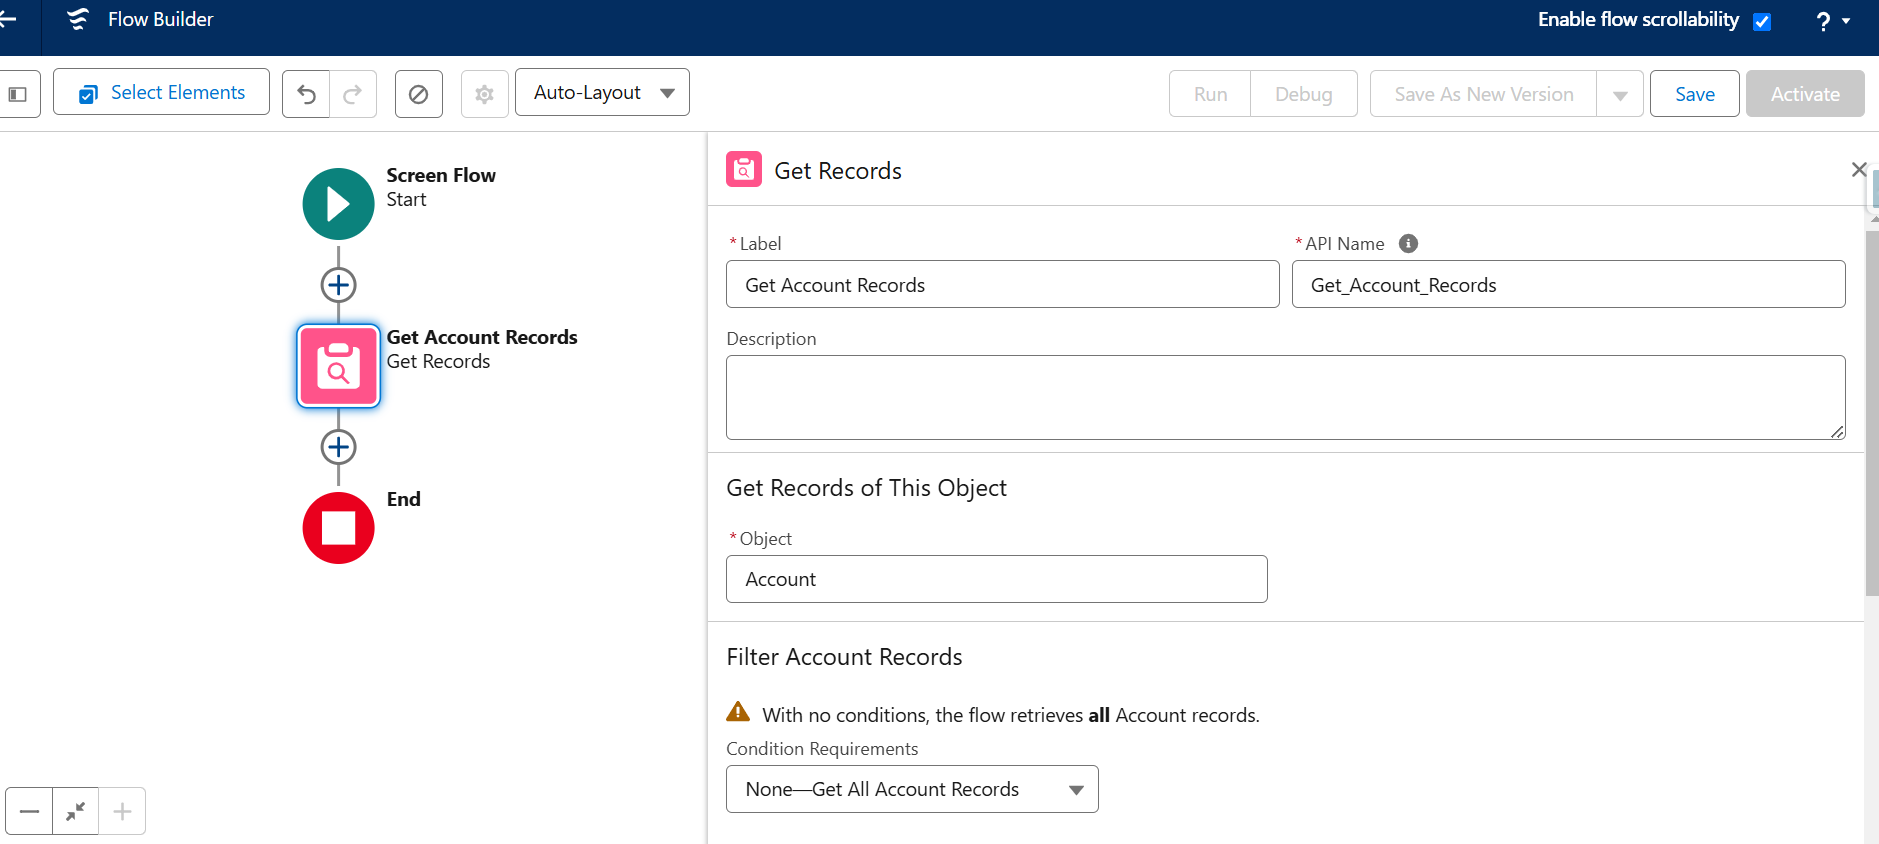
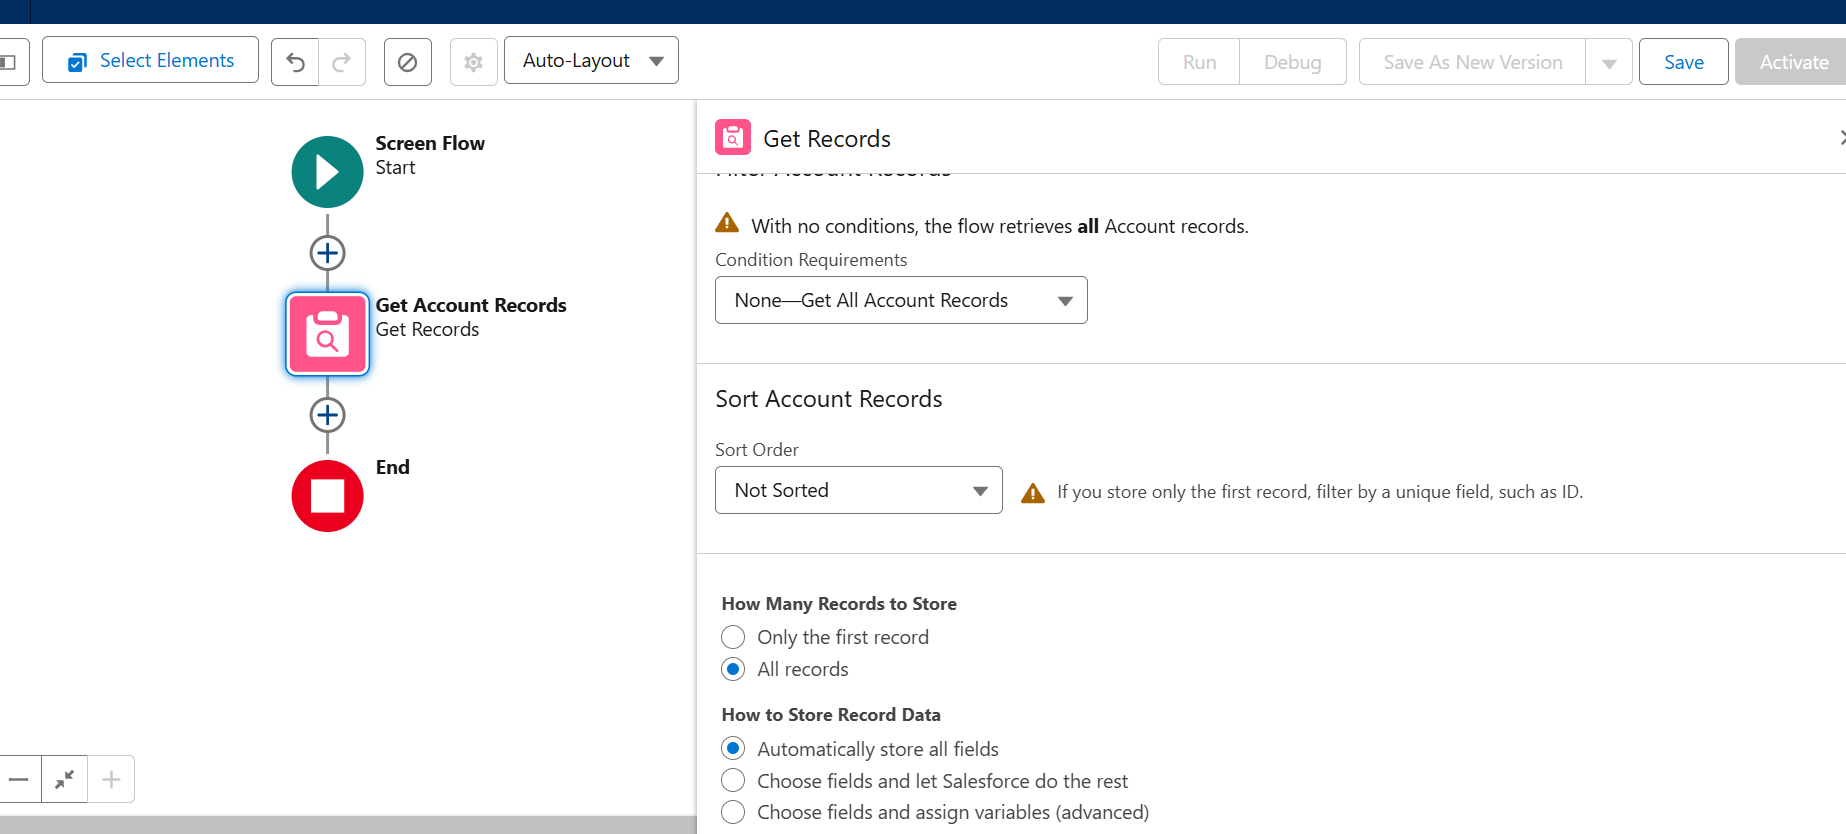
Step 2: Add a Get Records element to the flow to retrieve all Account records.
Step 3: After retrieving all Account records, add a Screen element to allow the user to select the Accounts for cloning.
To display the Accounts on the screen, drag and drop a Data Table component onto the screen. And configure data sources, rows, and columns.
Set the Get Account Records collection as the source collection to populate the Data Table.
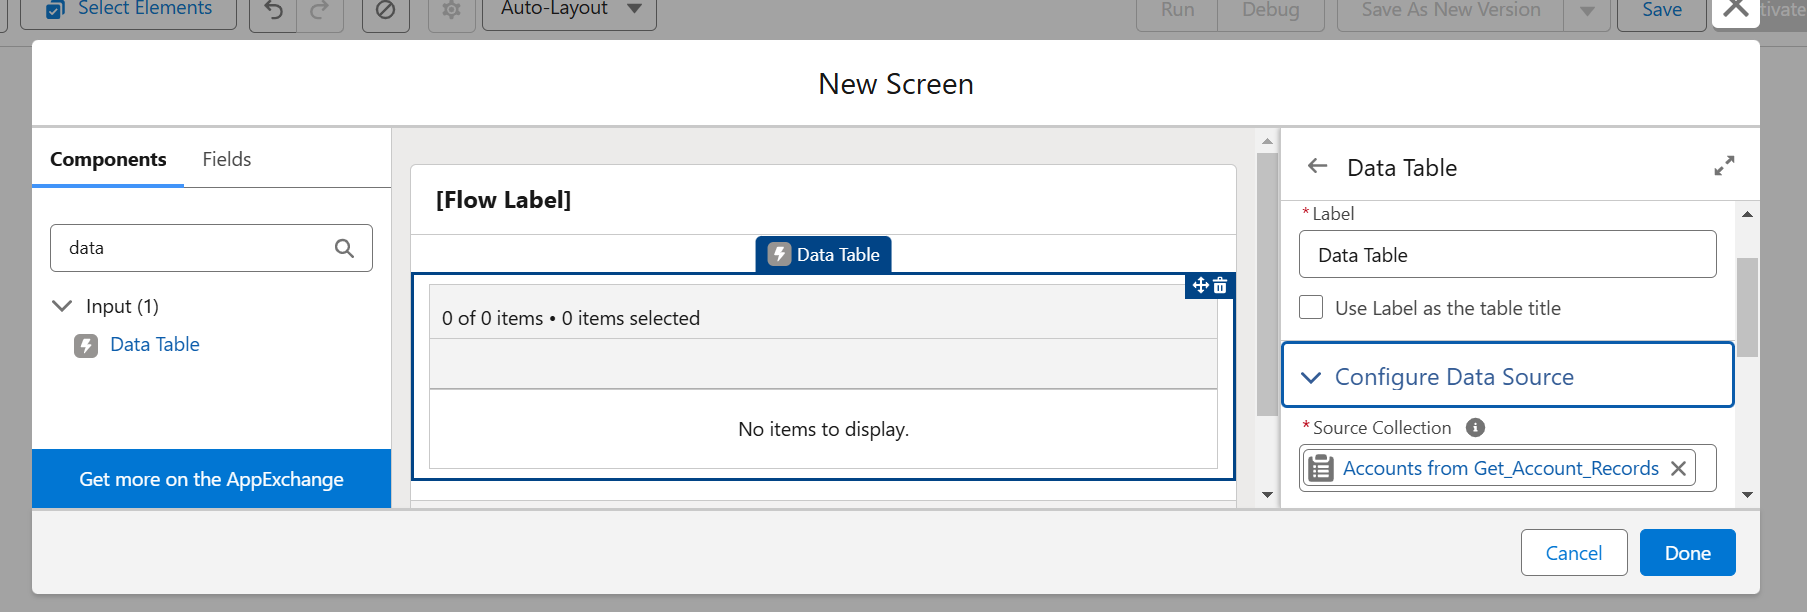
Set the Rows option to ‘Multiple’.
Configure Columns by adding Name and Industry fields.
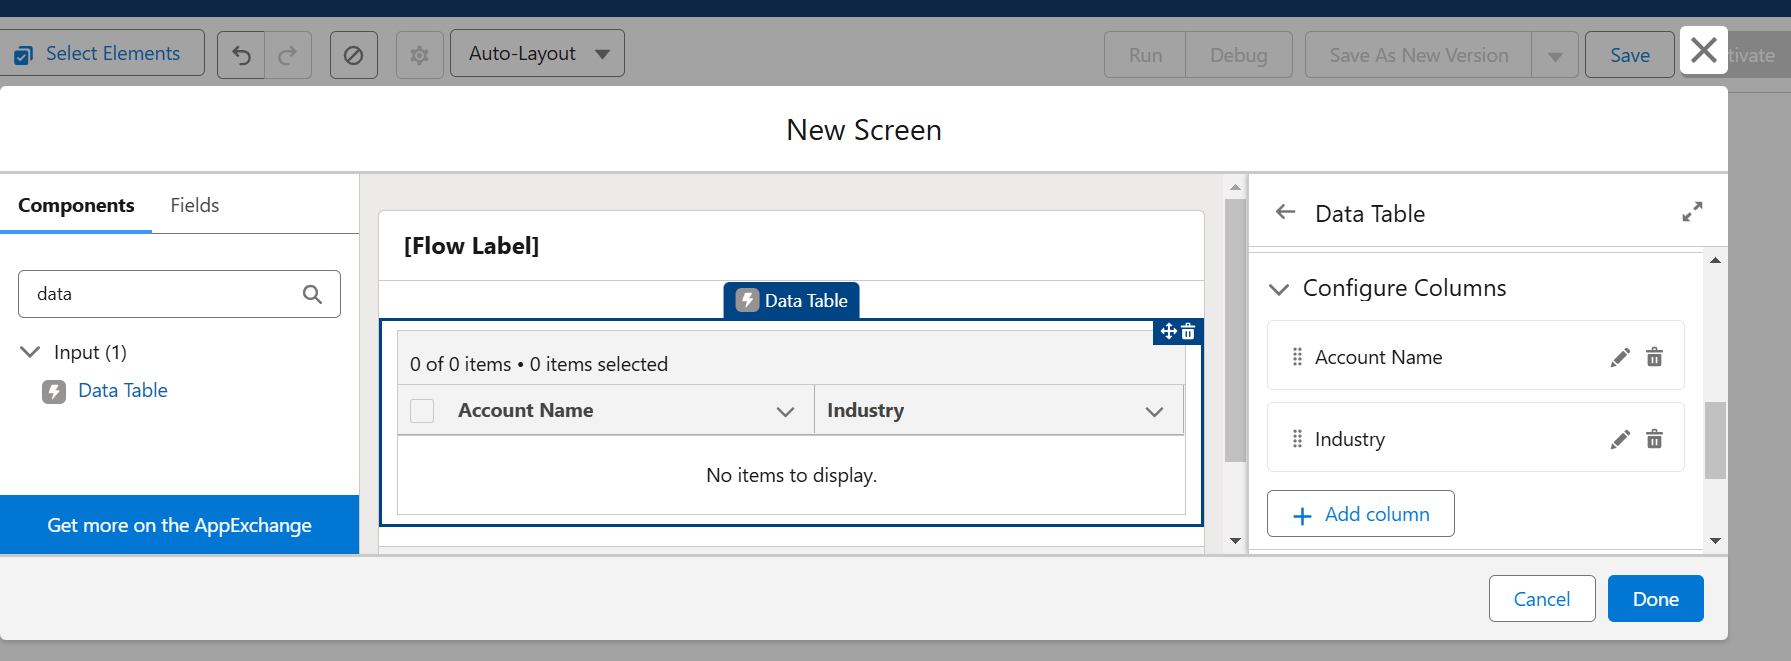
Step 4: After selecting the Accounts for cloning, use the Transform element to map and prepare the Account data for cloning
Add a resource to the source data.
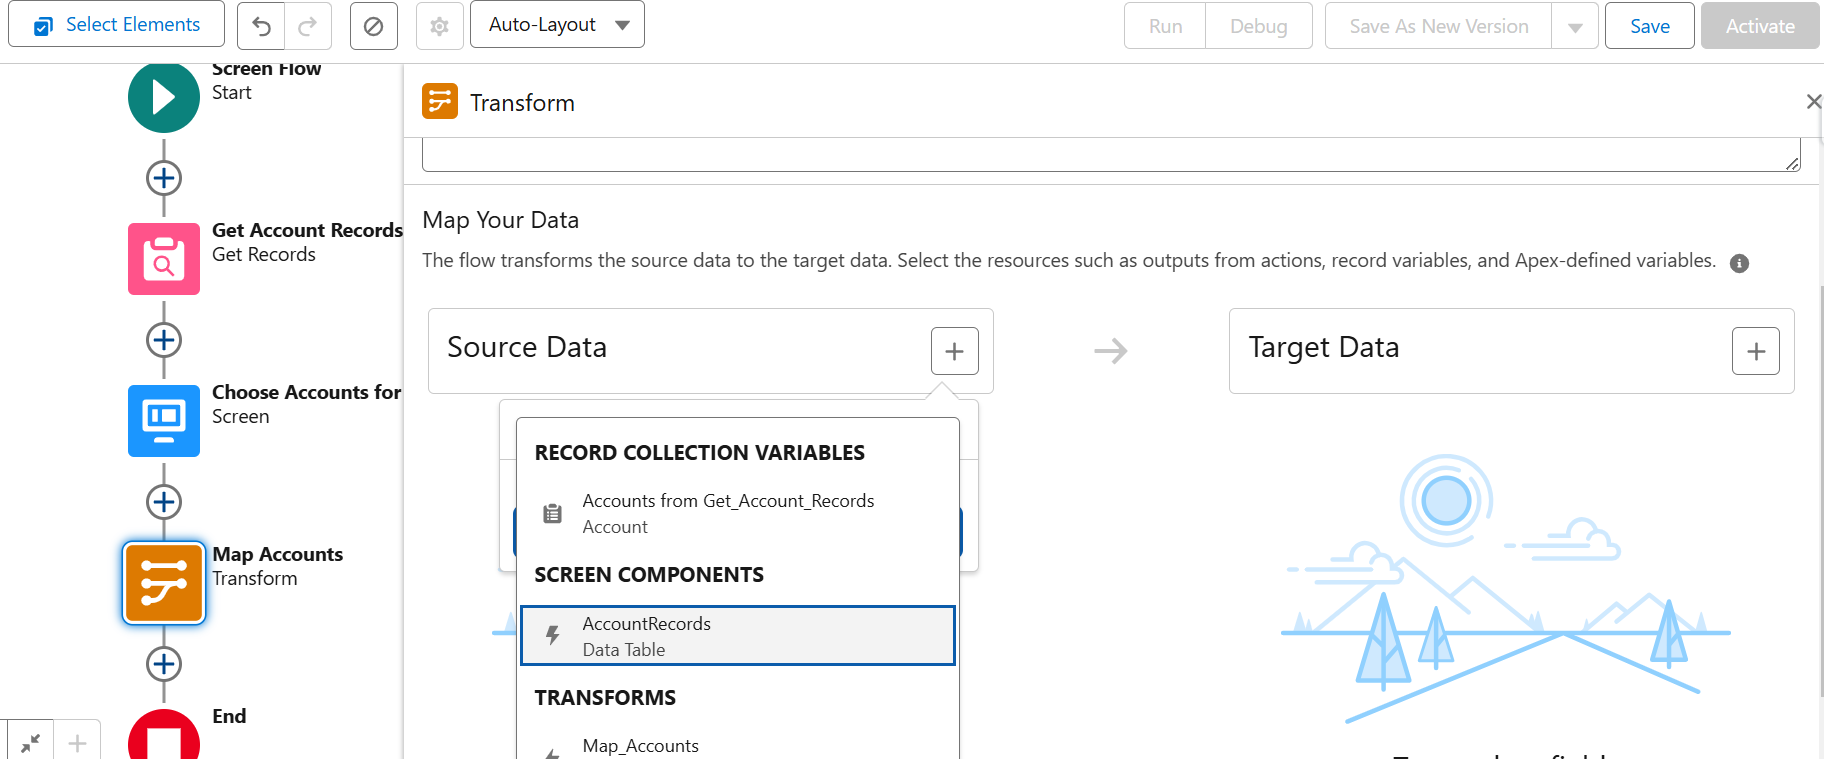
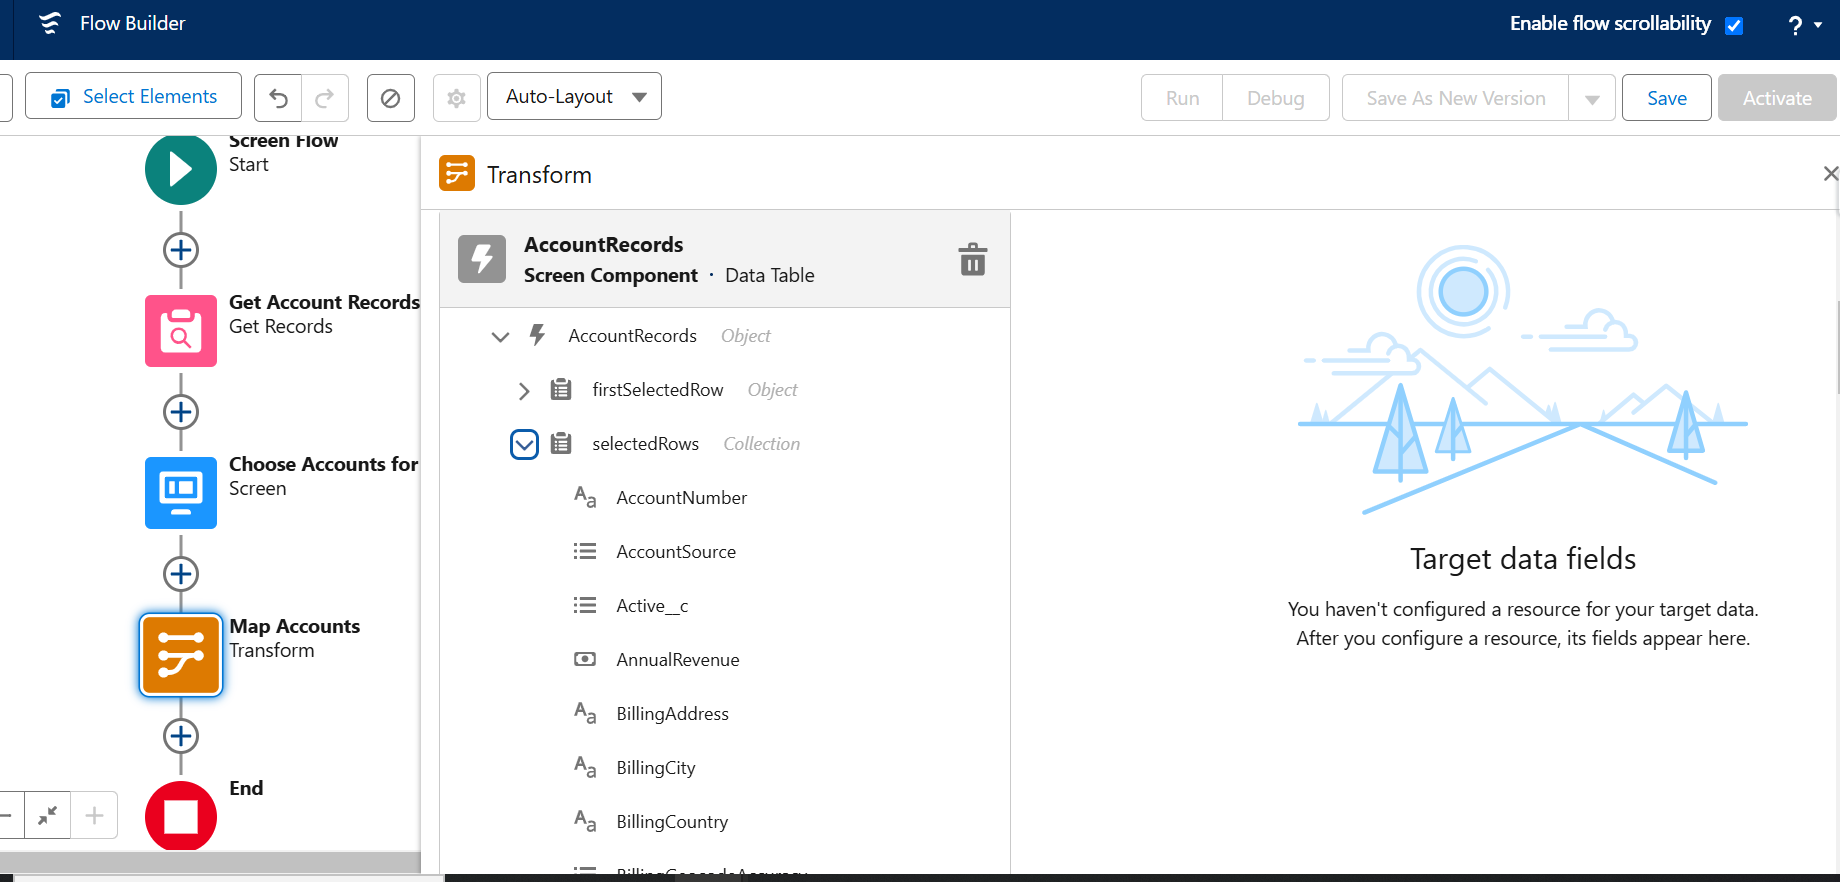
After selecting the source data, choose selected rows to map the collection for cloning multiple records. If you want to clone only a single record, select firstSelectedRow to map the data to the target.
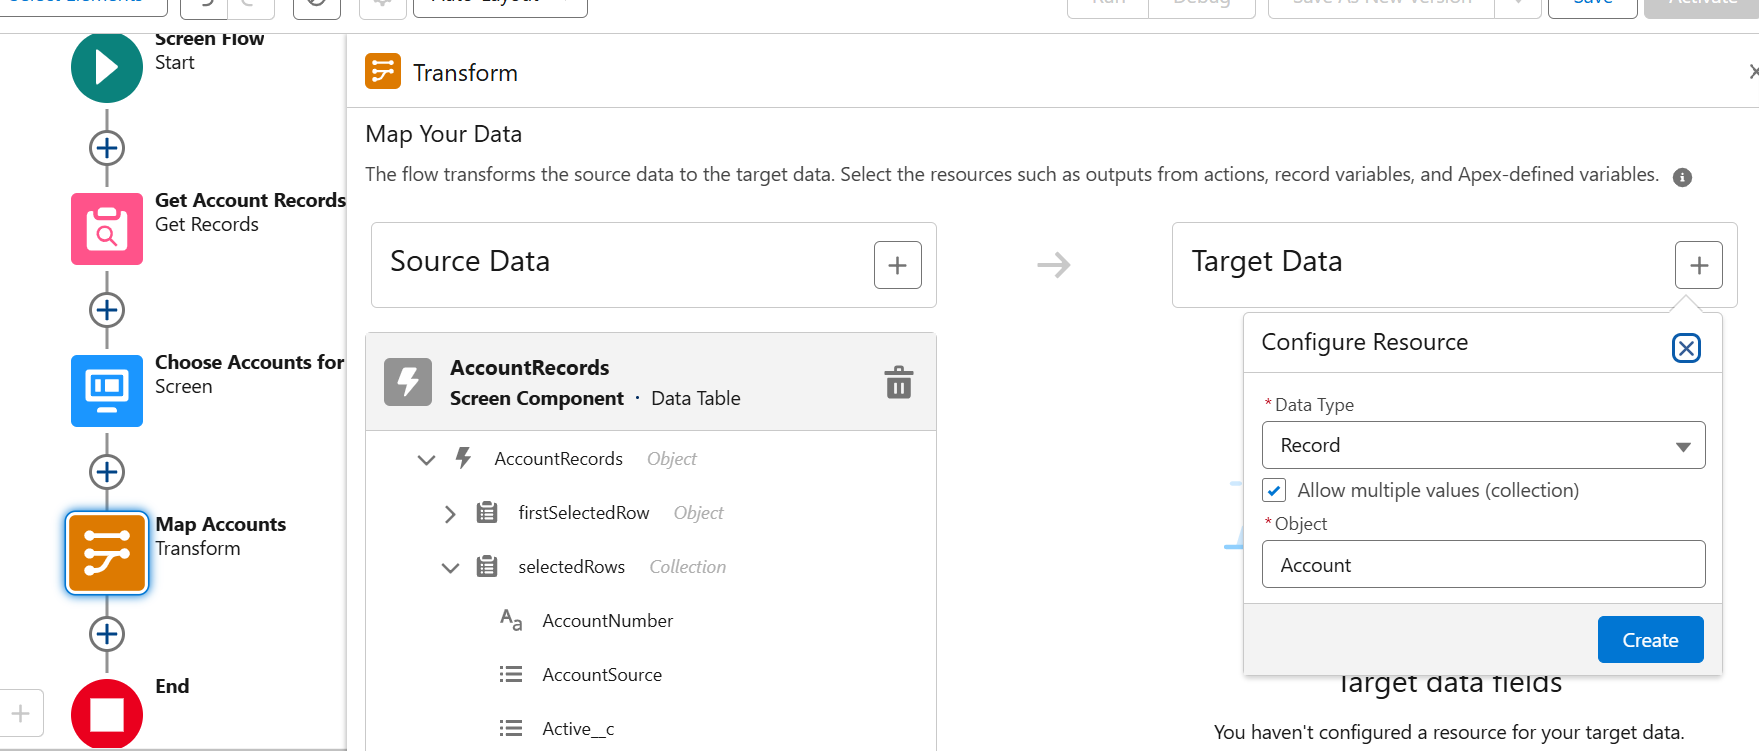
To map selected rows to the target data, add a Resource and set the data type to Record. Ensure to check the ‘Allow multiple values’ checkbox. Then, select the target object as Account.
After creating the target collection variable time to map the source data with the target data
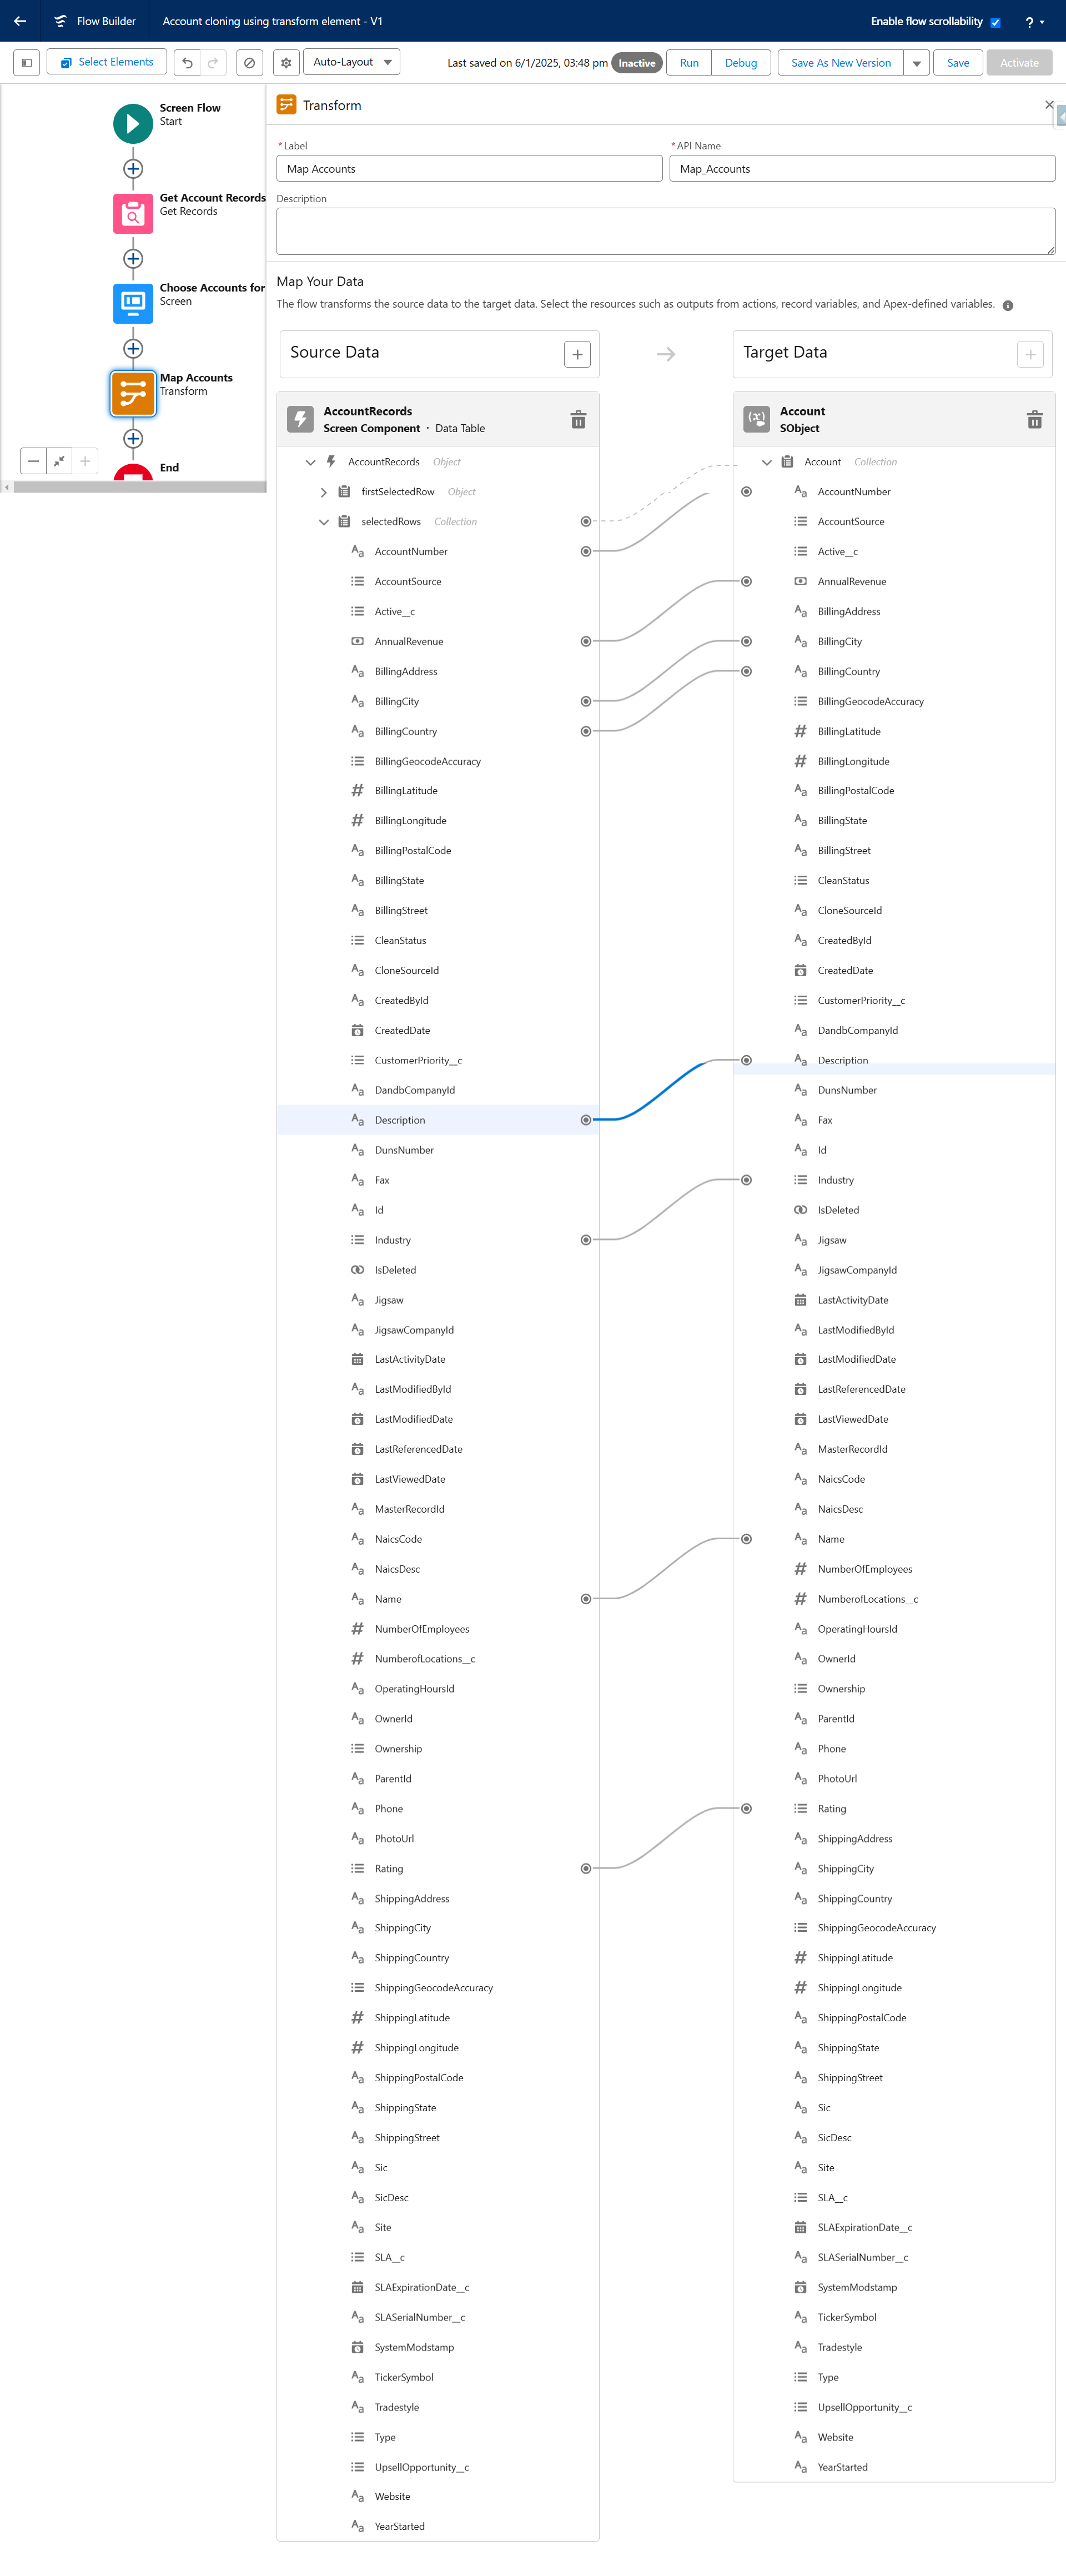
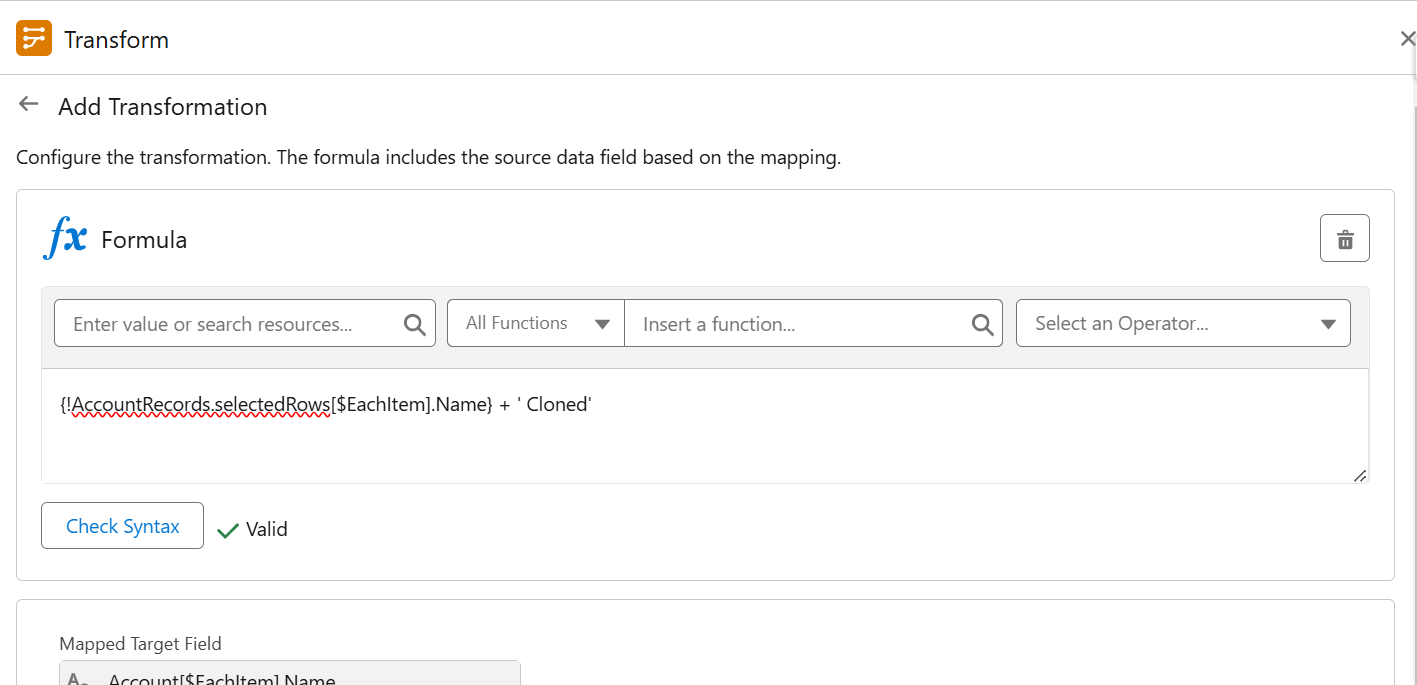
To indicate that a record has been cloned by this flow, you can append ‘Cloned’ to the name of the record (e.g., ‘Edge Communications Cloned’). This can be achieved by using a formula in the Name field of the target data while mapping.
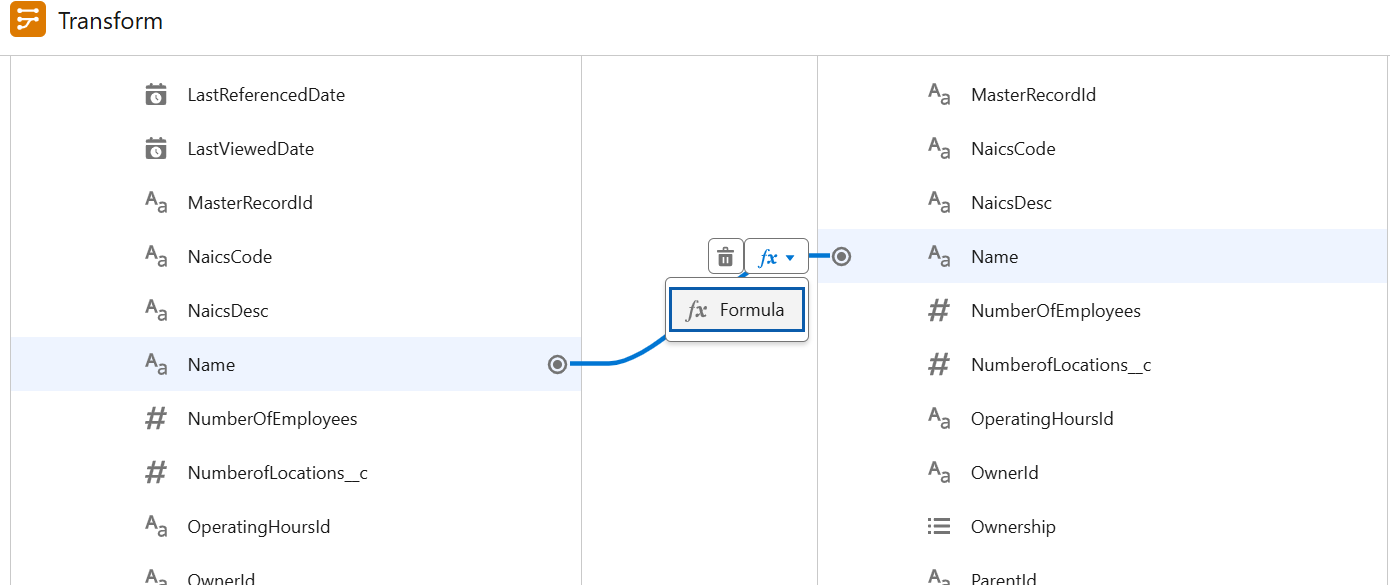
Add formula as per the business requirement
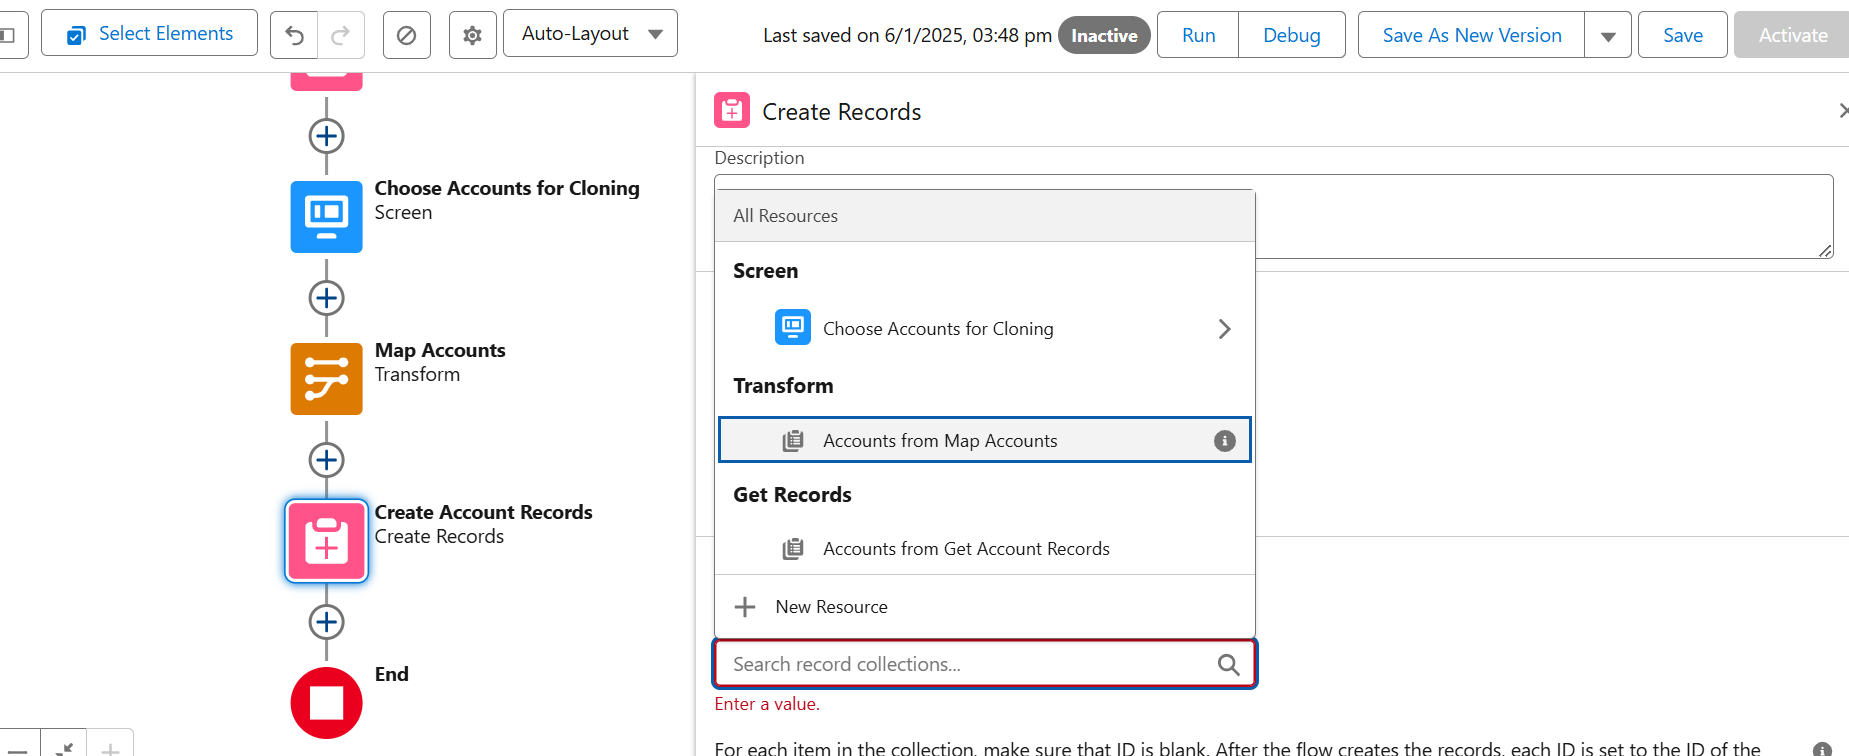
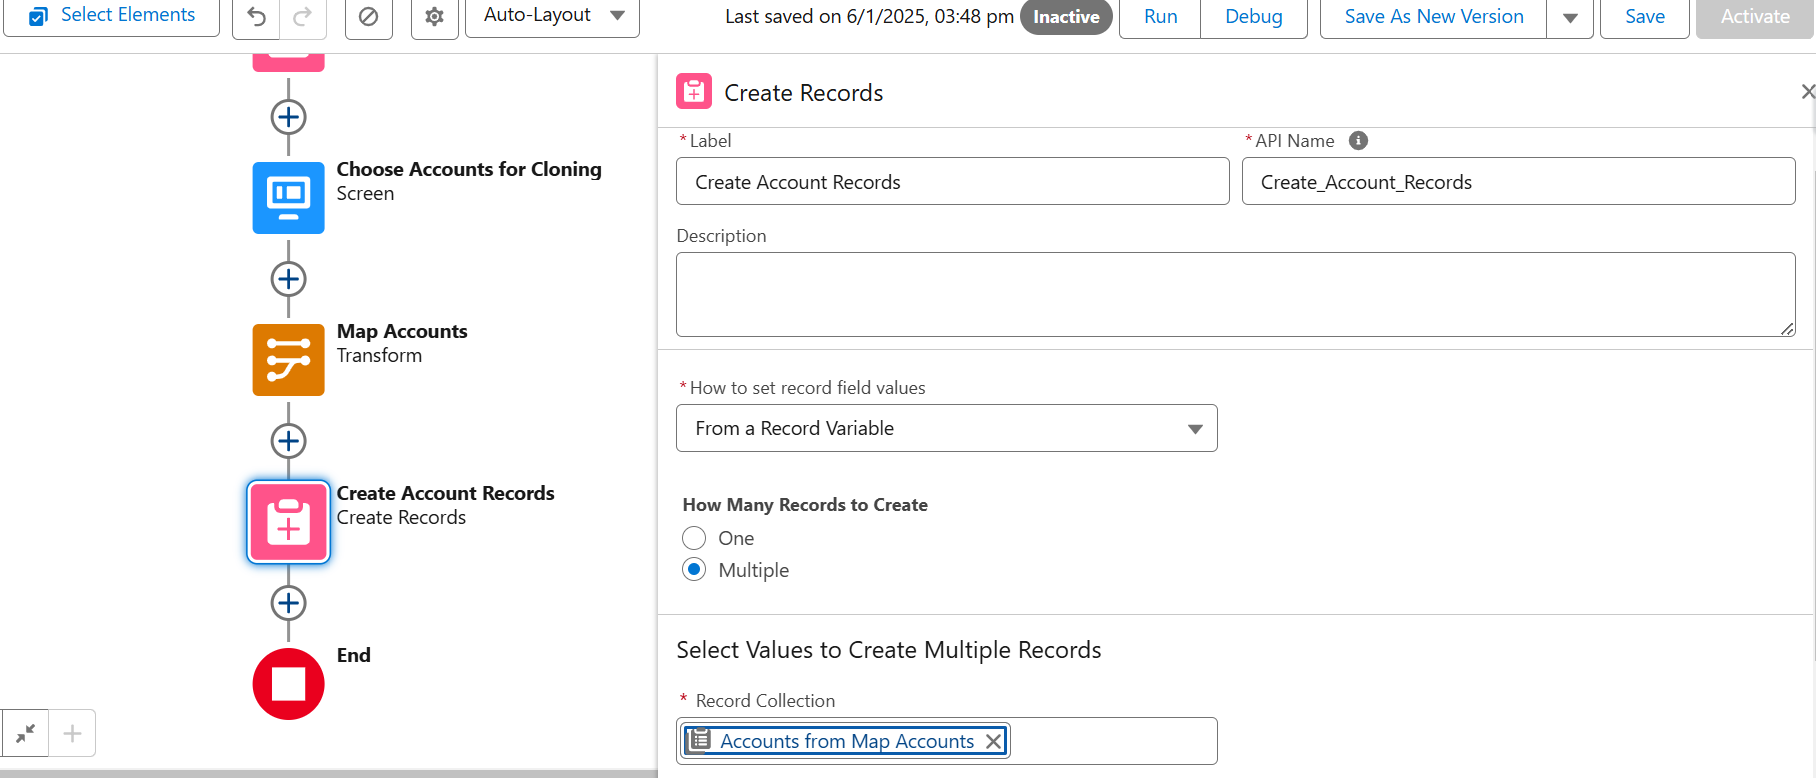
Step 5: After completing the mapping between the source data and the target data, add the Create Records element.
Enable Multiple toggle to specify the creation of multiple records. Then, select the Map Accounts collection to create the cloned records.
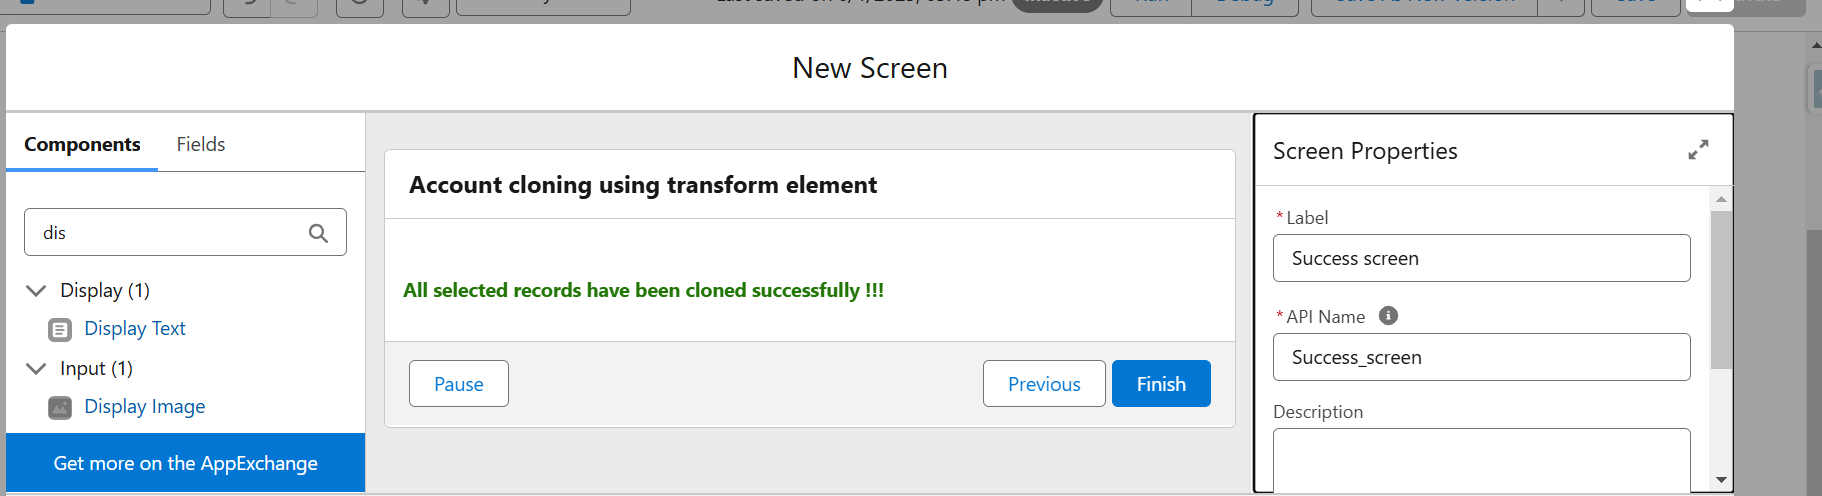
Step 7: Save and activate the flow.
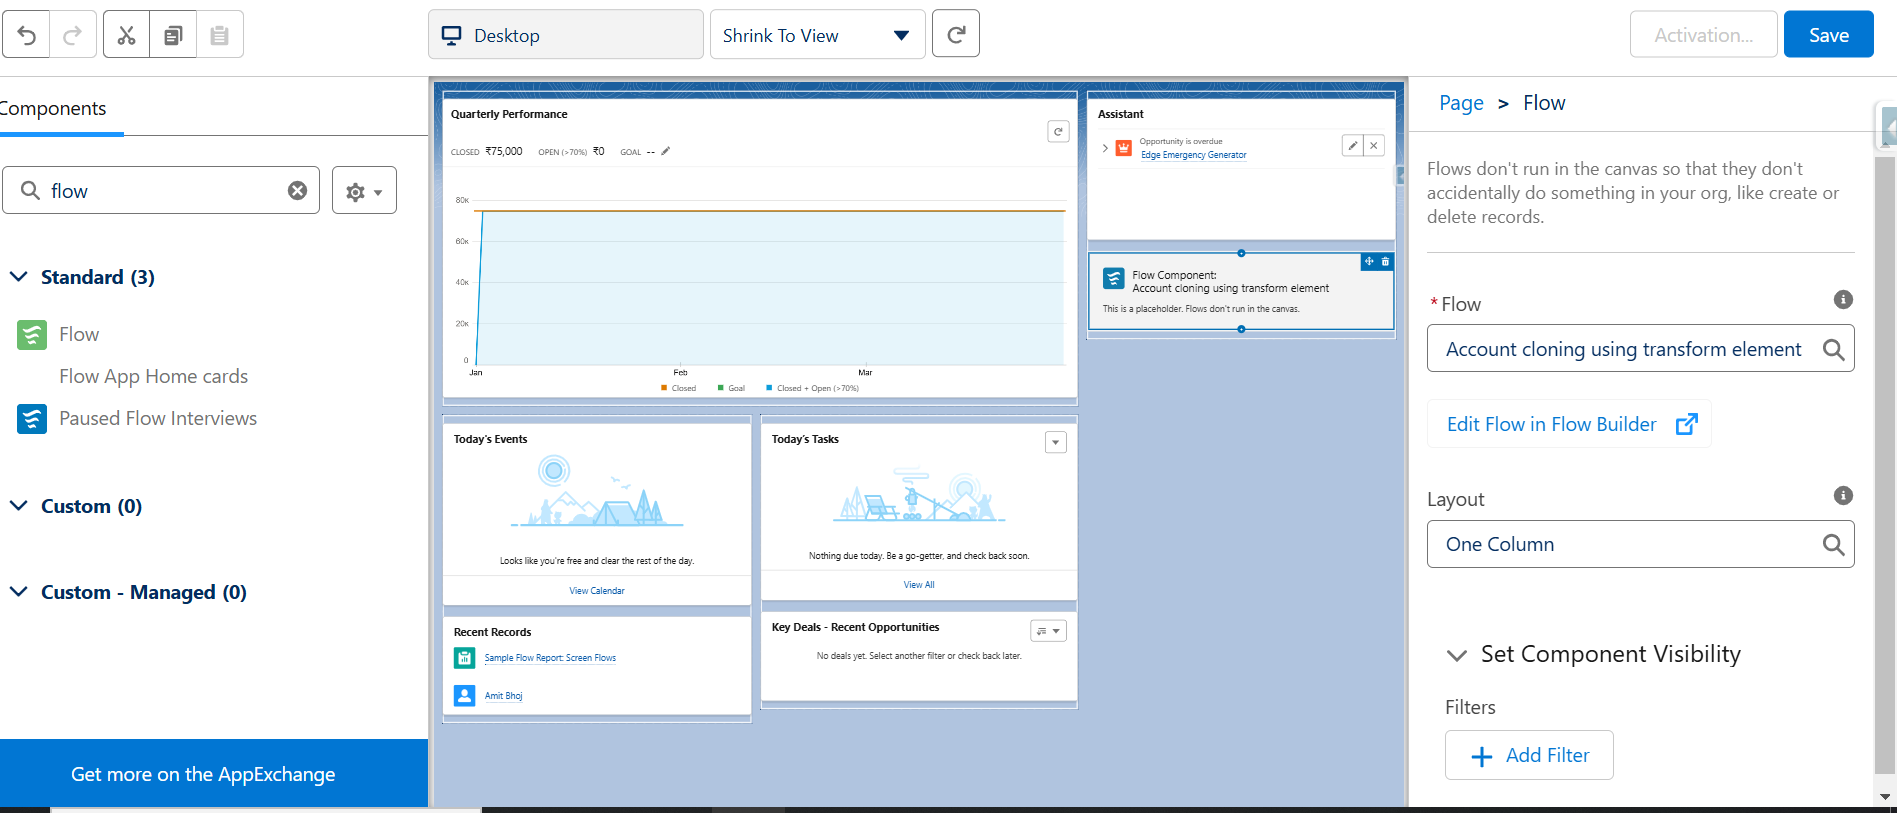
Step 8: Add flow to the Home Page
- Go to the gear icon and select the edit page
- Search for the Flow component
- Drag and drop the flow onto the desired section
- Select the Flow
- Save the page
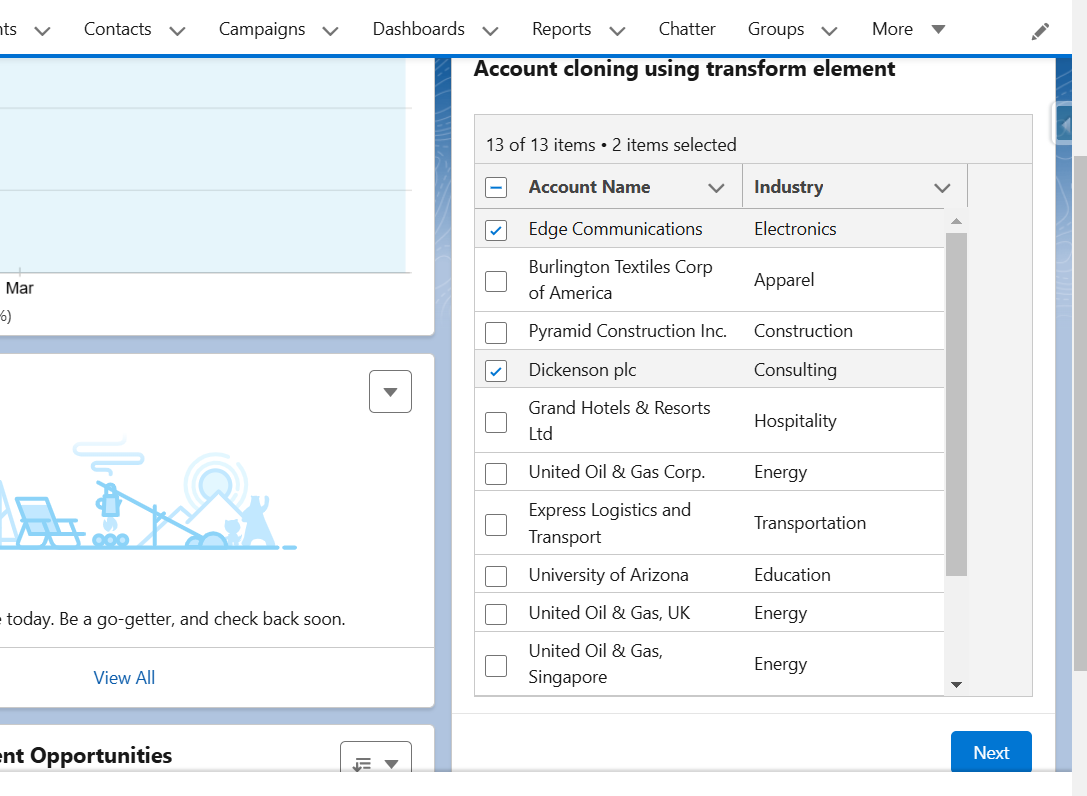
Test the screen flow :
Select the records you want to clone from the displayed list.
After selecting the records click on the next button for cloning the records.
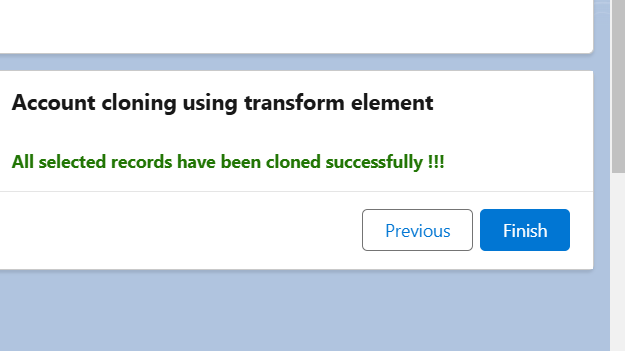
To check the selected accounts are cloned successfully.
Go to the account page and select All Accounts list view. You see the records with ‘Cloned’ appended to their name.
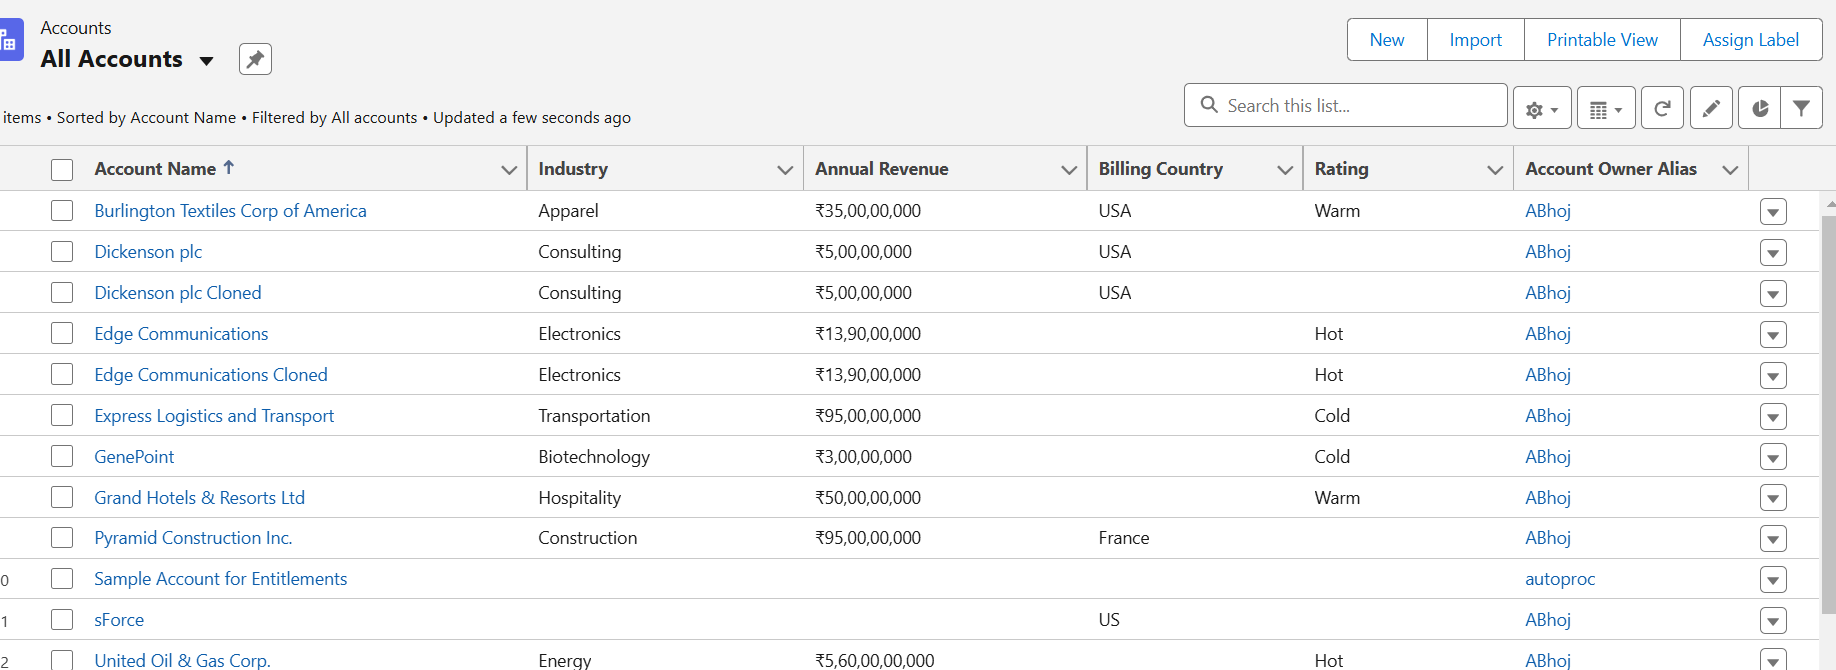
Result: All selected accounts have been cloned.
Here is the Demo.
https://youtu.be/4awc1Qqg7fg
Case 2: Used for Aggregate Calculations
Display the total sum of the ‘Amount’ field and the count of all related Opportunities where the Stage is ‘Closed Won’ on the account record.
Prerequisite:
Create two custom fields on the Account object.
- Total Closed Won Amount field to store the sum of total opportunities amount where the stage name is ‘Closed Won’. The data type will be currency.
- Count of Closed Won Deals field to store the total count of opportunities related to the account where the stage name is ‘Closed Won’. The data type will be a number.
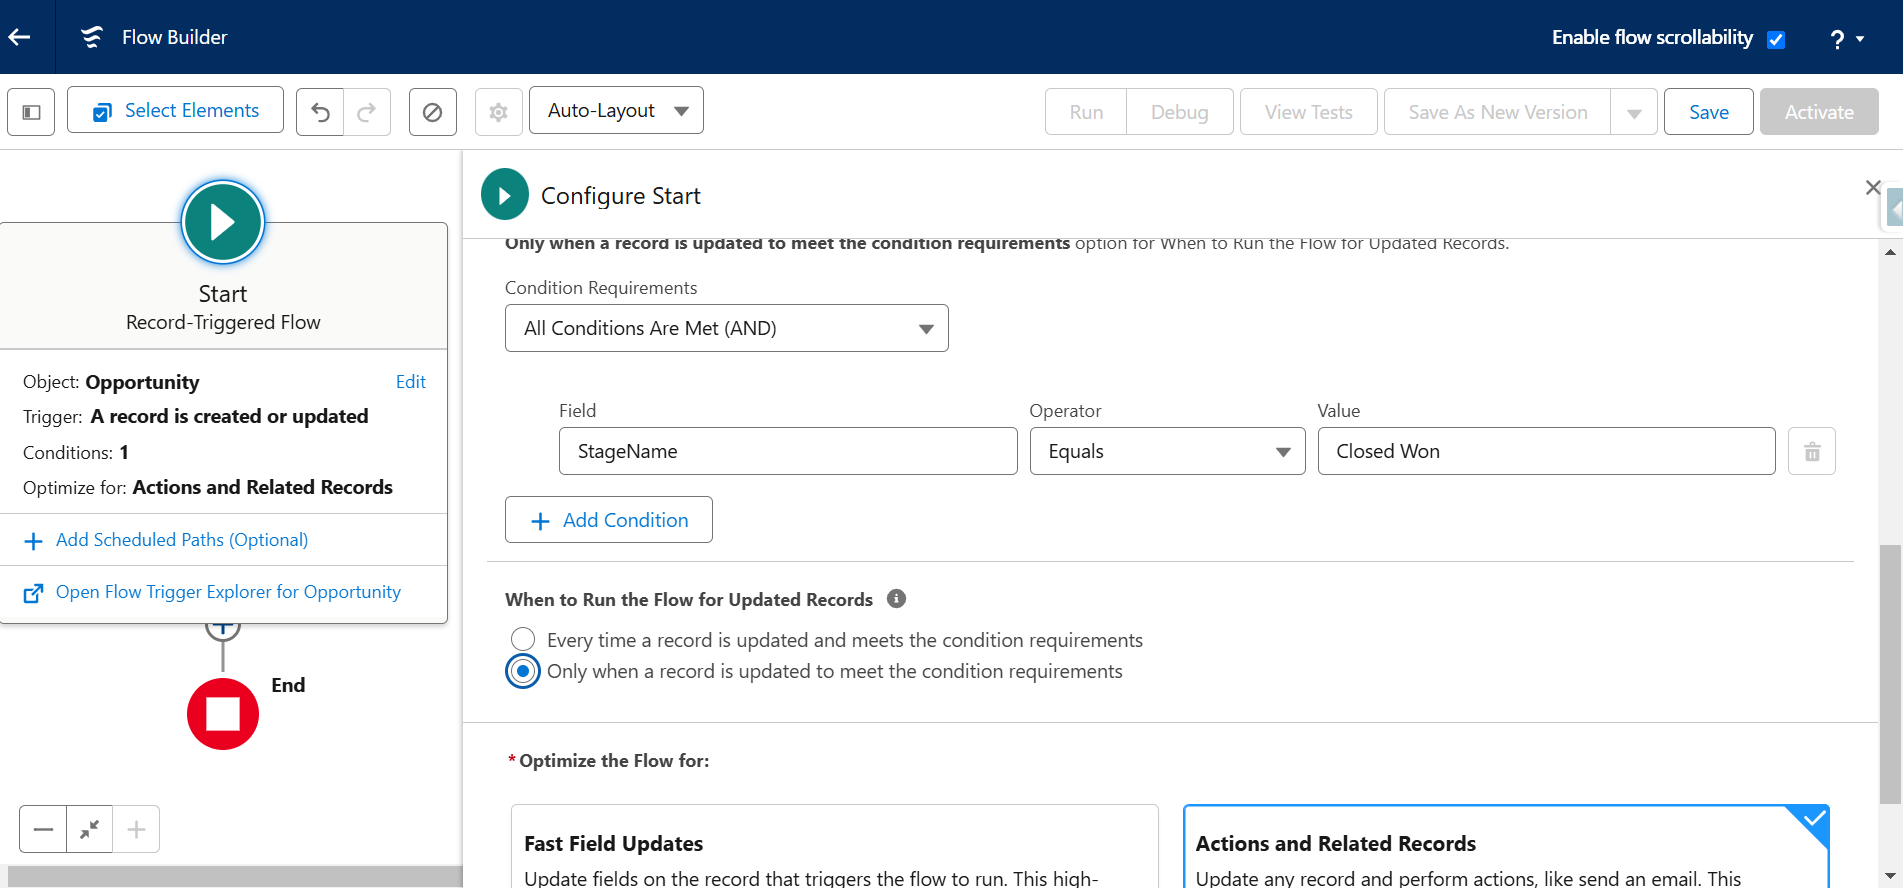
Step 1: Go to the flow and select Record-Triggered Flow
- Select opportunity object
- Select A record is created or updated when to trigger the flow
- Set the entry conditions mentioned in the image
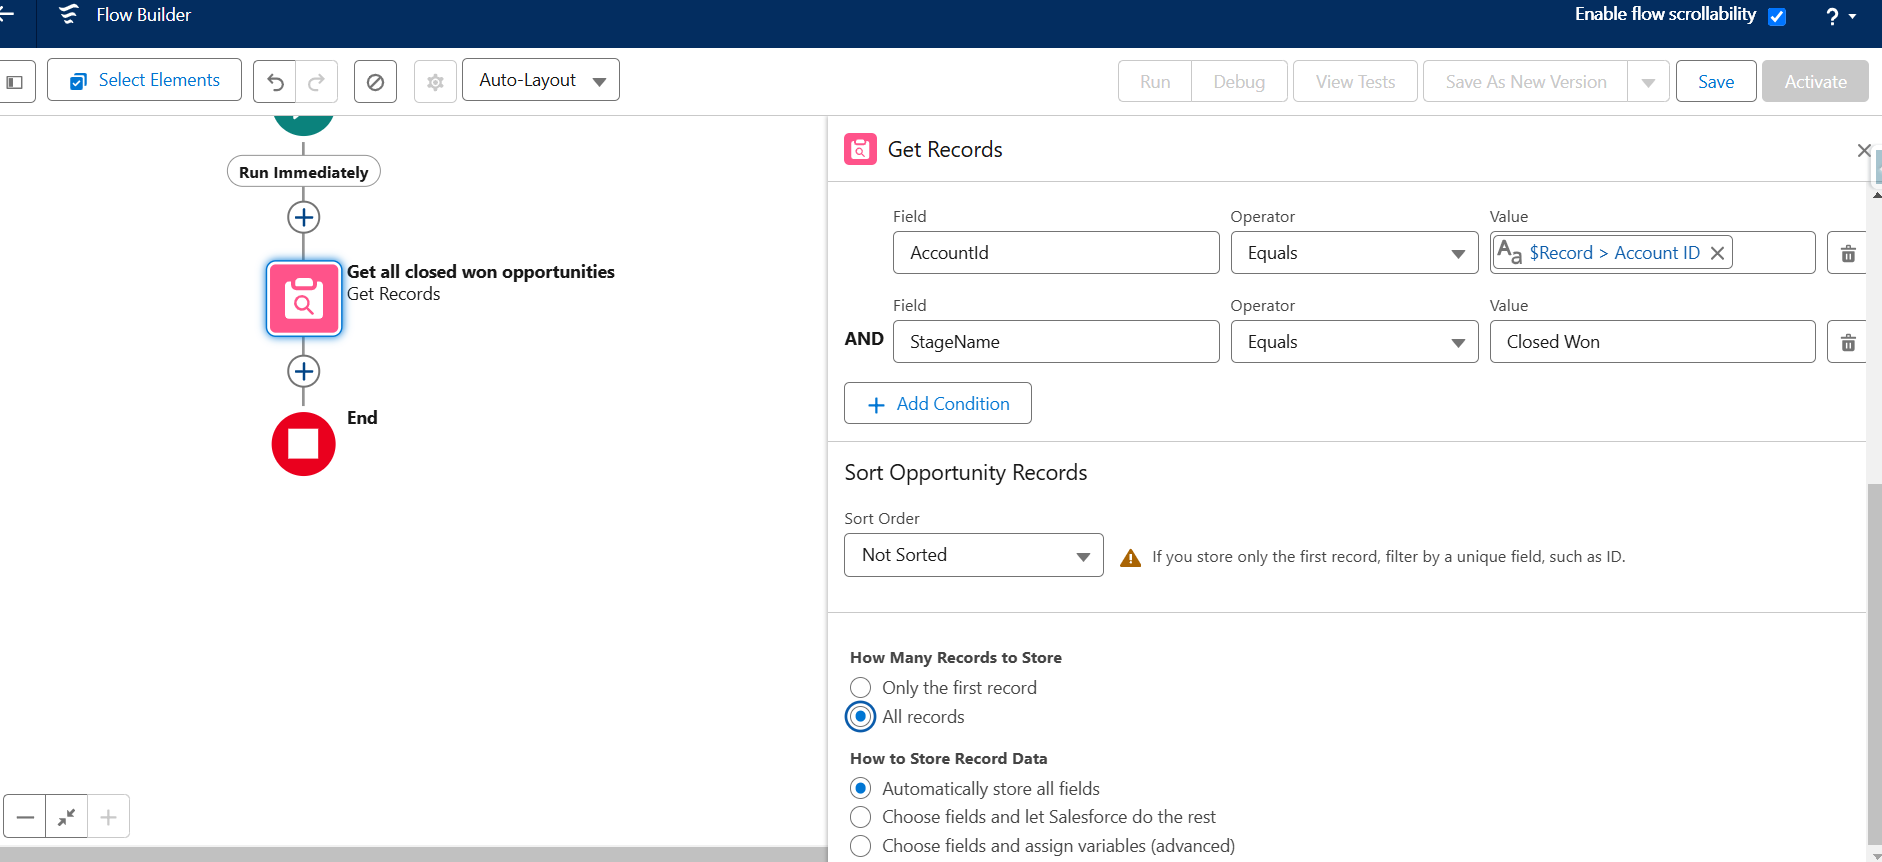
Step 2: Add a Get Records element to retrieve all related Closed Won Opportunities.
Set the following conditions:
- Account ID equals the Record Account ID.
- StageName equals ‘Closed Won‘.
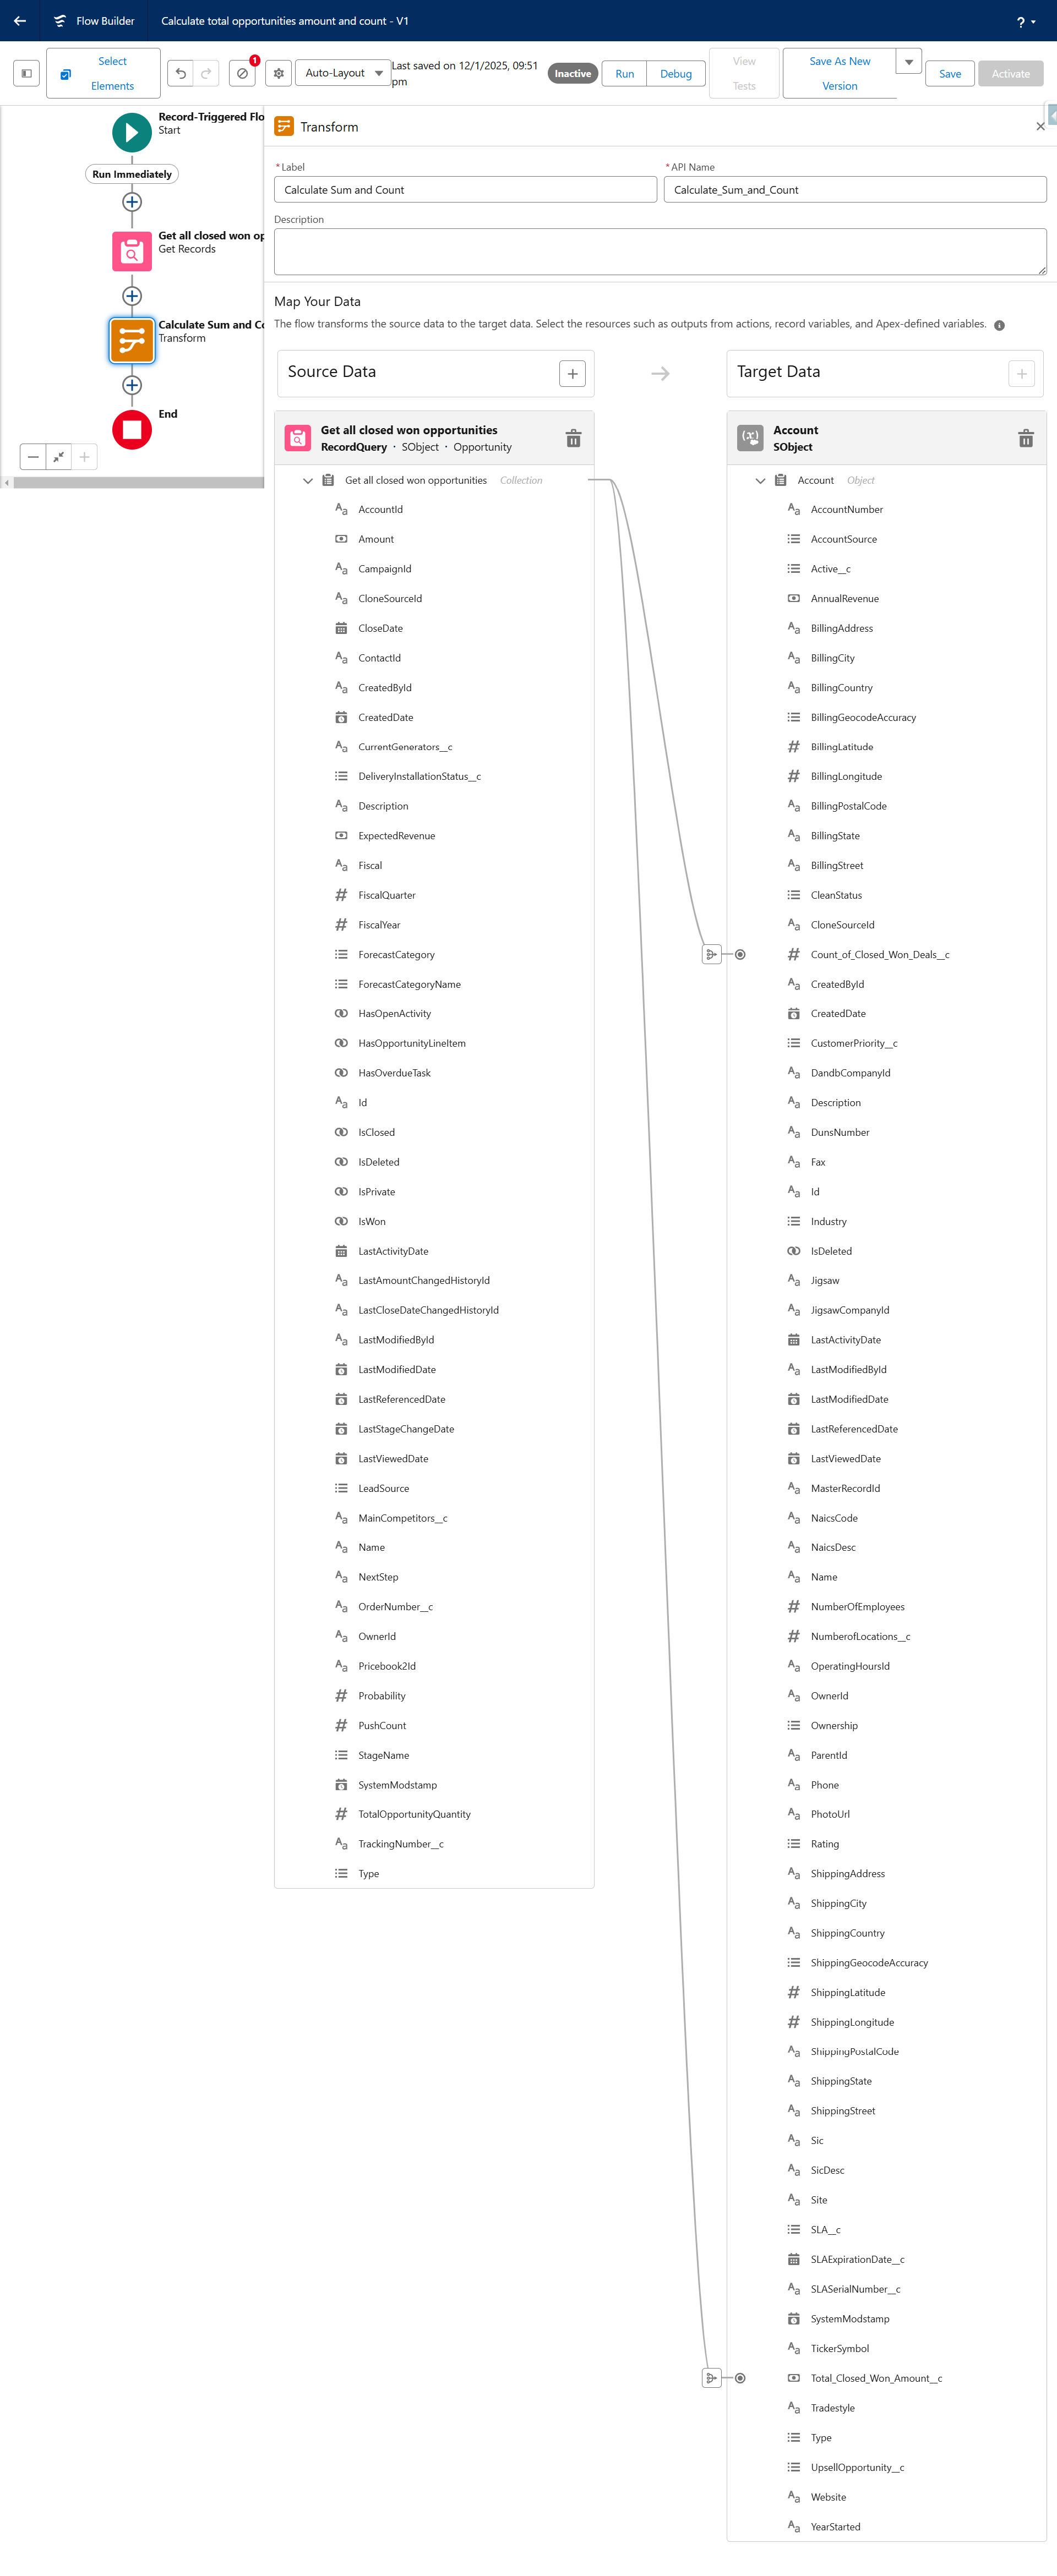
Step 3: Add a Transform element to map the source data with the target data
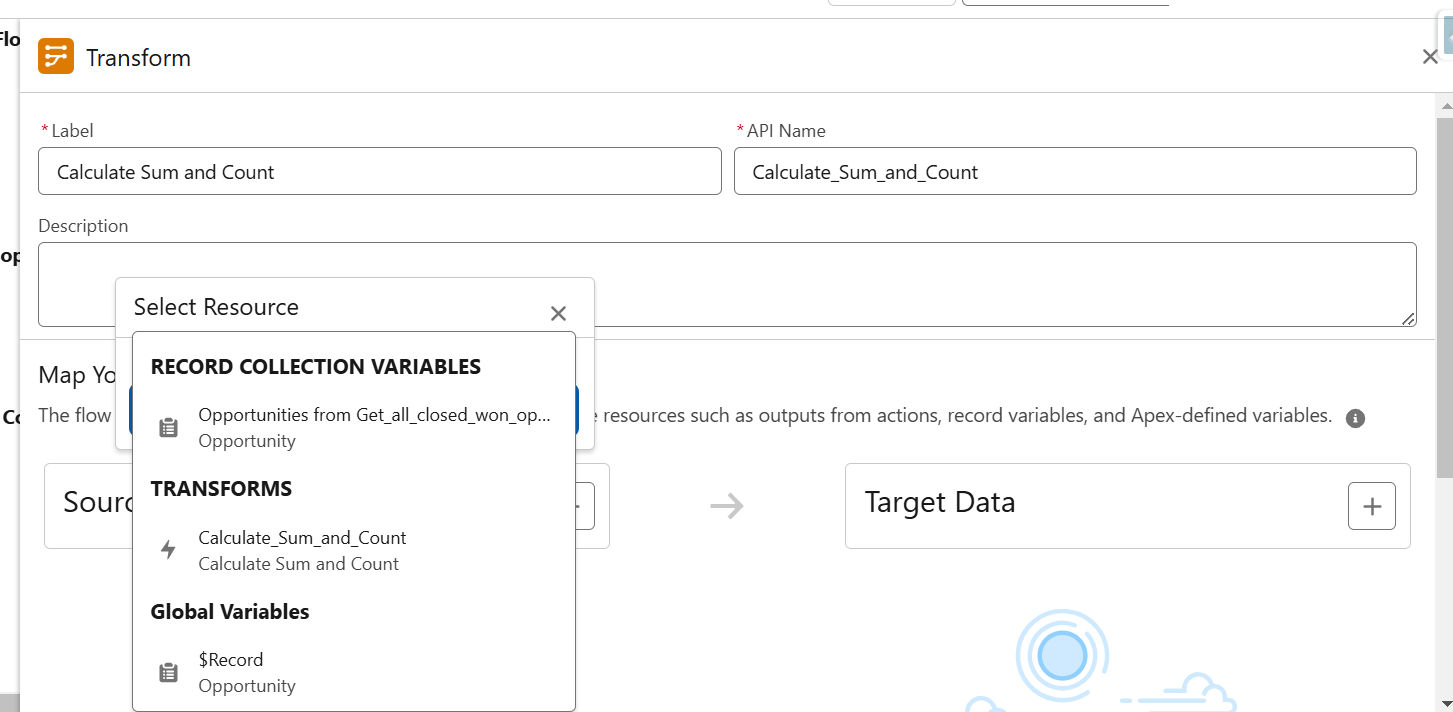
A. Add record collection to the source data.
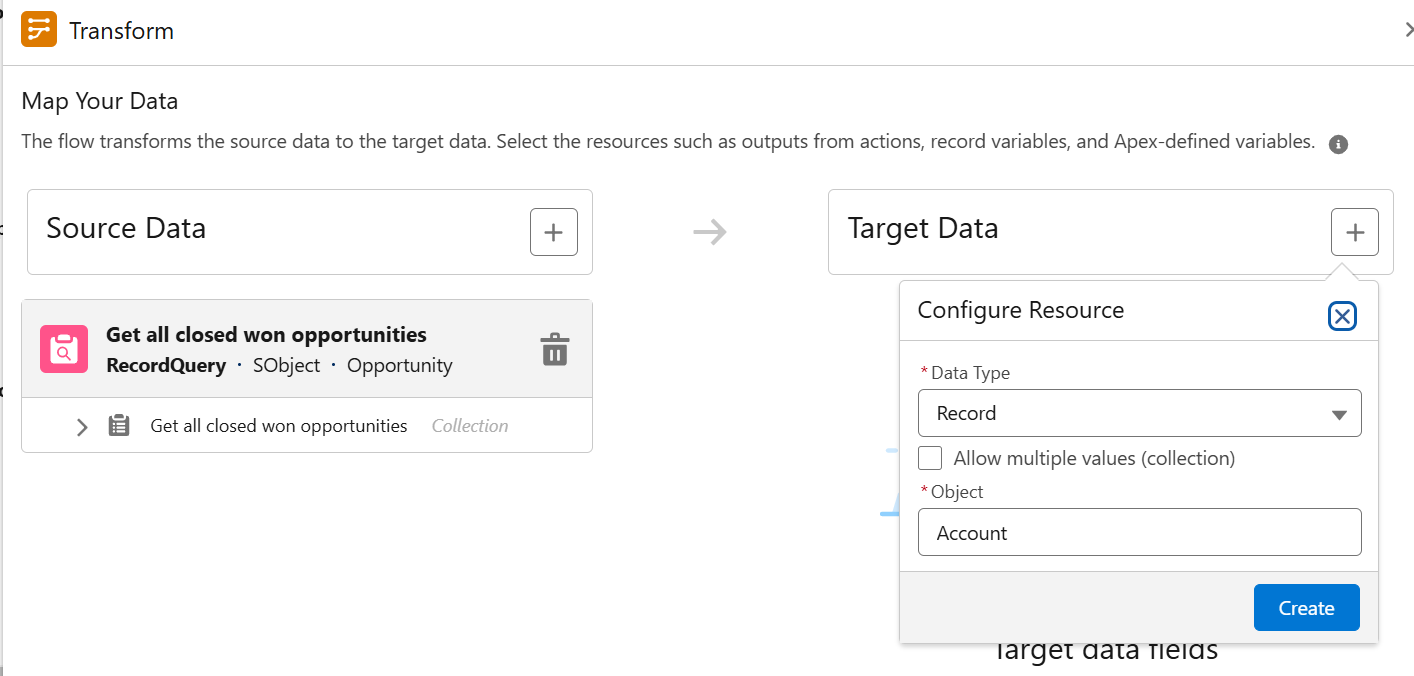
B. Configure target data
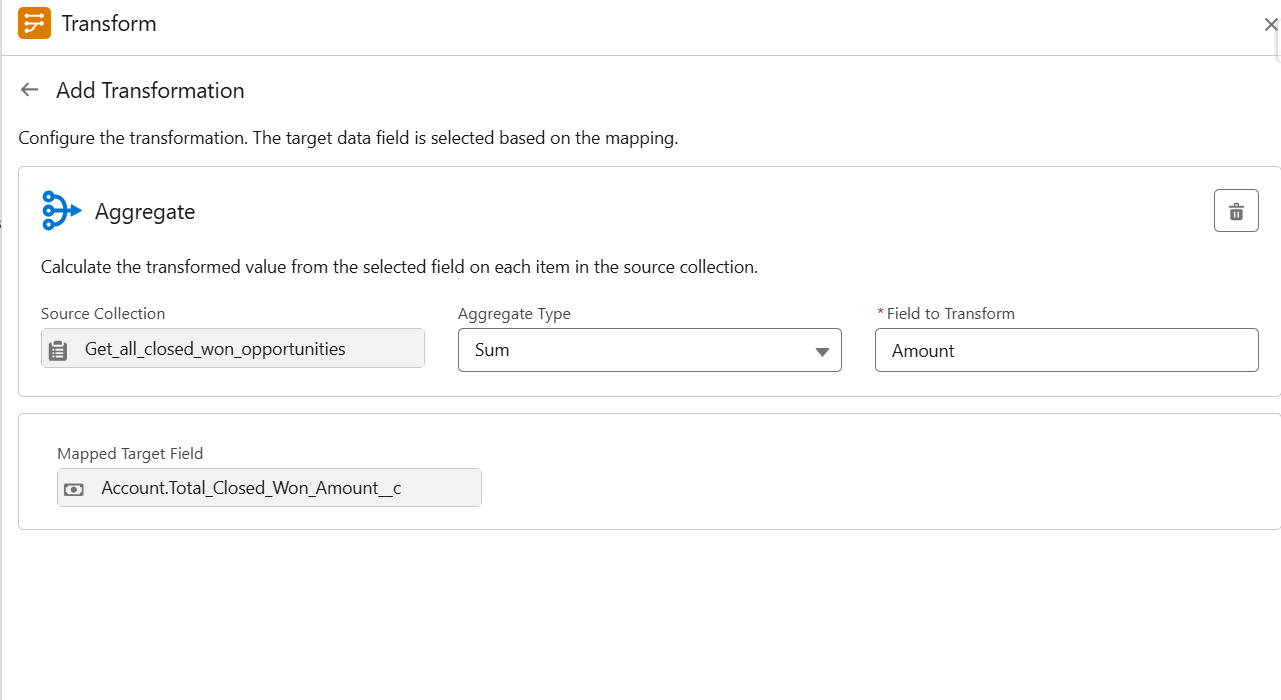
C. Map source data with target data
To calculate the total opportunities amount, Map the source collection to the Total Closed Won Amount field of the target data source.
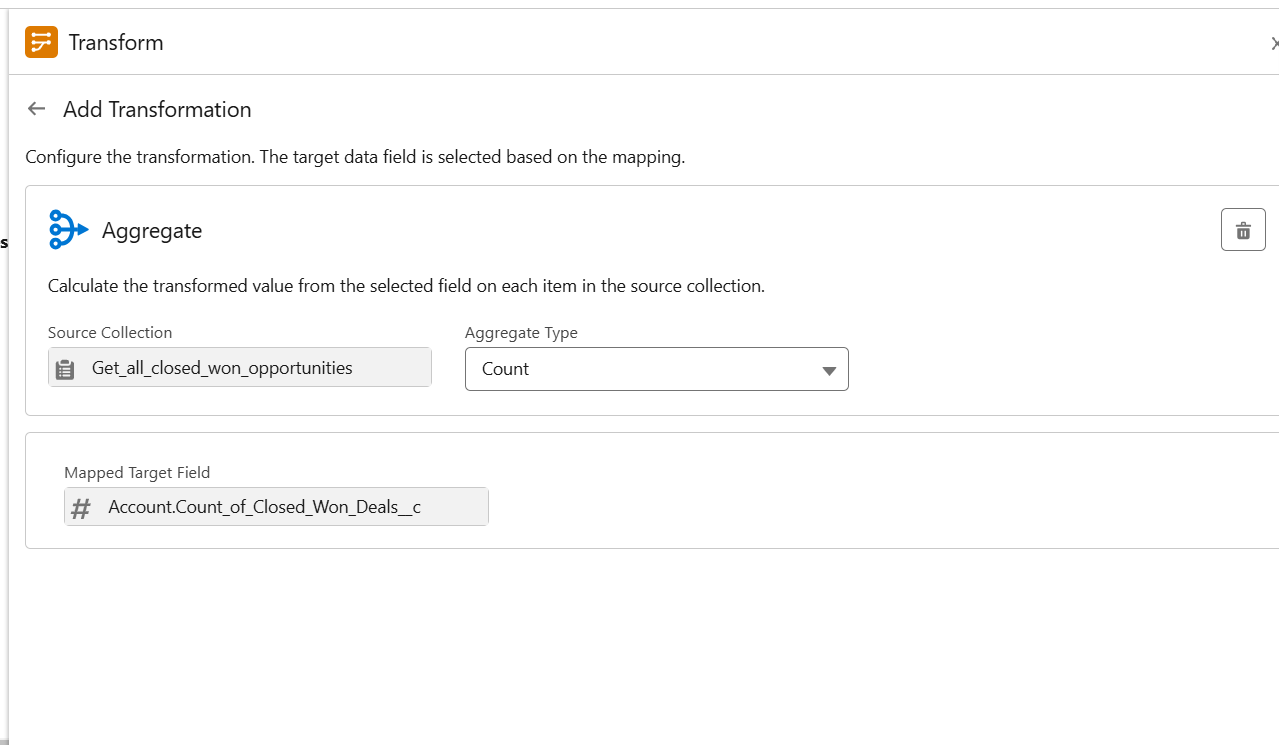
To calculate the count of the closed won opportunities related to the account, Map the source data to the Count of Closed Won Deals field of the target data.
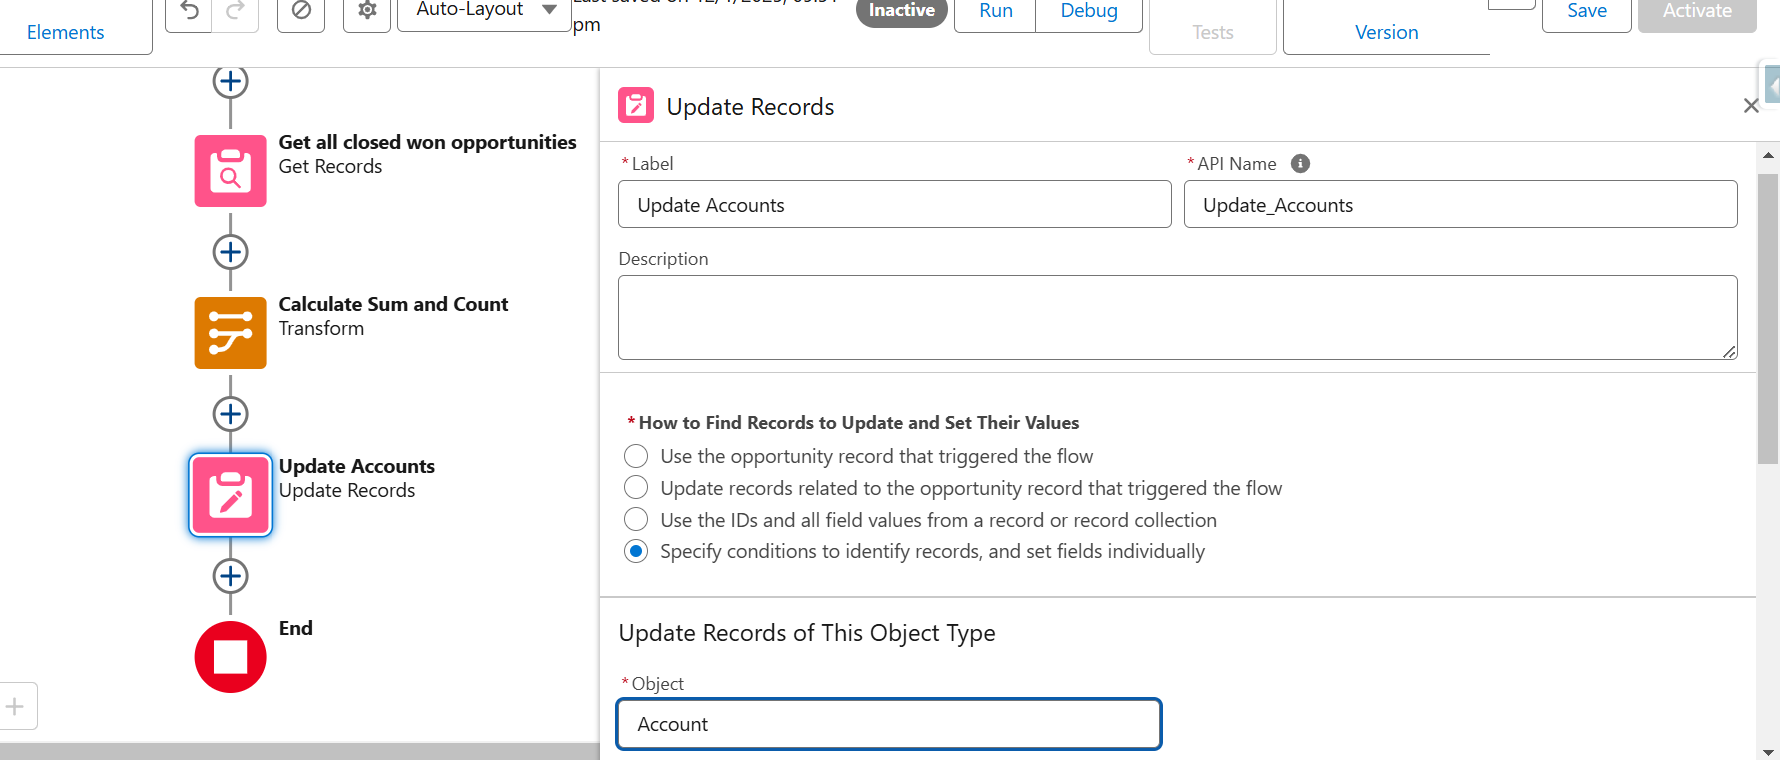
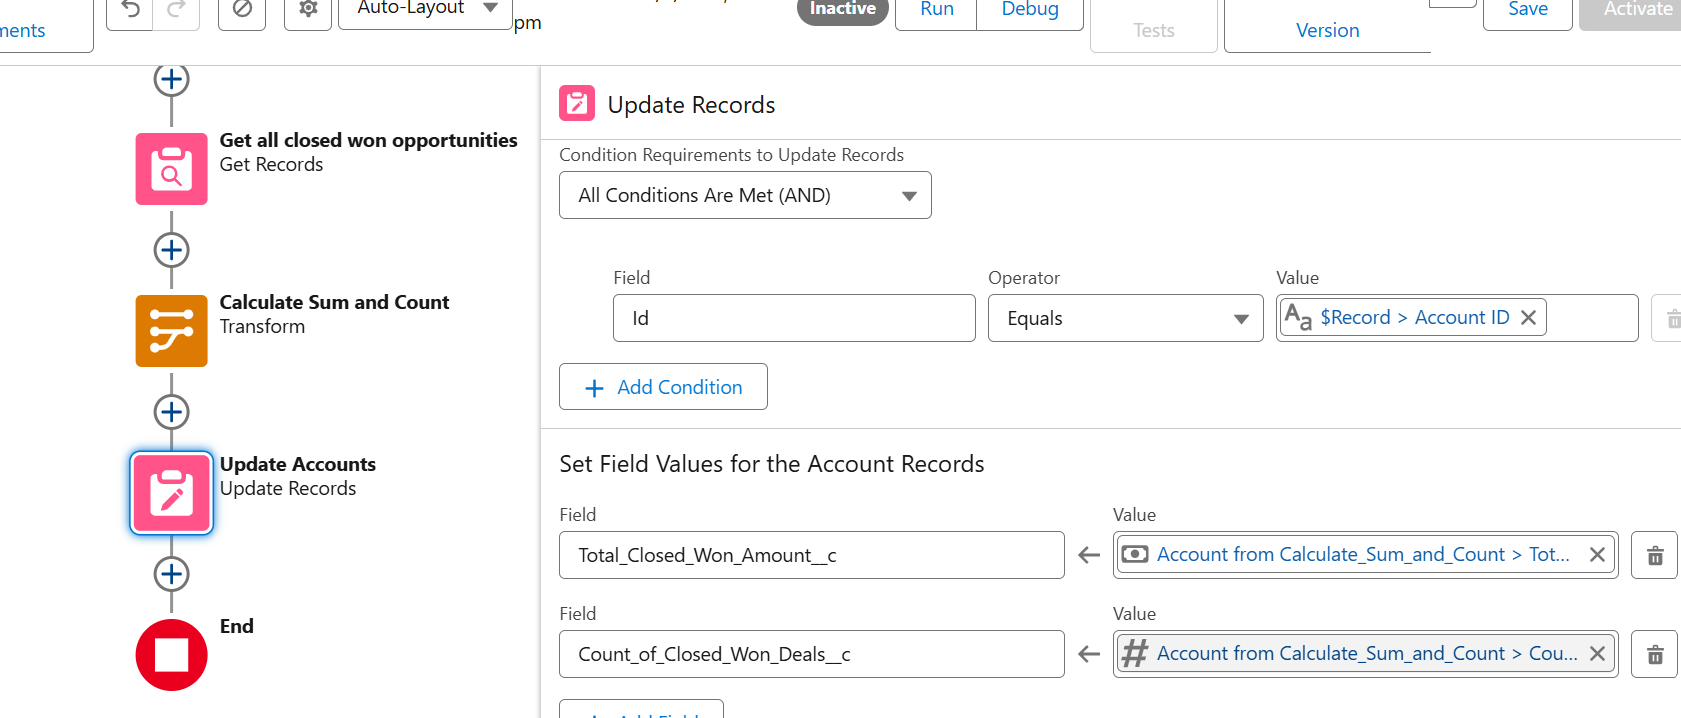
Step 4: After mapping the data, add an Update Records element to update the Account records.
Set Total Closed Won Amount and Count of Closed Won Deals fields
Step 5: Save and Activate the flow
Test the record-triggered flow.
Select an Account that has related Opportunities.s
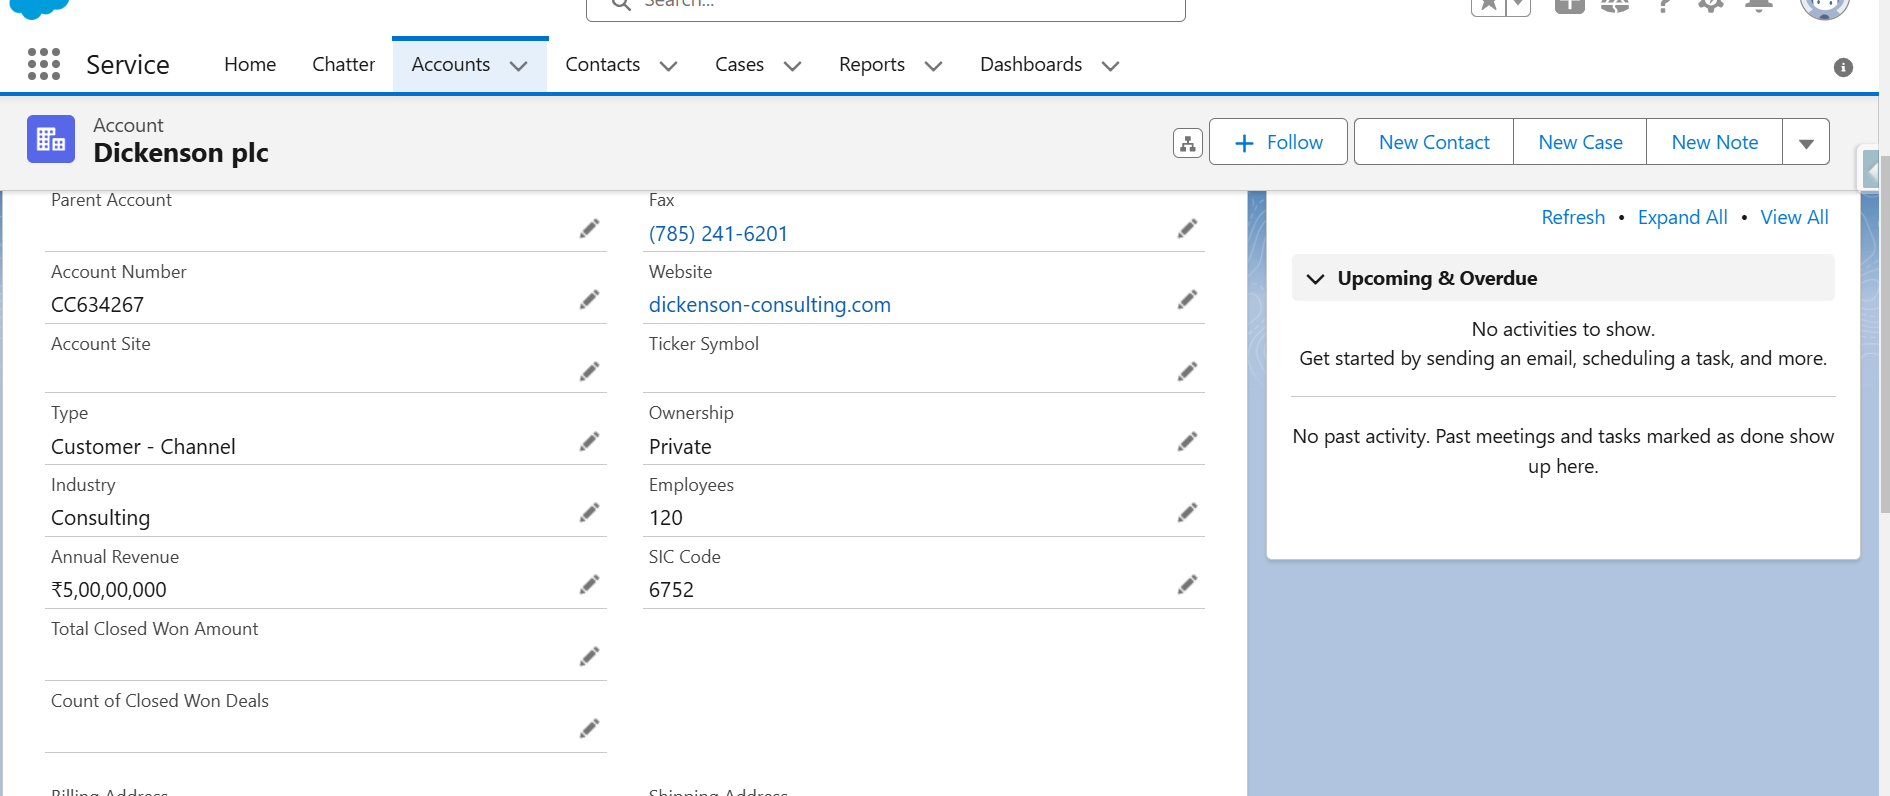
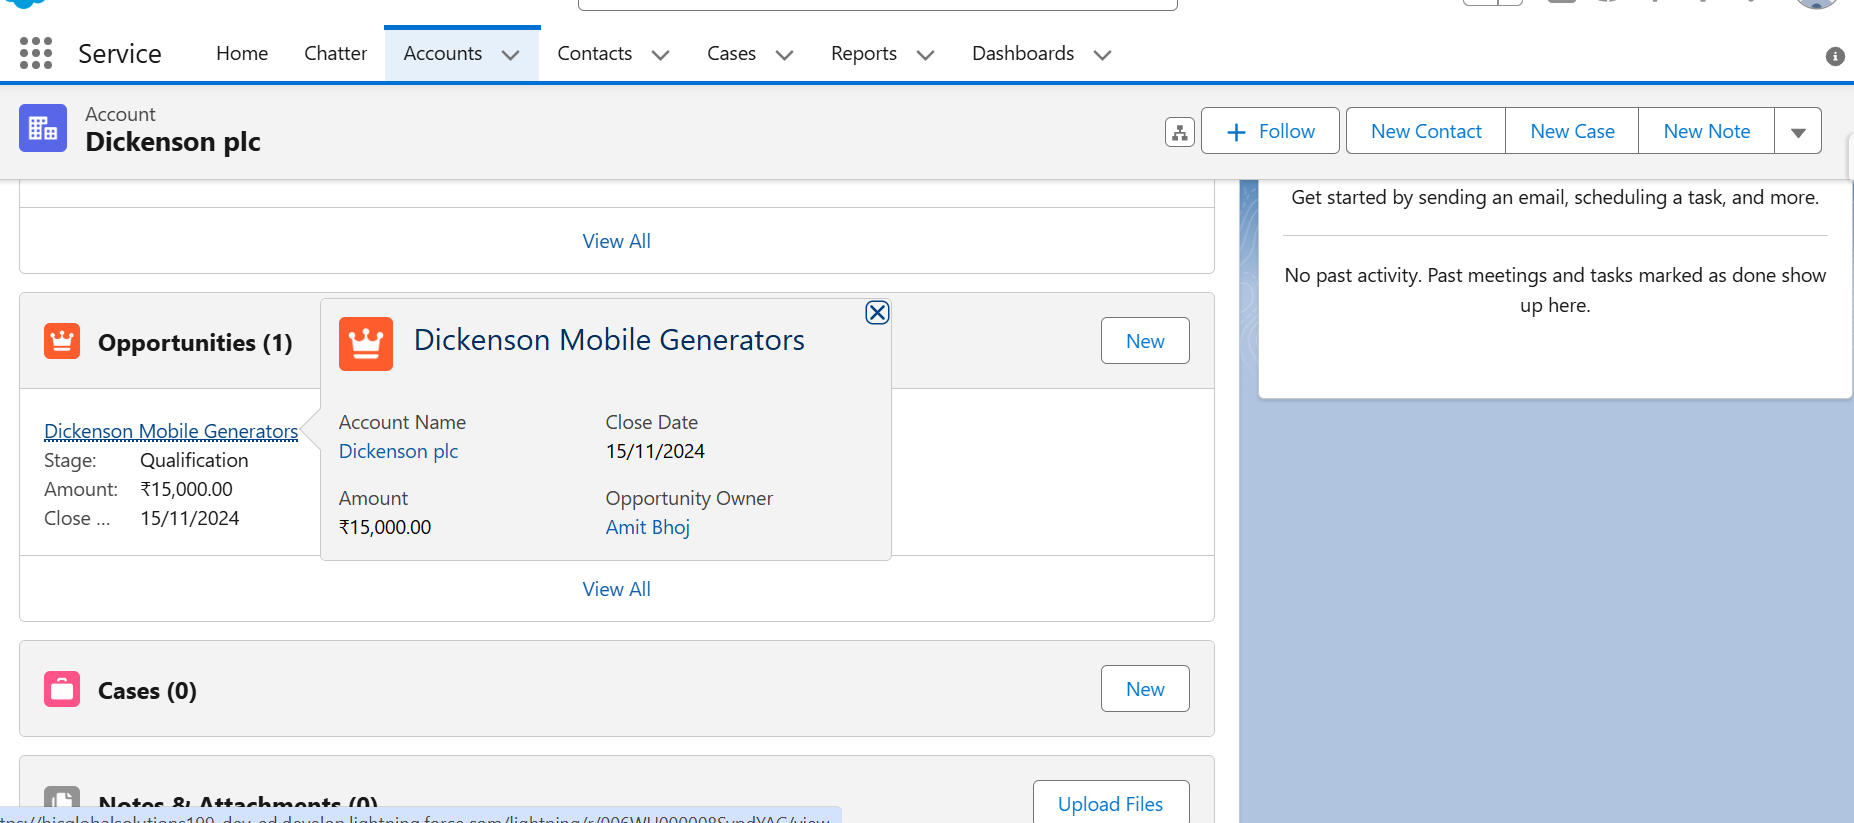
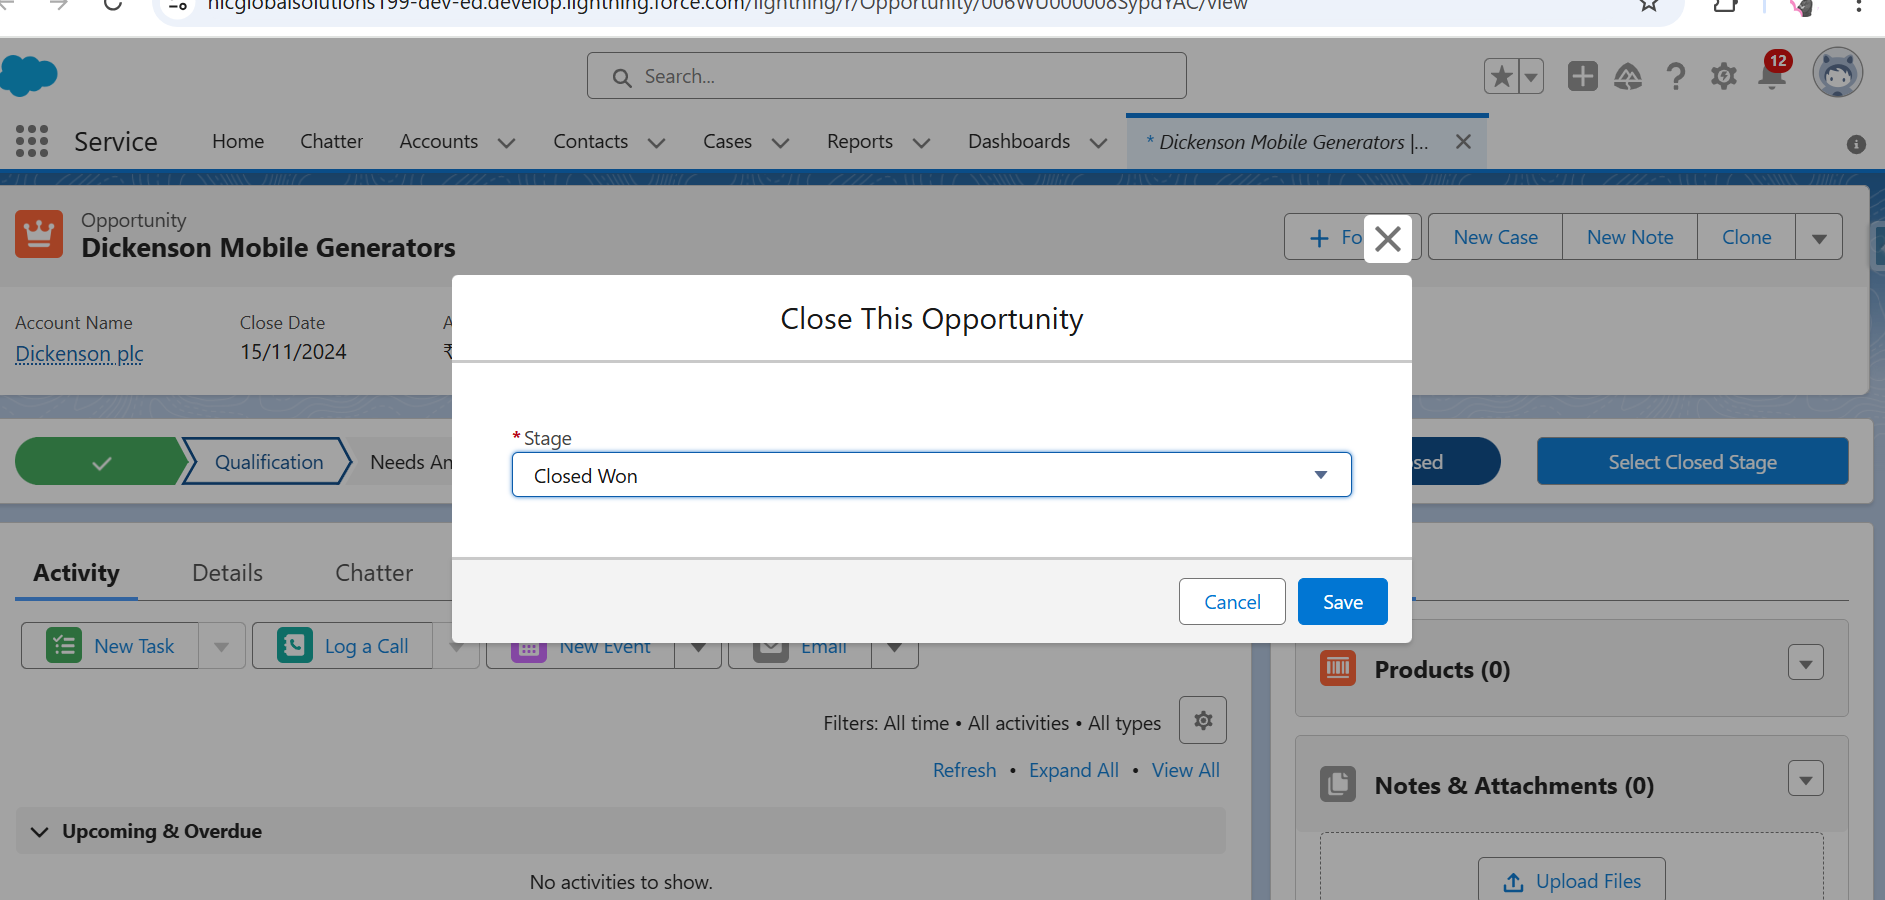
Go to the opportunity record and change the stage to closed won.
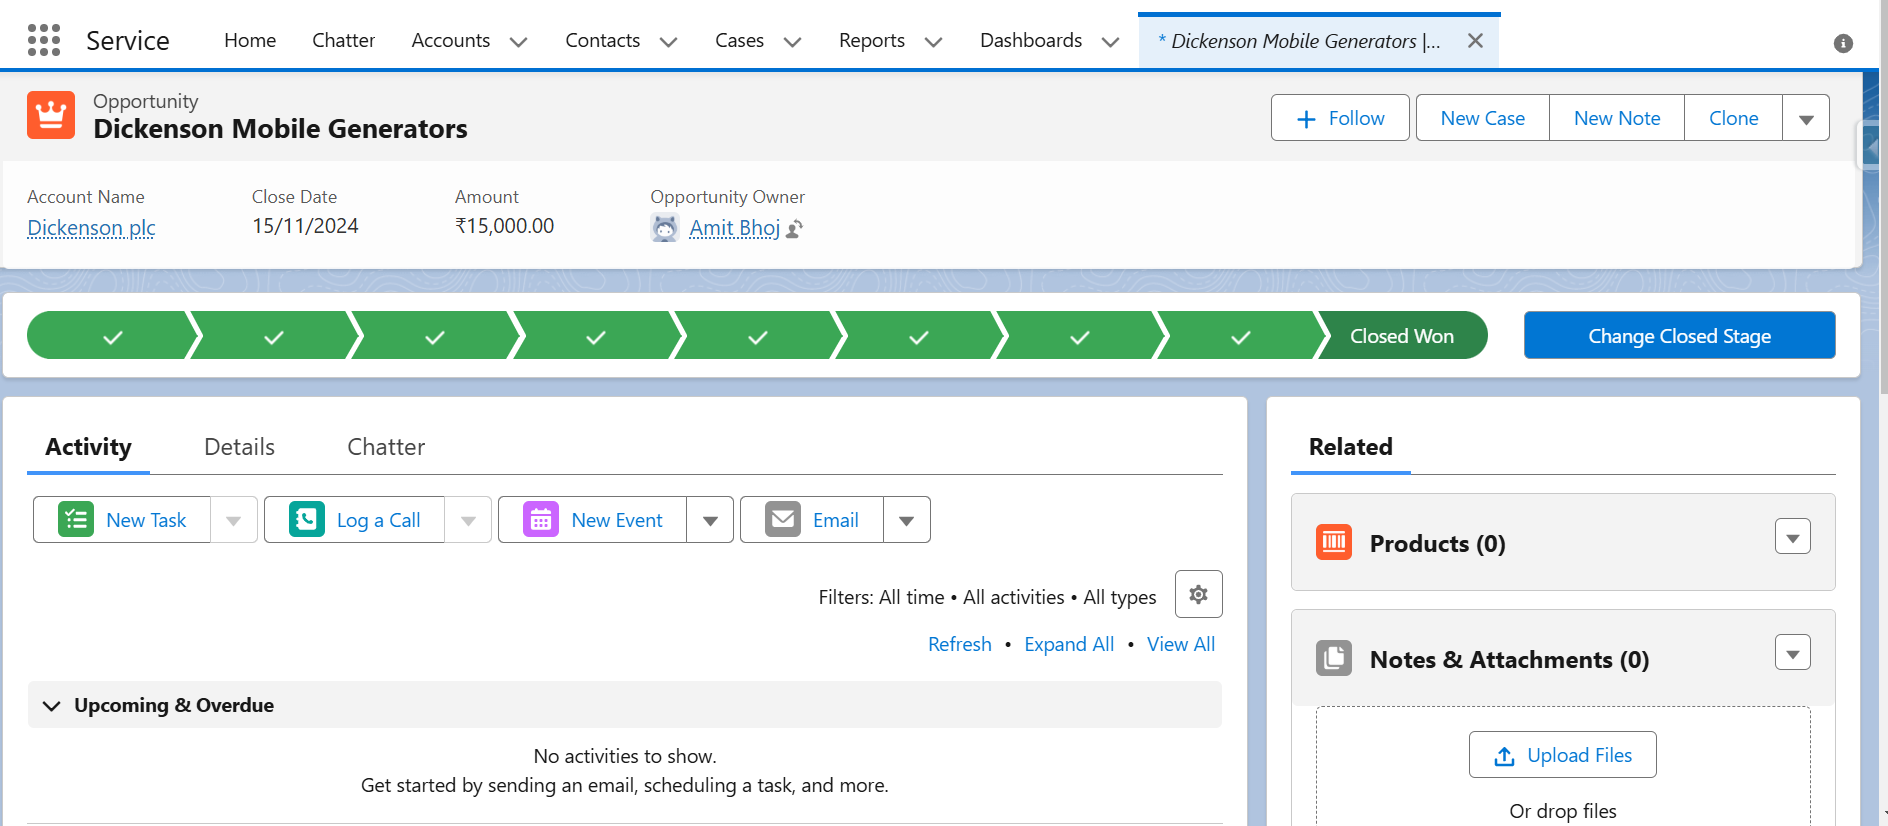
After updating the opportunity, go to the related account and check whether the fields are populated with the correct values.
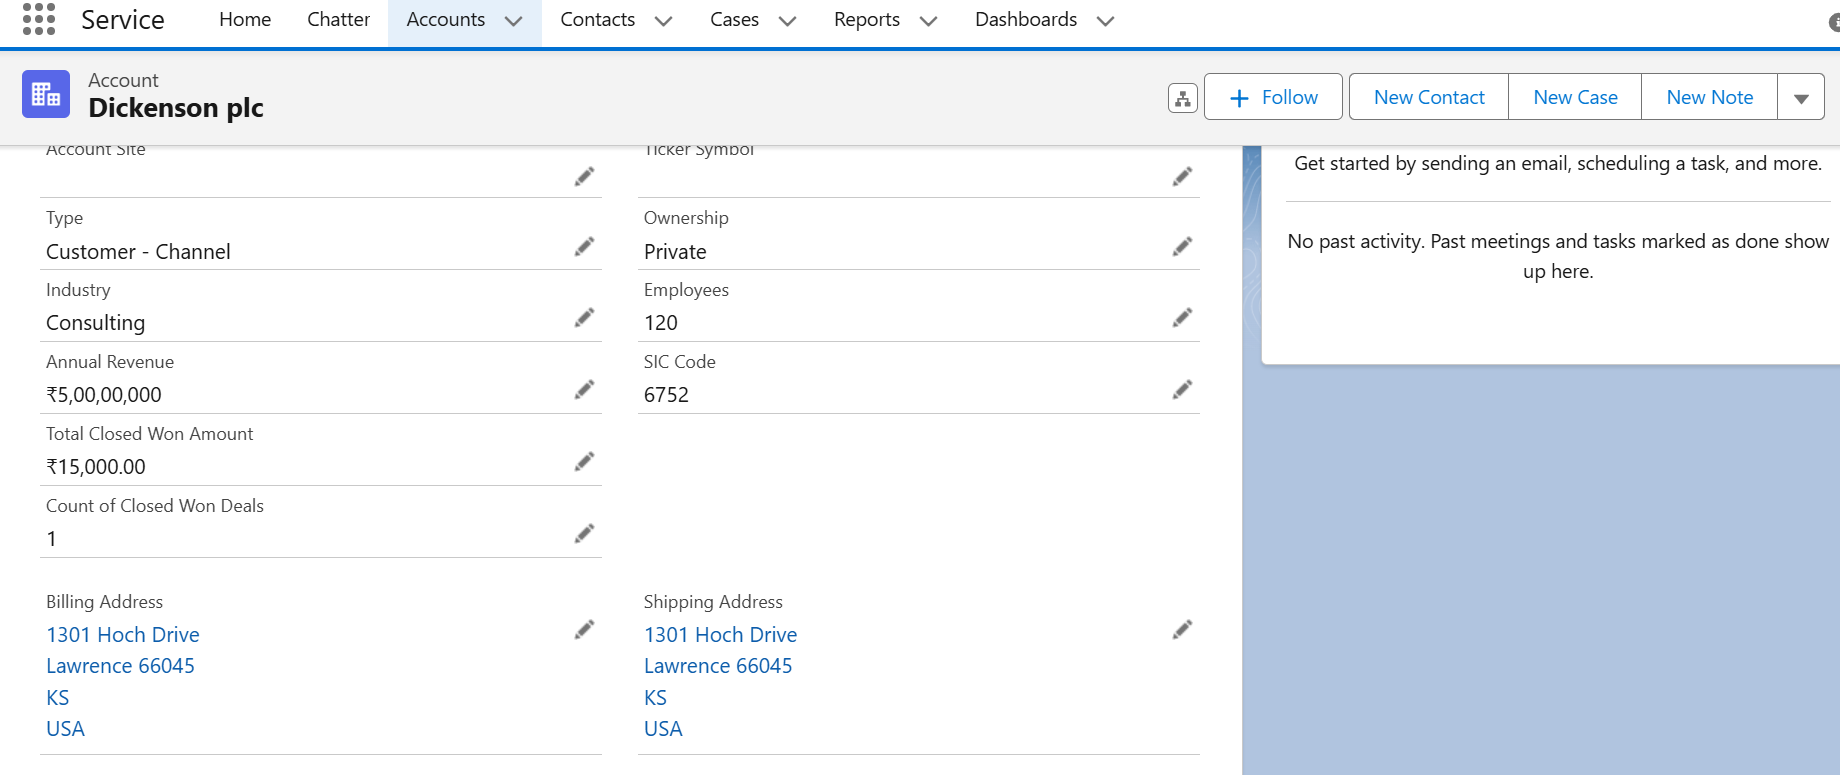
Result: Both the Total Closed Won Amount and Count of Closed Won Deals fields are populated with the correct value.
Now add one more opportunity with closed won and associated with the same account.
After saving a new opportunity go back to the related account and check the fields are updated correctly.
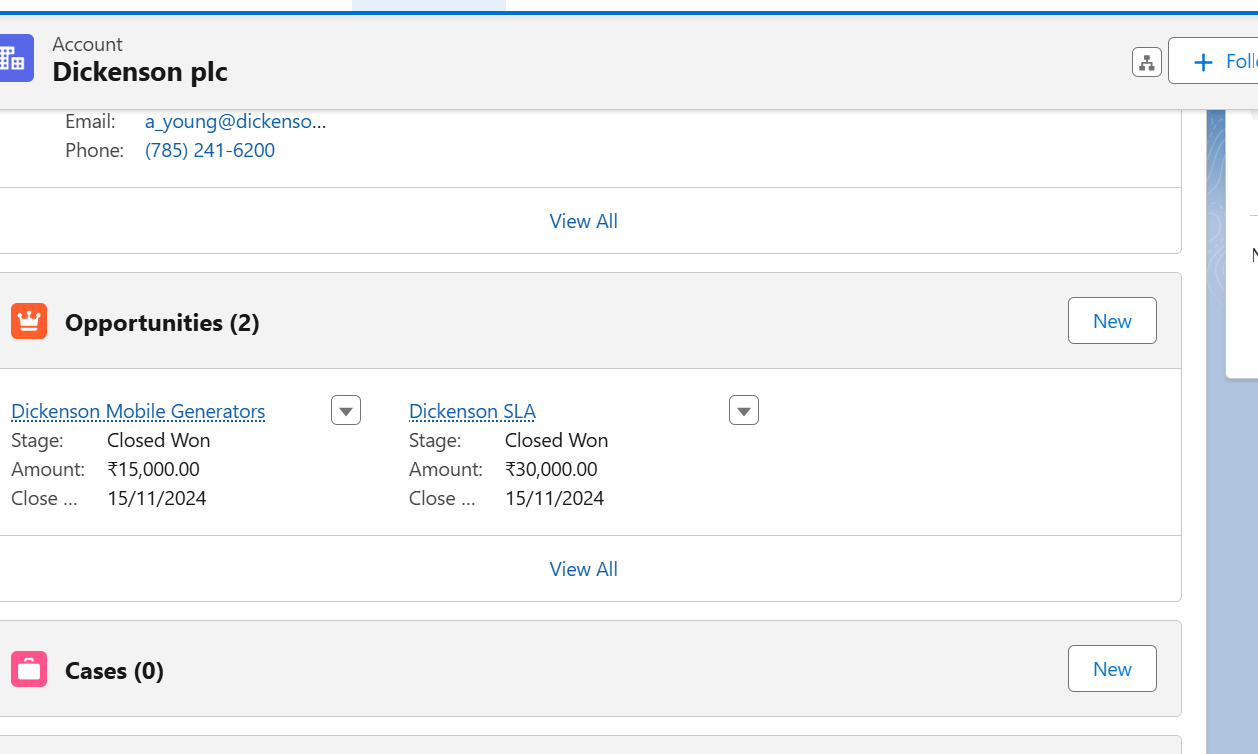
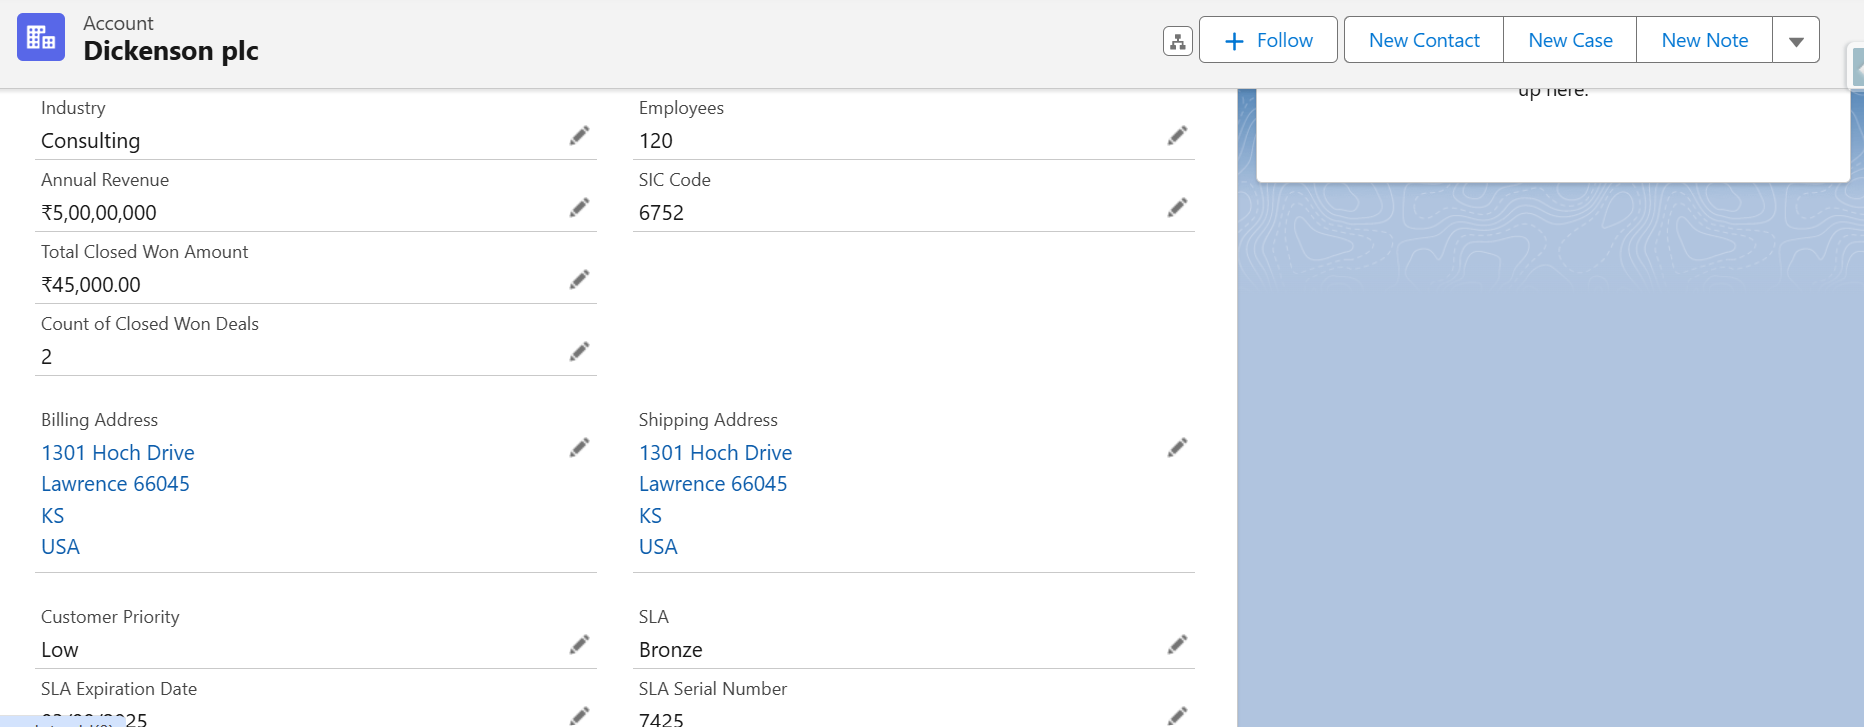
Result: Both The total Closed Won Amount and Count of Closed Won Deals fields populated with the correct value.
Here is the Demo.
https://www.youtube.com/watch?v=jEYbV5R62K4
Conclusion
The Transform Element in Salesforce Flow simplifies data mapping and modification by allowing the conversion of multiple variables into a single or collection variable. It supports features like formula-based adjustments, Apex class integration, and aggregate calculations.
While tasks like cloning accounts or data handling can be achieved using Loop and Assignment elements, the Transform element streamlines the configuration process, making it faster and more efficient.
Stay tuned for more informative blogs! Click here!