
Second Generation Managed Packaging (2GP) is a must-have modern approach that helps in building and managing packages on Salesforce. It offers a myriad of tools for developing, distributing, and managing apps and metadata to AppExchange partners.
With the help of Managed 2GP packaging, you can utilize your custom Apex code, interact with your version control system, create compact modular packages, and organize your source code.
There are no packaging or patch organizations since version control is the only source of truth. All packaging tasks can be carried out either manually using scripts or automatically through Salesforce CLI.
We can submit second-generation managed packages for security review and list them on AppExchange.
Prerequisites for Developing Managed Packages for the Second Generation
- Enable the Dev hub in your org.
- Enable Second-Generation Managed Packaging.
- Install SalesforceCLI.
- Create and Register Your Namespace.
What is Namespace?
A Namespace is a 1–15 character alphanumeric identifier that distinguishes your package and its contents from other packages in your customer’s org.
A Namespace is assigned to a second-generation managed package (managed 2GP) at the time that it’s created, and can’t be changed.
Please Note: Keep the above information in mind while working with Namespaces.
You can develop more than one second generation managed package with the same Namespace but you can associate each package with only a single namespace. If you work with more than one namespace, Salesforce recommends that you set up one project for each namespace.
When you specify a package namespace, every component added to a package has the Namespace prefix to the component API Name Example: If you have a custom object called student with API name ‘Student__c’.
If we add this object to a package associated with the ‘hic_signeasy’ namespace, then the API name becomes ‘hic_signeasy__Student__c’.
How to Create a Namespace?
- Sign up for a new Developer edition org.
- Go to setup enter package manager in the quick find box and select package manager.
- In developer settings, click Edit, and under Change developer settings, click Continue.
- In the Namespace prefix enter a namespace, and select check Availability.
- For a package to be managed, select None, then click Review my selections.
- Review your selections and then click save.
How to Register/Link a Namespace?
- Log in to your Dev Hub org as the System Administrator or as a user with the SalesforceDX Namespace Registry permissions.
- Select Namespace Registries from the App Launcher menu.
- Click Link Namespace
- Once the window appears, use the org’s System Administrator credentials to log in to the Developer Edition org where your Namespace is registered.
- Because sandboxes, scratch orgs, patch orgs, and branch orgs need to be linked to the Namespace Registry, you cannot link orgs without a namespace.
- Choose the All Namespace Registries list view to see every Namespace connected to the Namespace Registry.
Process for Managed Second-Generation Packages
- A second-generation managed package (managed 2GP) can be created and installed simply from the command line.
- These actions are part of the basic managed 2GP process.
- Create an SFDX project by simply running the below command.
- Sfdx force:project: generate –output-dir expense-manager-workspace –name expense-app
- Authorize the Dev Hub Org
- Sfdx force:auth: login web –set-default-dev-hub
- Use the Namespace attribute in the sfdx-project.json file for specifying a namespace. For instance, “namespace”: “hic_signeasy.”
You can skip this step if you’ve already provided a Namespace in the first stage of creating a SalesforceDX project. Make sure you’ve linked a Namespace to your Dev Hub organization before adding it.
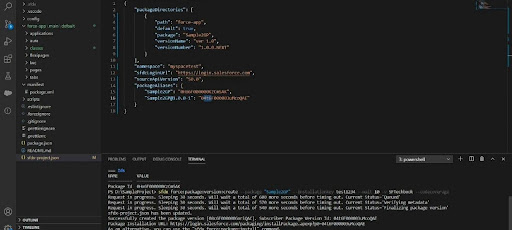
Figure: sfdx-project.json file
- Create the package from the SalesforceDX project directory.
- Sfdx force:package: create –name “Expense Manager” –path force-app –package-type Managed.
- Create a package version.
- Sfdx force:package:version:create –package “Expense Manager” –code-coverage –installation-key test1234
- Install and test the package version.
- Sfdx force:package:install –package “Expense Manager@0.1.0-1” –target-org MyTestOrg1 –installation-key test1234
Note: Once a package is created, it cannot be altered, a Namespace added, or the Dev Hub it is connected to change.
Difference Between 1 Generation Package and 2 Generation Package
| 1 Generation Package (1 GP) | 2 Generation Package (2 GP) |
|---|---|
|
|
Demo Video
Concluding Words
In a nutshell, Second Generation Managed Packages are considered as one of the significant packagings of Salesforce. It gives developers enhanced flexibility and control over their apps; moreover, it simplifies the development and management process. By leveraging the features of 2GP, developers not only get to meet the ongoing business requirements but also ensure future scalability & growth. Stay tuned for more latest updates!