

VitalSource is a leading digital content platform that offers an extensive library of academic materials, textbooks, and learning resources. Its digital distribution platform is designed to empower educational institutions, students, and instructors by providing access to a diverse array of scholarly content. Integrating Salesforce with VitalSource LMS can be of profound benefit to educational institutions or partners helping with digital learning.
Some of the benefits can be narrowed down to:
- Efficient Data Management: Centralized student data for easier tracking and management.
- Personalized Learning: Tailored content to meet individual student needs and enhance their learning journey.
- Enhanced Accessibility and Distribution: Easy access to a broad library of educational content from anywhere.
In this blog today, we will share how you can integrate Salesforce with Vitalsource using the most efficient integration platform Dell Bhoomi. So, let’s start!
A comprehensive Dell Boomi process for integrating Salesforce with Vitalsource
I have created a ‘VitalSource user’ as an example to explain the integration between Salesforce and VitalSource using Dell Boomi’s platform.
Here are the steps to follow:
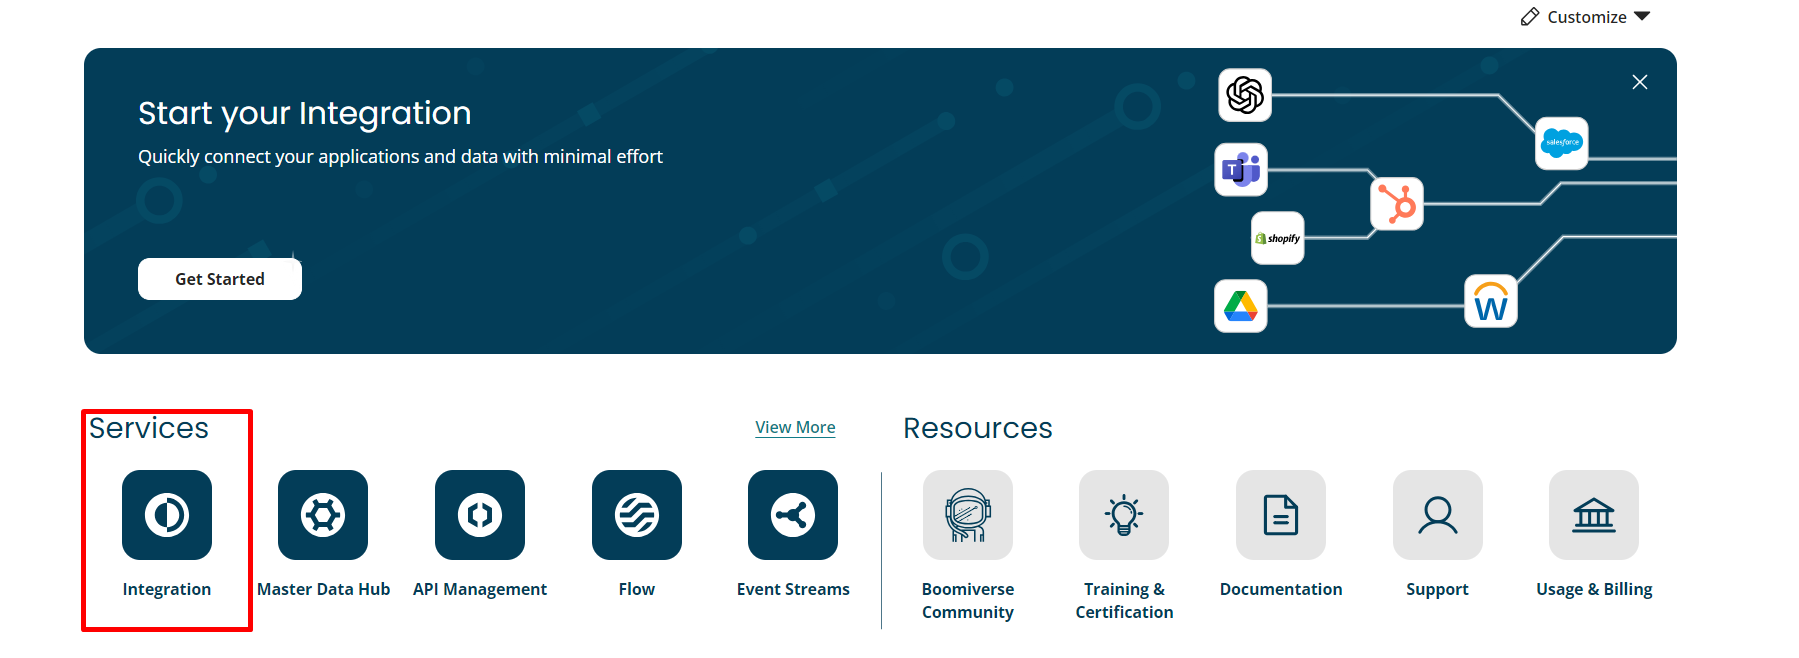
Step 1: Log in to your Dell Boomi account and select integration from the services menu.
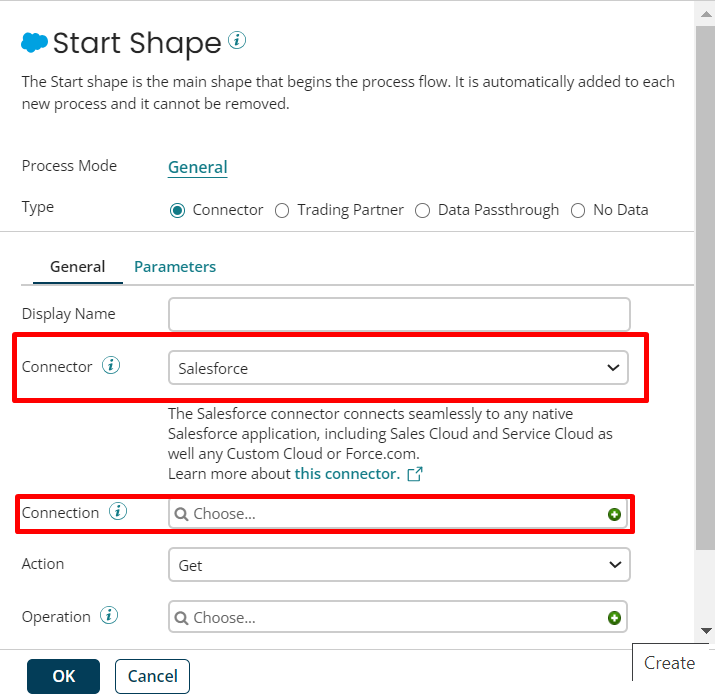
Step 2: Create a folder for the new process and select >New Component> Create Component>Process> edit the Start Process shape.
- Select the standard Salesforce connector.
- Click on Connection and create a new connection using the “+” icon.
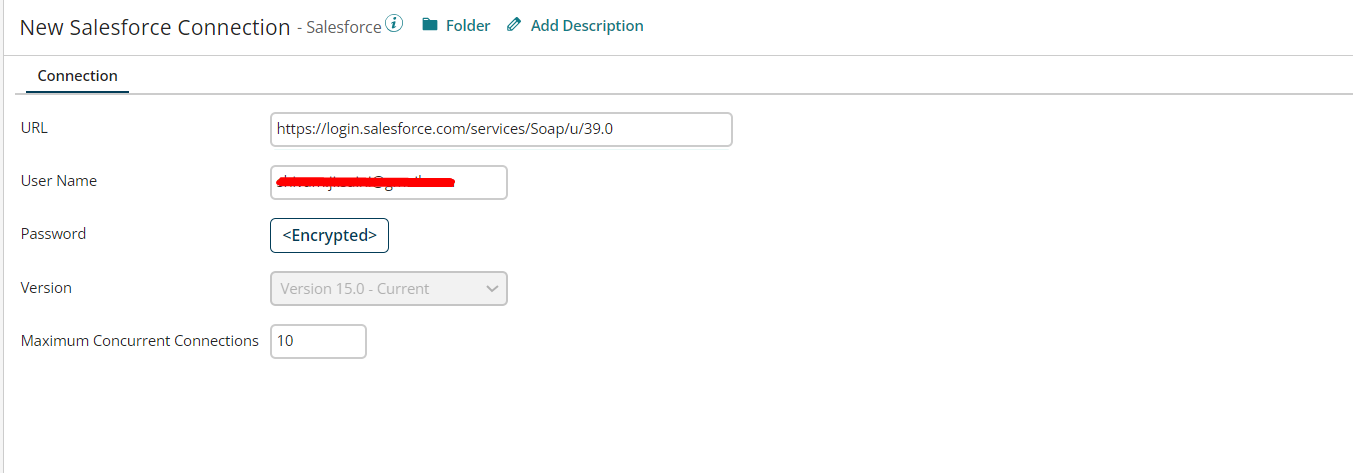
Connection
In the Connection section follow these steps.
- Enter end-point URL “https://login.salesforce.com/services/Soap/u/39.0”.
- Insert your organization ID.
- Combine your password and your organization’s Salesforce security token(password+ security token).
- Save the connection.
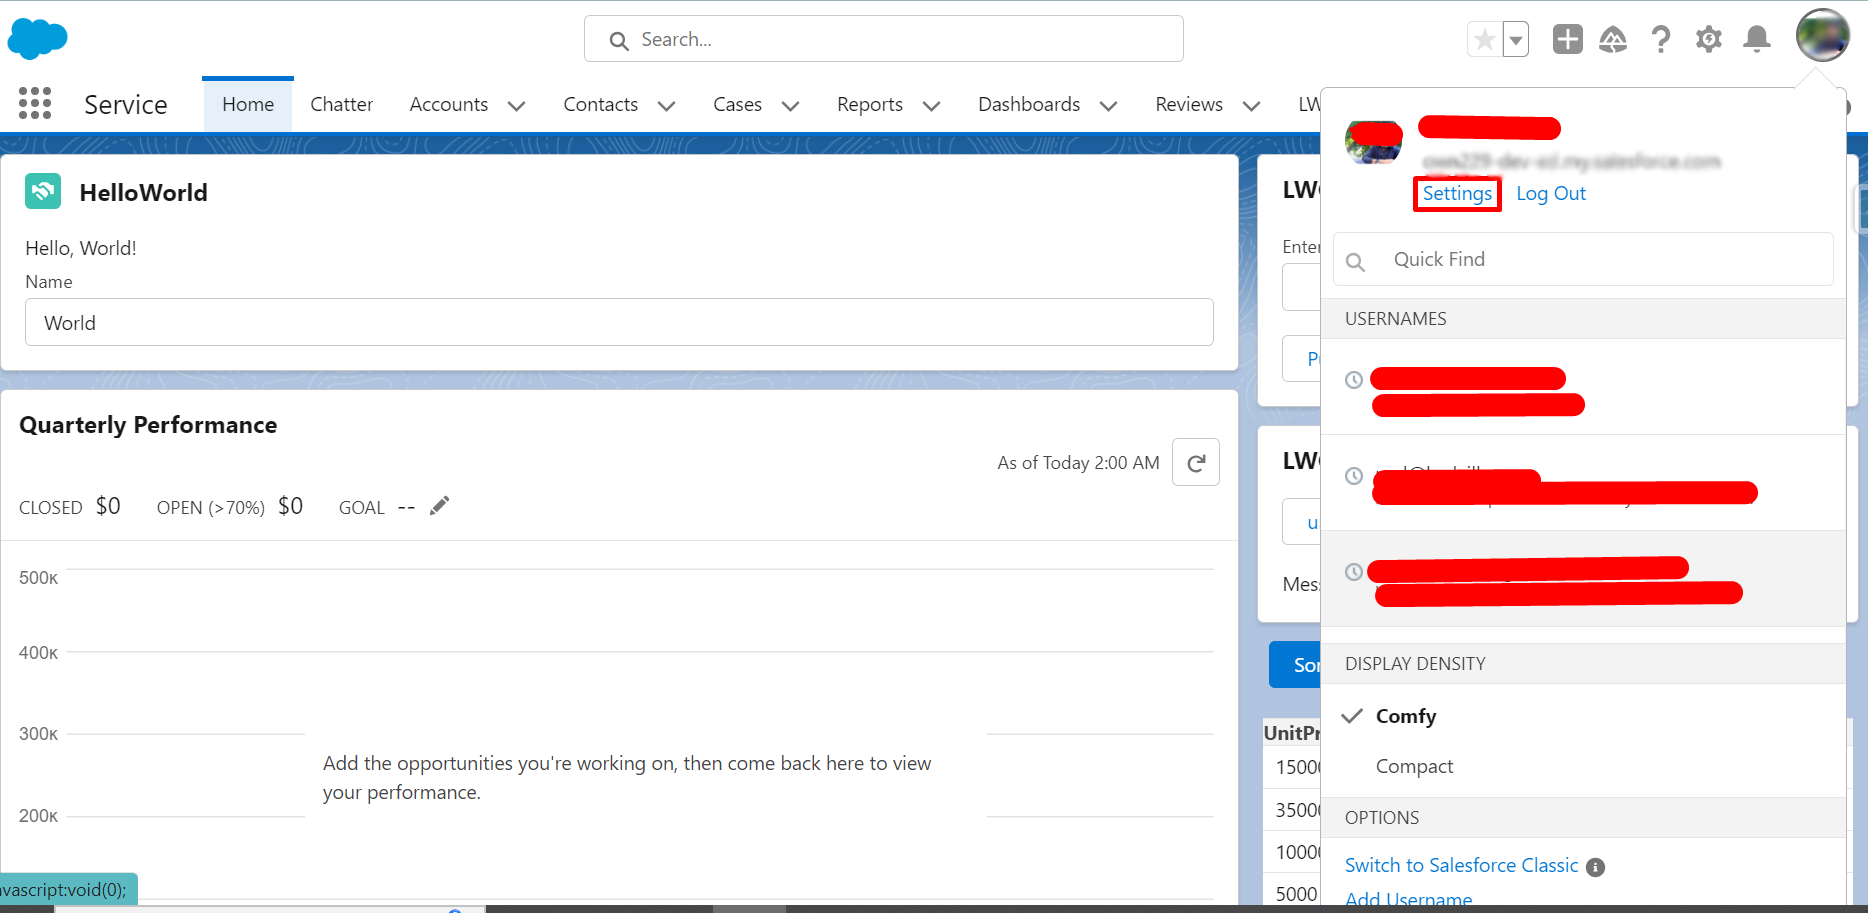
Note: If you do not have the security token you can reset your it.
- Follow the steps to reset your Salesforce security token.
- Select the settings option from the profile in Salesforce.
- Search security token in the search bar and click on Reset security token.
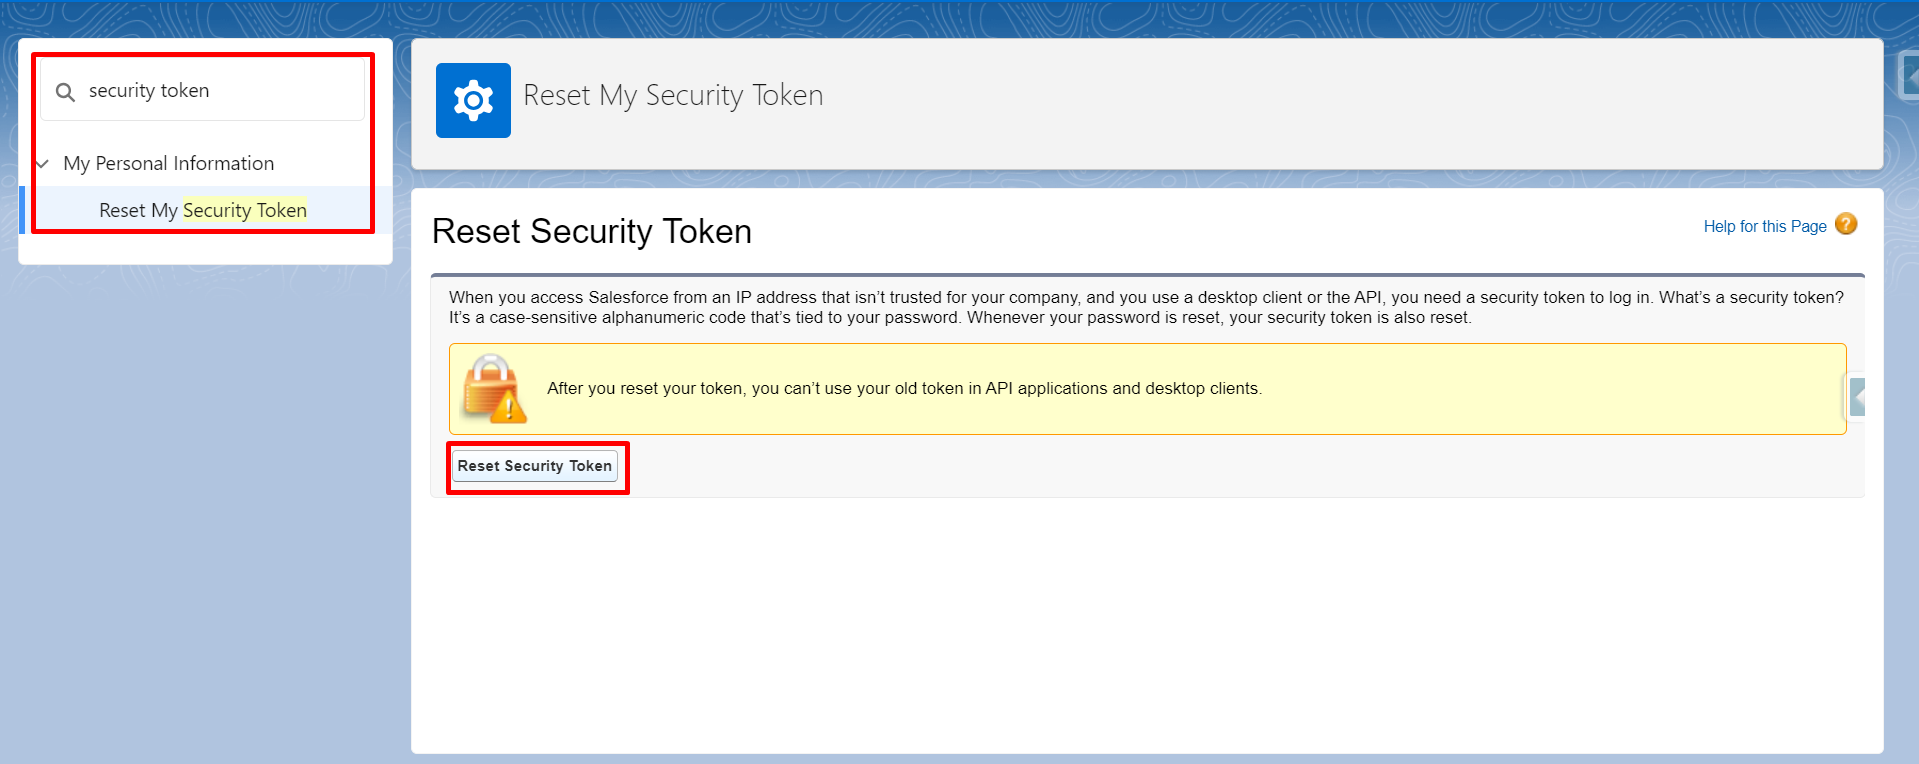
- You can get a new security token on your registered email address.
Operation
In the Operation section follow these steps.
Create a new operation using the + icon.
- Using the import button select the object of your salesforce.org.
Response profiles are automatically created after selecting an entity (object). The response profile stores your object data.
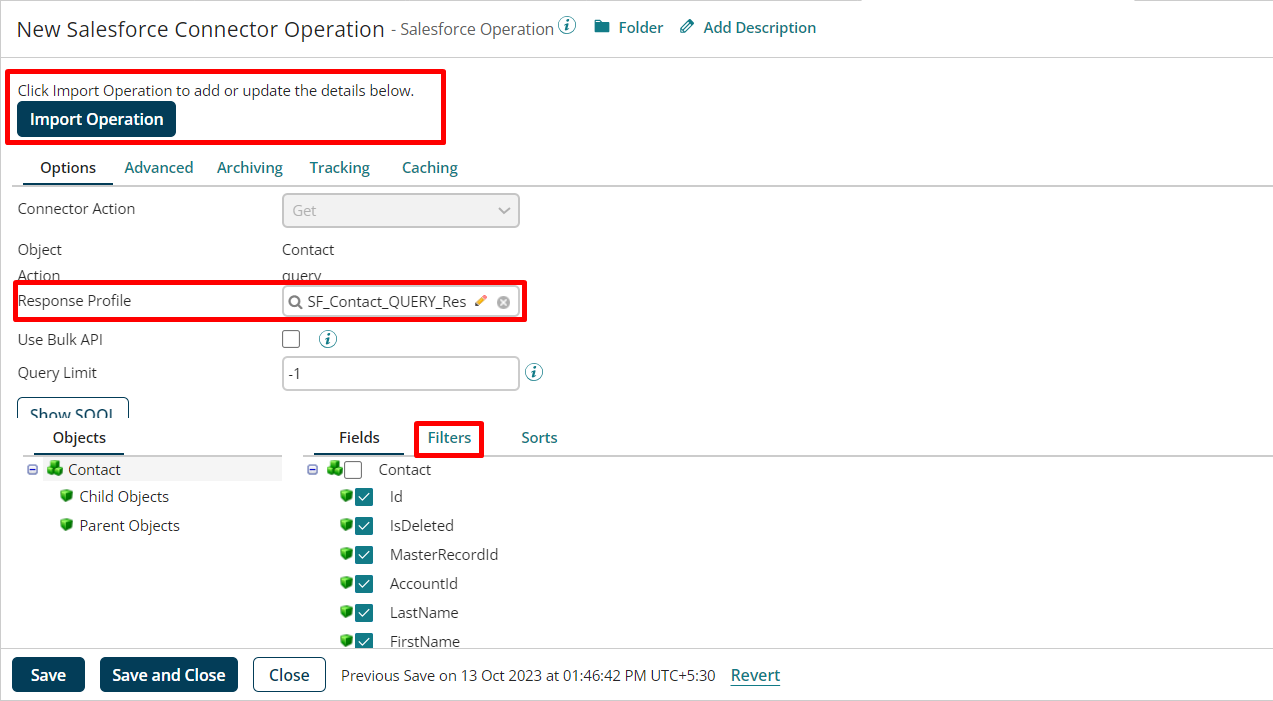
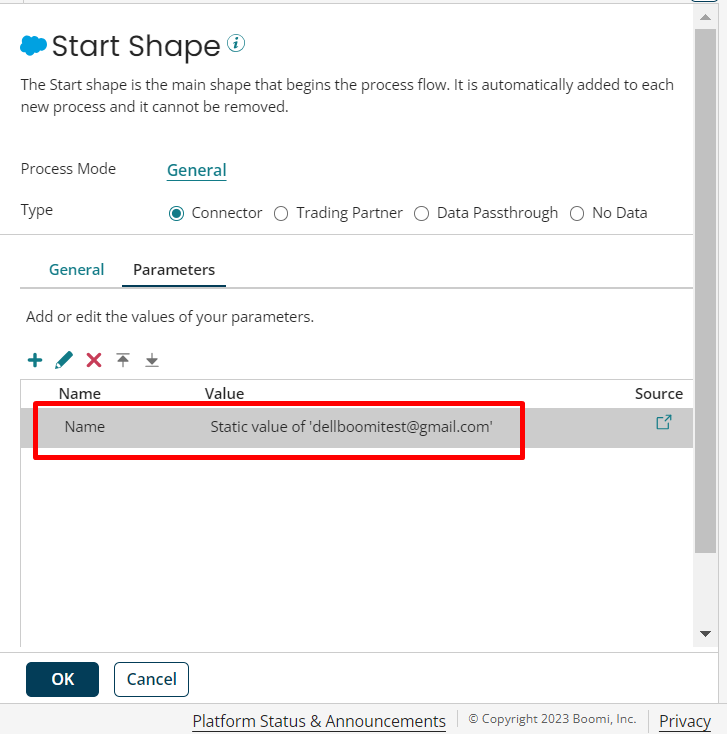
You can also use a filter option if you want to get specific records from Salesforce org and pass the parameters.

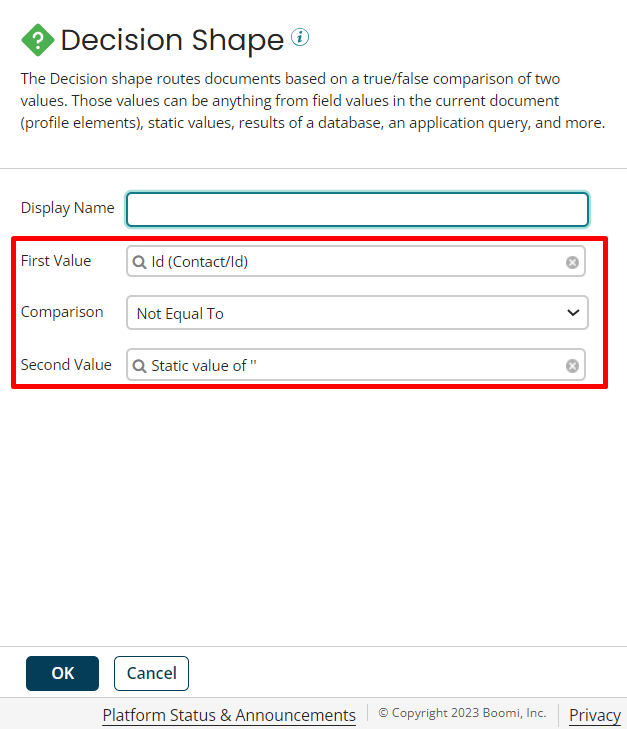
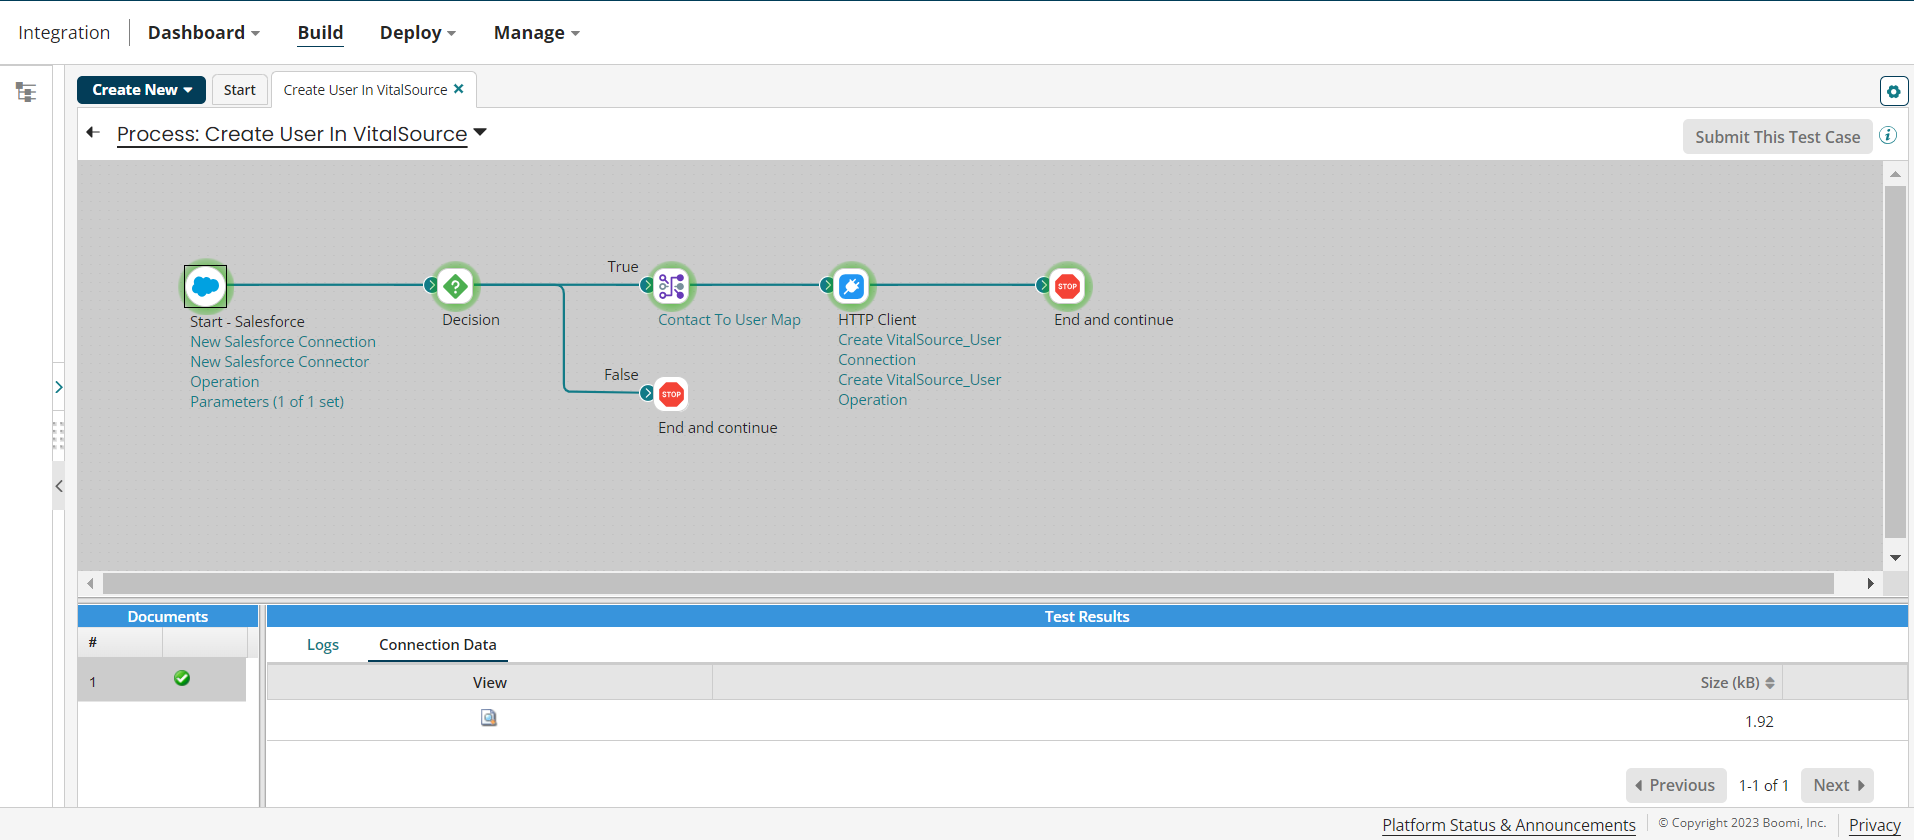
Step 3: Add a ‘Decision’ and ‘Map’ shape into your process using drag and drop. In decision shape, you can check whether the record is available or not using the record ID.
- In map shape you can create a new map using the ‘+’ sign.
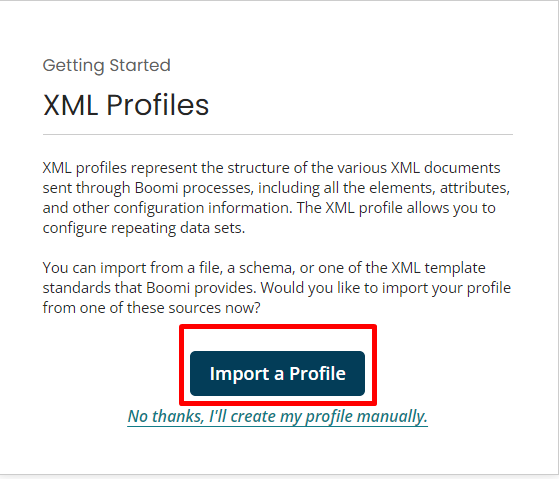
- After creating a map, you can choose a response profile for your source profile and create or import an XML profile using the import profile button from your local computer for your destination profile.
- Simply drag fields from the source and drop them on the destination fields to map them.
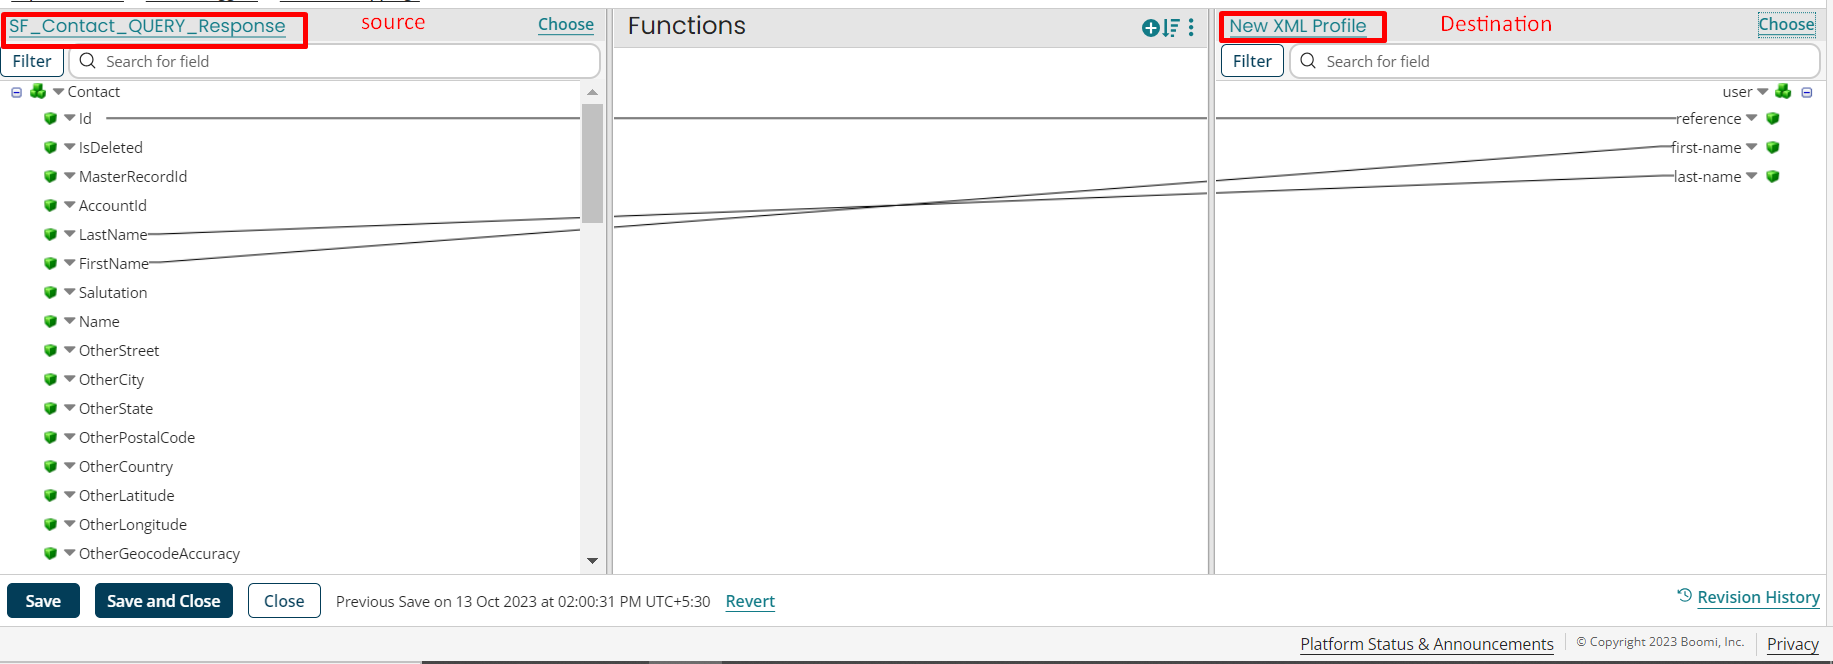
- I need only three fields to create a reference user in VitalSource, so I used only three fields.
- Now that we have the final data from the map, it is time to send it to the VitalSource.
Step 4: Add an HTTP Client Connector shape for post request to your process using drag and drop.
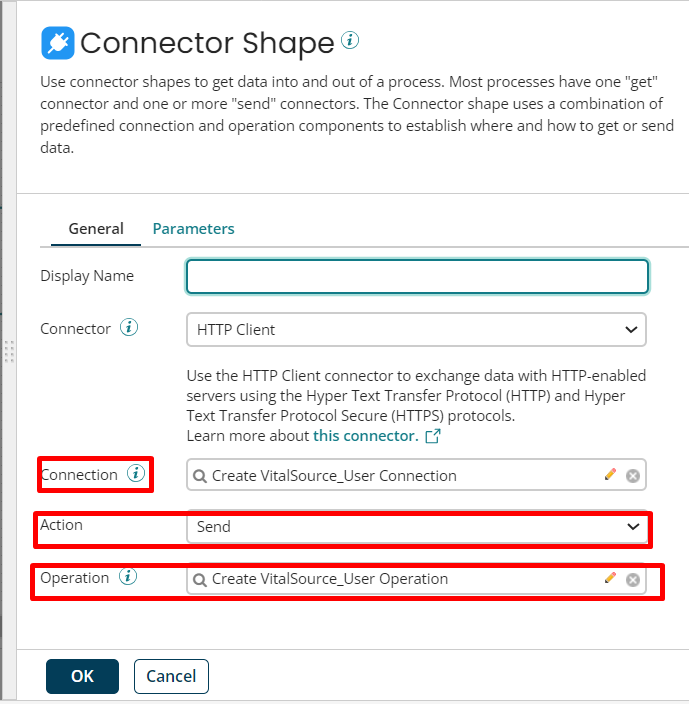
- Click on Connection and create a new connection using the “+” icon.
Connection
In the Connection section follow these steps.
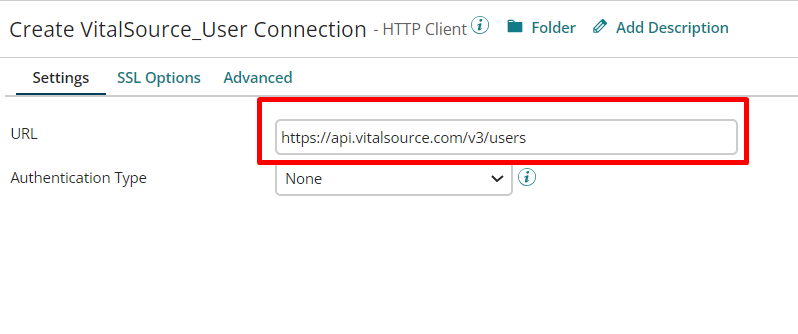
- Enter the end-point URL for creating a user in VitalSource ‘https://api.vitalsource.com/v3/users’.
- Set the Authentication type to “None” and save.
- Select the “send” operation in the action field.
Operation
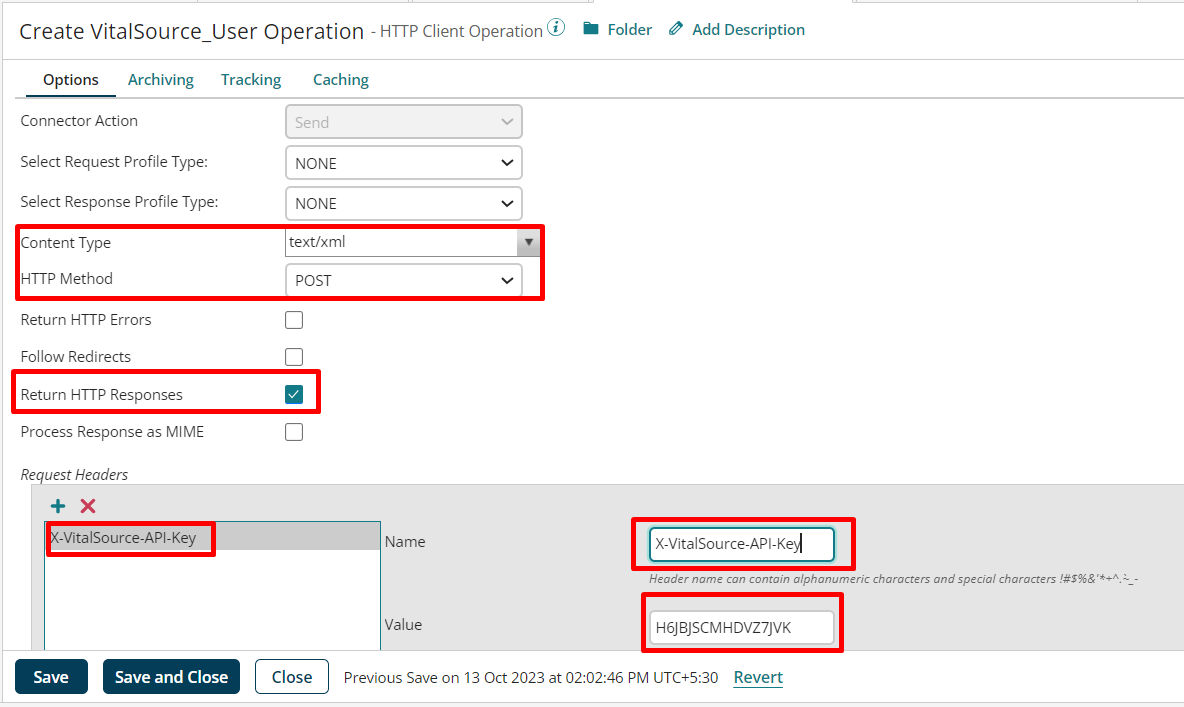
- Select Content Type as ‘text/xml’ and HTTP Method as a ‘post’.
- Select the ‘Return HTTP Responses’ as a true.
- You need to set the header for authorization in Request Headers click on the ‘+’ icon and set the header name and value.
- Save the operation.
Step 5: Now add a stop shape into your process using drag and drop to stop your process and save the process.
Your process has been successfully created and looks like this; you can test it using the Test button.
When the test is finished, check your VitalSource account to see account is created or not also you can check the user details in Postman.
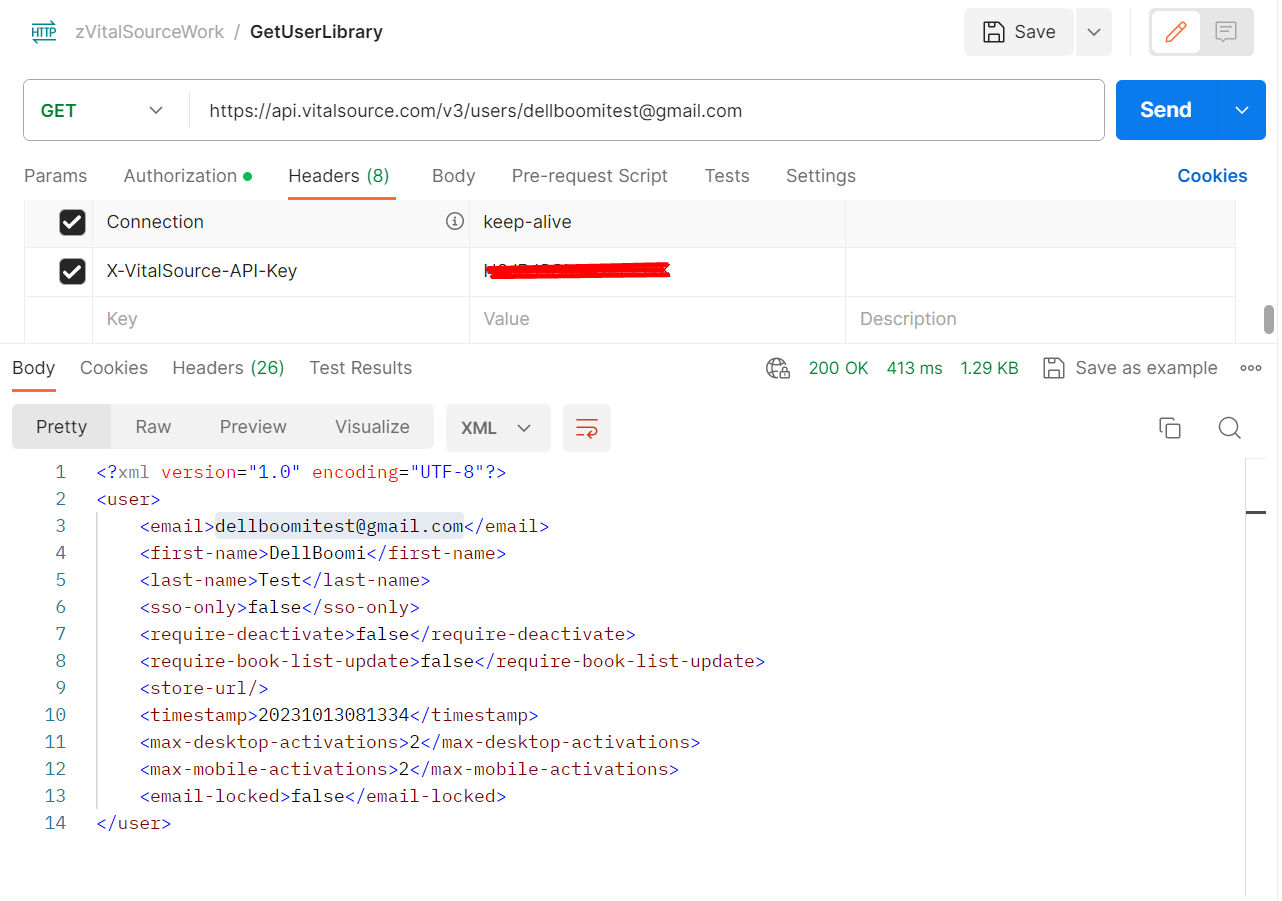
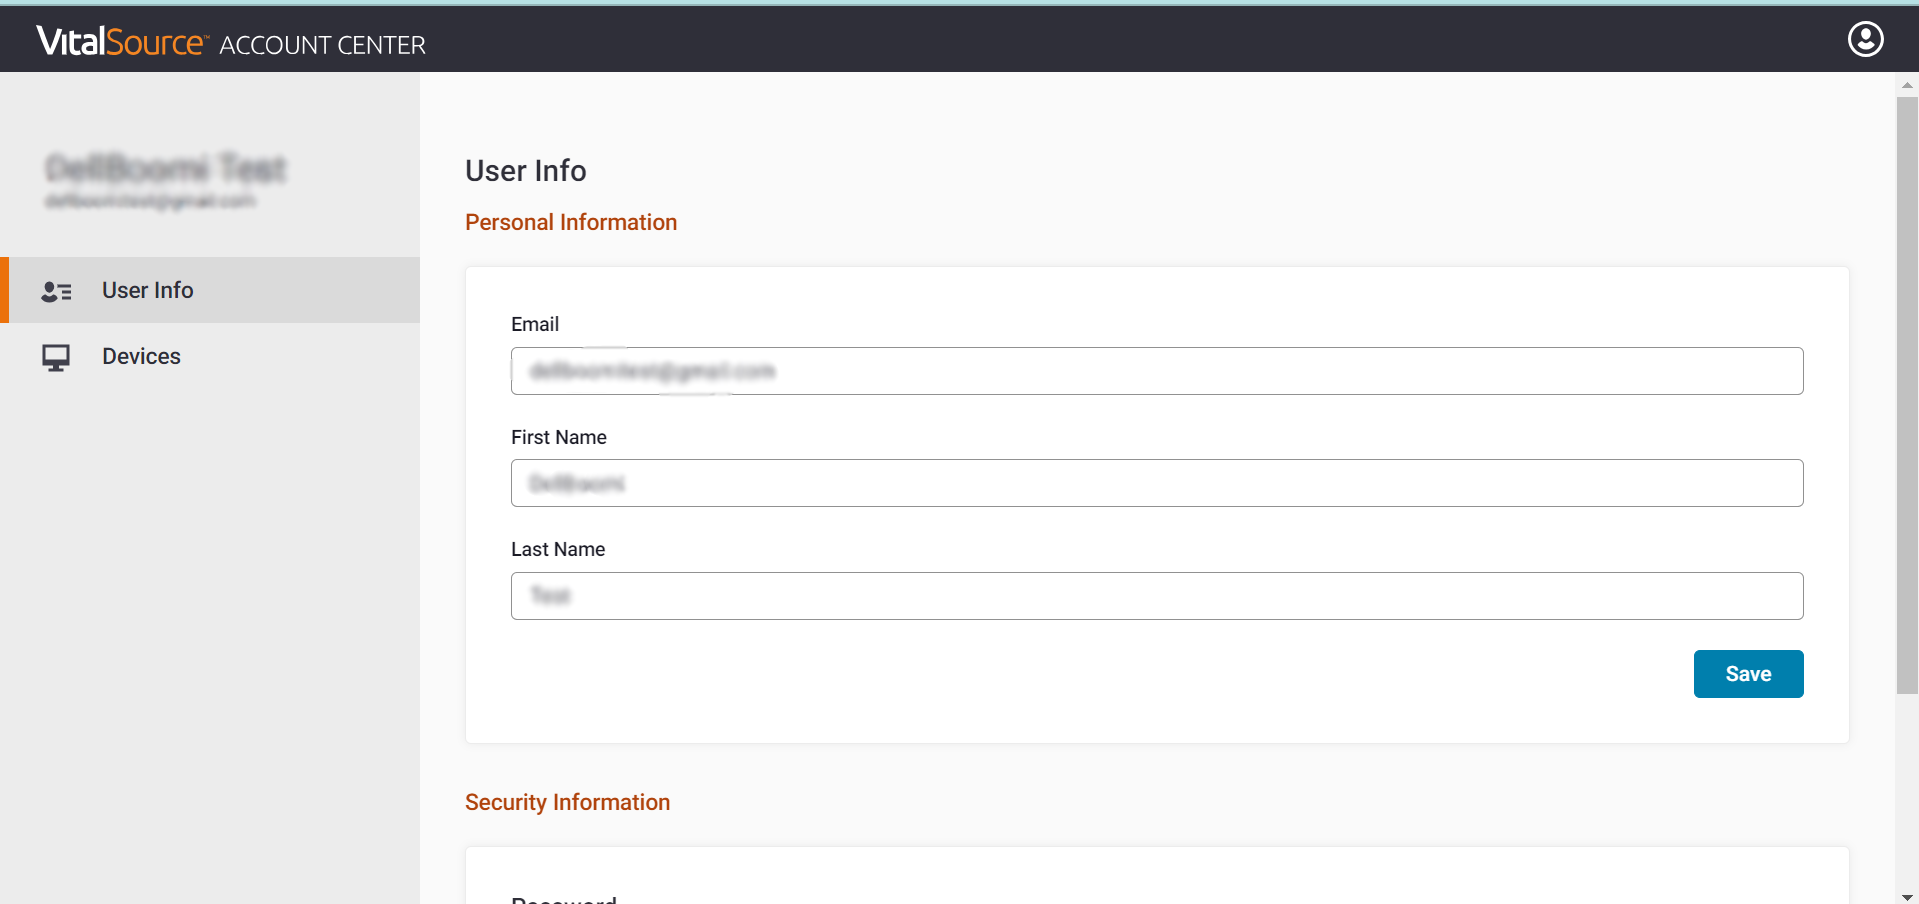
The record has been successfully created.
Conclusion
There you have it, your step-by-step guide to connecting Salesforce and Vitalsource easily using Dell Boomi’s drag-and-drop interface.
Try out the solutions in your org and feel free to share your feedback with us. And for Salesforce development tutorials, keep an eye on our next blogs!





