
In today’s fast-paced digital landscape, streamlining document workflows is no longer a luxury—it’s a necessity.
Integrating a document generation app, like Docs Made Easy, with an eSigning tool, helps businesses automate the entire document lifecycle—from creation to signature—saving time, reducing errors, and boosting productivity.
In this guide, we’ll walk you through the key steps, tools, and best practices to successfully connect your Doc-Gen and eSigning apps for a seamless, end-to-end workflow.
Prerequisites for the Integration Process
First things first, make sure you have installed the Docs Made Easy app. Afterward, activate the pro features of Sign Made Easy and Docs Made Easy.
Once the installation is done, and you have enabled the pro version, you need to assign the required app permission sets to the intended profile as mentioned below:
- Sign Made Easy Pro Admin = Admin User
- Sign Made Easy Pro Business = Standard User
- Sign Made Easy Pro Guest = Guest User
- Docs Made Easy Admin User
- Docs Made Easy Business User
- Docs Made Easy Guest User
- Docs Made Easy Community User
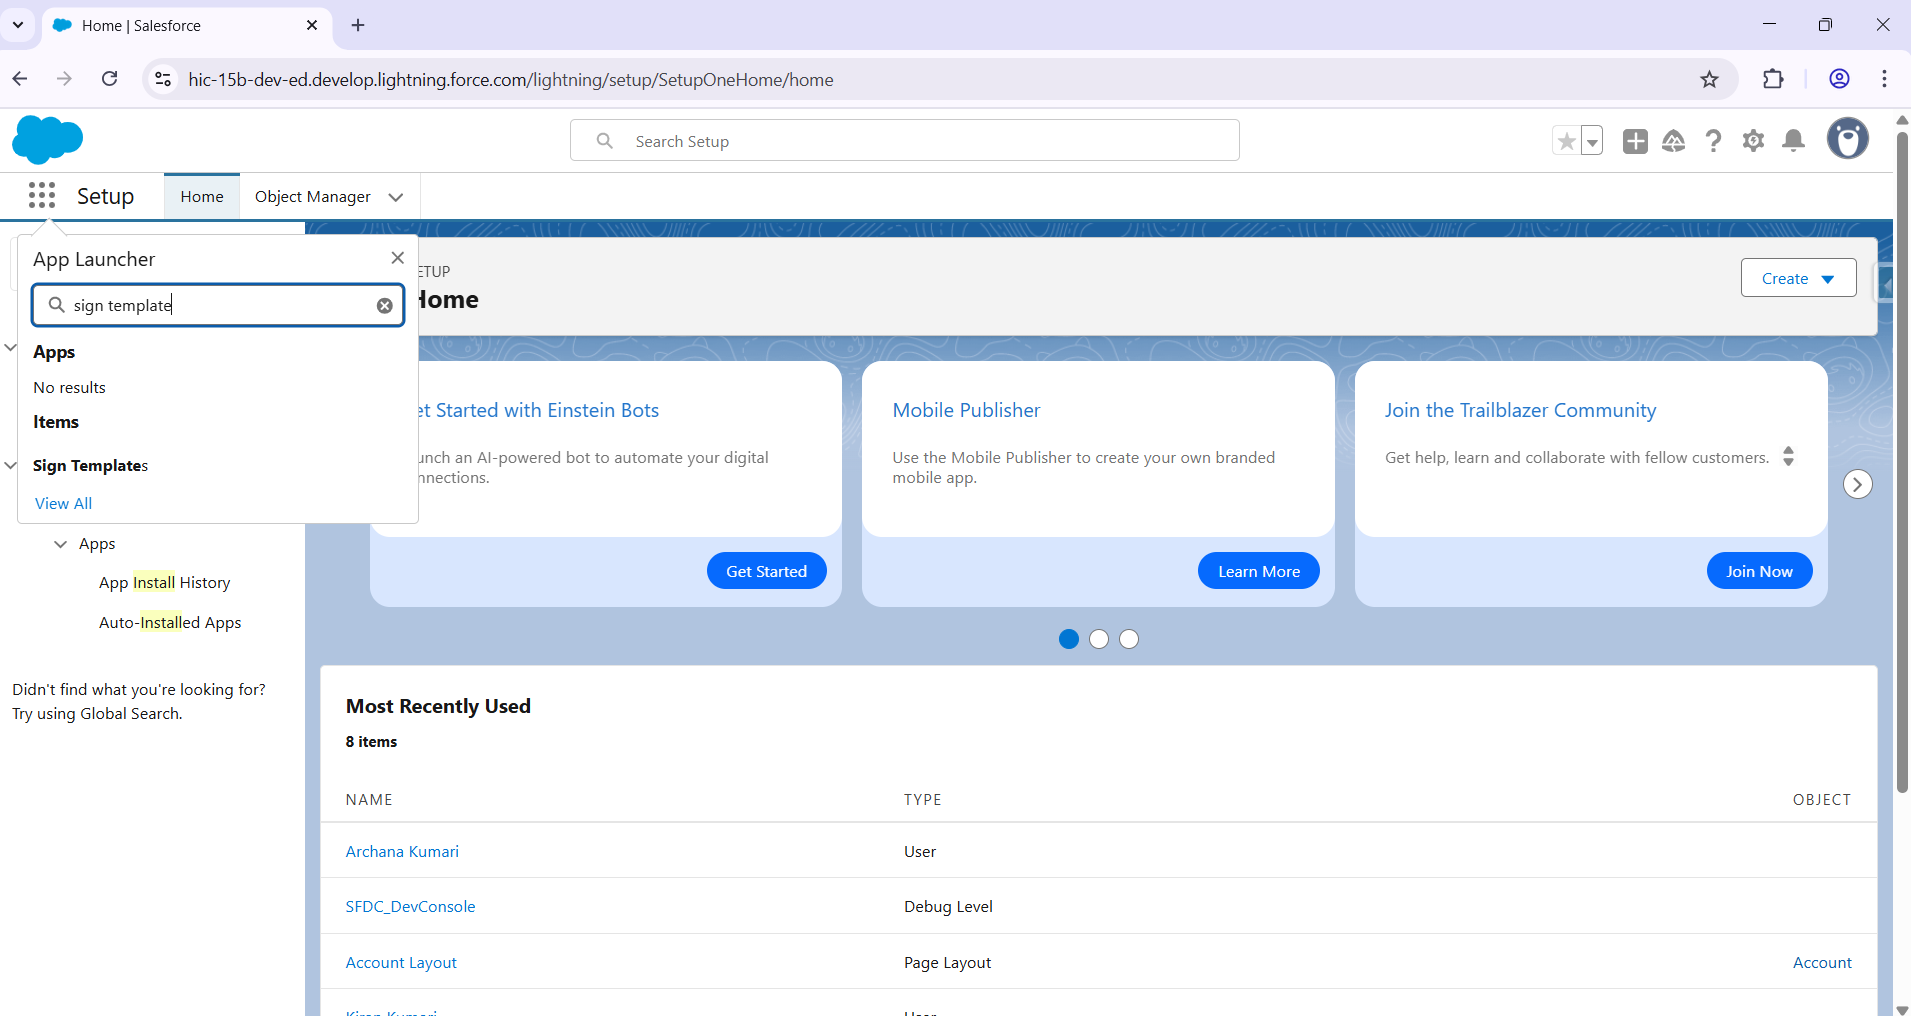
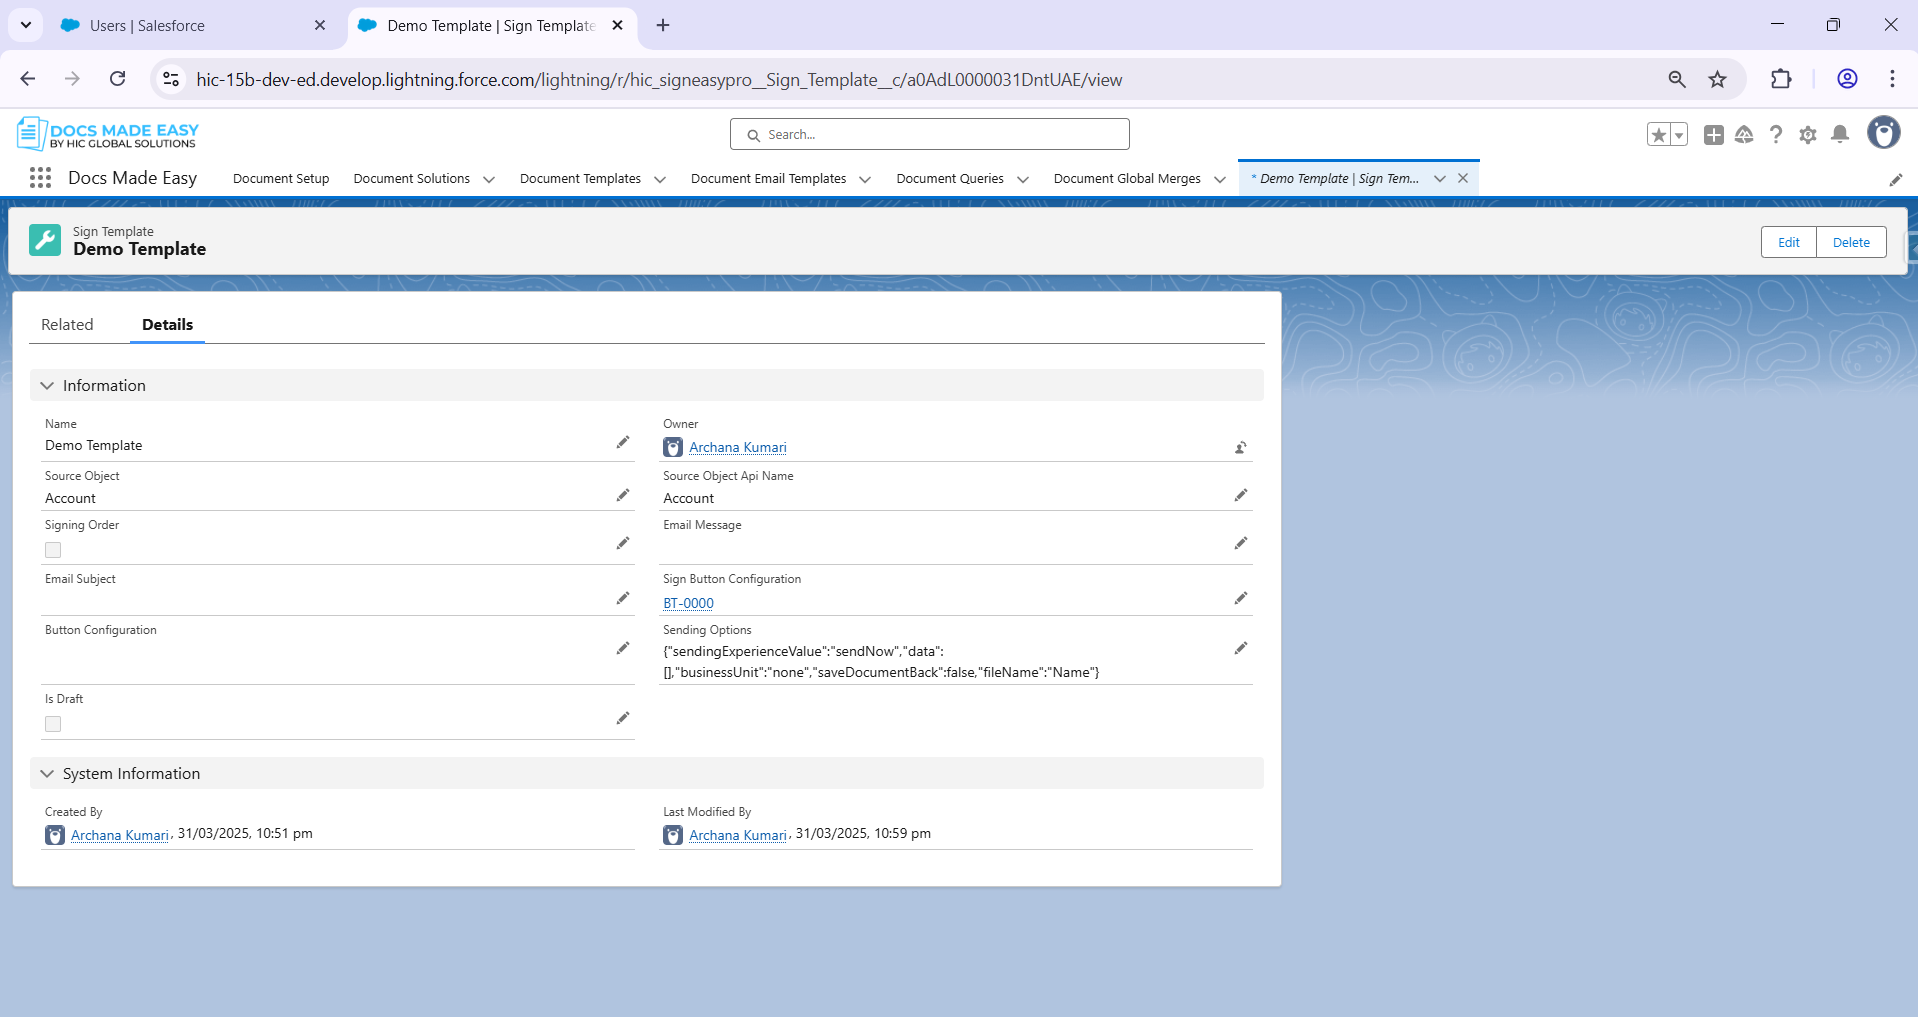
- Create a “Sign Template Record” – for that, go to App launcher > search Sign template and click.
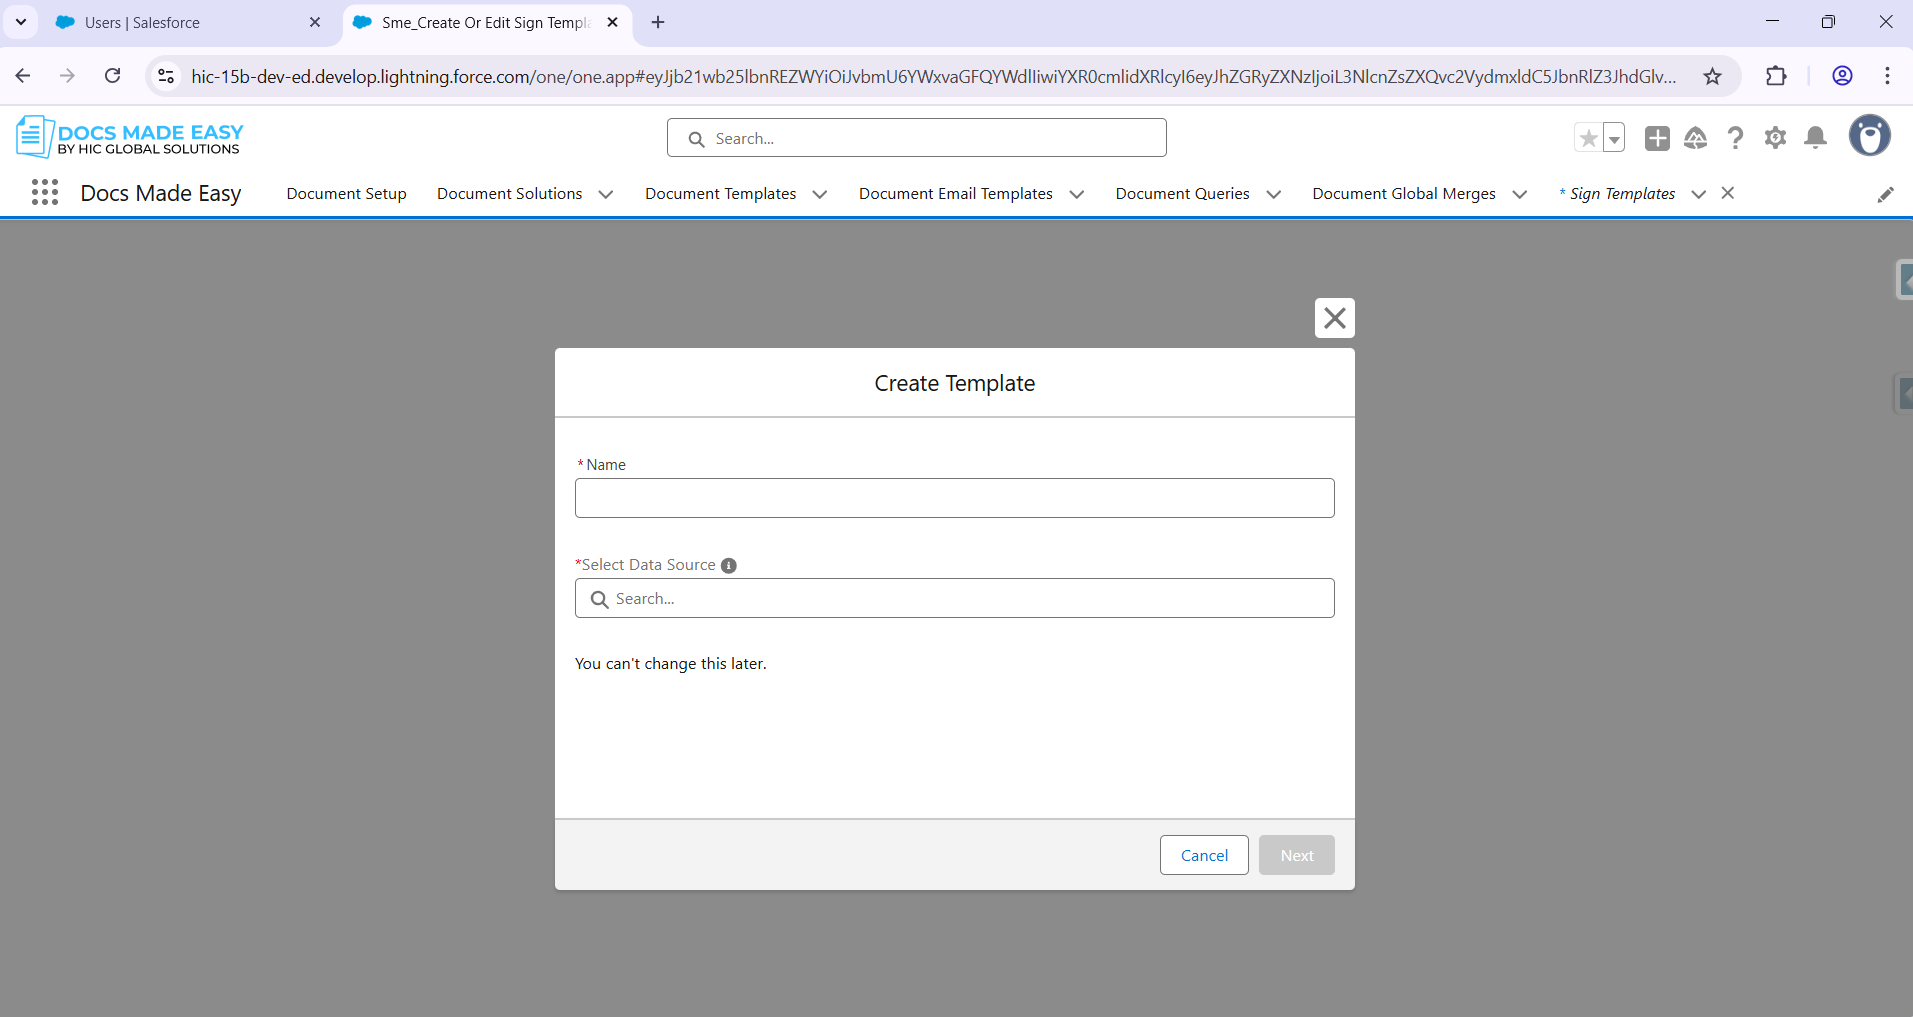
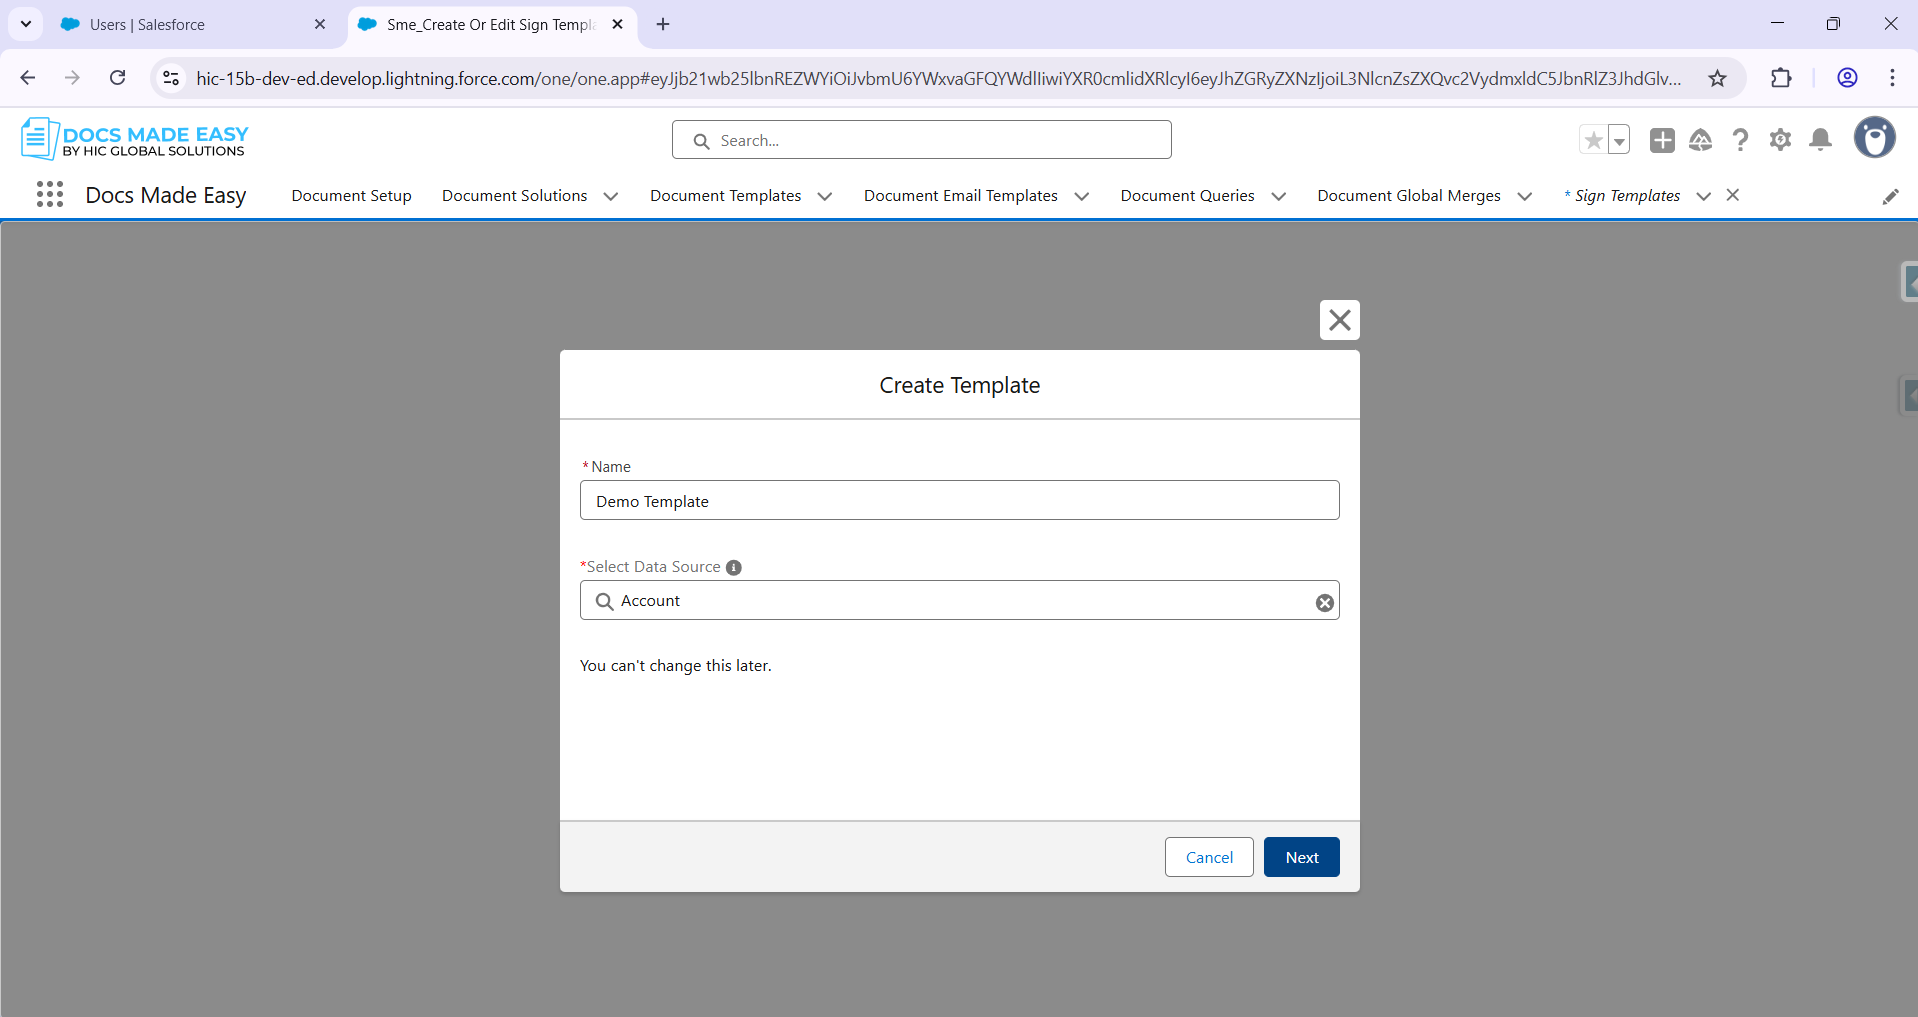
- After completing that, click on the new button > enter the sign template name > select “Object” of your choice.
- Now, it’s time to upload your document, and if not, you can directly attach the document from the Salesforce record as well.
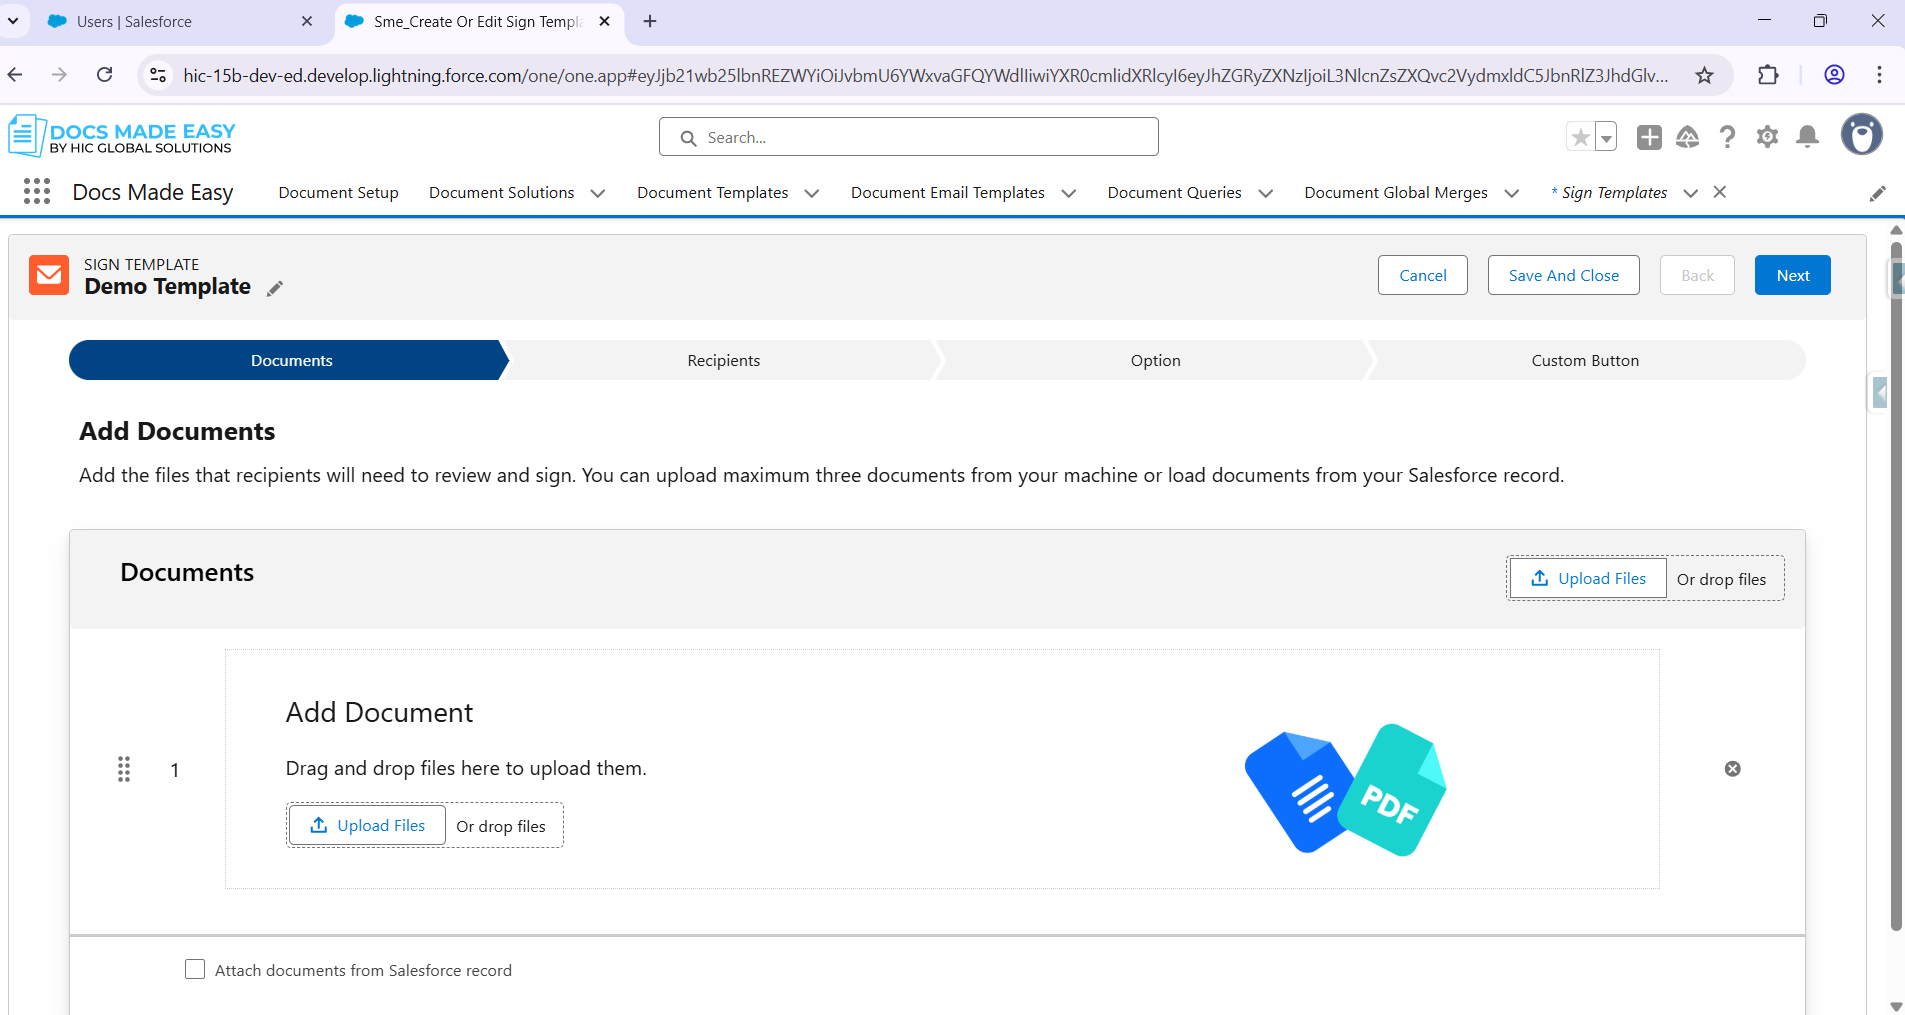
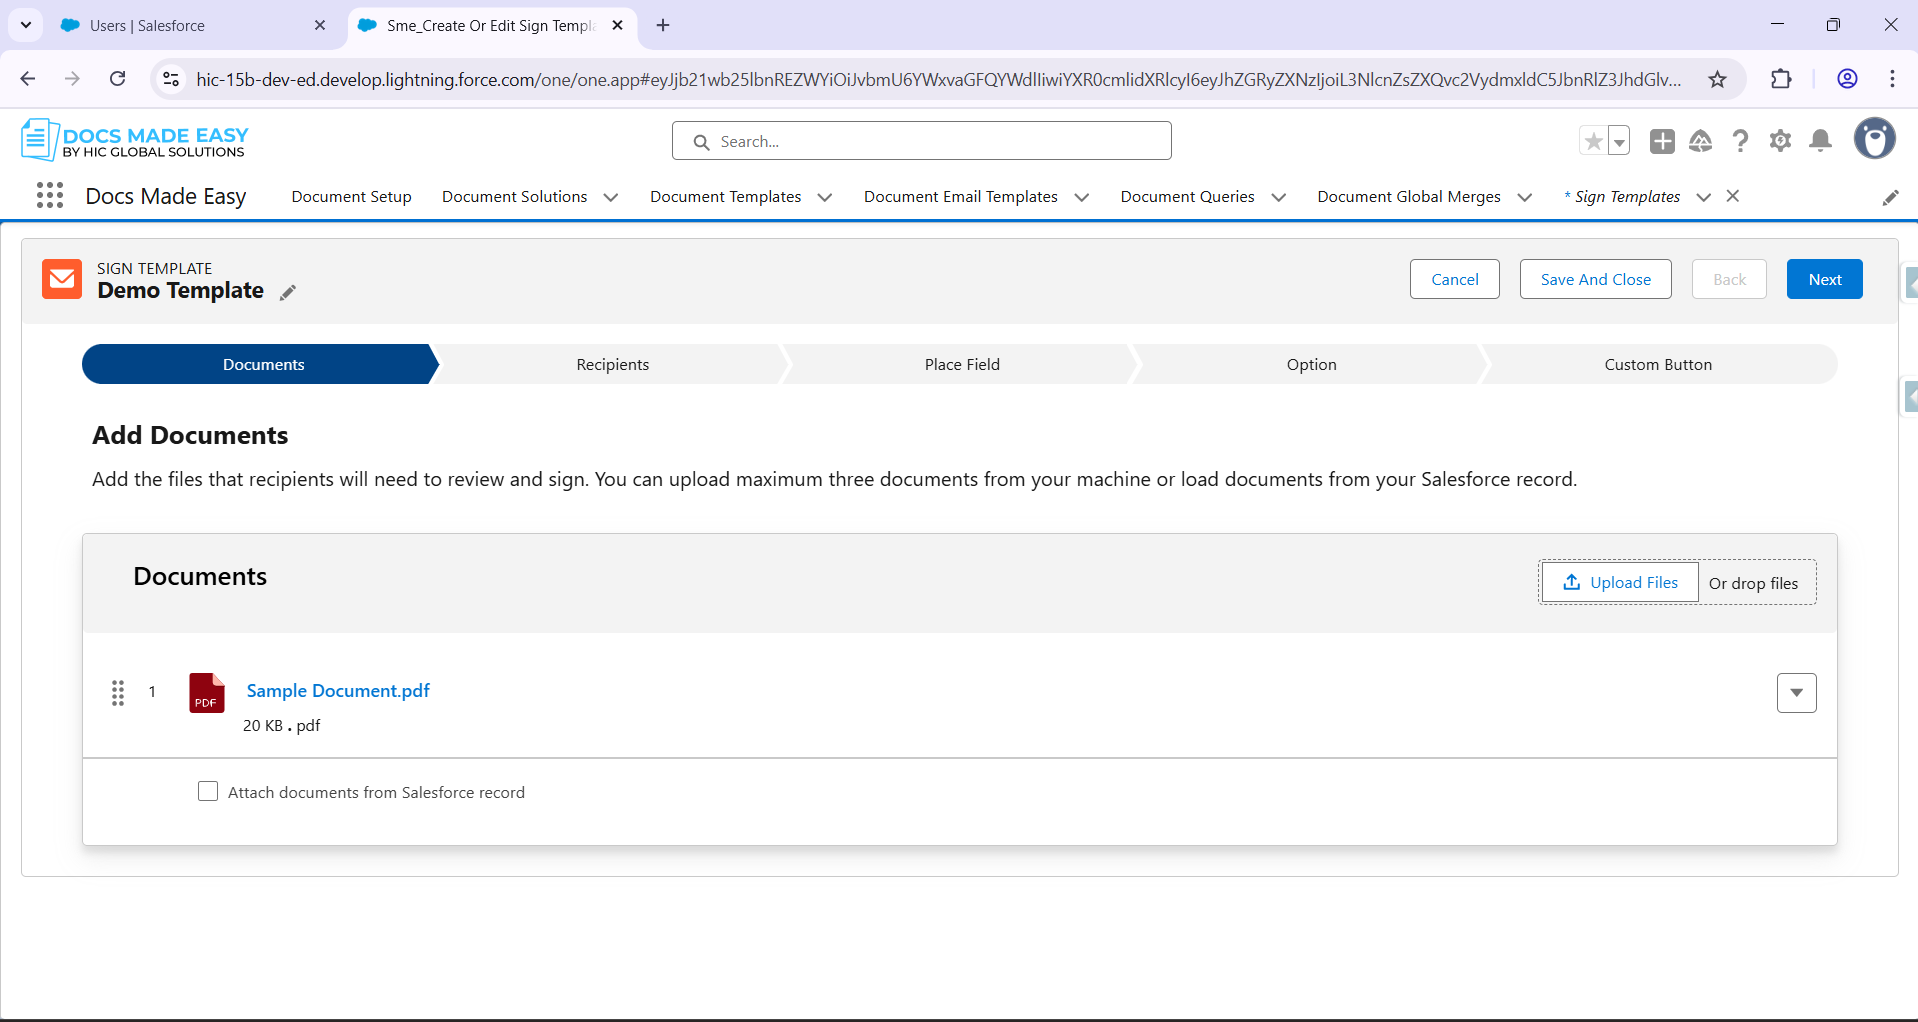
- After uploading the documents, you need to add recipients. Click on the “Recipients” button at the top.
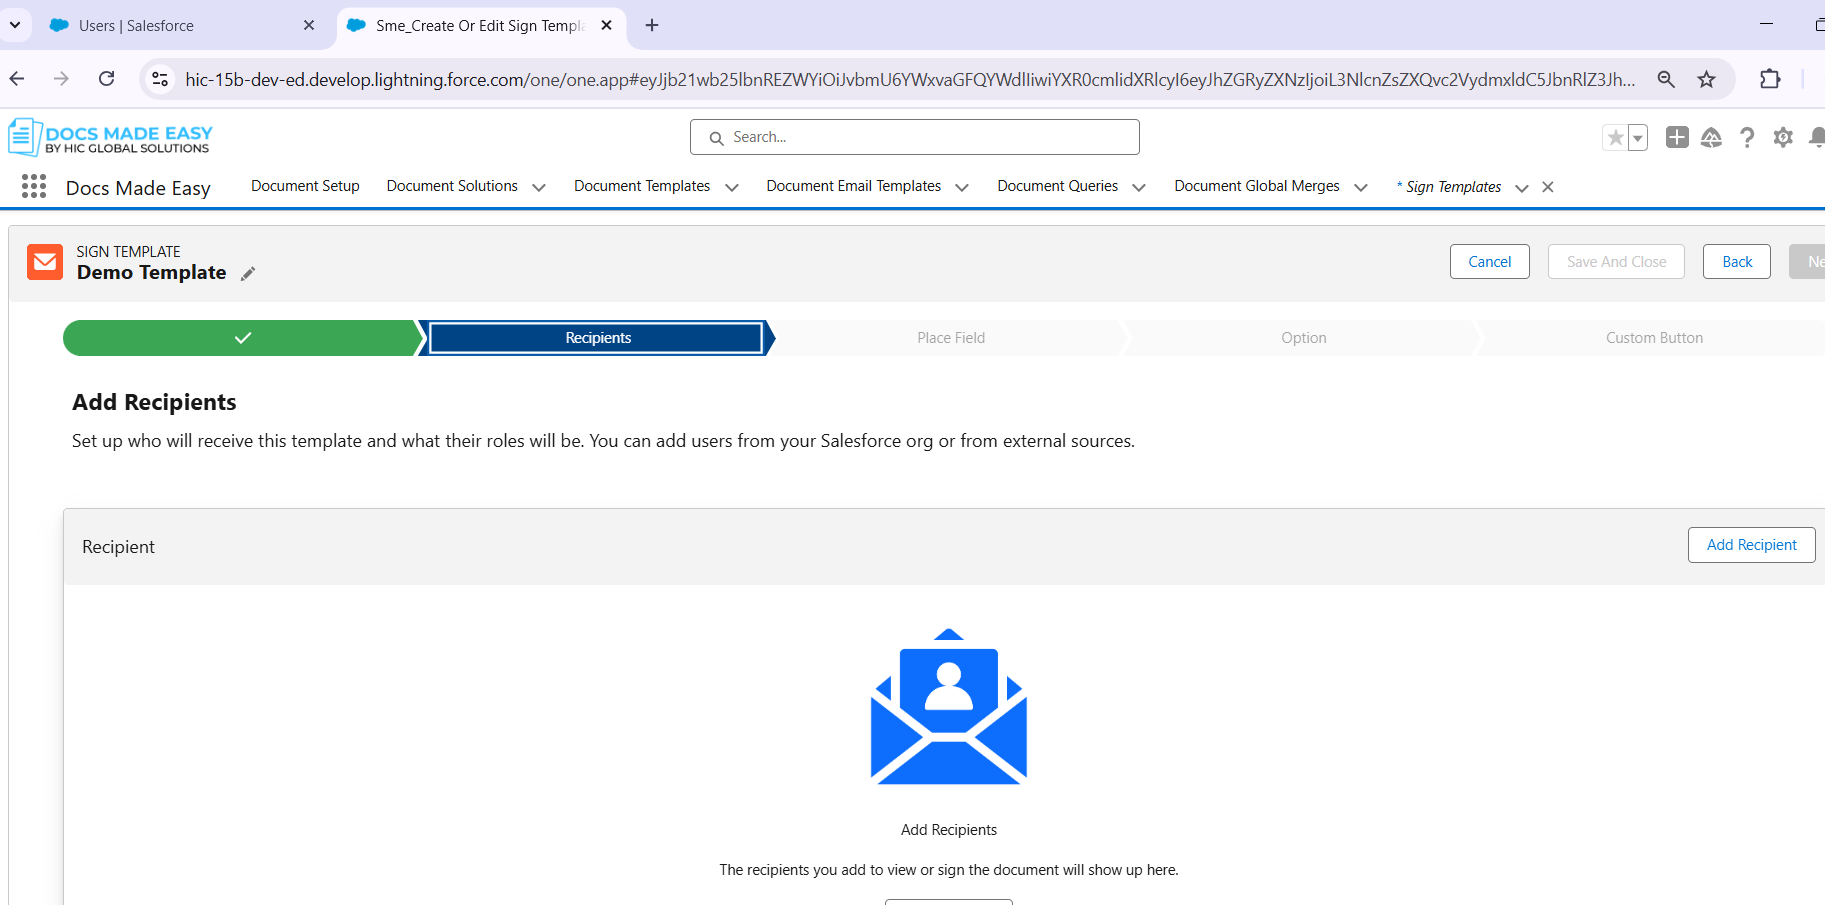
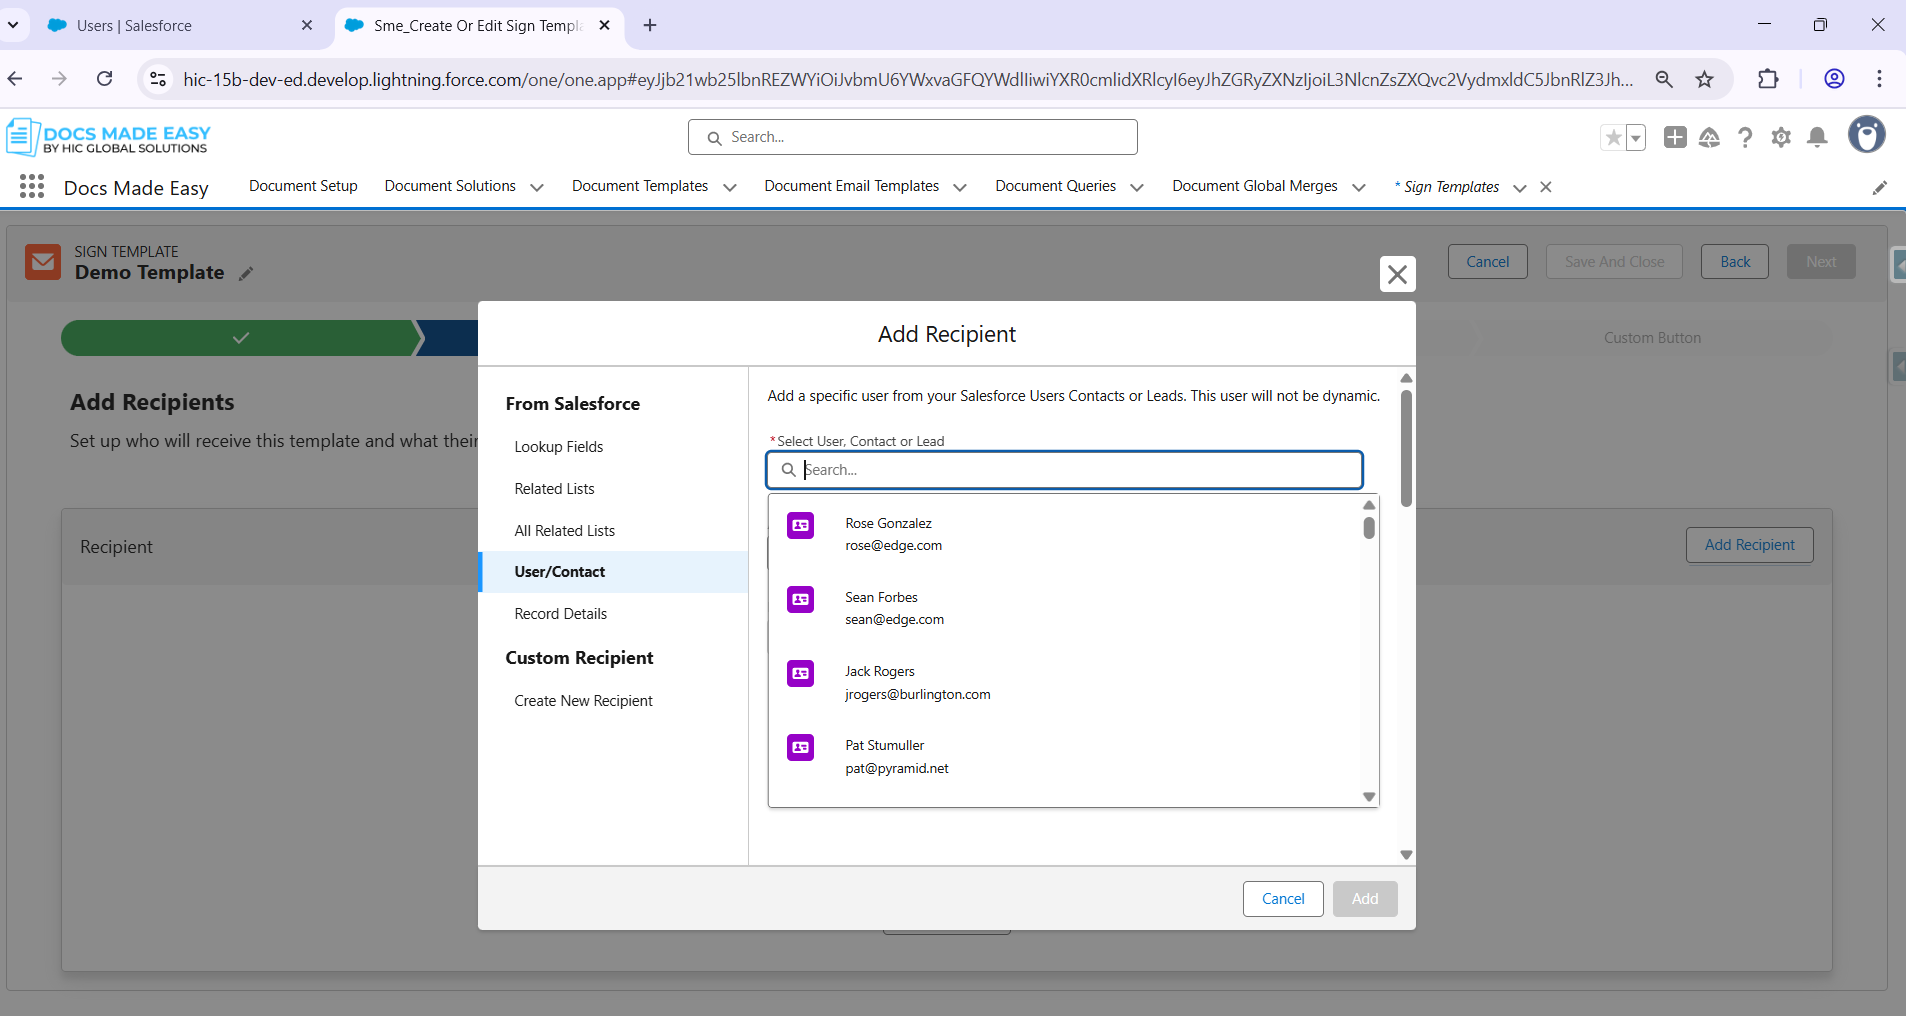
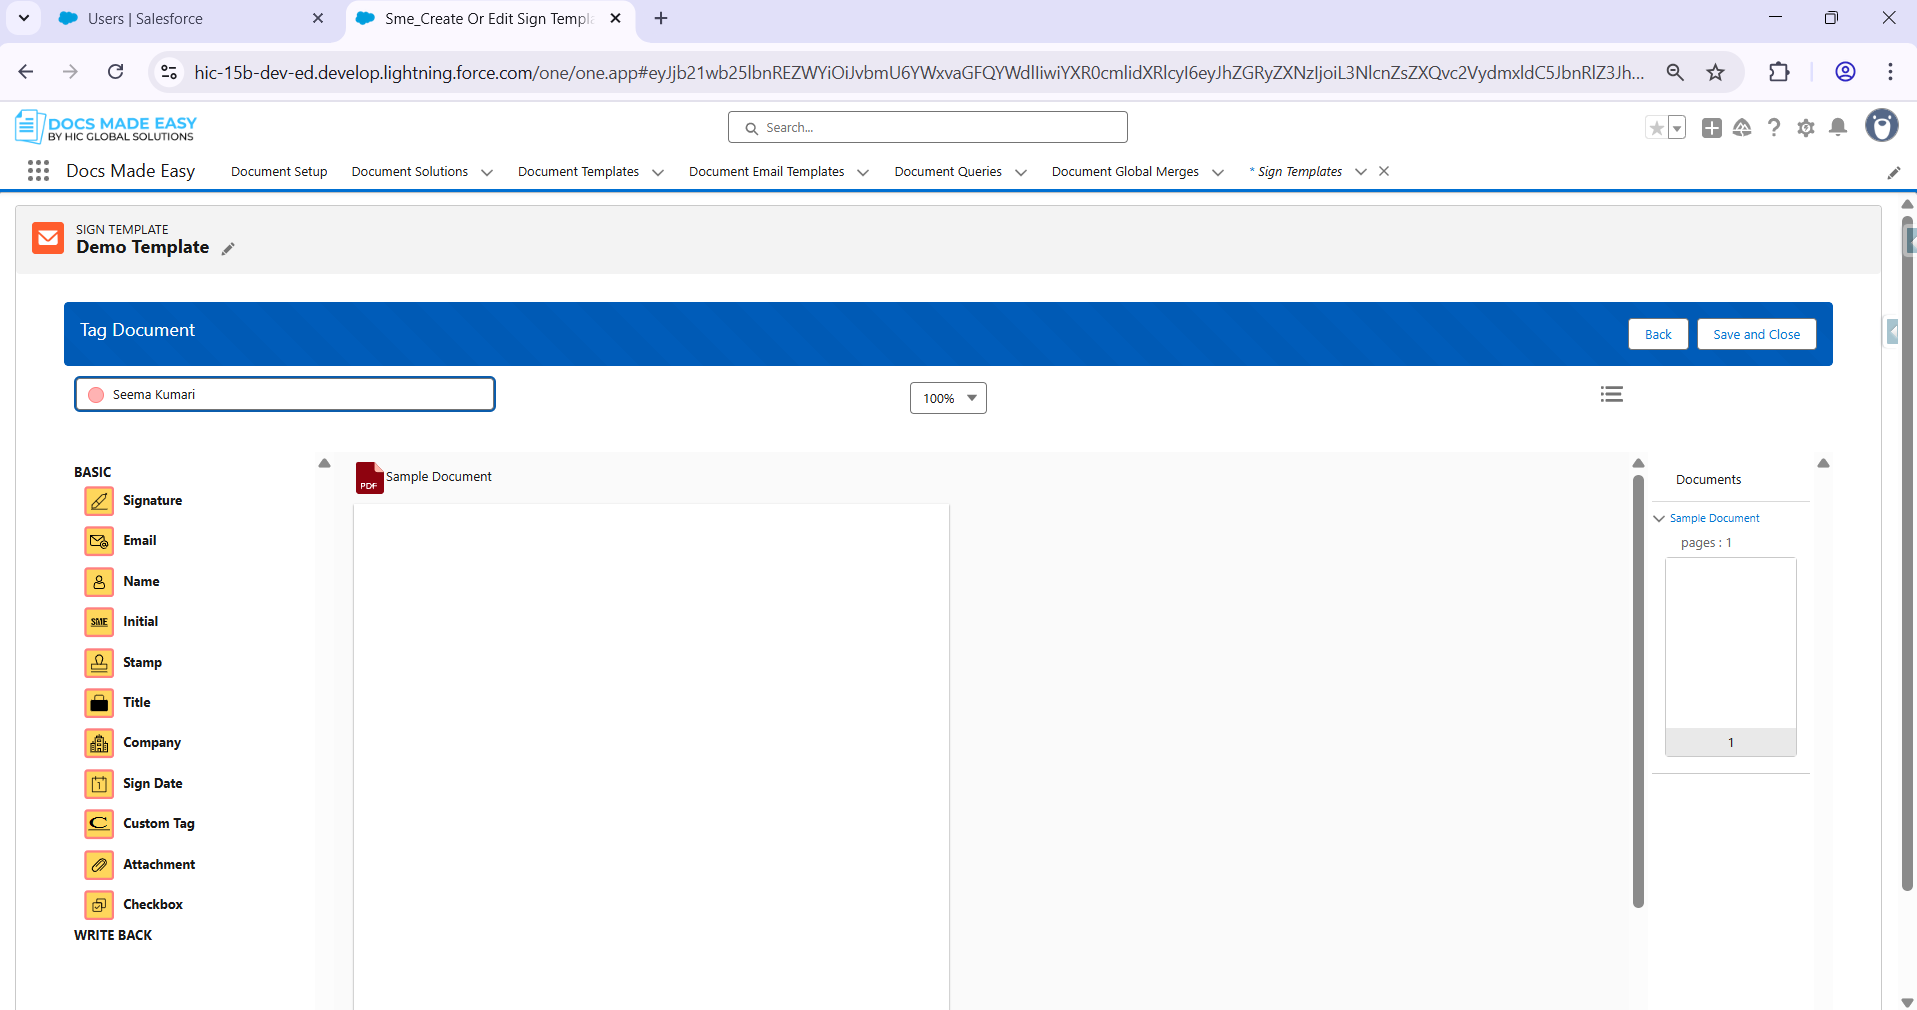
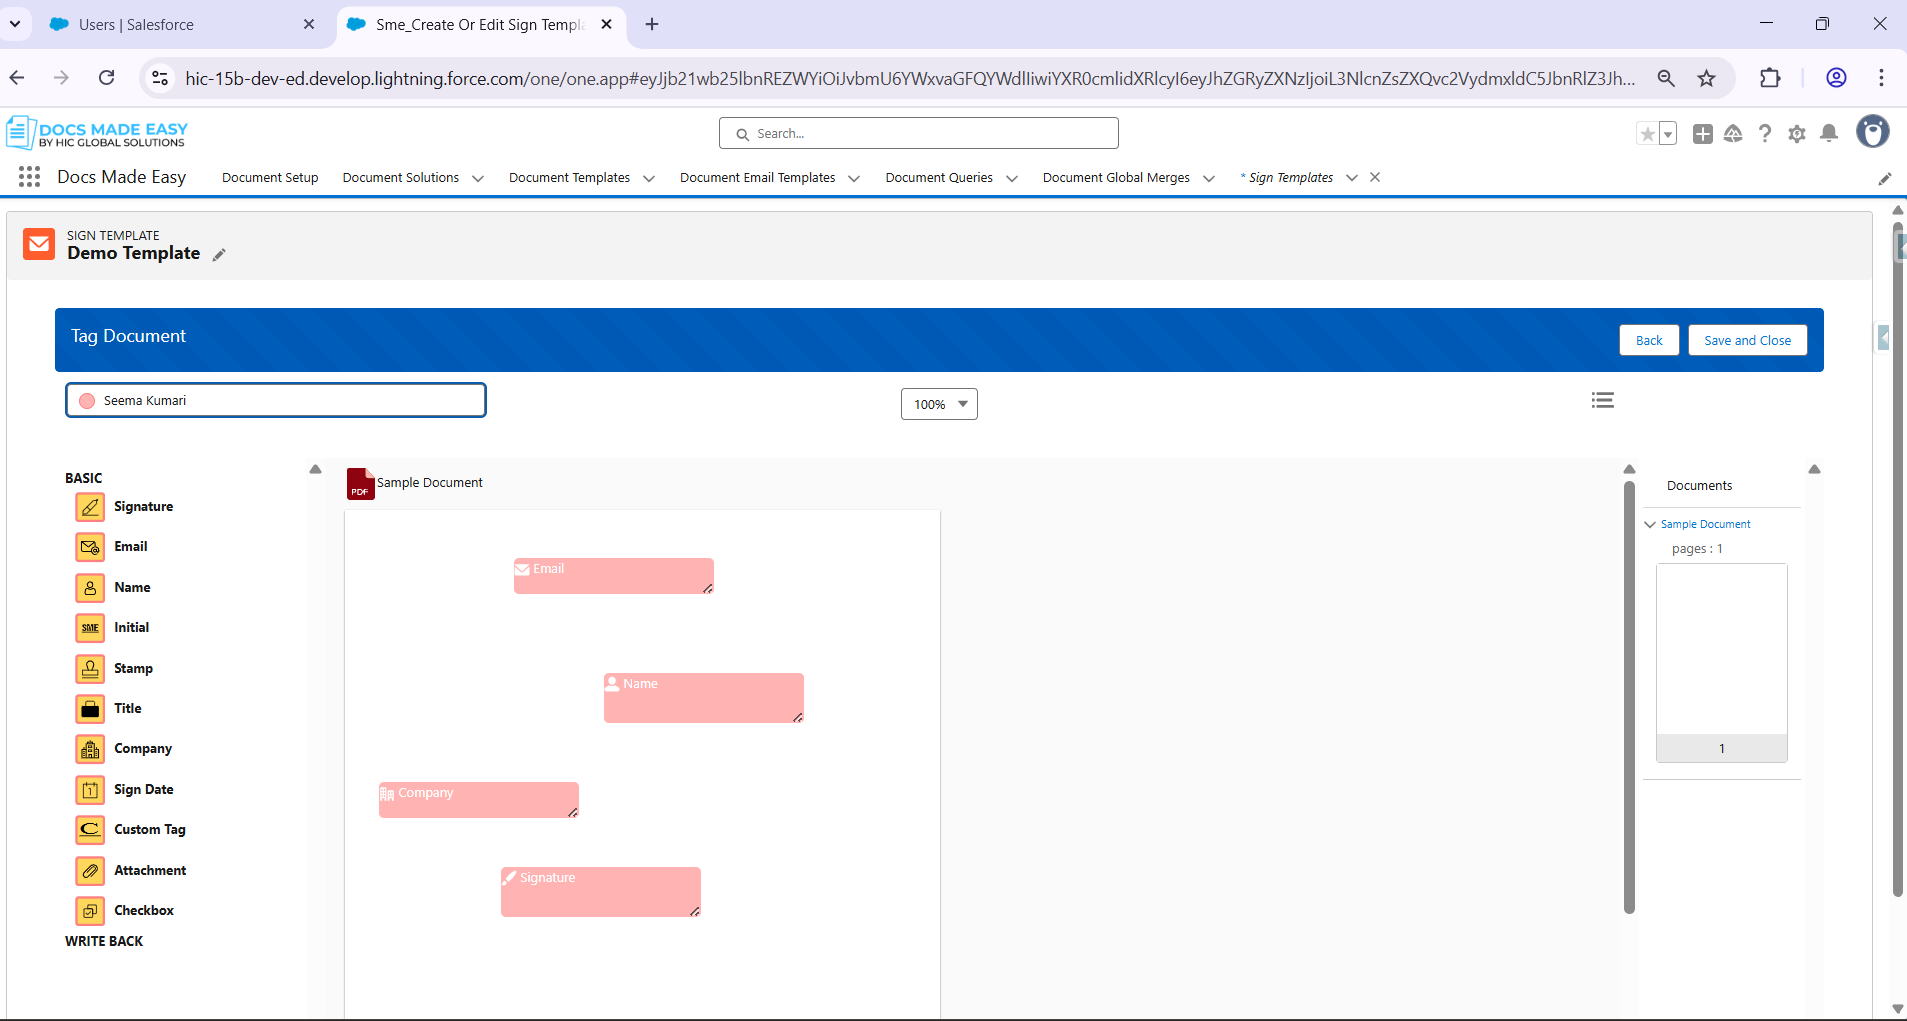
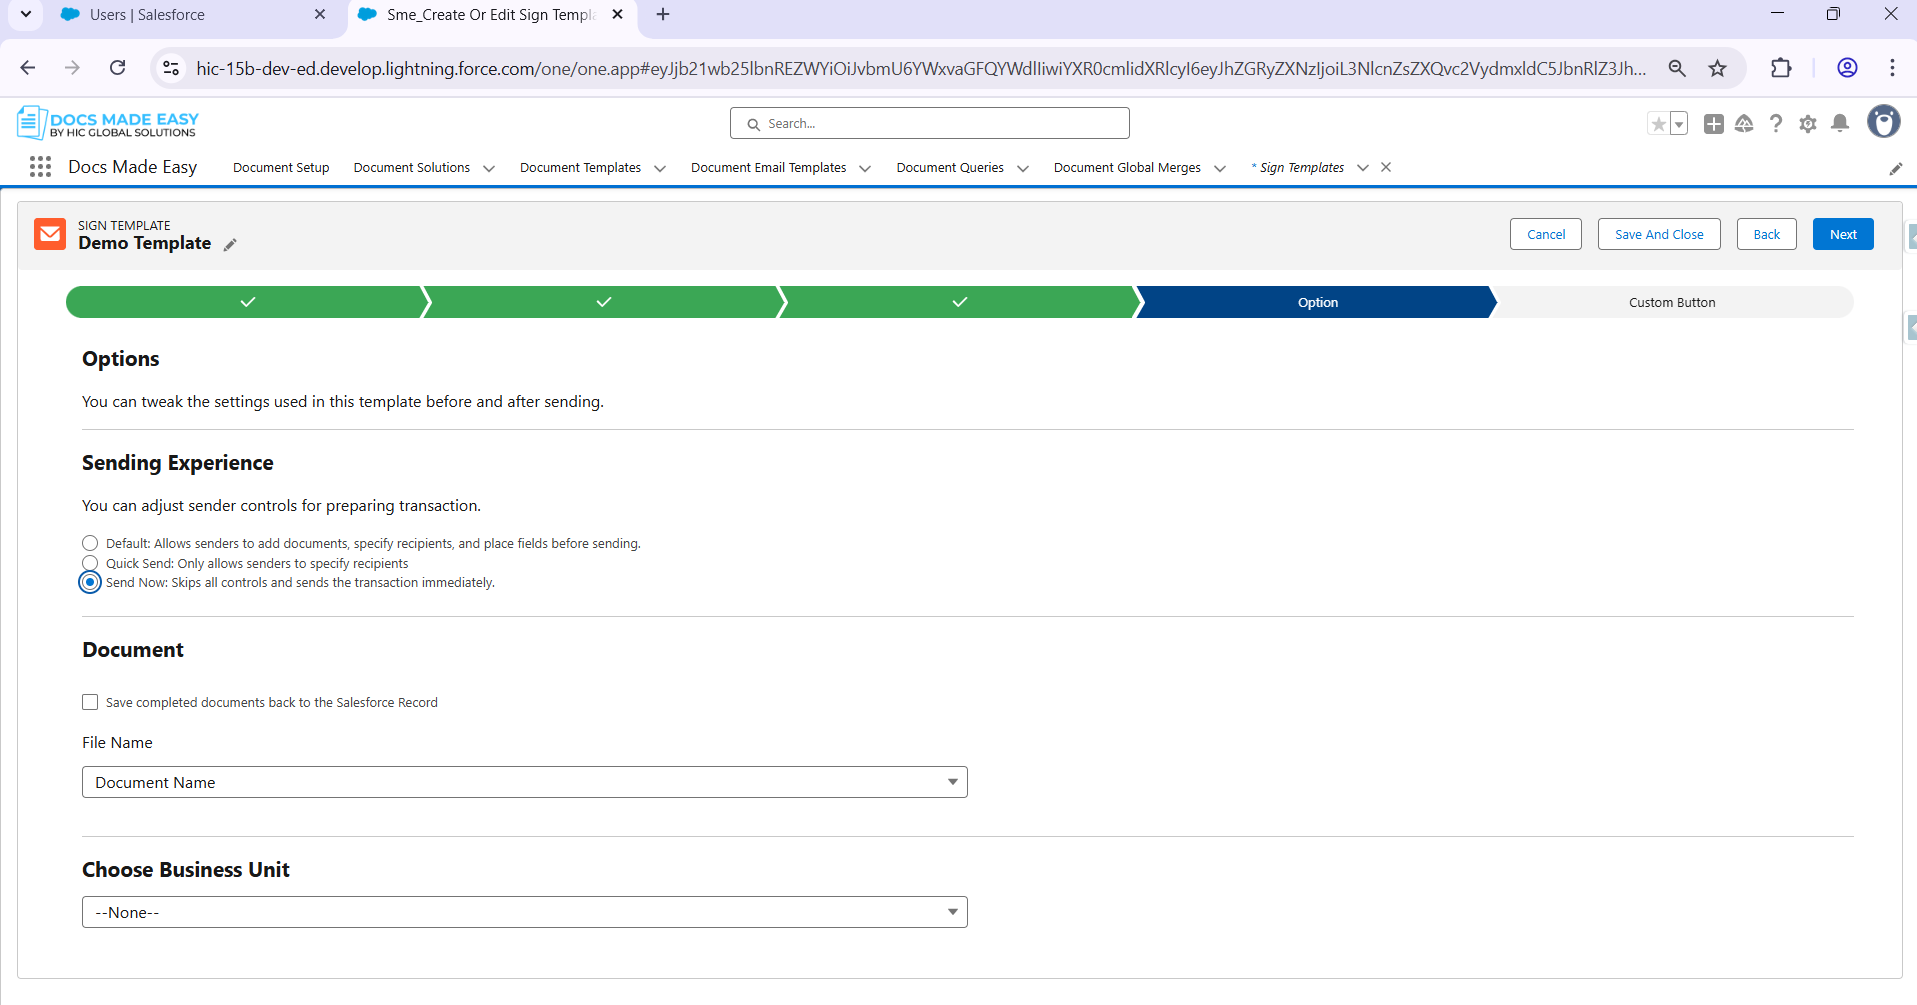
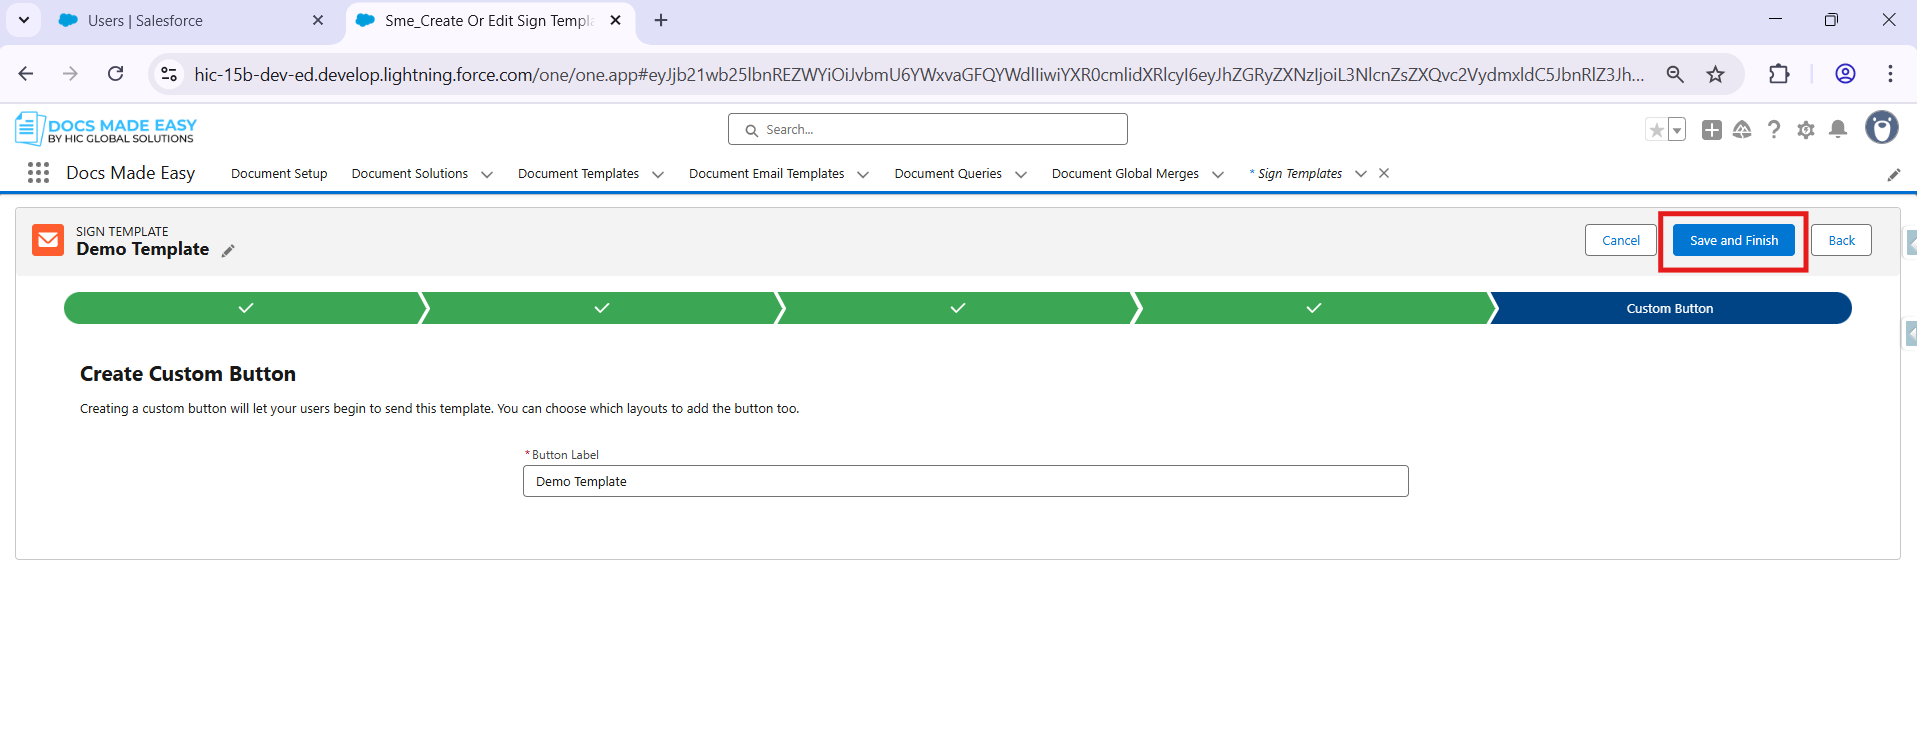
- After adding the recipients, you can simply add document tags using the “Drag-and-Drop” functionality.
Steps to Integrate Sign Made Easy with Docs Made Easy
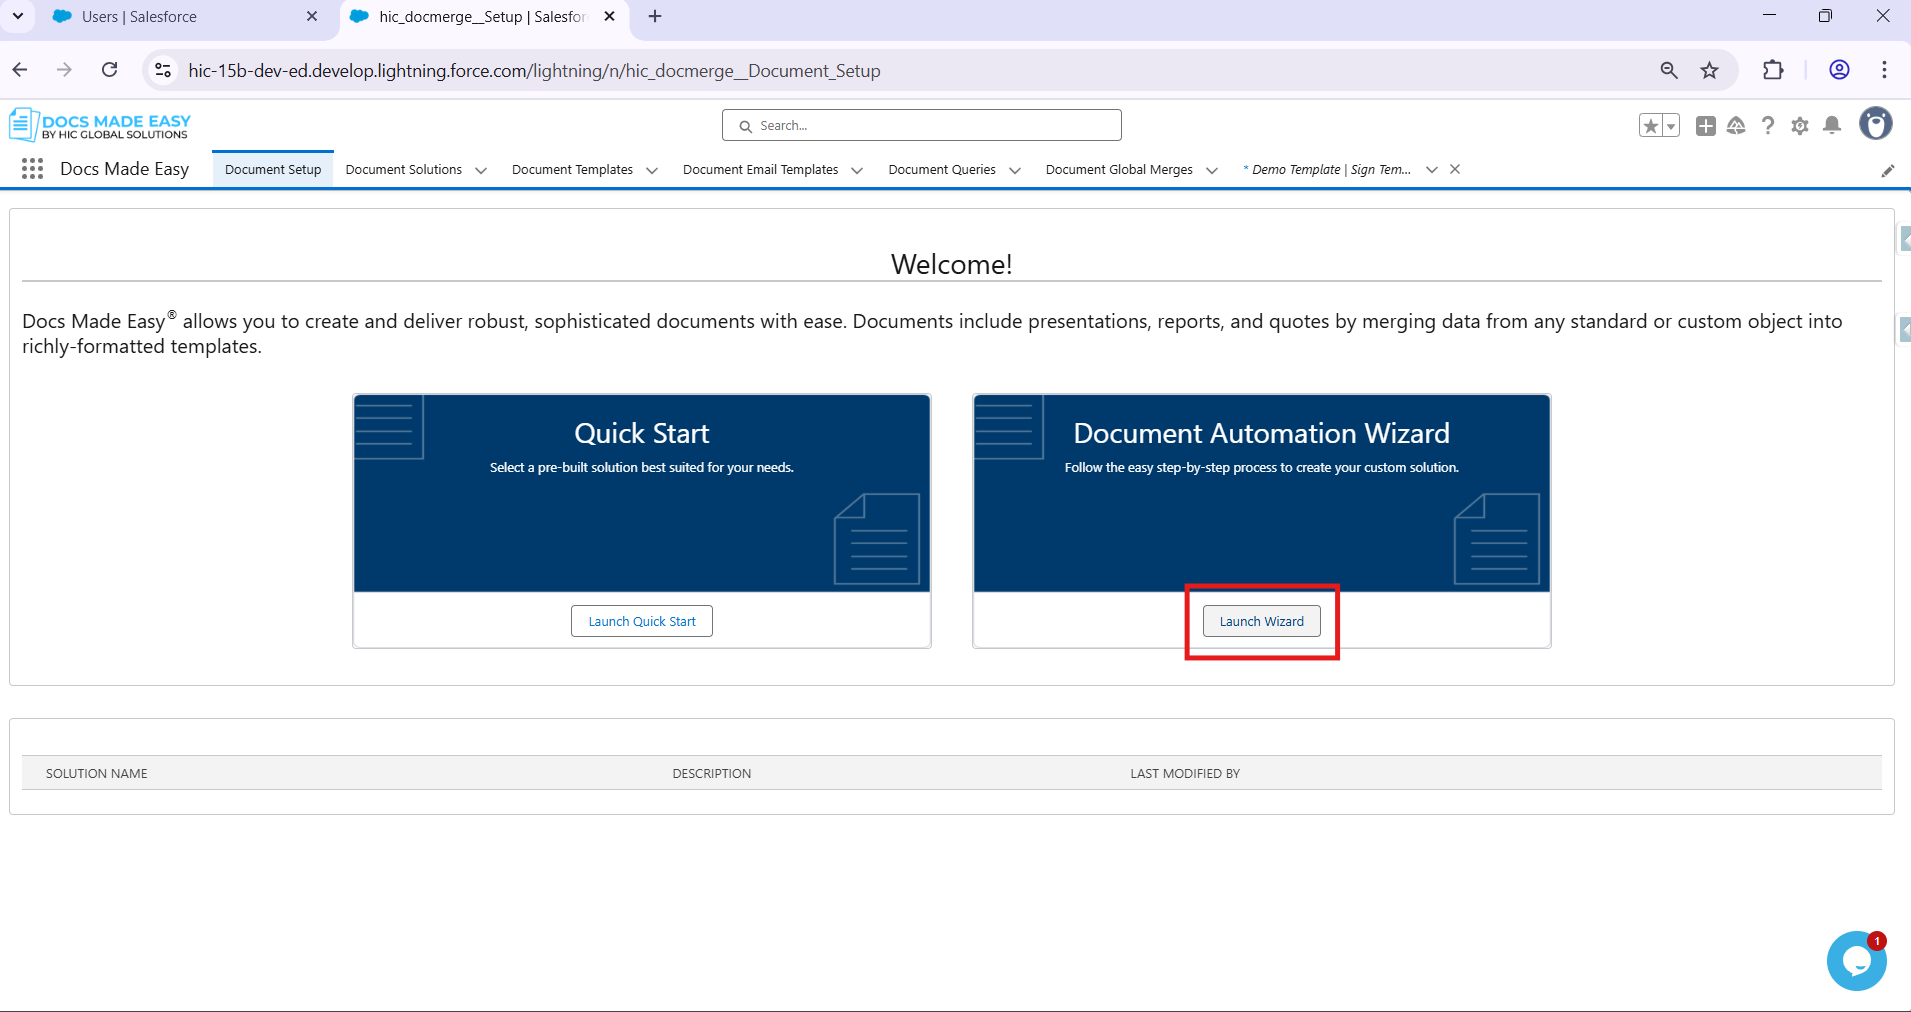
Step 01: Go to Docs Made Easy and click on the launch wizard.
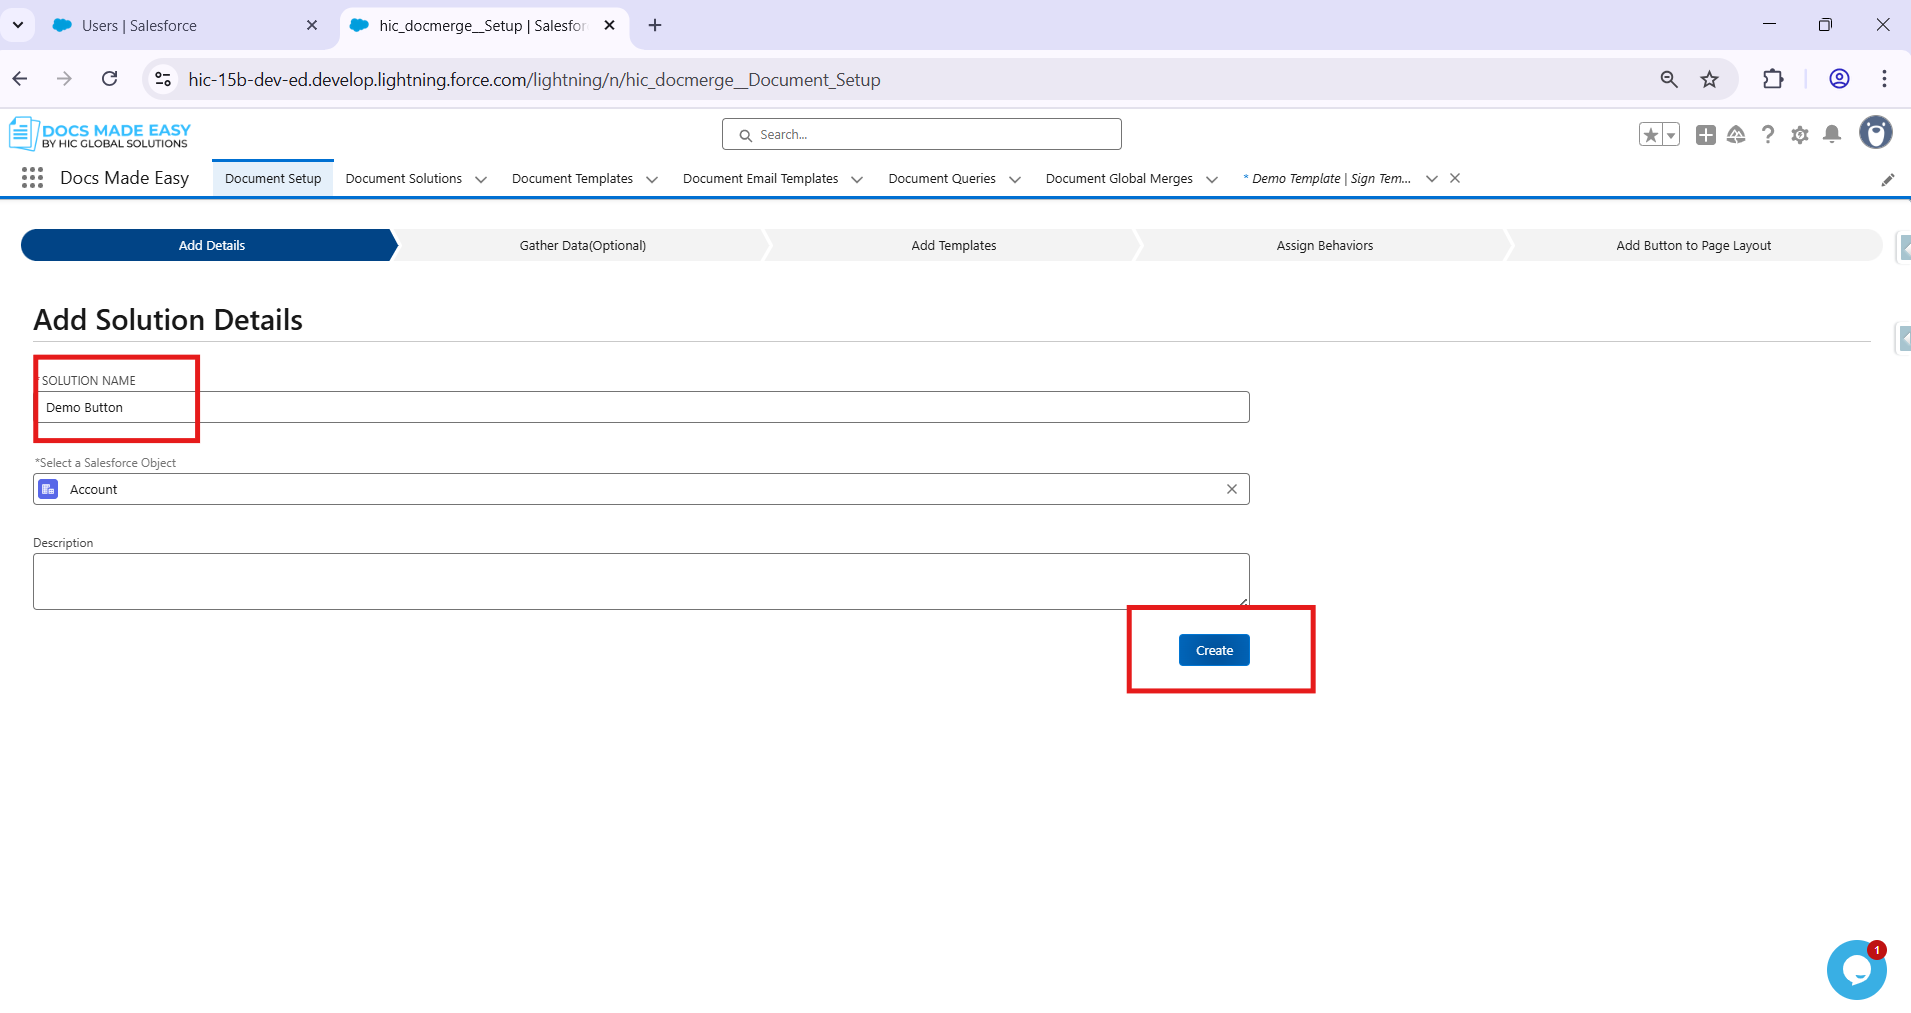
Step 02: Give the name of the solution and select the object at which you want to create the solution.
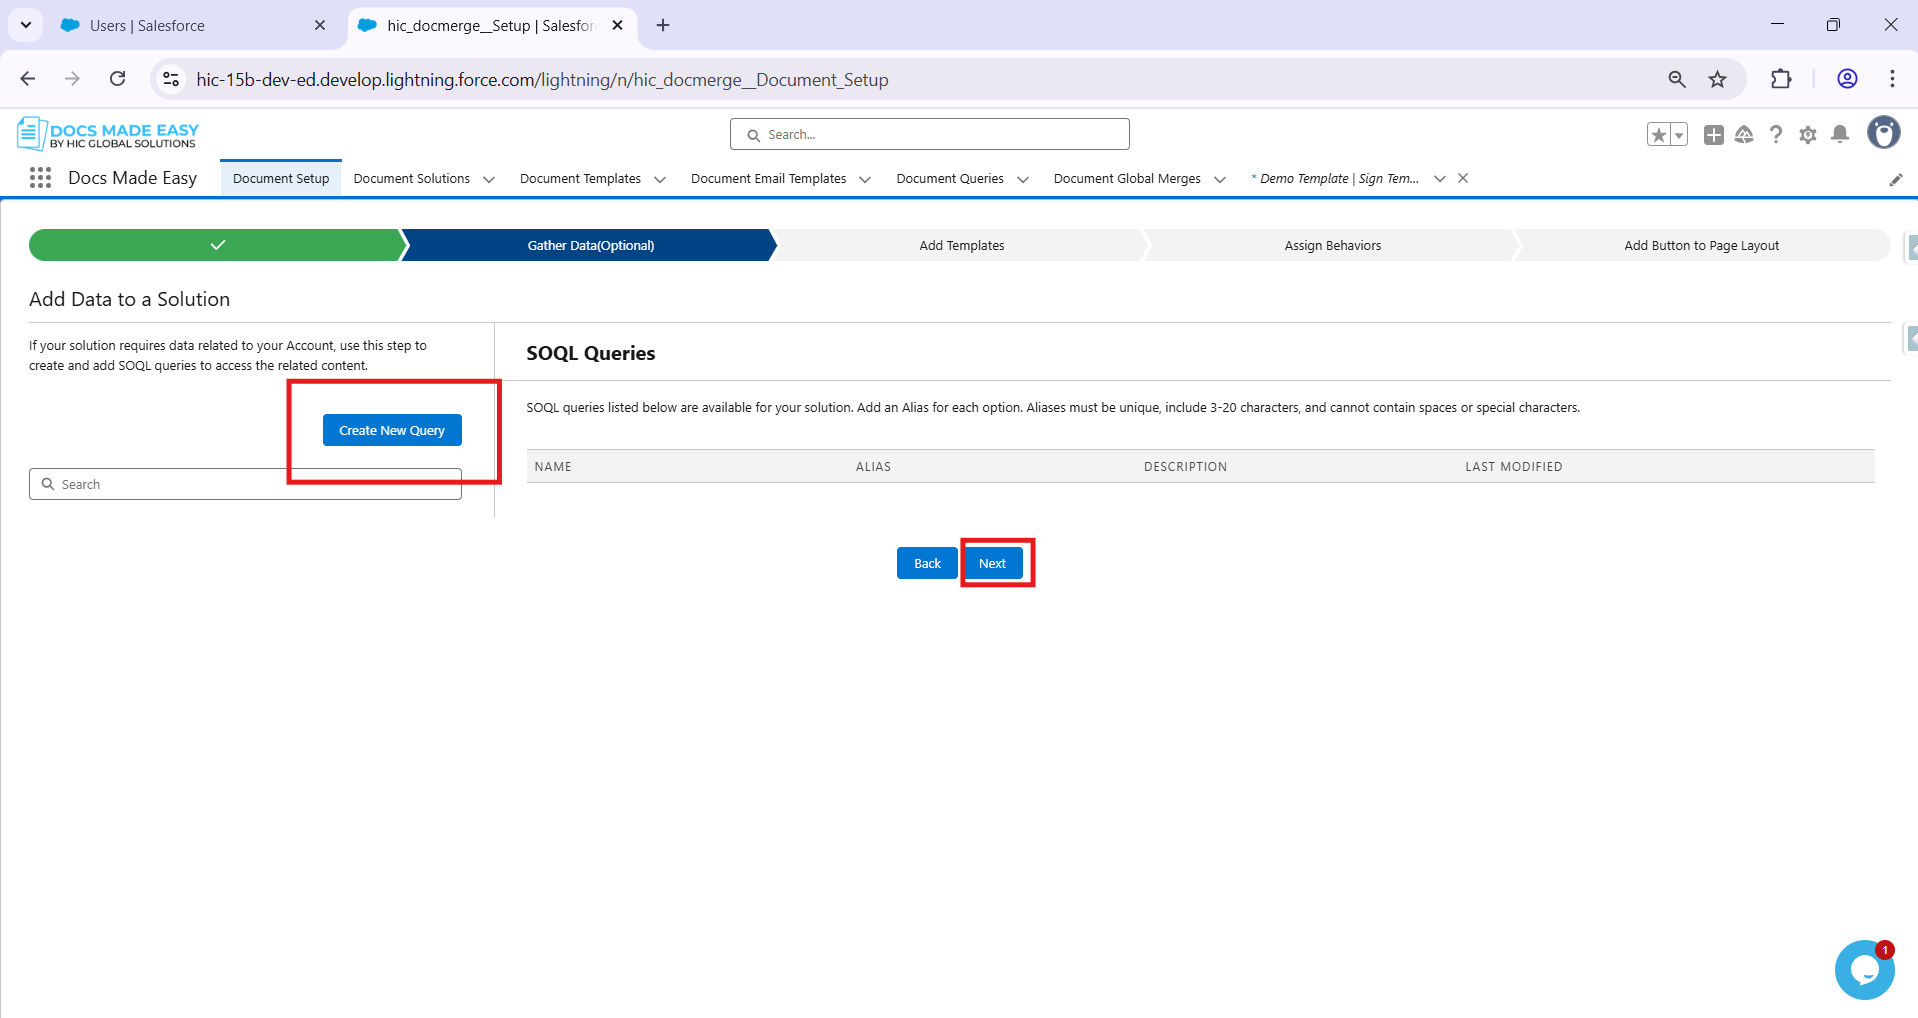
Step 03: If you want, then add a query; otherwise, you can move to the next step.
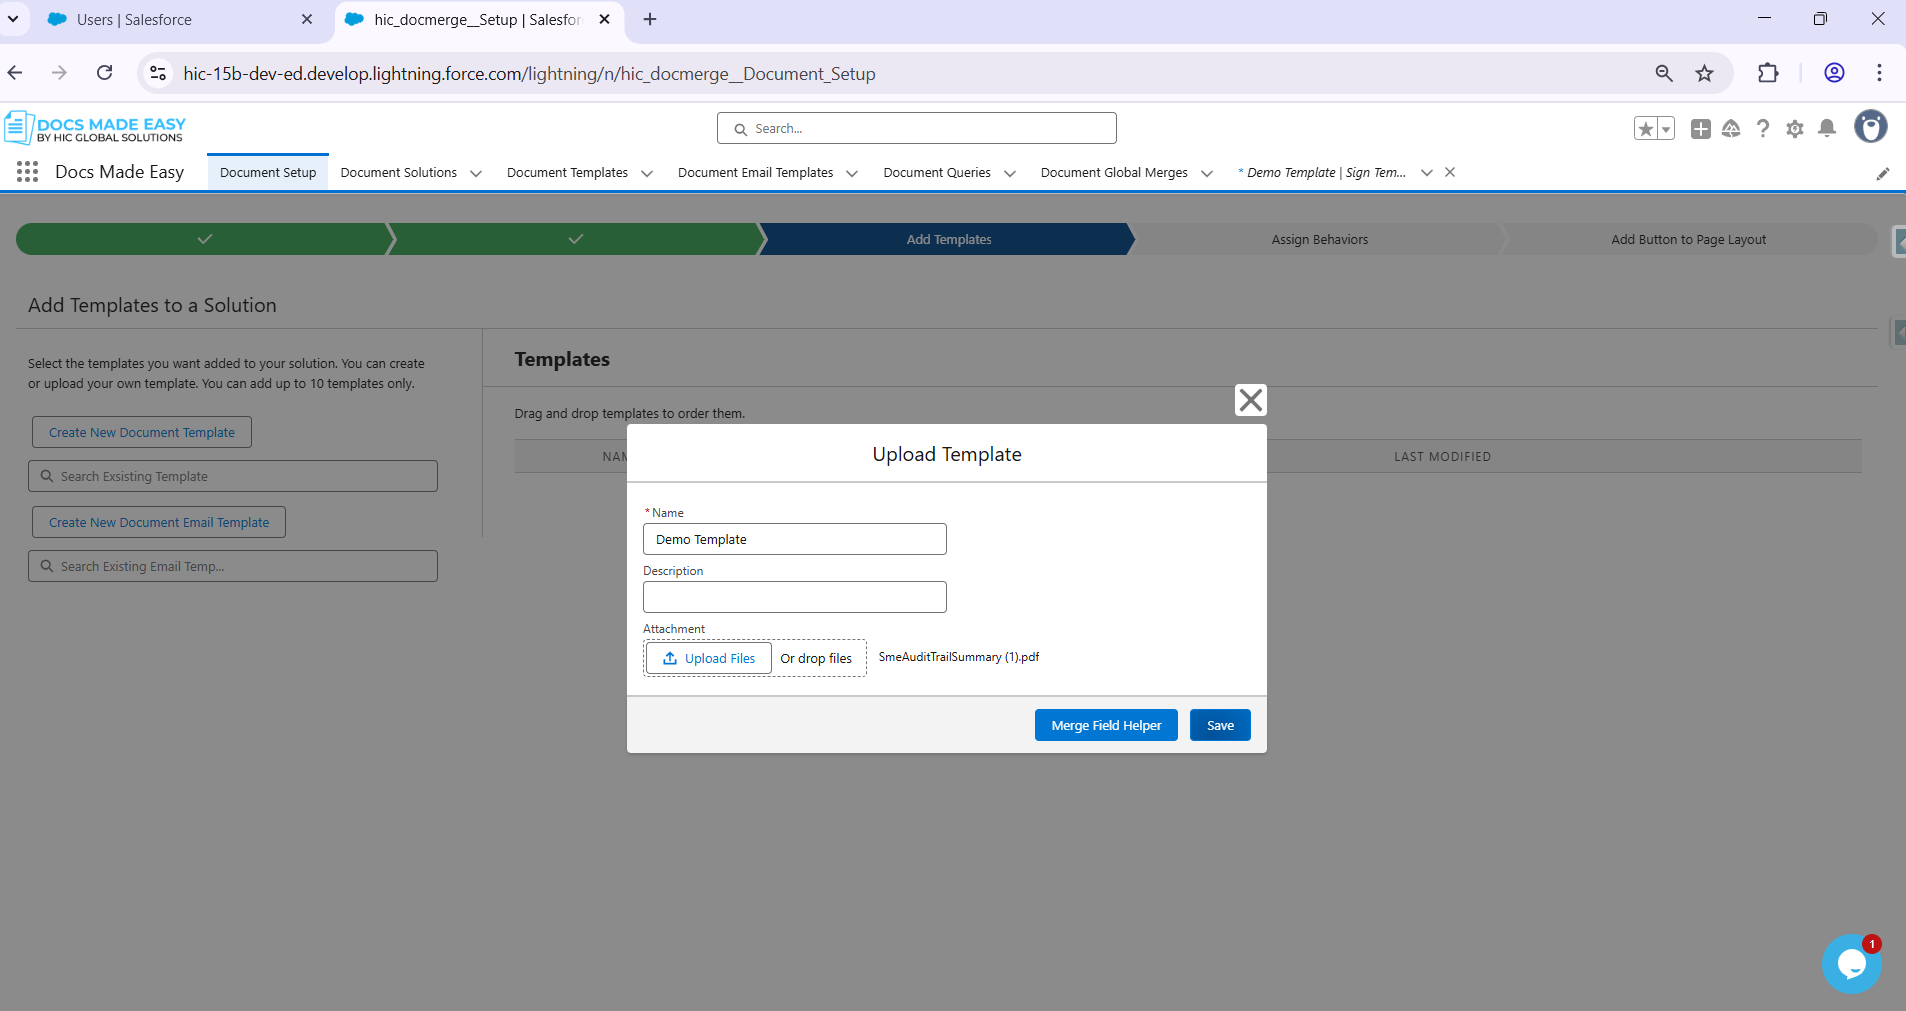
Step 04: Upload the template > give a name to it and save.
Step 05: Now that your template is saved, go to the next step.
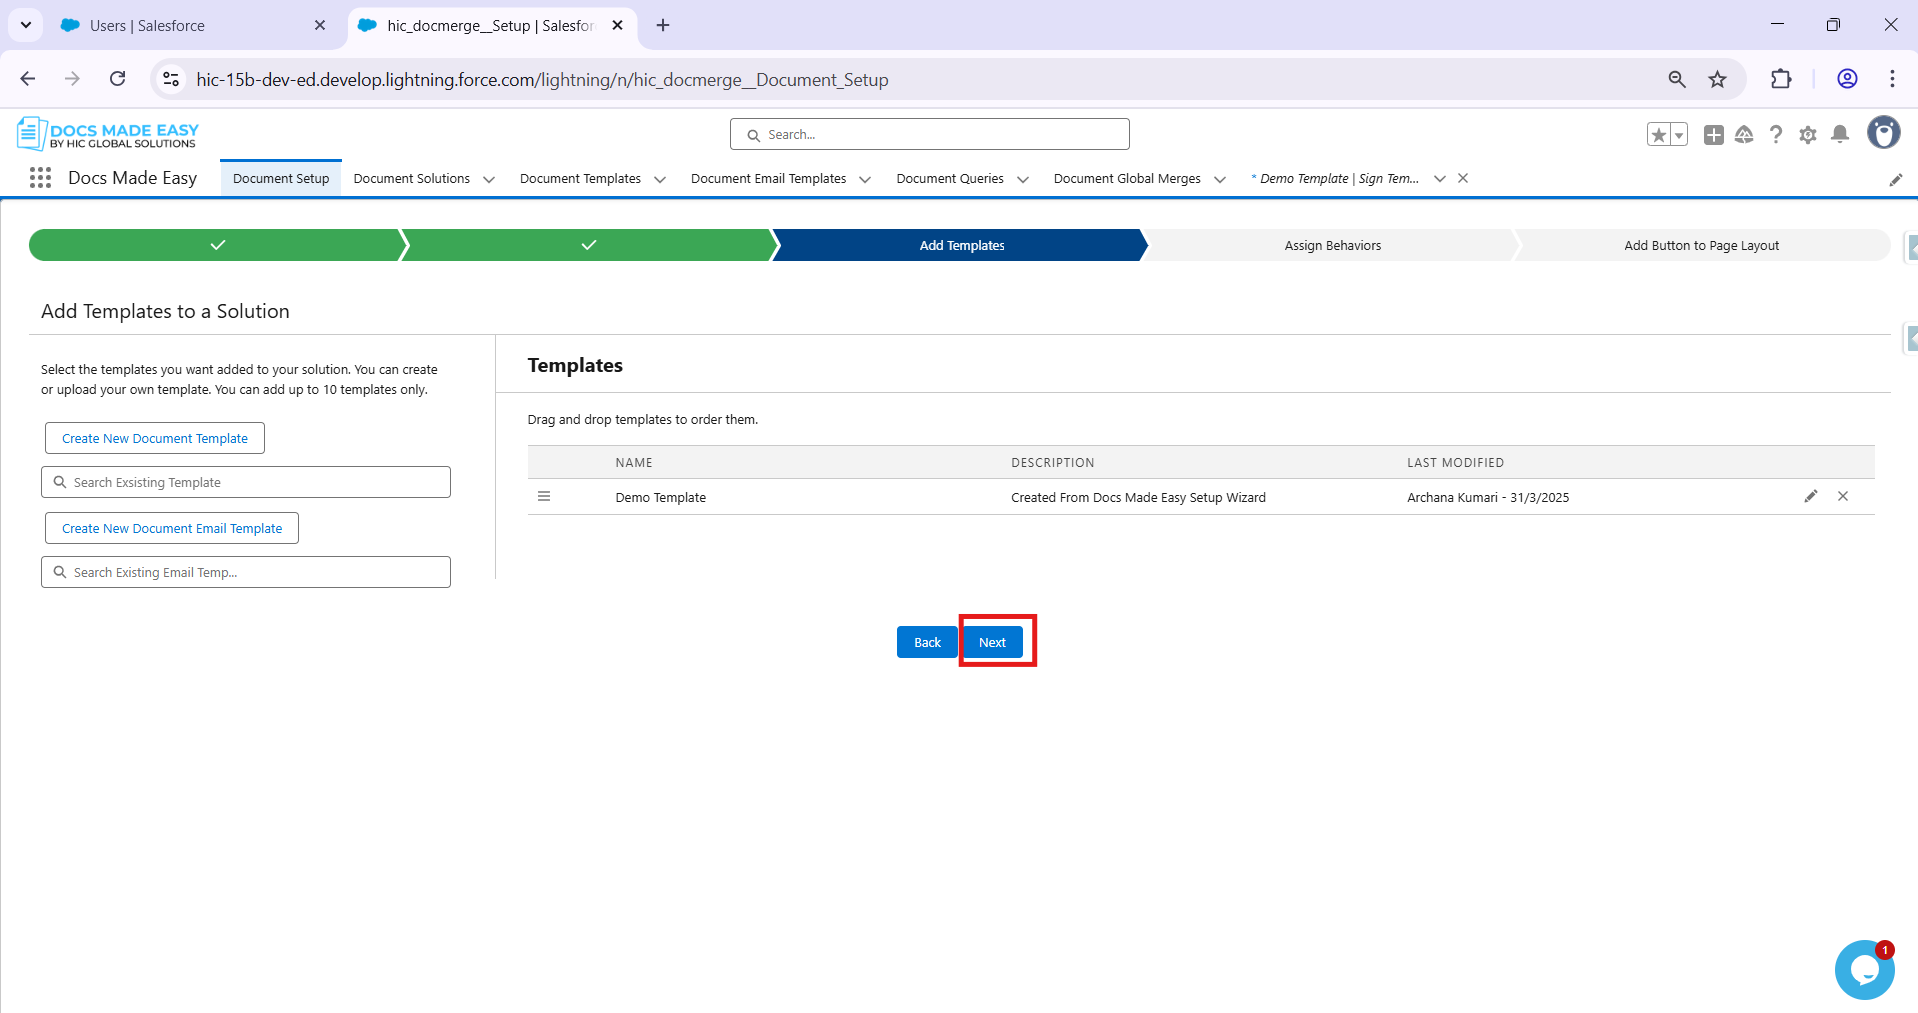
Step 06: Now go to the “Other Parameter” and add “Other Parameter”.
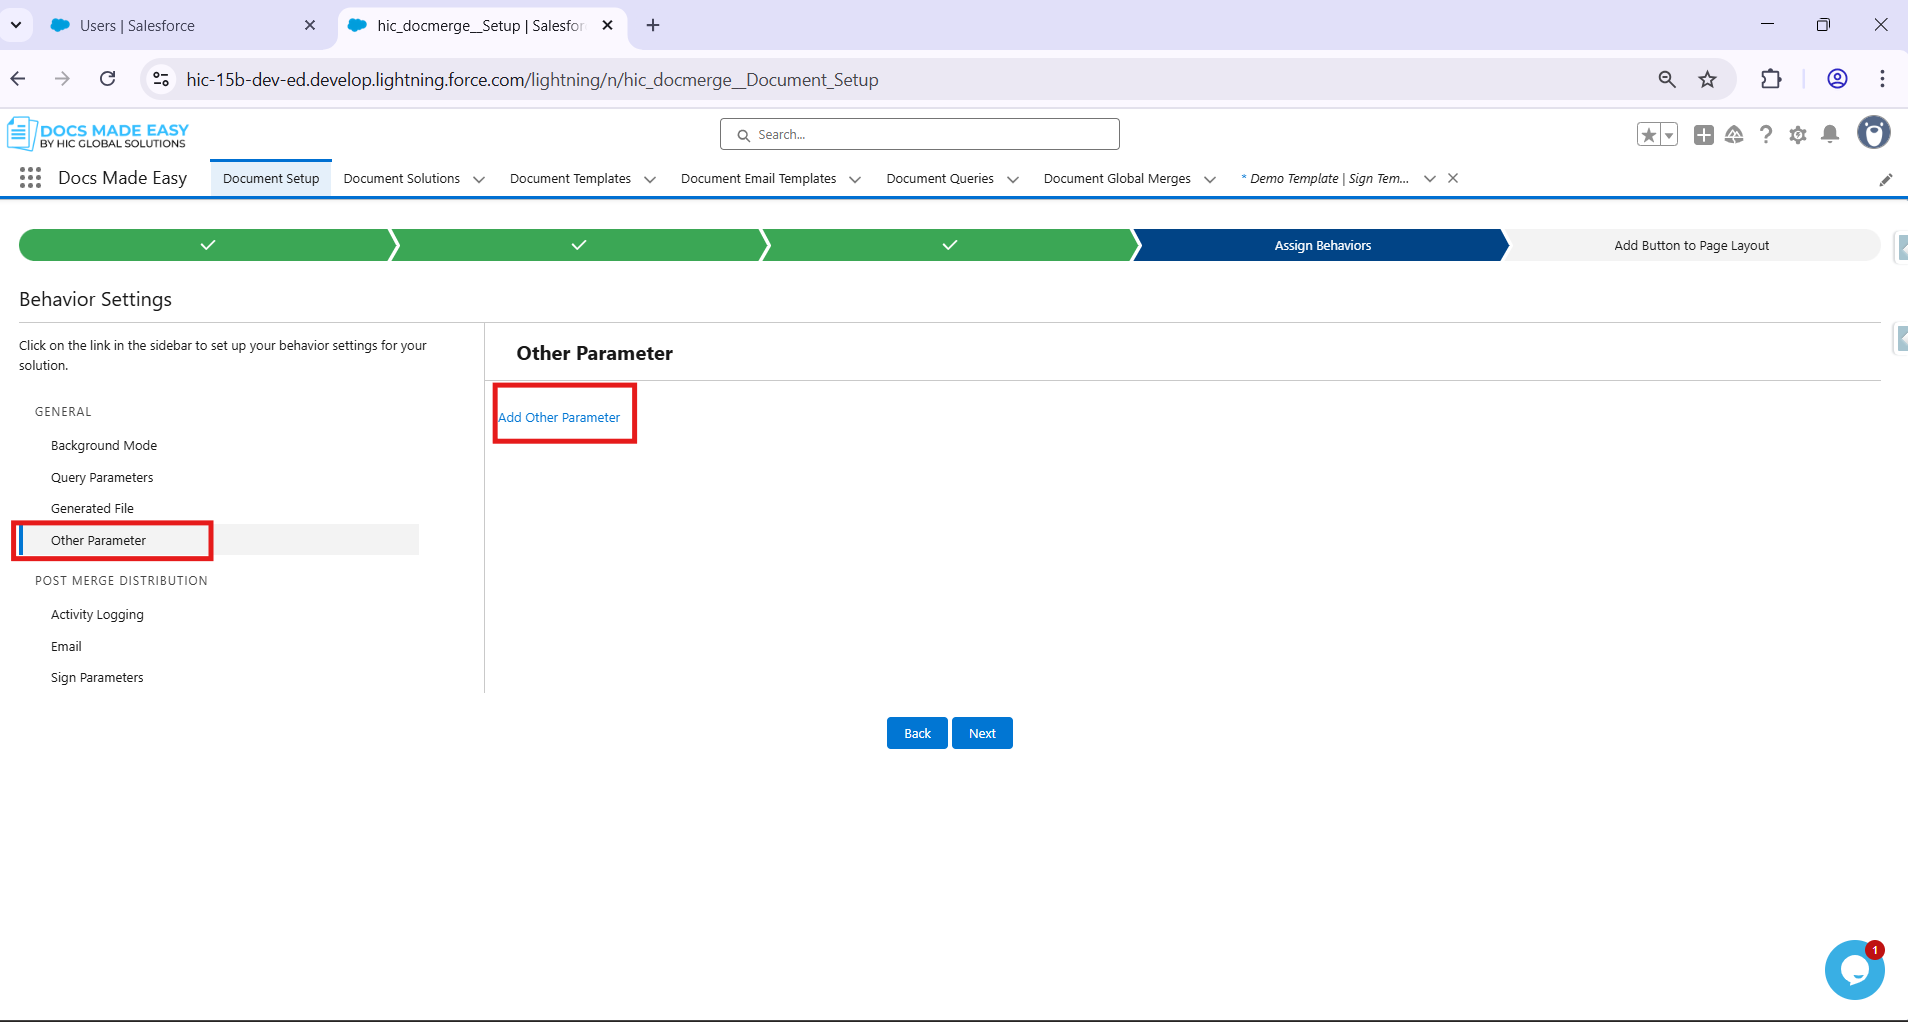
Step 07: Give parameter name “bgm” and parameter value “11”.
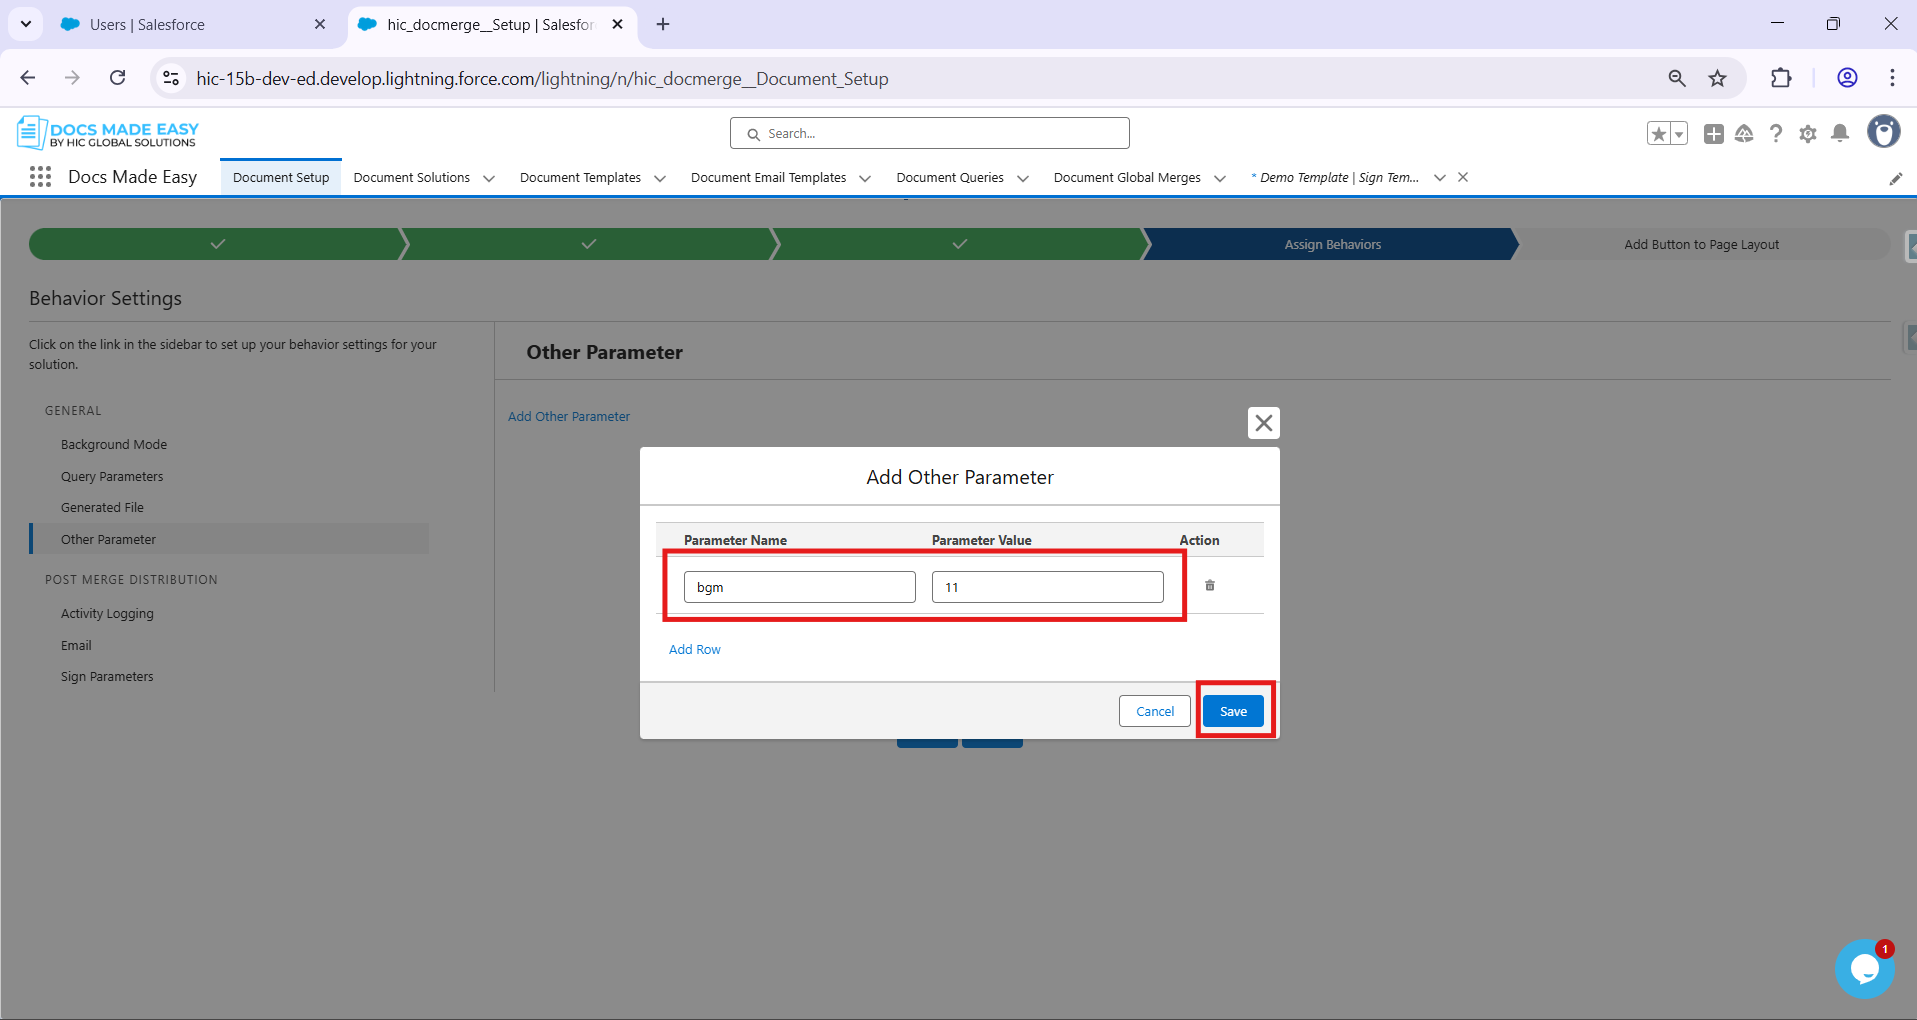
Step 08: Open Object Manager and Select the object at which you have created the Solution.
Step 09: Now go to Buttons, Links, and Actions, select your button, and edit it.
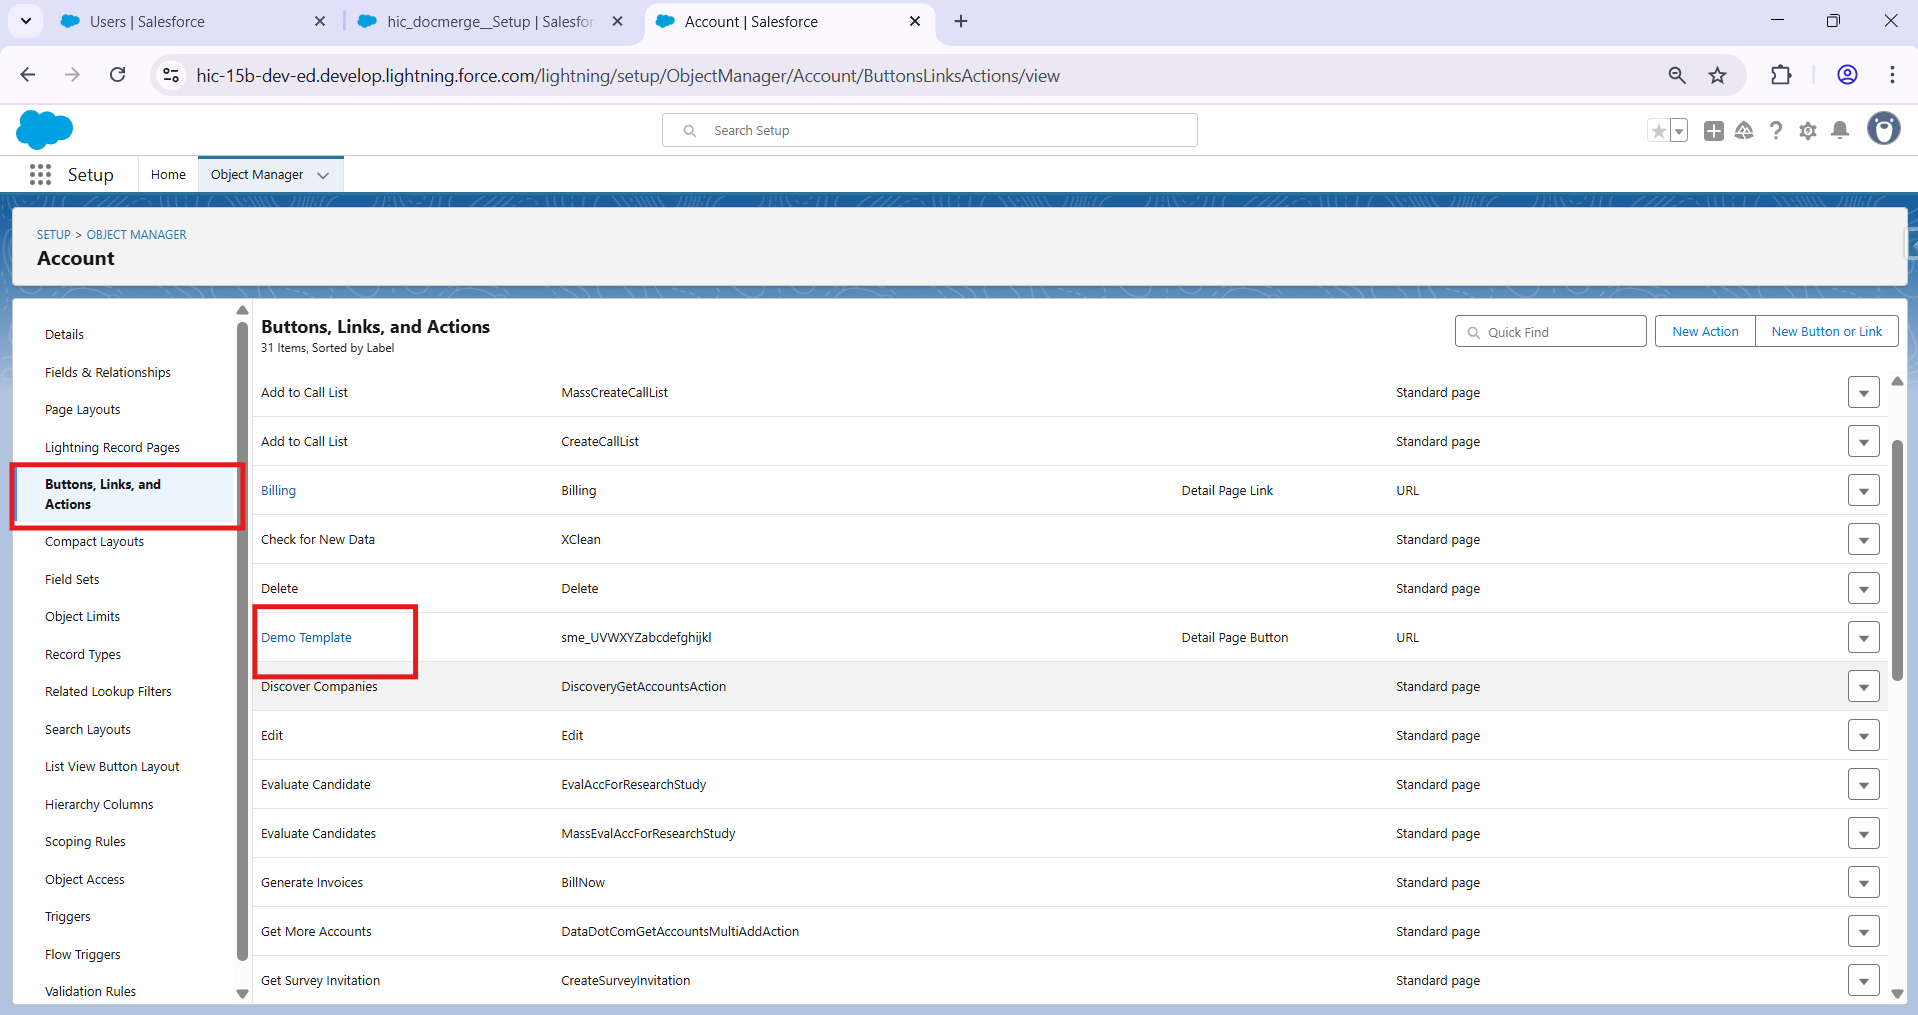
Step 10: The button or link URL that is present in the button.
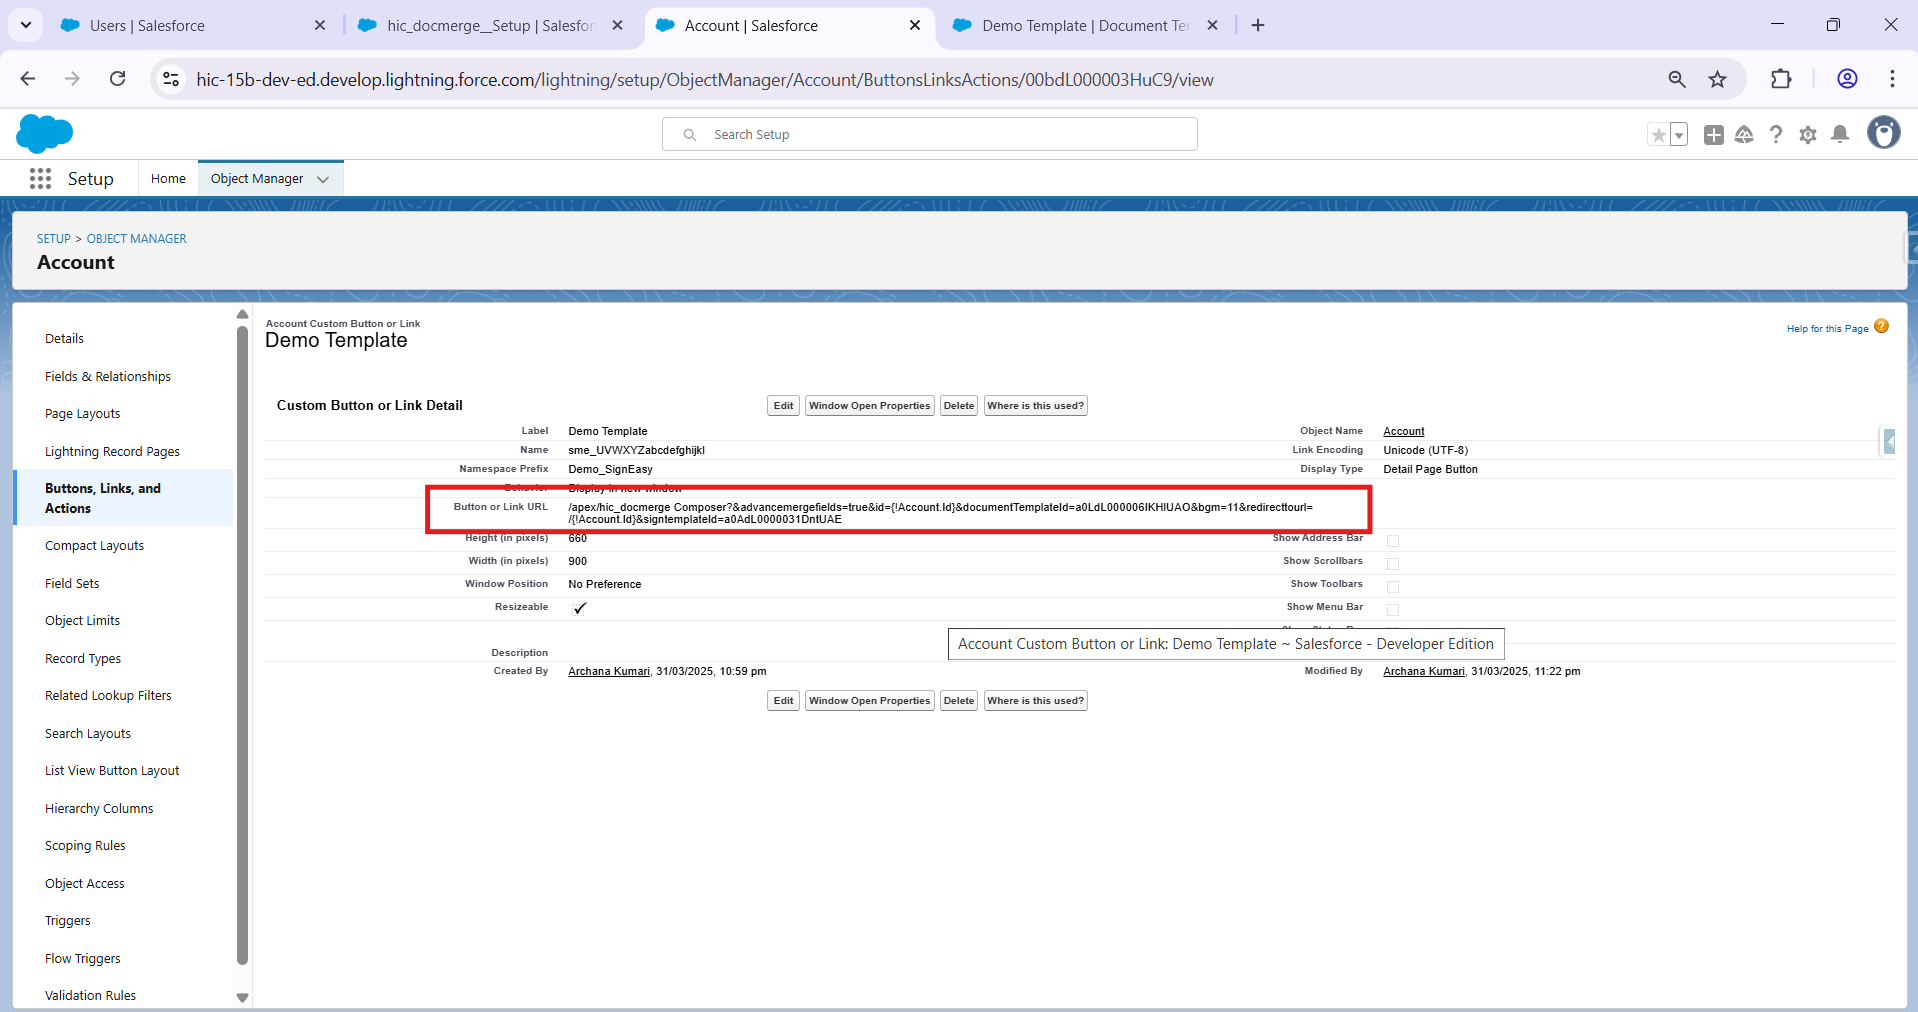
Replace that URL with the given URL

URL to Replace-
/apex/hic_docmergeComposer &advancemergefields=true&id{!Account.Id}&documentTemplateId=a0eQy00000CjExZIAV&bgm=11&redirecttourl=/{!Account.Id}&signtemplateId=a0kQy00000KjaAHIAZ
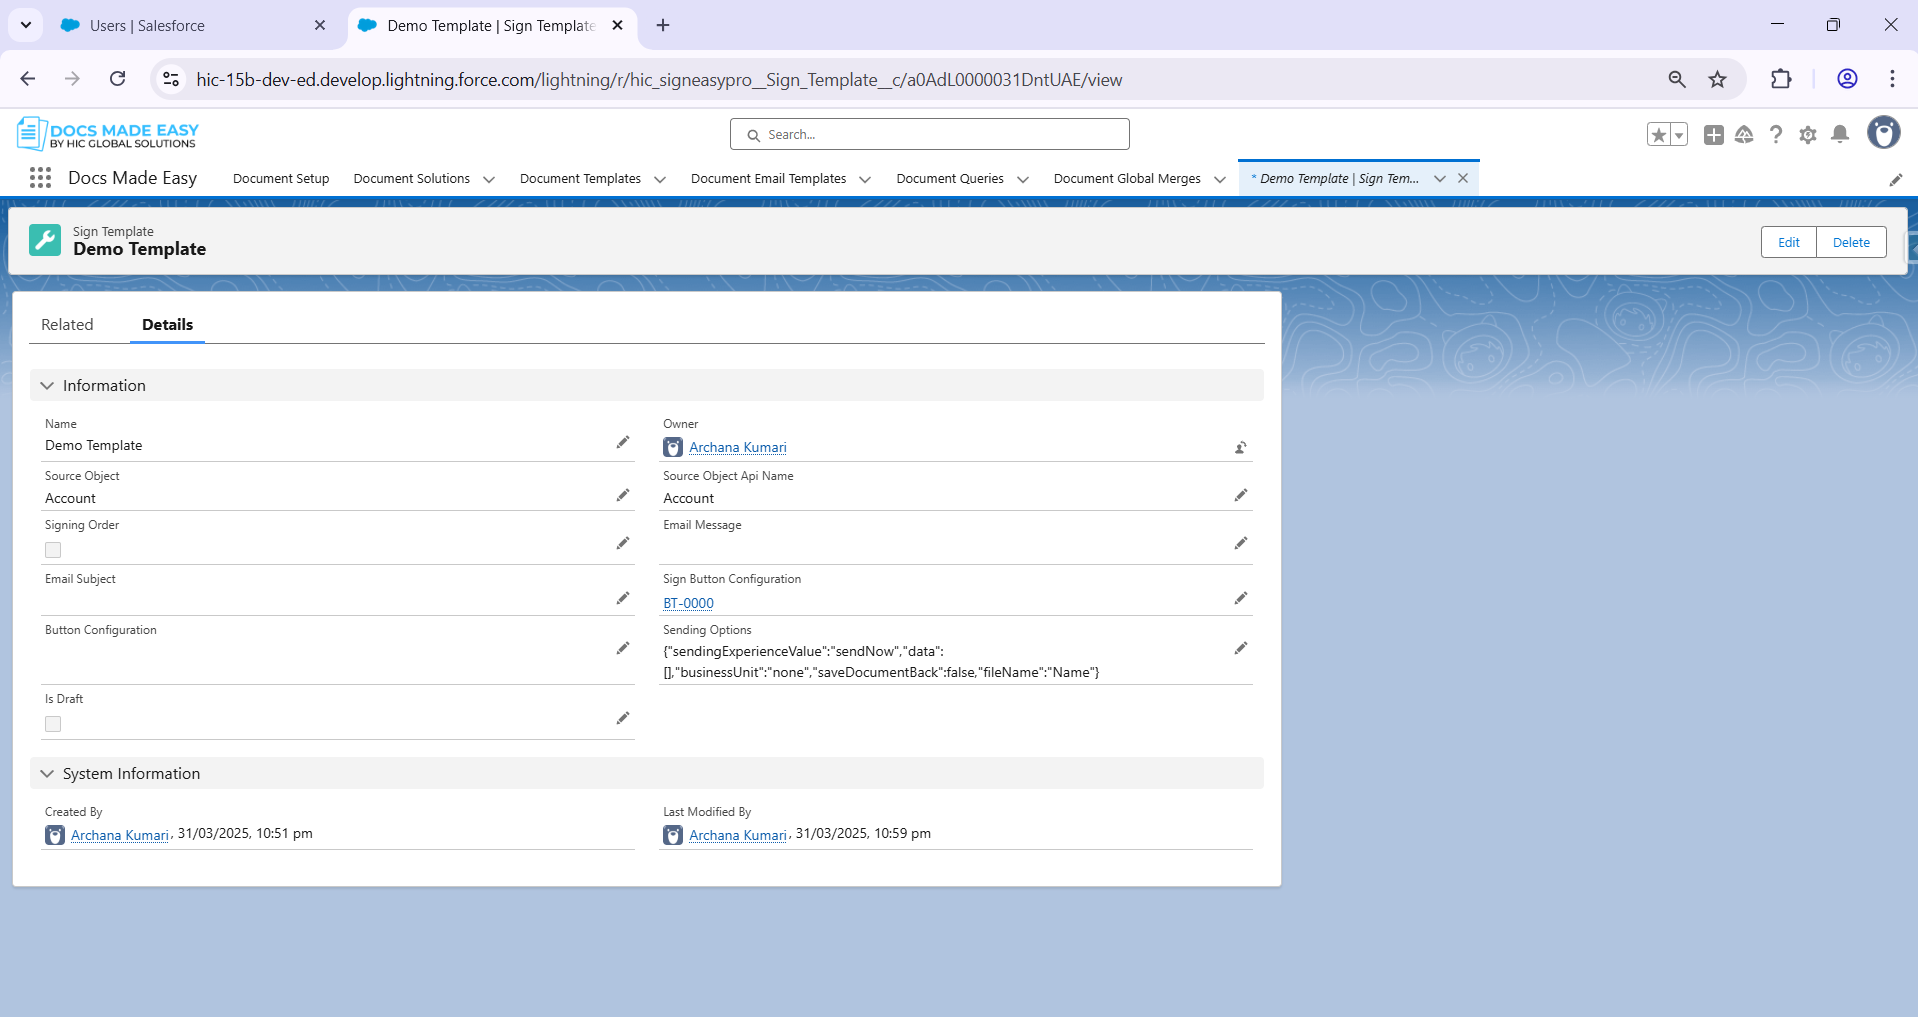
For the Document template, you can copy the ID from the sign template record as shown below.

Note: For non-admin users, you need to assign an additional permission set to make this integration work.
Below are the steps to create that permission set
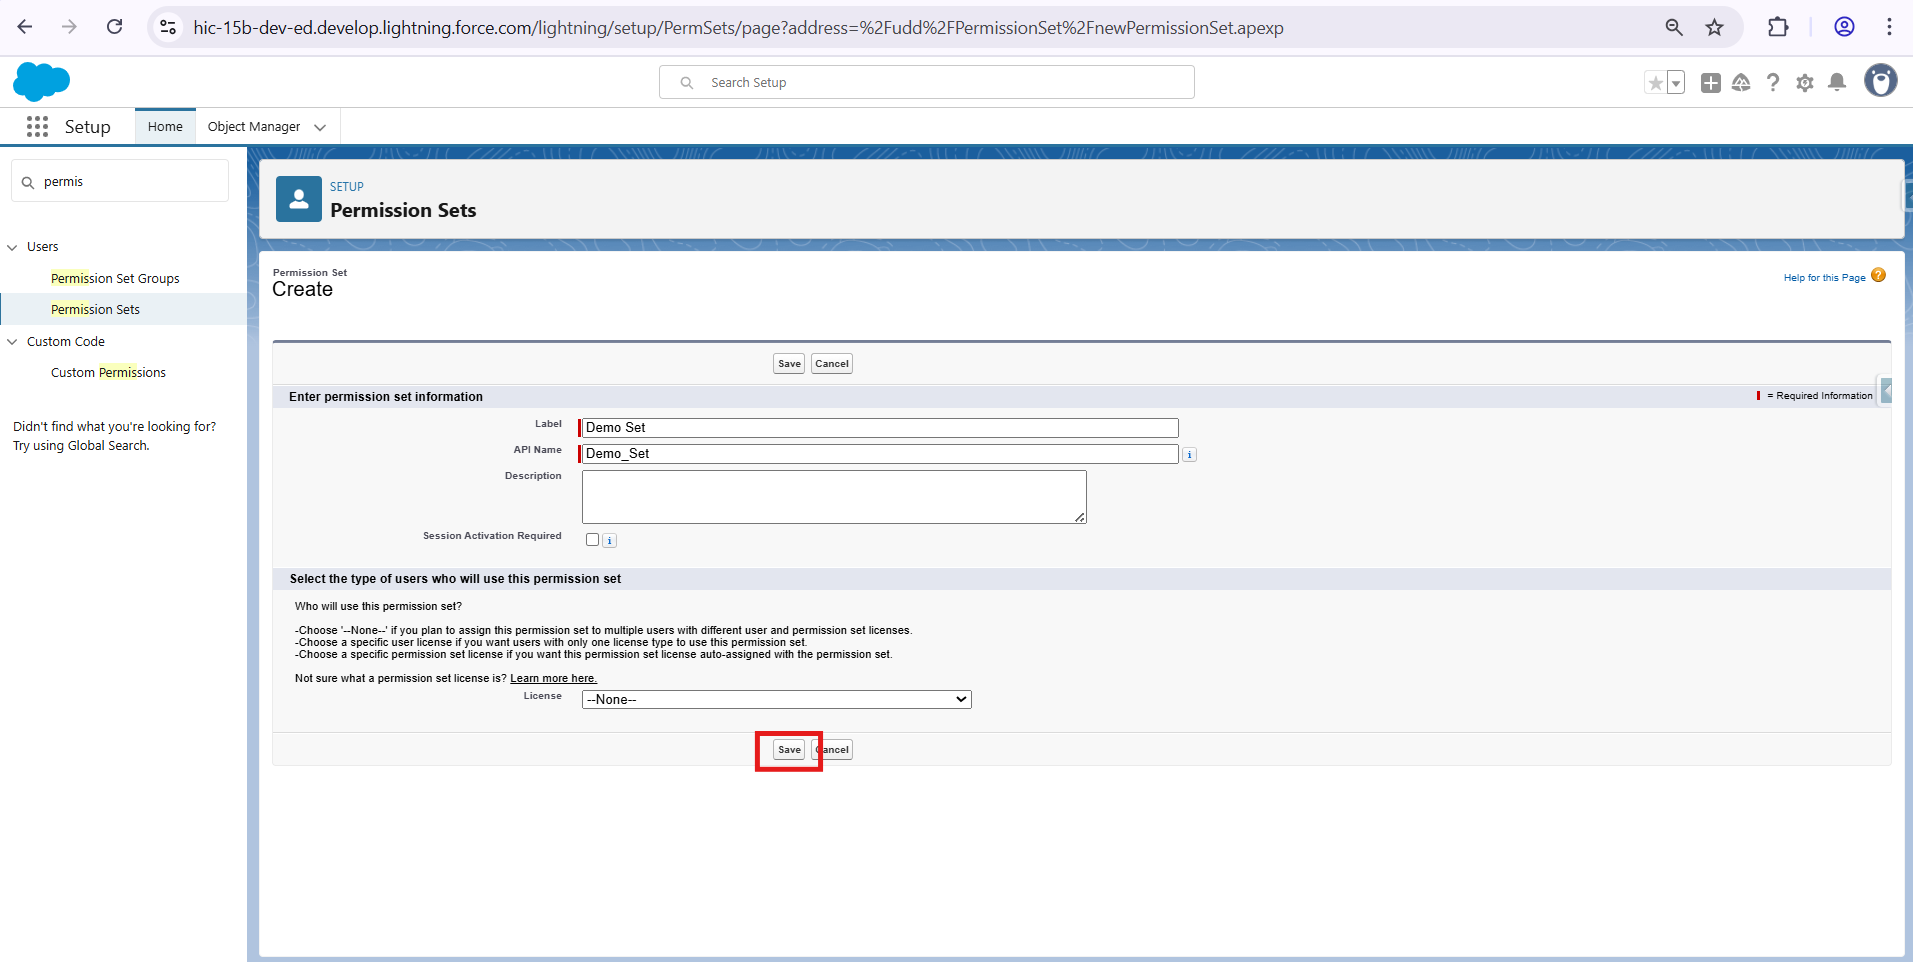
Step 1: Go to Setup and Search permission sets, and create a new Permission set.
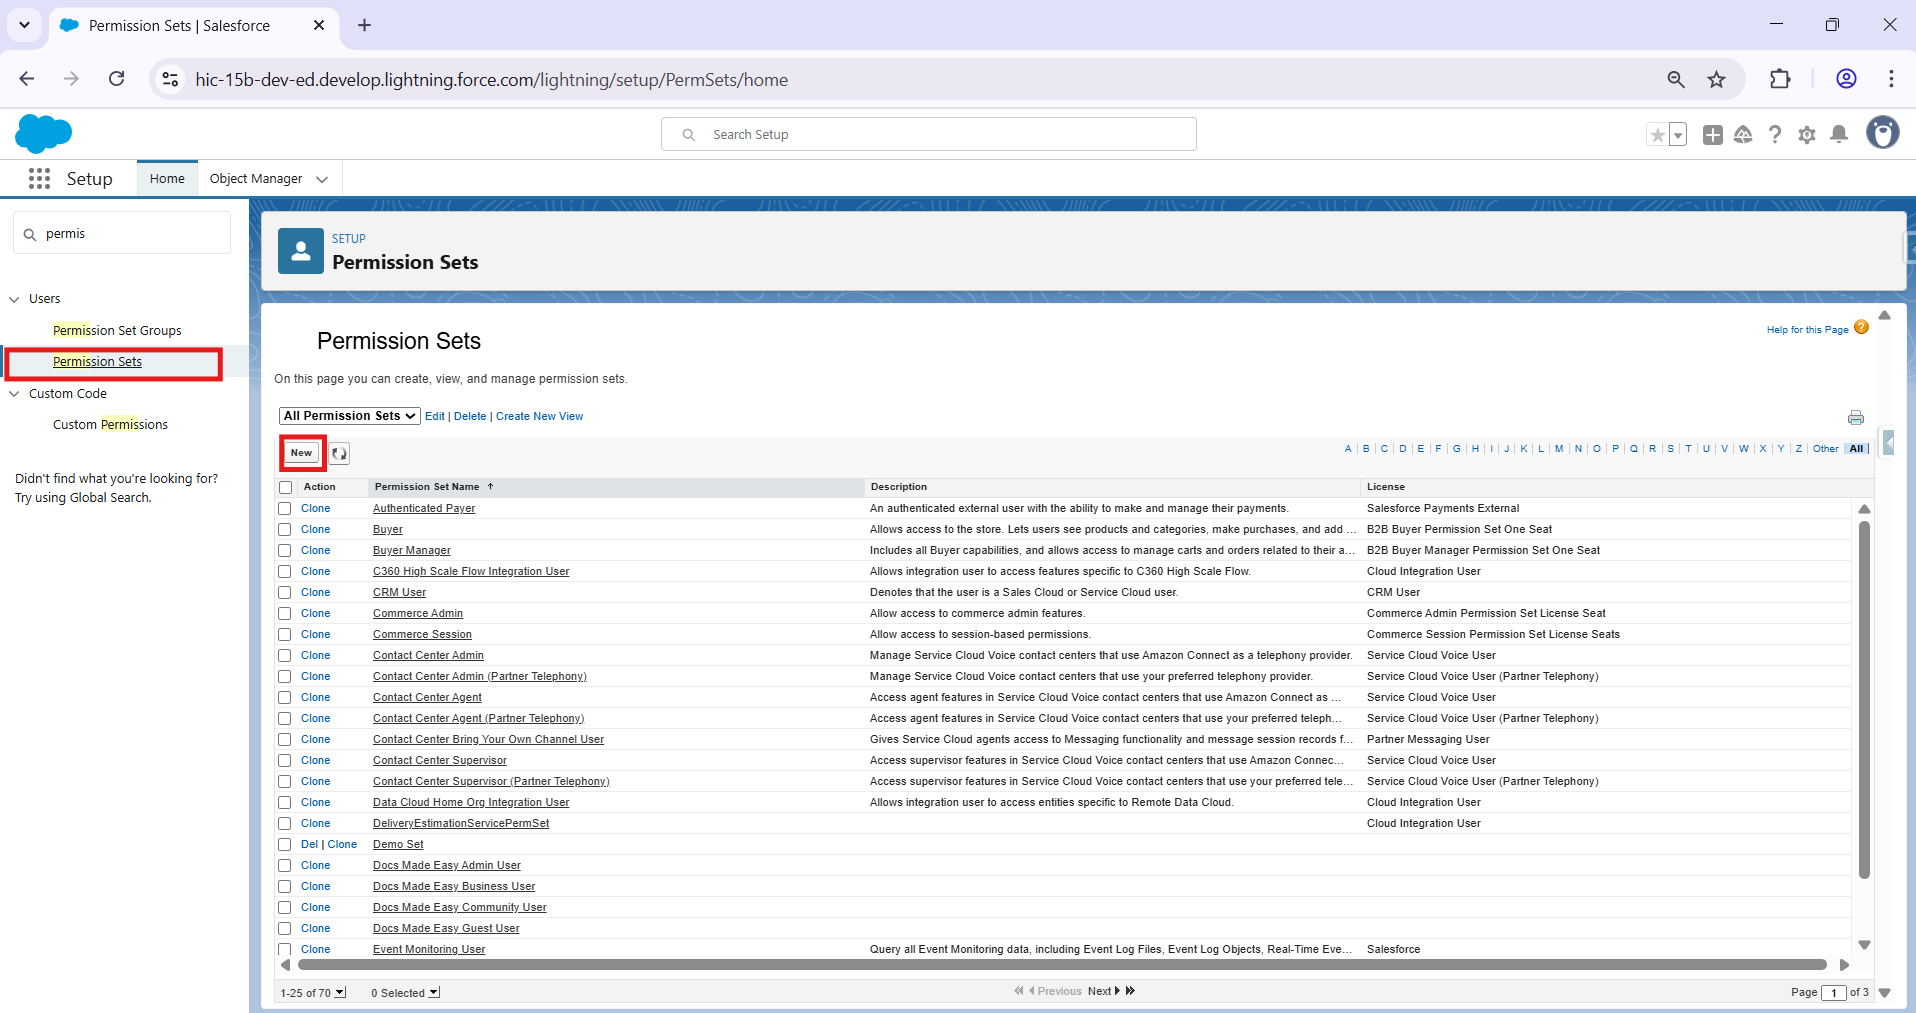
Step 2: Name that permission set and save
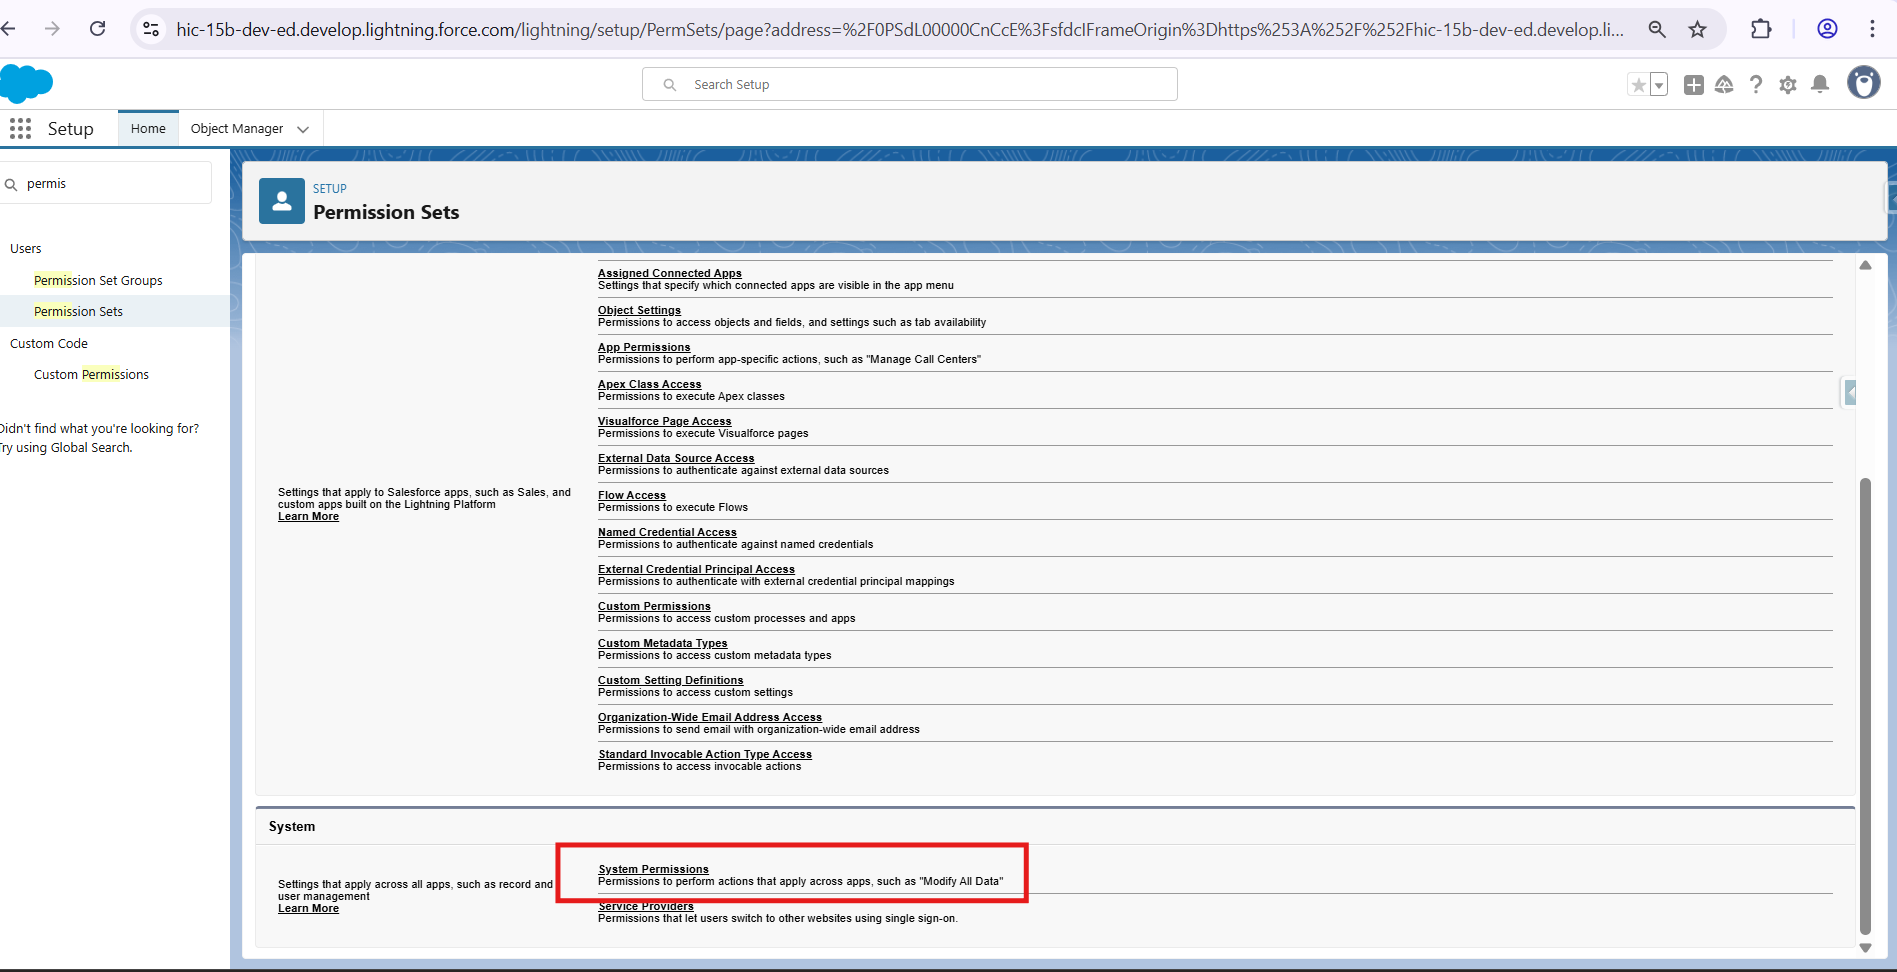
Step 3: Now in the same permission sets, go to System Permissions.
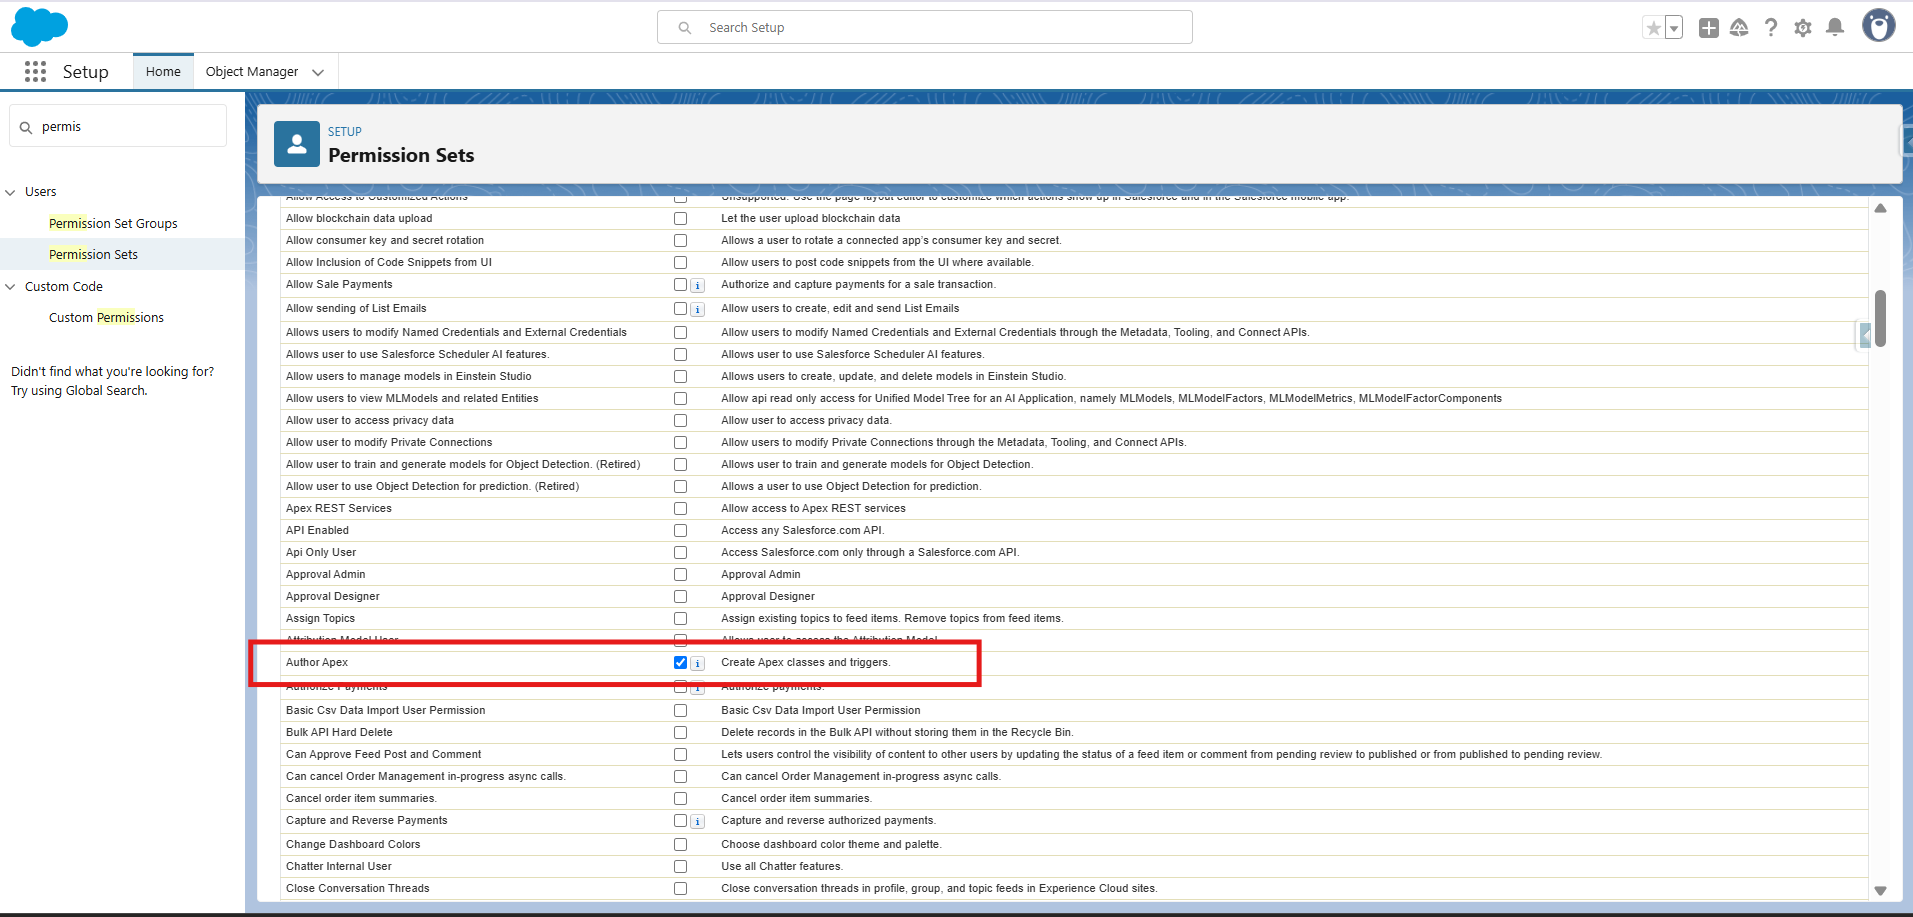
Step 4: Tick the “Author Apex” checkbox and save.
And, it’s done!
If you want to gain more valuable insights or need such information, click here.