




Wondering how to set up web chat in Salesforce? You’re in the right place! Web chat in Salesforce allows you quick interactions to address simple questions and issues. Also, it is perfect for agents to handle multiple chats at once rather than one call at a time. And it helps improve ticket resolution speed and keeps call wait times short.
Today, in this solution, we will tell you how you can set up web chat in Salesforce. So, let’s dive in!
Benefits of Implementing Web Chat
- Quick interactions to address and resolve issues.
- Agents can handle multiple chats at a time rather than one call at a time.
- Improves ticket resolution speed.
- Improves customer experience by delivering seamless services across channels.
- Achieve more robust automation like Salesforce Chat Bots (Einstein Bots).
Set Up Web Chat in Salesforce
Step 1: Log in to your organization, and if you’re in Salesforce Classic, switch to Lightning Experience.
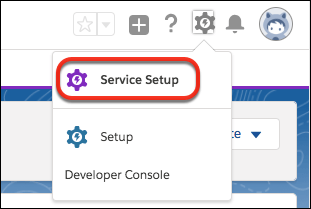
Step 2: Click the Setup gear icon and select Service Setup.
Step 3: Under Recommended Setup, click View All.

Step 4: Enter Chat in the search box and select Chat with Customers.
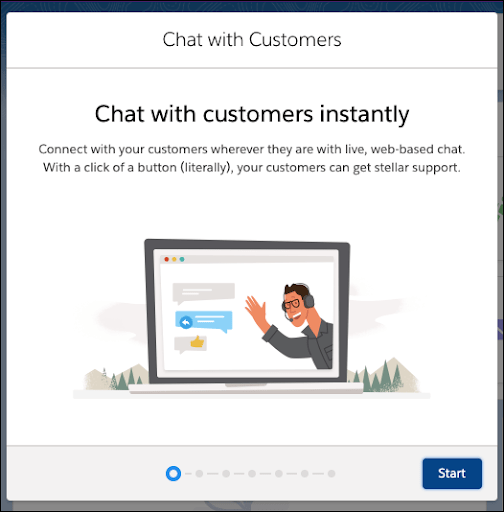
Step 5: Read the prompt to learn about what this flow sets up, then click Start.
Step 6: Enter the queue name Chats and agent group name Chat Agents. Then select yourself as a member.
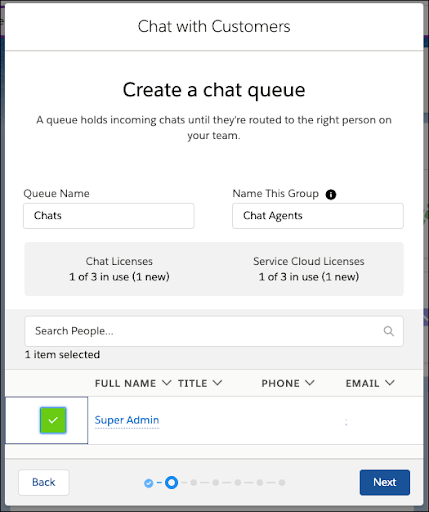
Step 7: Click Next.
Step 8: If you see the Prioritize Chats screen, enter the routing configuration name Chats and give it a priority of 1. (That means it’s the most important.) If you don’t see the Prioritize Chats screen, then you can skip to step 10.
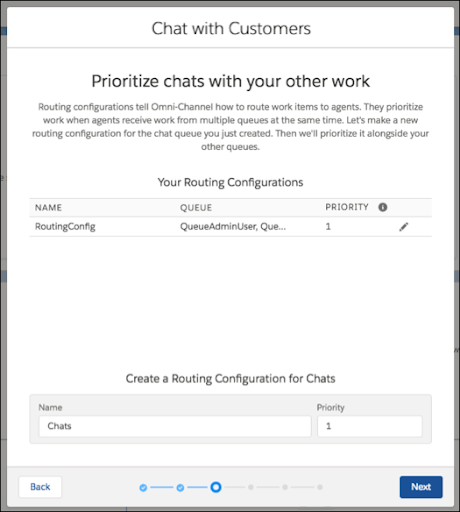
Step 9: Click Next.
Step 10: Leave the work item size and agent capacity at 5 and 20, respectively, then click Next.
Step 11: In the website URL field, enter https://*. Followed by the domain suffix of your site. For example, if your site URL is https://mycompany.my.site.com, enter https://*.site.com. If your site URL is https://mycompanyportal.force.com, enter https://*.force.com.
Step 12: Create or select a Salesforce site. If you’re creating a site, ensure it’s unique (suggested way to ensure it’s unique, type your initials + today’s date MM/DD/YY).
Step 13: Check the box to indicate that you’ve read and accepted the terms of use.
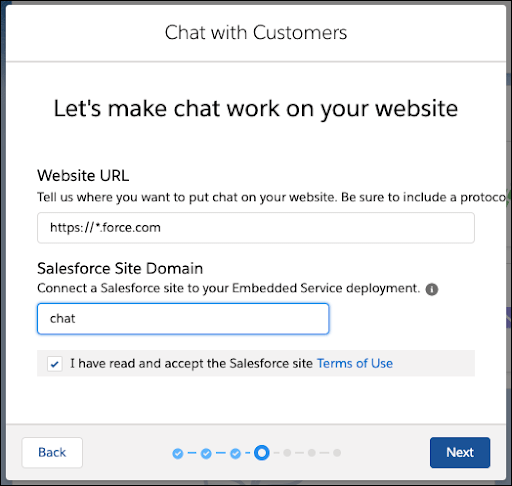
Step 14: Click Next.
Step 15: Select Service for your chat type.

Step 16: Click Next.
Step 17: Click Next to skip setting up offline support. We’ll get to this in a later unit.
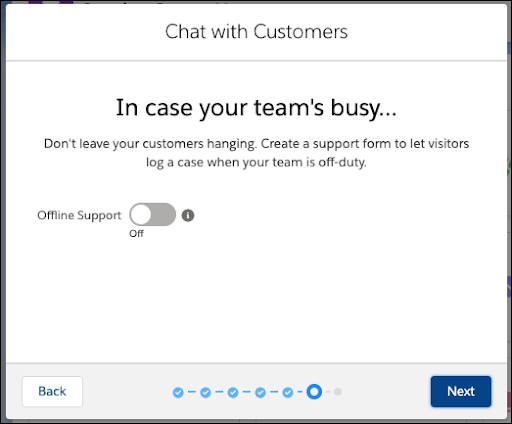
Step 18: Click Next to skip the Grab your code snippet screen.
Step 19: Review what you just set up on the final screen. Everything is enabled in the out-of-the-box console app in your org.

Step 20: Click Done.
Create a Test Website for Web Chat
Step 1: From Service Setup, enter Embedded Service Deployments in the Quick Find box and select Embedded Service Deployments.
Step 2: Click the down arrow next to Chat Agents and select View.
Step 3: Click Get Code in the Embedded Service Code Snippets section.
Step 4: In the Chat Code Snippet section, click Copy to Clipboard to copy the provided code snippet. Paste it somewhere safe. You need it shortly.
Step 5: Click Done.
Step 6: Enter Visualforce in the Quick Find box, then select Visualforce Pages.
Step 7: Click New.
Step 8: Enter the Label: Web Chat and the Name: Web Chat, with the Description: A test website for using webchat.
Step 9: Replace the code on the page with the following code
Step10: Click in Line 6 after the words <!–Embedded Service Snippet–> and press enter to add a blank line before </apex:page>.
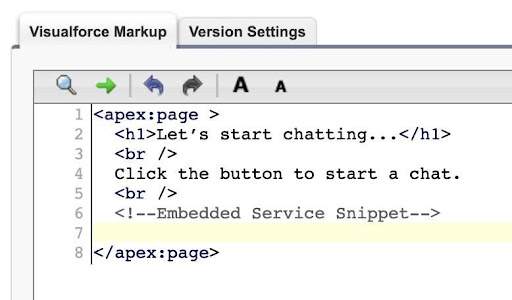
Step 11: Paste your Embedded Service Code Snippet that you copied earlier to the blank line (between Line 6 and Line 8).|
Step 12: Click Save. And Live web chat is ready to go.
Conclusion
And there you have it! Just the right solution that allows you to set up web chat in Salesforce. Wasn’t it easy? We hope that you liked this solution and it was helpful for you. If you try it out, then do share your feedback with us. Also, if you need further assistance in implementing this or any other solution, then get in touch. We will be back soon. Till then, happy learning! 🙂





