




The StandardSetController class in Visualforce is a powerful tool that allows you to retrieve records that are selected by end users on a standard list view.
However, in Lightning Web Component, this functionality is not directly available. Despite this limitation, there is a clever workaround that involves leveraging the capabilities of Lightning Flow and List View URL Button in Salesforce.
By doing so, you can capture the record IDs of the records selected by the end users on the standard list view and then pass them to your Lightning Web Component for further processing.
So, let’s see how we can pass record ids from Flow to LWC and then launch LWC from the flow. Let’s start!
Steps to get ids from the standard controller and pass them to LWC
We will be designing a Lightning Flow that will incorporate our Lightning Web Component. This Lightning Flow will be triggered through a URL button located on a standard list view.
Create LWC which iterates over Records Ids which we get from Flow.
- HTML File for LWC:
Code
- JS File for LWC:
Code
- XML File for LWC:
Code
Create Flow from Flow Builder which store Standard List View Record Ids and pass it to LWC.
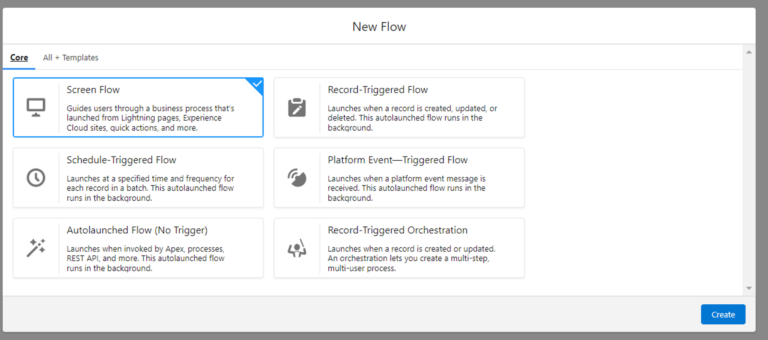
- Select Screen Flow and click Create button.
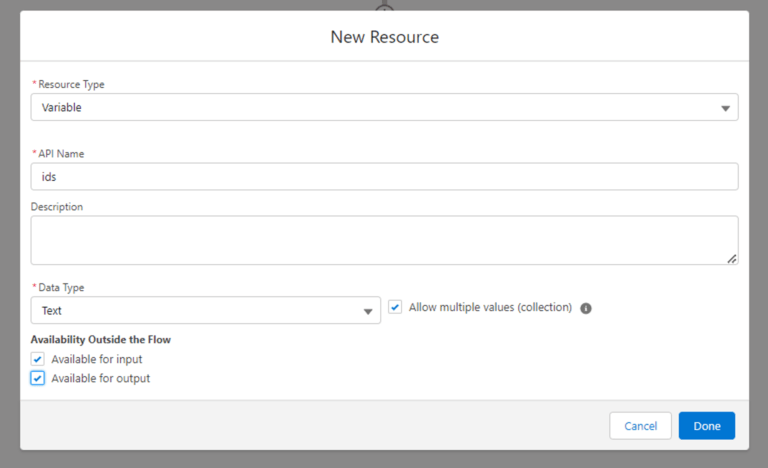
- Click in new Resource and create a variable with name ids. It will store selected record Ids from the standard list view.
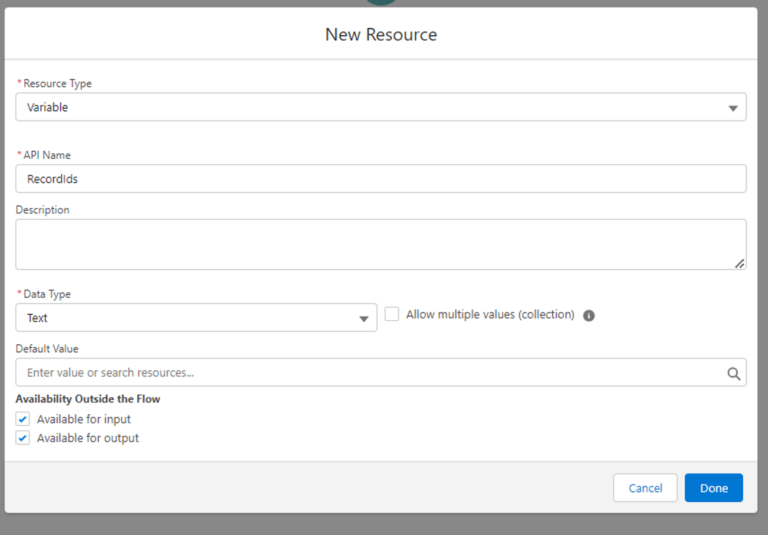
3. Click on new resource and create a variable with the name RecordIds
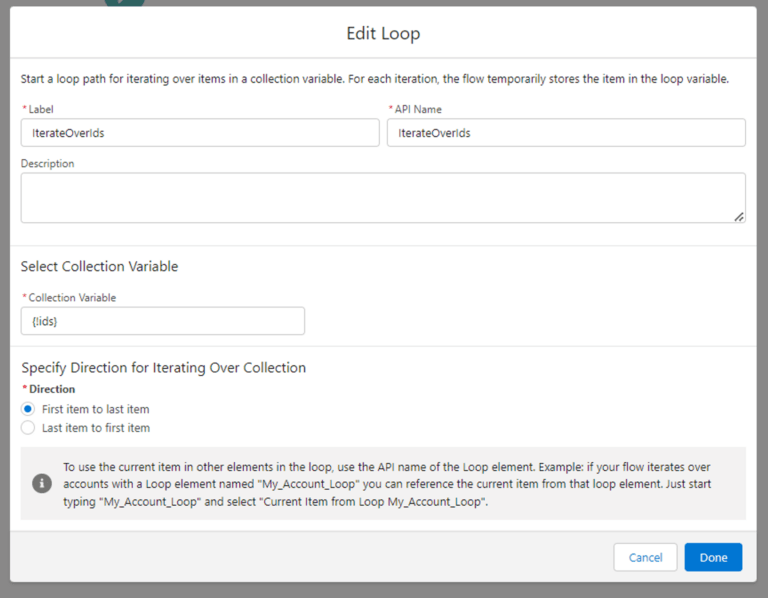
4. Add Loop after the start node of Flow
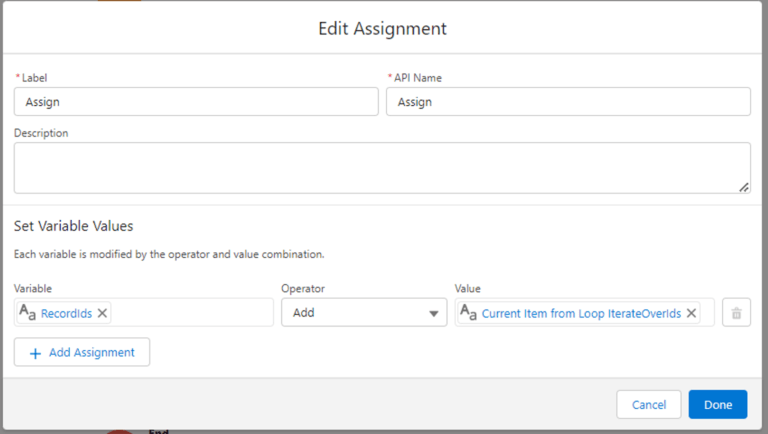
5. Add assignment to Loop
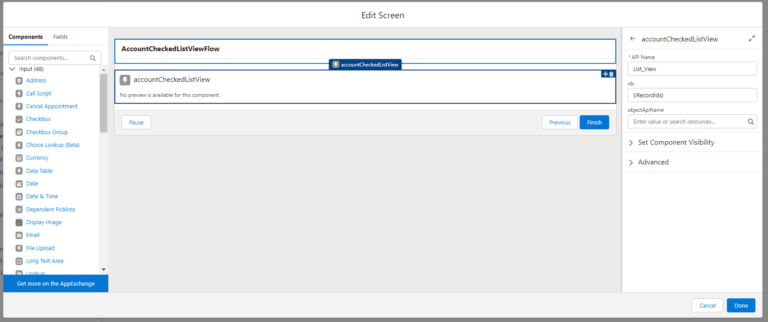
6. Add screen element to flow and drag your LWC into that screen6. Add screen element to flow and drag your LWC into that screen
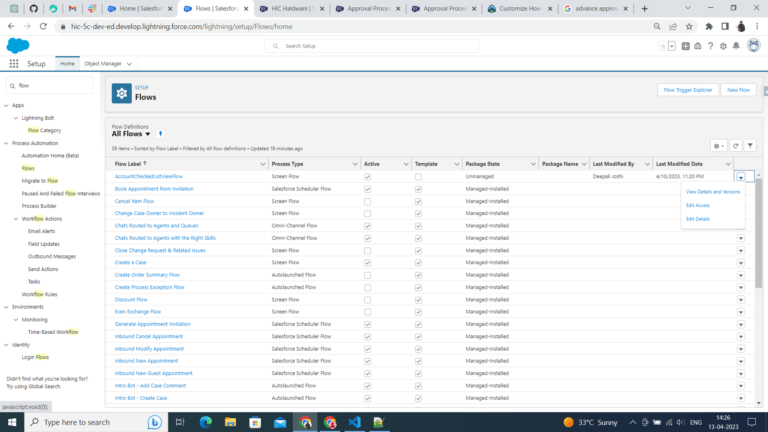
7. Now its time to save your flow, So click on save and then on the activation button in the flow builder

8. After the flow is activated, it’s time to get the URL of the flow which will use in later steps. For this first click on view detail and version of your flow name you just created in the above steps
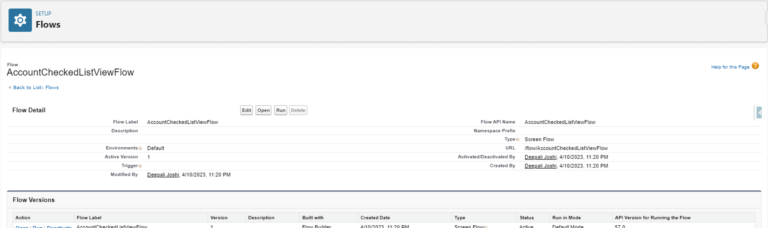
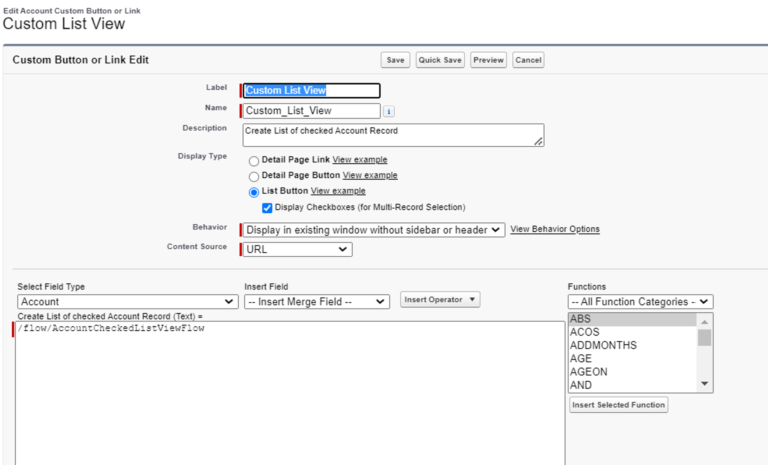
9. In the flow detail page from the URL field copy the URL
Create a List View Button
- Go to object manager and click on an object to which you want to apply. Now click on Buttons, Links, and Actions, and then click on New Button or Link
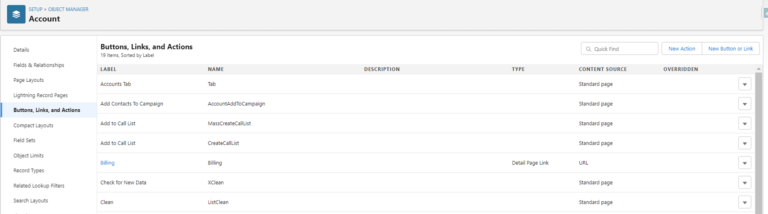
2. Fill in the detail for the button and paste the URL which you have copied from the flow detail page in the URL of the button and then click on save
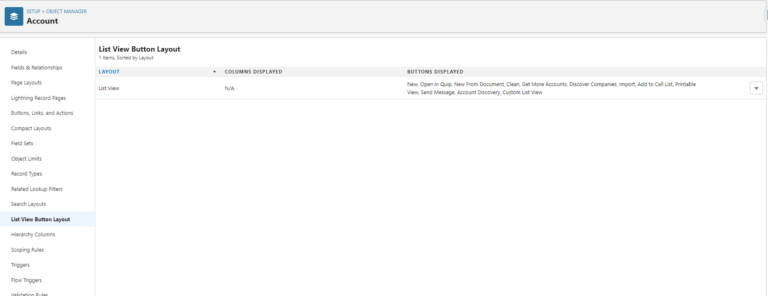
3. After creating the button now it’s time to add it to the layout. For this click on List View Button Layout and then from the drop-down click on edit
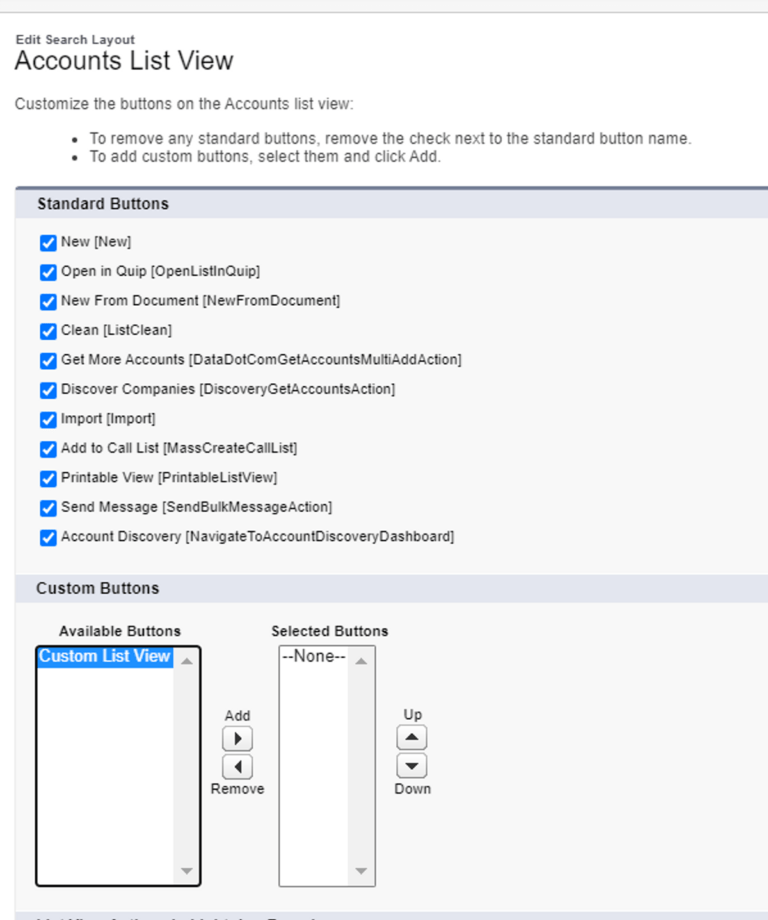
4. Add the List View Button you have created in the layout edit page and then click on save
5. Check the Object page to check your button is visible in the object standard list view page

6. Select records from the standard list view and then click on the custom list view button and your LWC will launch which shows selected records Ids

Congratulations! You have successfully created LWC which will show selected Standard List View records ids with the help of flow in simple steps.
Conclusion
We hope you liked the article. Feel free to try out the code in the blog and share your suggestions with us. Also, keep an eye on our blogs for more insightful Salesforce development updates. Happy Learning!





