




We know that Screen Flow in Salesforce is one of the many types of Flows that can be used to enhance users’ experience. And the amazing part is that we can do all of this using point-and-click logic.
For instance, we can create a user interface (UI) to collect information on one screen and save it on multiple objects.
Screen Flow can be added to a Lightning page, a Lightning Community, or can be launched from a Quick Action.
So, in today’s blog, we will share a step-by-step guide to create a Screen Flow to display the input screen for creating records.
Steps to create a Screen Flow in Salesforce
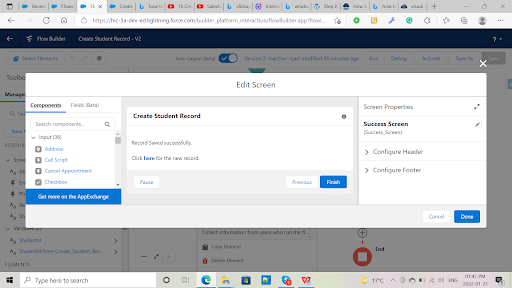
The Screen element of Flow contains various standard input components such as
Address, Call Script, Checkbox, Currency, Date & Time, Picklists, Display Image, Email, File Upload, Long Text Area, Lookup, Multi-Select Picklist, Name, Number, Password, Phone, Radio Buttons, Slider, Text, Toggle, URL, etc.
Also, it contains a standard ‘Display Text’ component to display information to users running the Flow.
Step1: Setup -> Flows -> Click on New Flow
In the below screenshot, we have built Flow for creating Students records
Now, moving on, Below are the steps that we will have to follow in order to develop the complete flow.
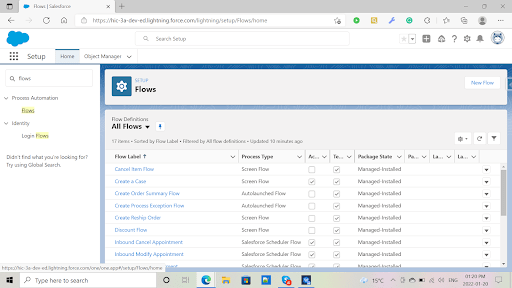
Step 2: Then Select Screen flow from all the options
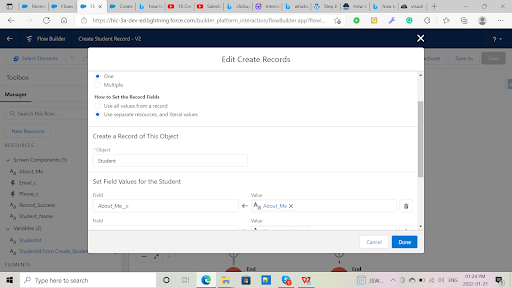
First, Create a Custom Object named Student with Phone, Email, and About Me field.

Then, Develop a Screen that will display the input to enter the information by the User.

Step 3: Create Record Element Which Will Create Record. (Student Record in this case)

Step 4: Success Screen which will display Success Information.
Here we have the complete Flow

Wrap Up
There you have it! You can follow this guide to create a Flow Screen for creating records displaying the input screen. You can also get more Screen components on Salesforce AppExchange.
Contact us at HIC Global Solutions if you need to know more about Salesforce Flow. Or, stay tuned to our blogs for more development solutions. We will be back soon!





