The Models API plays a significant role in providing access to and facilitating interaction with large language models (LLMs) from various Salesforce partners such as Anthropic, Google, and OpenAI. It enables applications to leverage these models for various tasks, including text generation and other AI-powered capabilities.
As a user, you can configure any Salesforce-enabled model with Einstein Studio. If you want to customize model hyperparameters, create a custom-configured model in Einstein Studio and later use it with the Models API.
Key Capabilities To Consider:
- Generate Chat
- Generate Embeddings
- Generate Text
- Submit Feedback
Steps to Generate Chat Using Model API
The Models API requires access to Einstein Generative AI on your Salesforce Org. If you don’t have an Org with this feature, you can get an Einstein AI Playground org from Trailhead to experiment or you can get a Developer Edition org with Agentforce and Data Cloud to experiment.
Step 1: Create a Salesforce Connected App
- Log in to your newly created Salesforce org.
- Go to the setup Button.

- Search for ‘Generative AI’ in the Quick Find box and select ‘Einstein Setup’
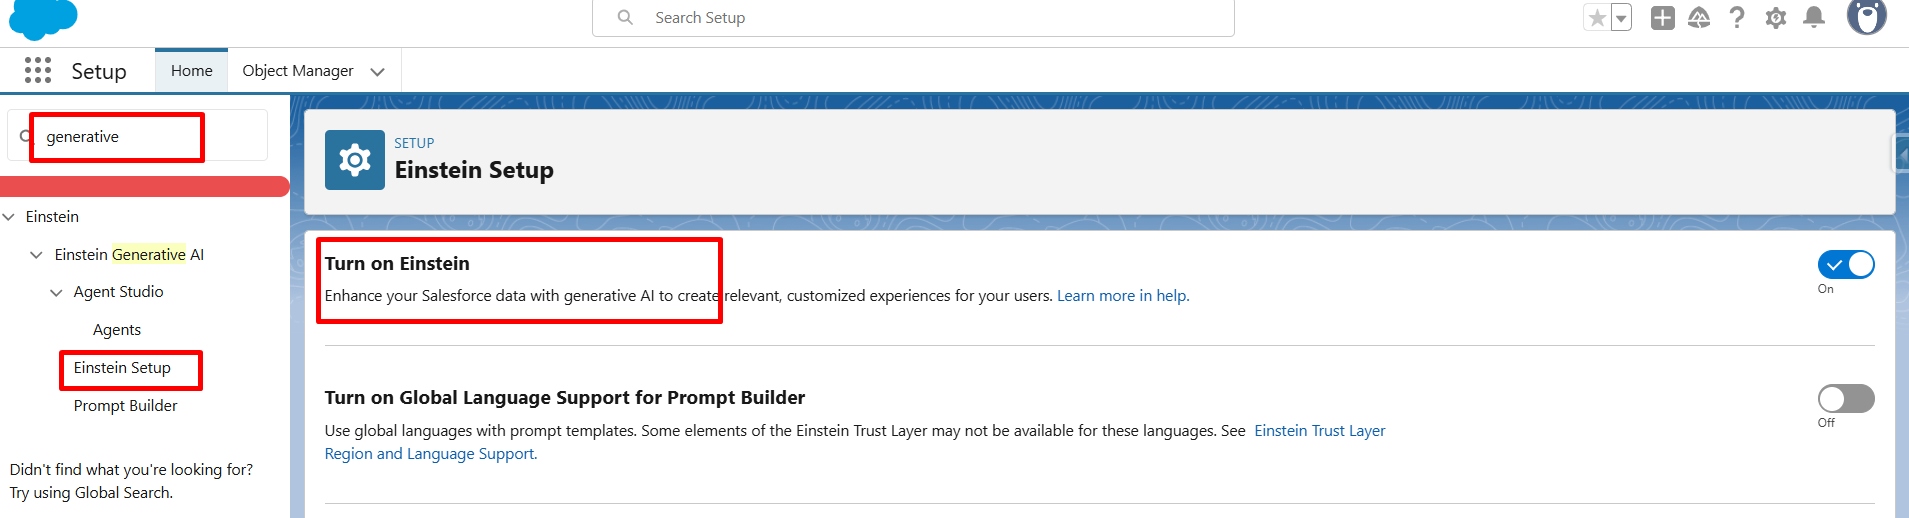
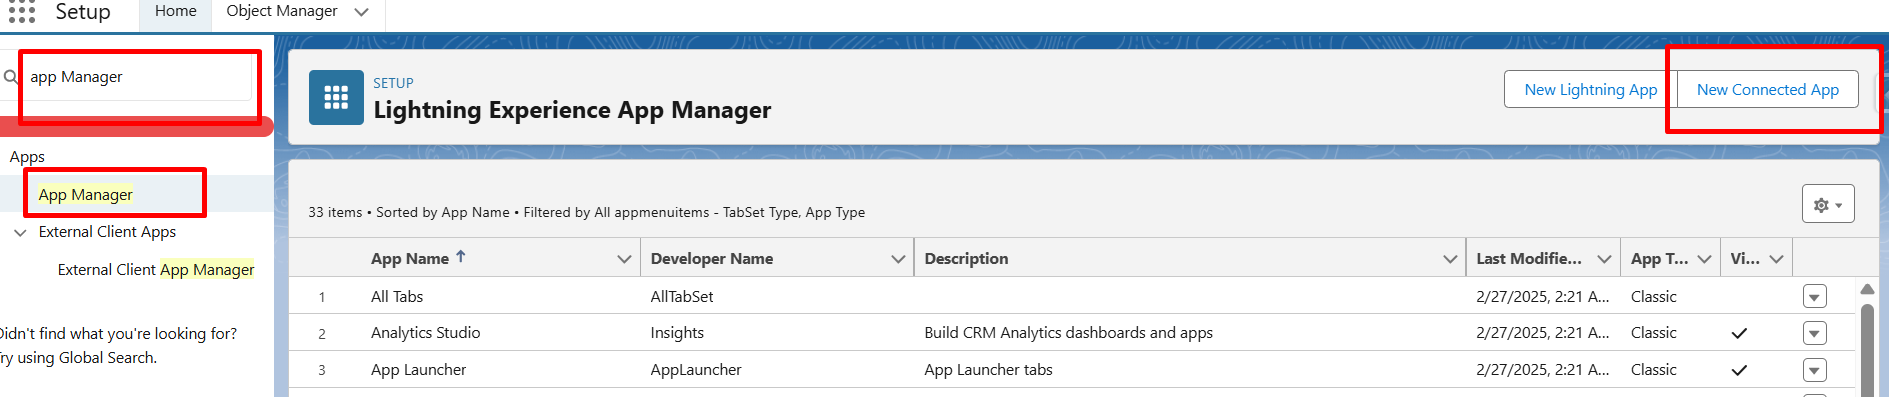
- After turning on Einstein, search for ‘App Manager’ in the Quick Find box, select ‘App Manager’, and click on ‘New Connected App’.
- Select “Create a Connected App” from the given two points mentioned below:
- Connected apps support plugins other than OAuth 2.0.
- ‘Create an External Client App’ supports only OAuth 2.0 plugins.
- Fill in the following details:
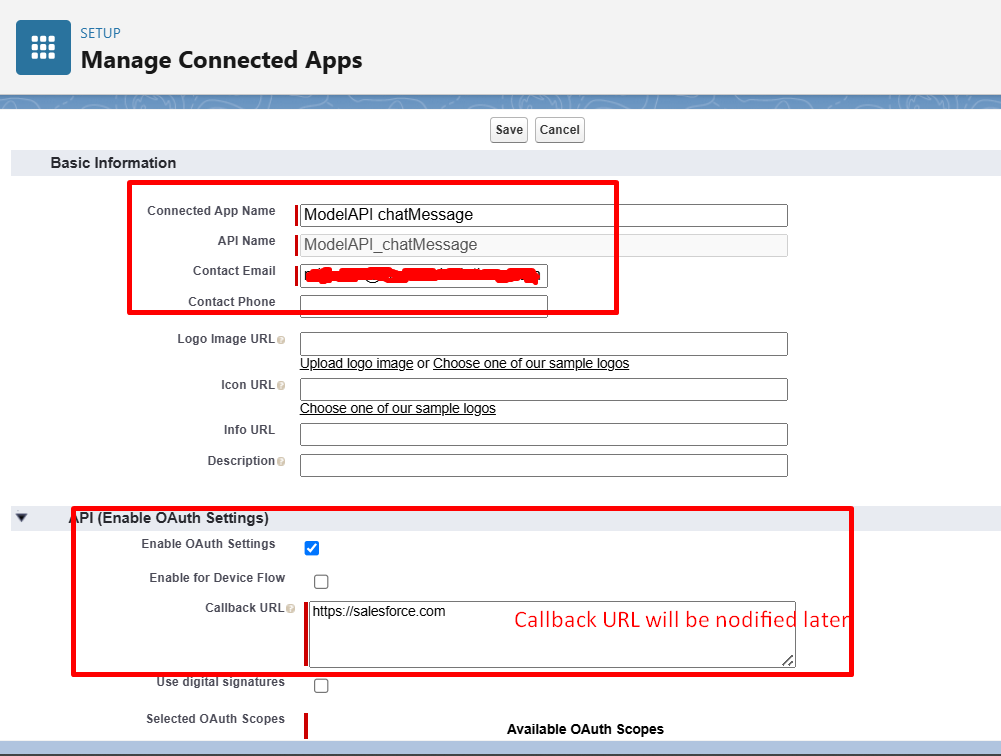
Enable ‘OAuth settings’,
Fill ‘Callback URL’
- Select the mentioned ‘OAuth Scopes’.
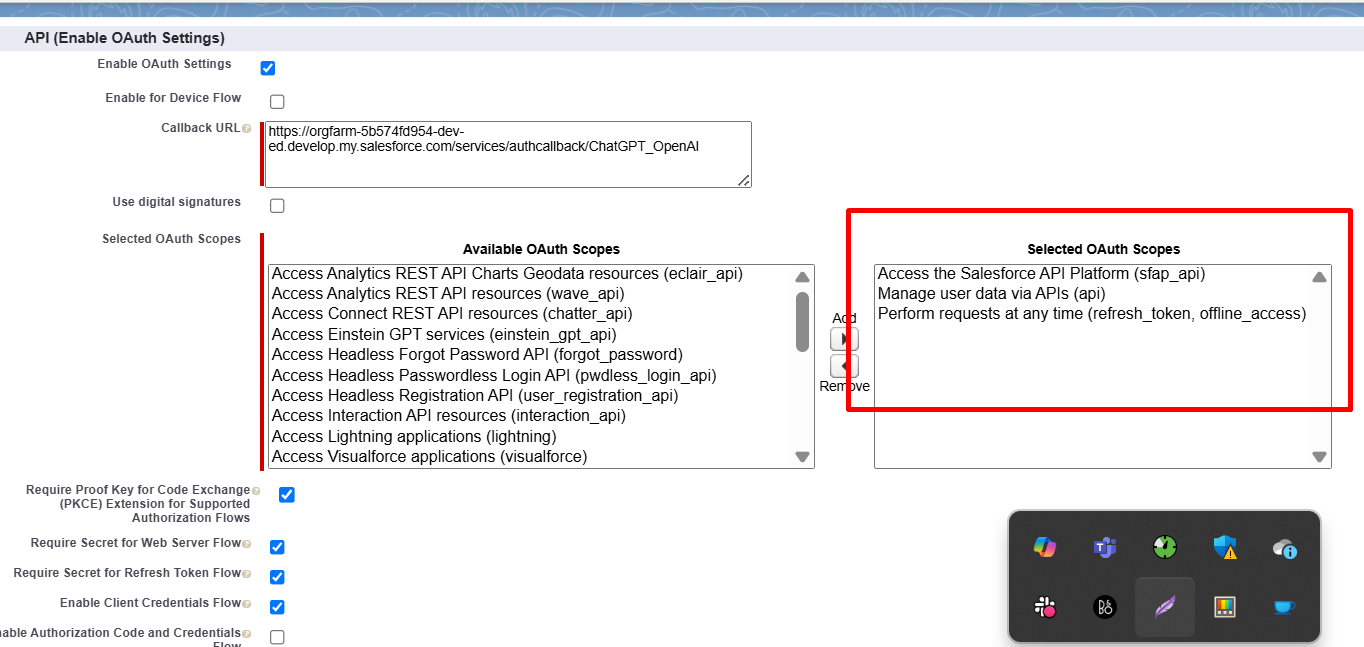
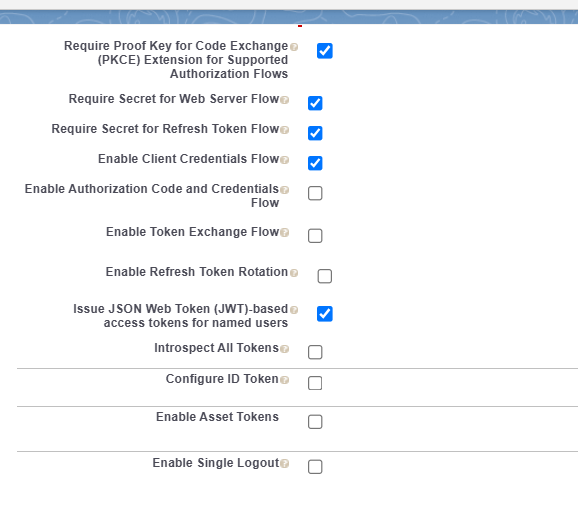
- Click on the Save button, then continue.
- A new Page will open, then click on the ‘Manage’ button.
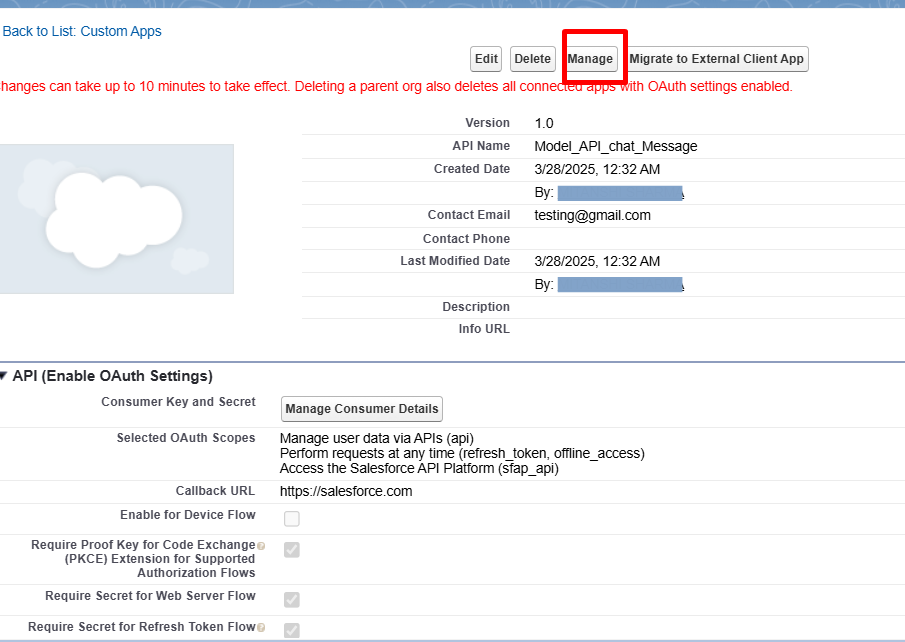
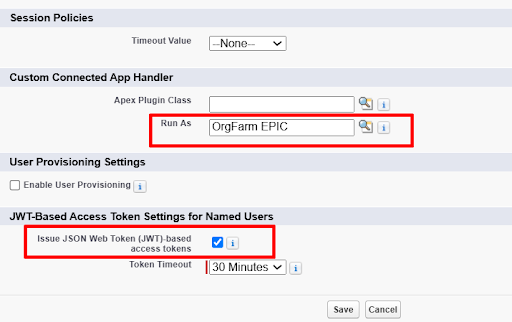
- Click on ‘Edit Policies’.
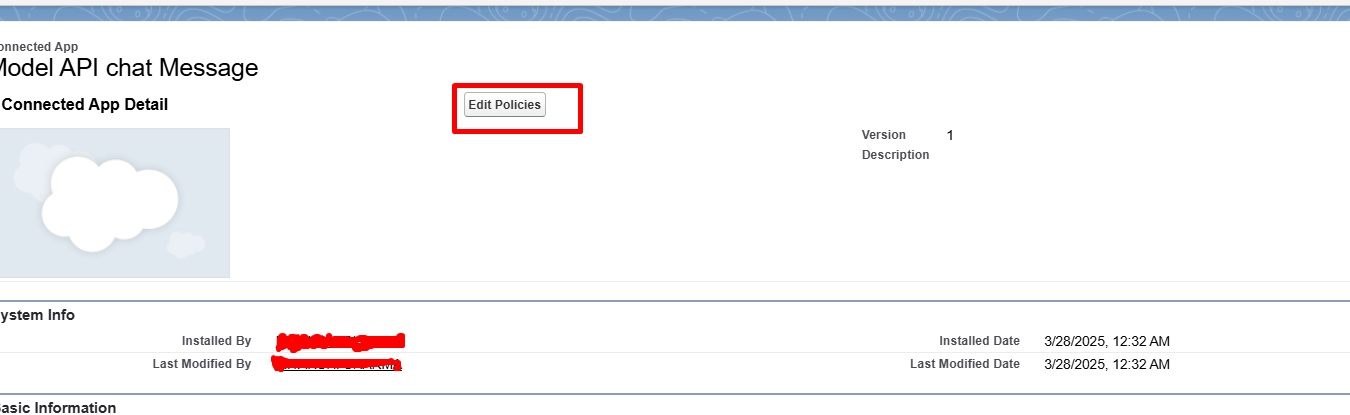
- Click on ‘Run as’, select the user you want to assign, check the appropriate checkbox, and save.
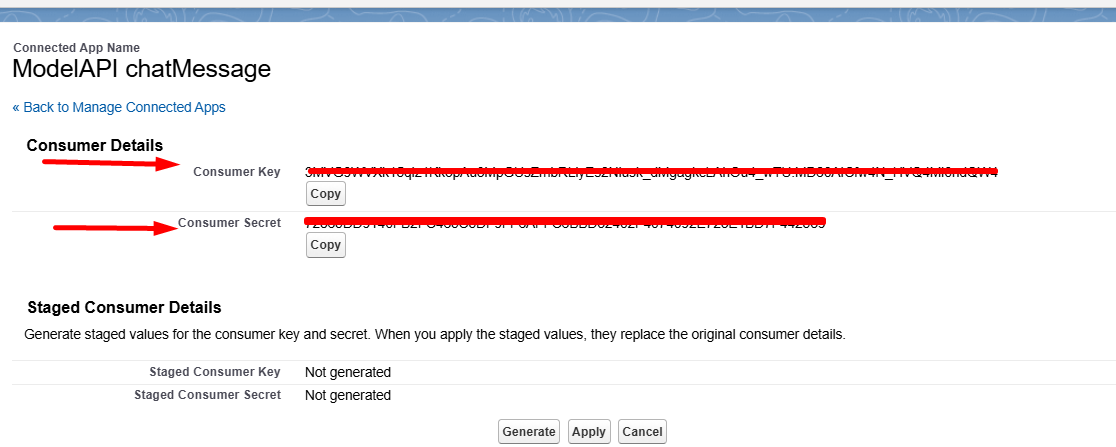
- After saving, you need to open the newly created Connected App from ‘App Manager’. Once the app is open, click on ‘Manage Consumer Details’.

- When you click on the ‘Manage Consumer Details’ button, you’ll be prompted to enter a verification code. Once it is done, you’ll be redirected to the Consumer Details Page, where you can find the Key and Secret.
Step 2: Now go to Auth Providers and click on “New”

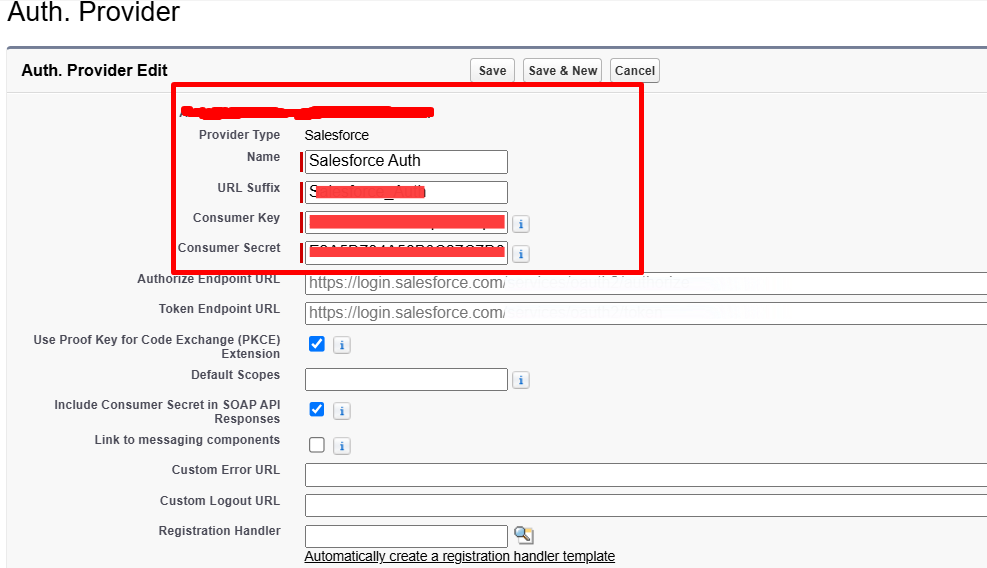
- Select ‘Provider Type’ as ‘Salesforce/Open id Connect’.
- Fill in the Name (URL suffix will fill automatically), Consumer key, and consumer secret, and leave the rest. Then click on save.
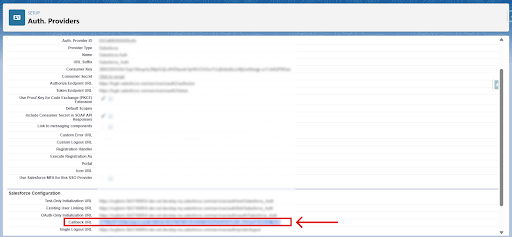
- Click on ‘Save’, and then copy the Callback URL provided.
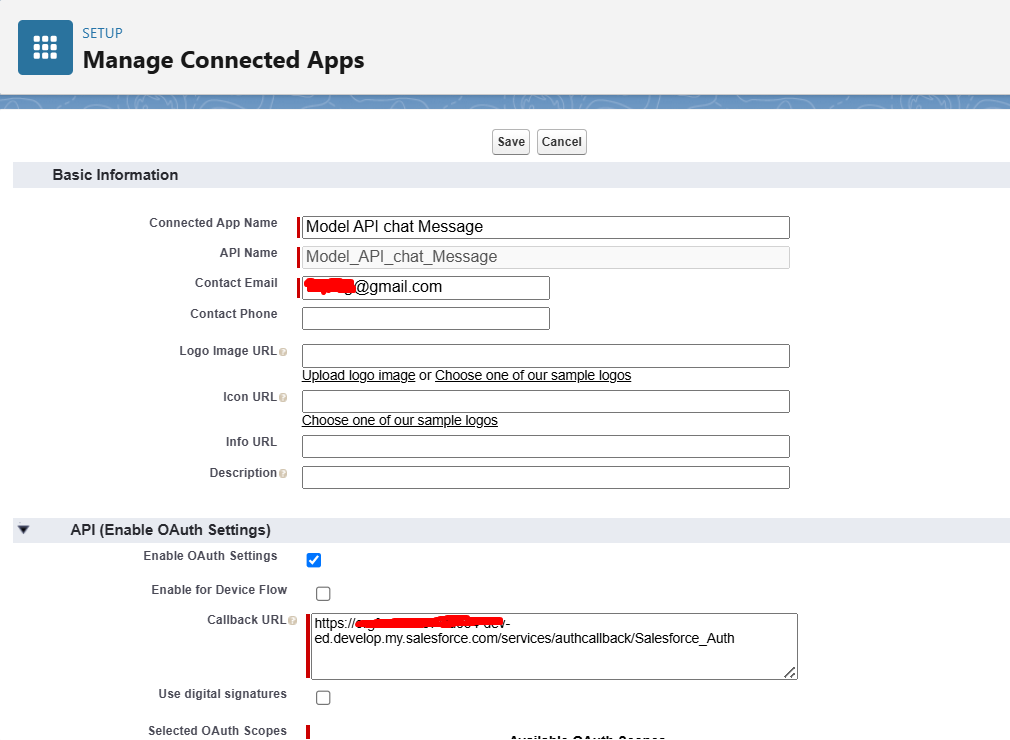
- Now go back to your created App, and click on edit.
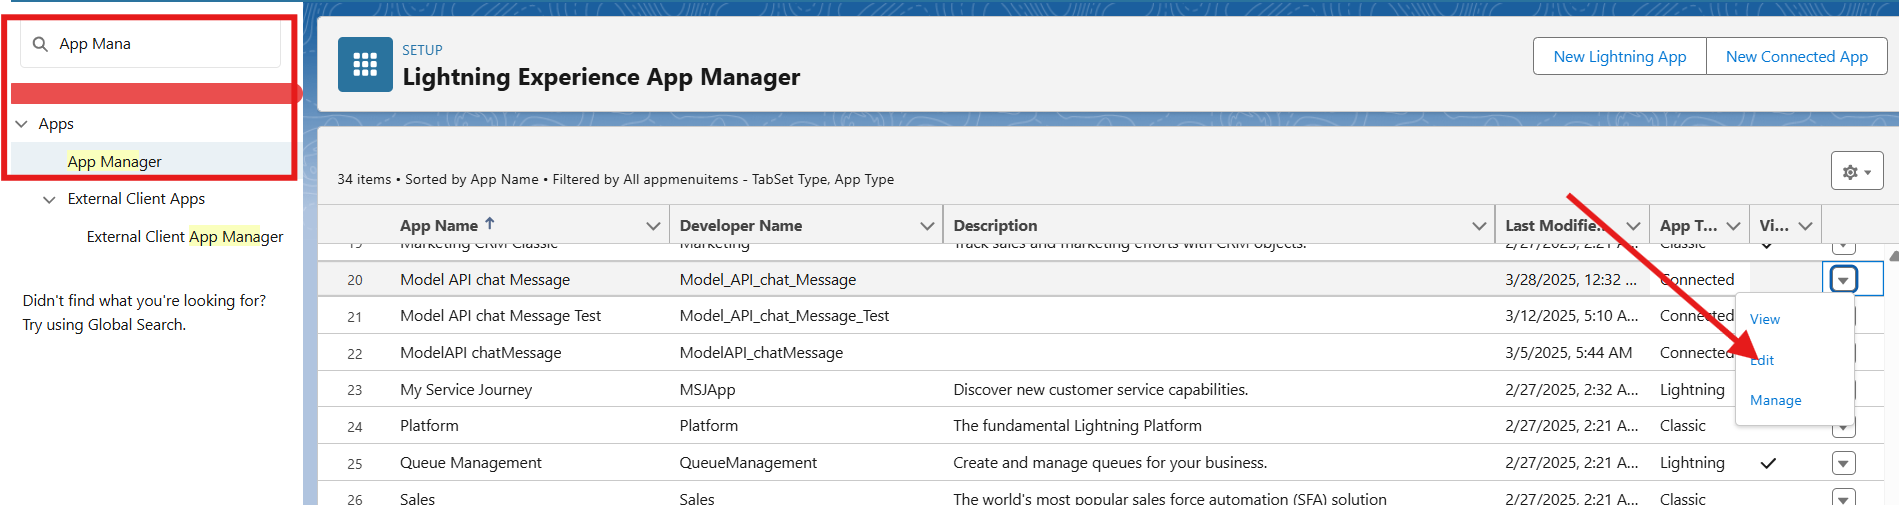
- And paste the URL in the Callback URL section and click on save.
P.S. – You’ll get this message, just click continue.

Step 3: Set Up Named Credentials:
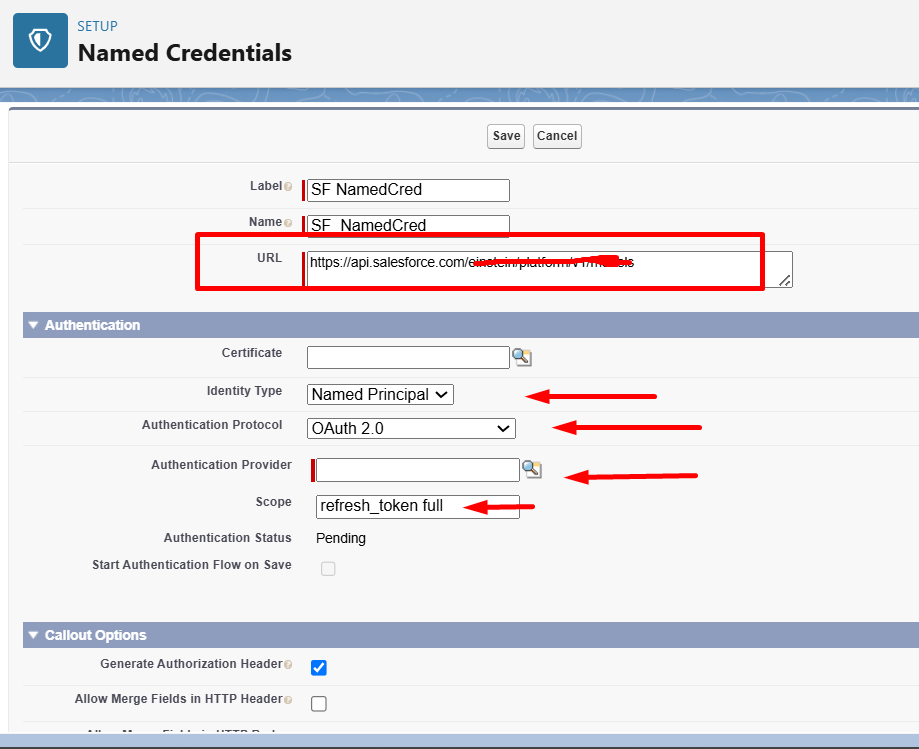
Now we have to create a Named Credential in Source ORG (In this example, in our org).
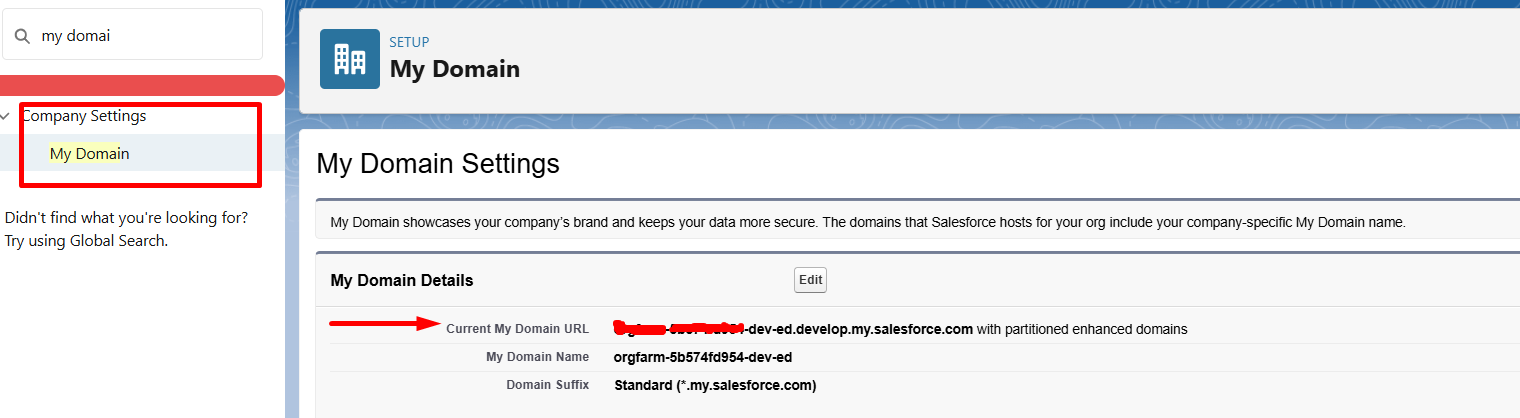
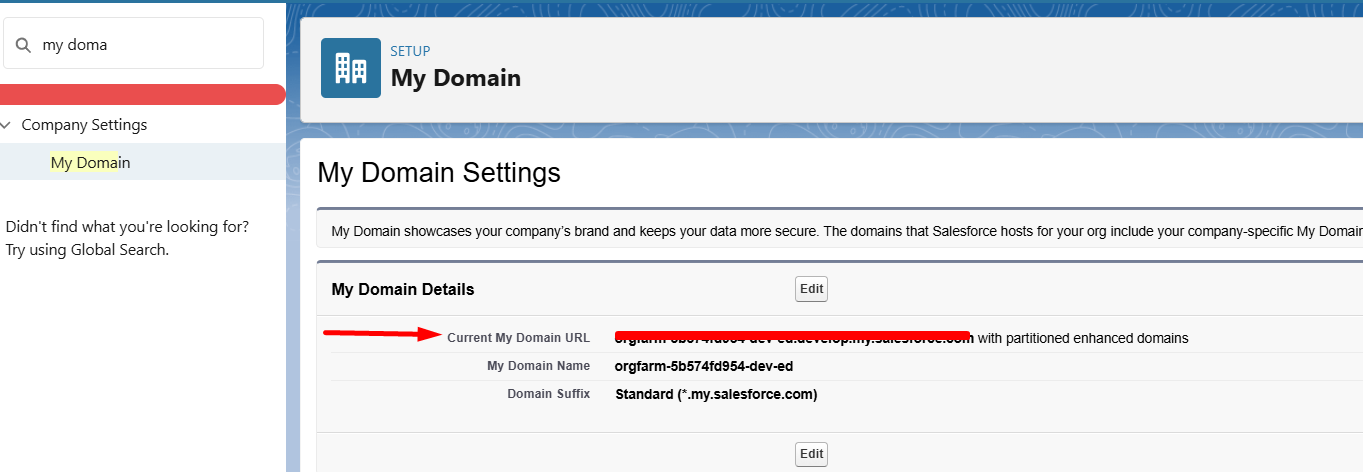
- First, go to my domain and copy the Current My Domain URL and copy it.
- Now, go to the Named Credentials tab and click on the ‘New Legacy’ option.

- Fill in the details below (The URL will contain the Current My Domain URL that we copied and add “https://” before that), click on the little search icon before Authentication Provider, and click on save. Once you click on save.
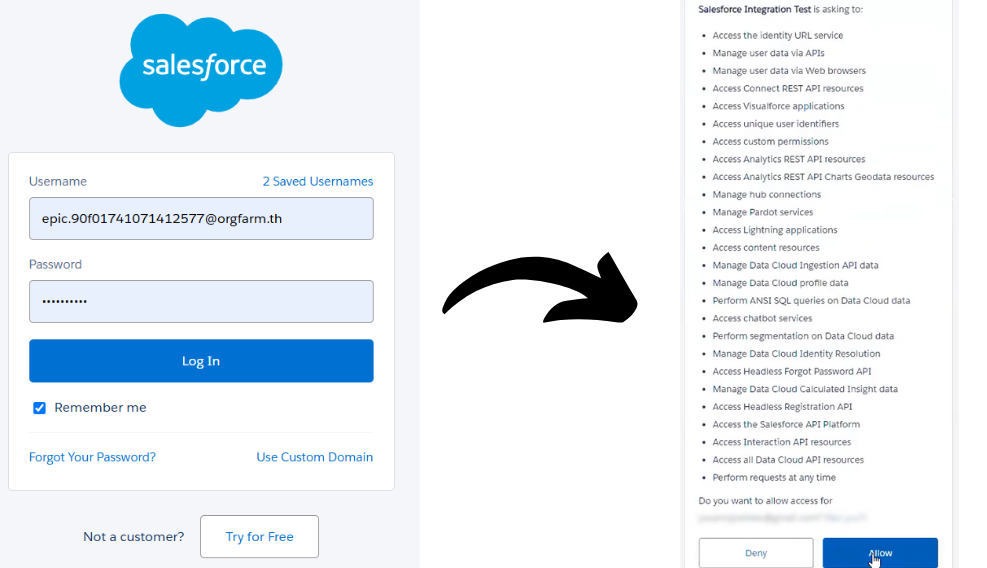
- You’ll be redirected to the login page, log in to the target org, and click on Allow.
- Now that we’ve set up everything in our org, we can test it in Postman.
Step 4: Set Up in Postman
Now that we’ve set up everything in our org, we can have a demo in the Postman.
- Go to the provided URL: Models API Postman, and create a fork.
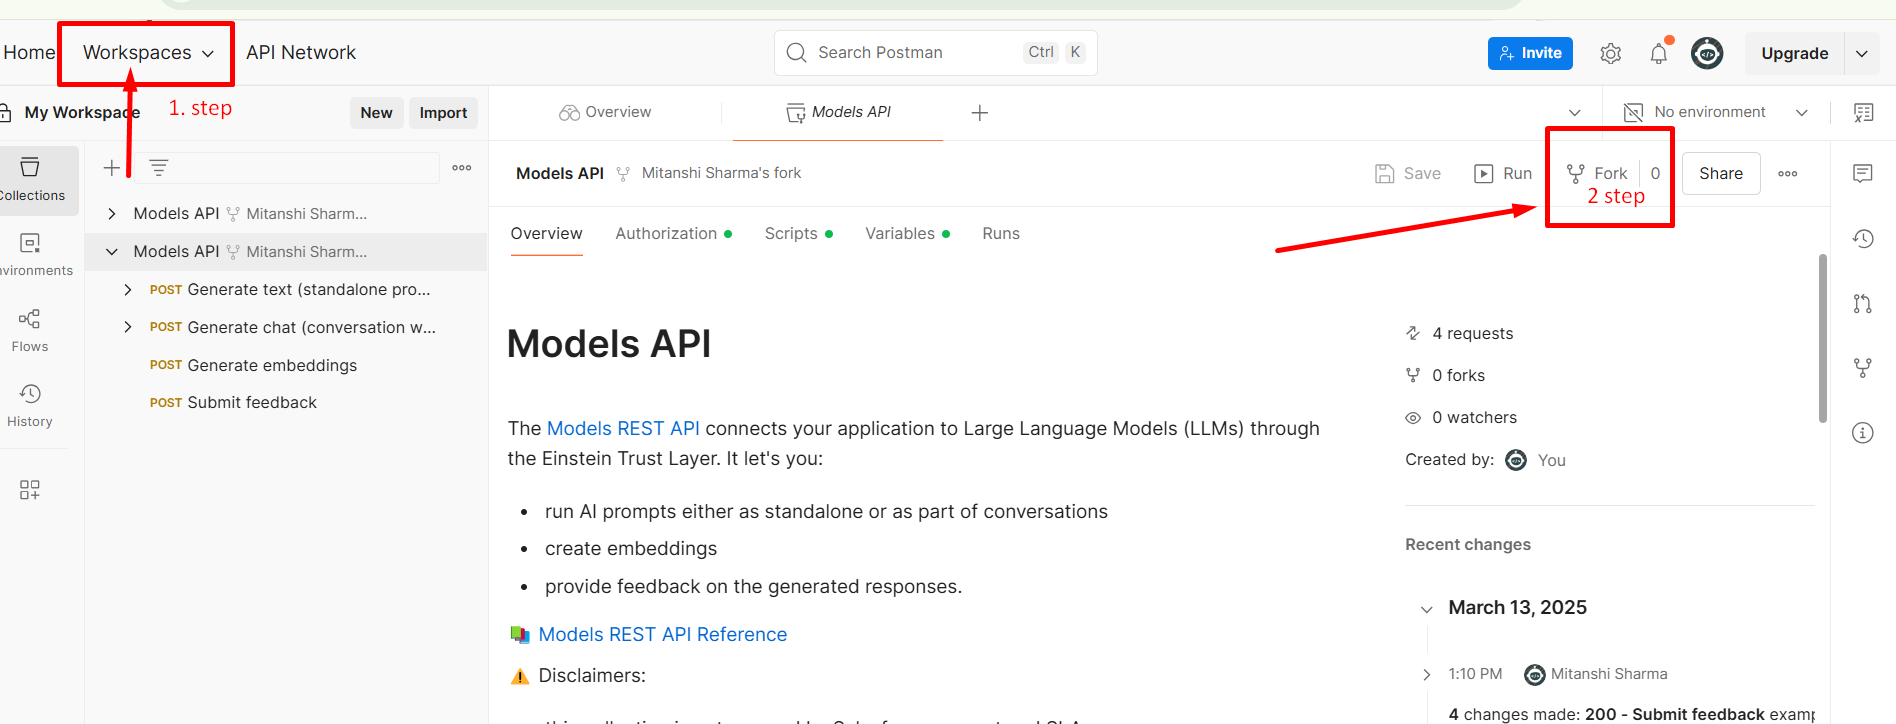
- Once you’ve created a fork, now it’s time to generate an authentication code.
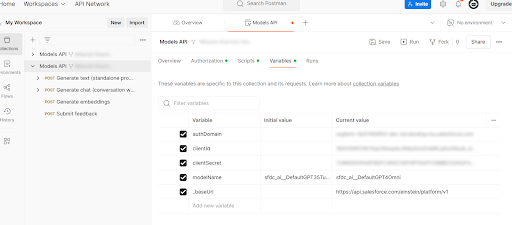
- Fill in Variable values after creating your workspace in Postman as mentioned below.
authDomain: Current My Domain URL( in My Domain)
clientId: Consumer Key from Connected App.
clientSecret: Consumer Secret from Connected App.
modelName: You can select any model Name from the given link( Supported Model).
_baseUrl: remain it as it is.
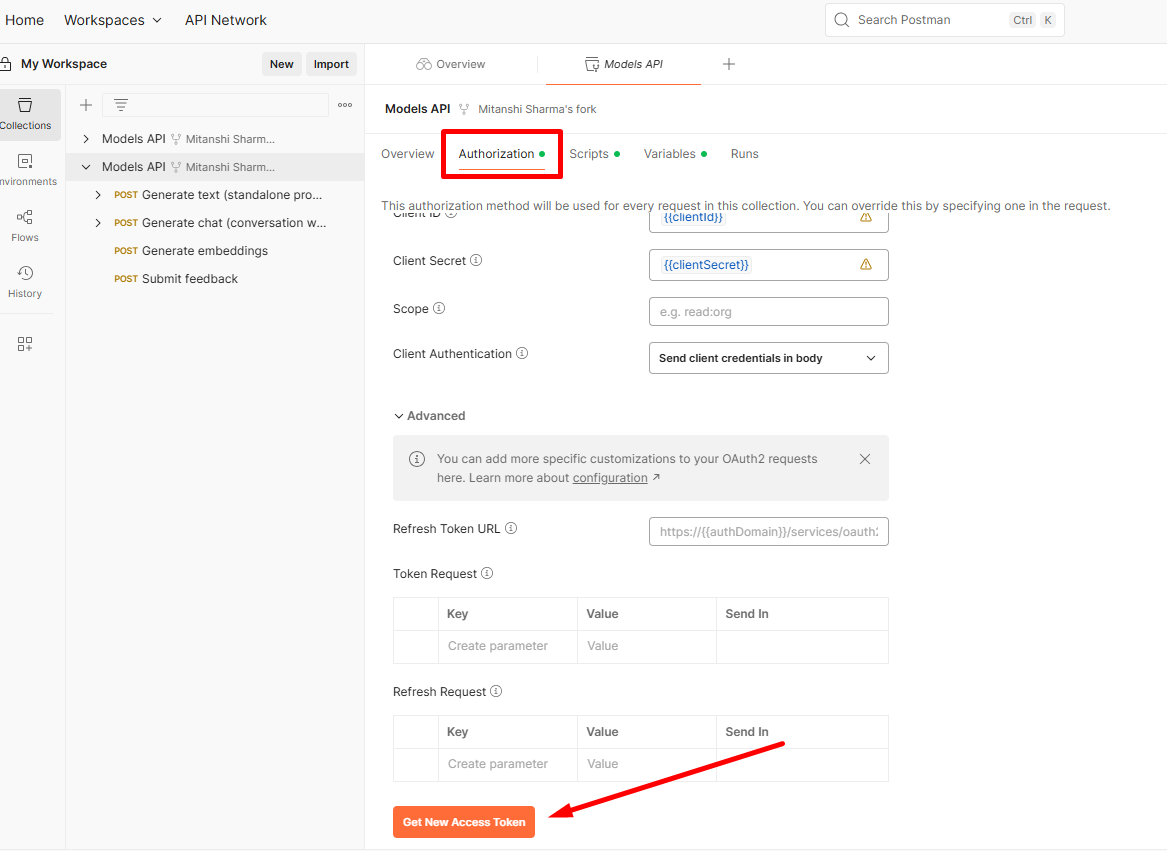
- Now, generate an authentication code if you want to test it directly in Postman. Inside ‘Authentication’ Click on the ‘ Get new Access Token’ button, then ‘Proceed’, and then ‘Use Token’.
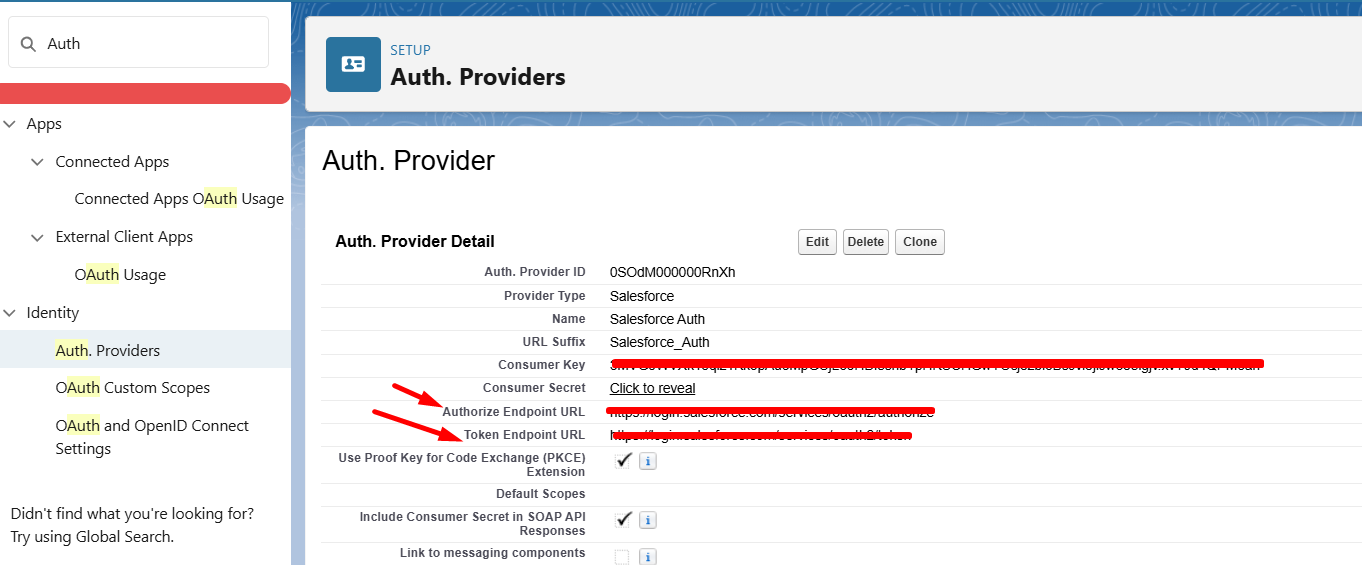
- From the above Page inside the ‘Authentication’ tab, copy ‘Access Token URL’ and then paste it into ‘the Token Endpoint URL’ field of ‘Auth. Provider you created above, and enter the ‘Authorize Endpoint URL’ field value as mentioned below.
Authorize Endpoint URL: https://hostname/services/oauth2/authorize
Replace the hostname with My Domain URL(as mentioned in the below image).
Step 5: Development Work
- Now you can go into any of the 4 sections of the Models API, we will explore all 4 options and what they do.
You can use the below chat based on your preference:
1. Generate text (standalone prompt)
In this, you will ask the chatbot only one question, and it will give you the answer based on that.
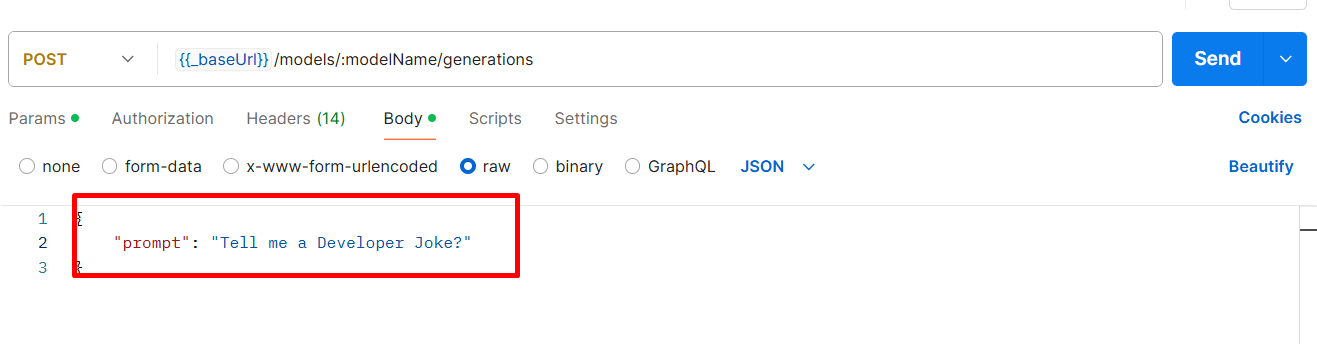
For example, we will ask “Tell me a developer Joke?” (Like why not, we are developers and we deserve a good developer joke)
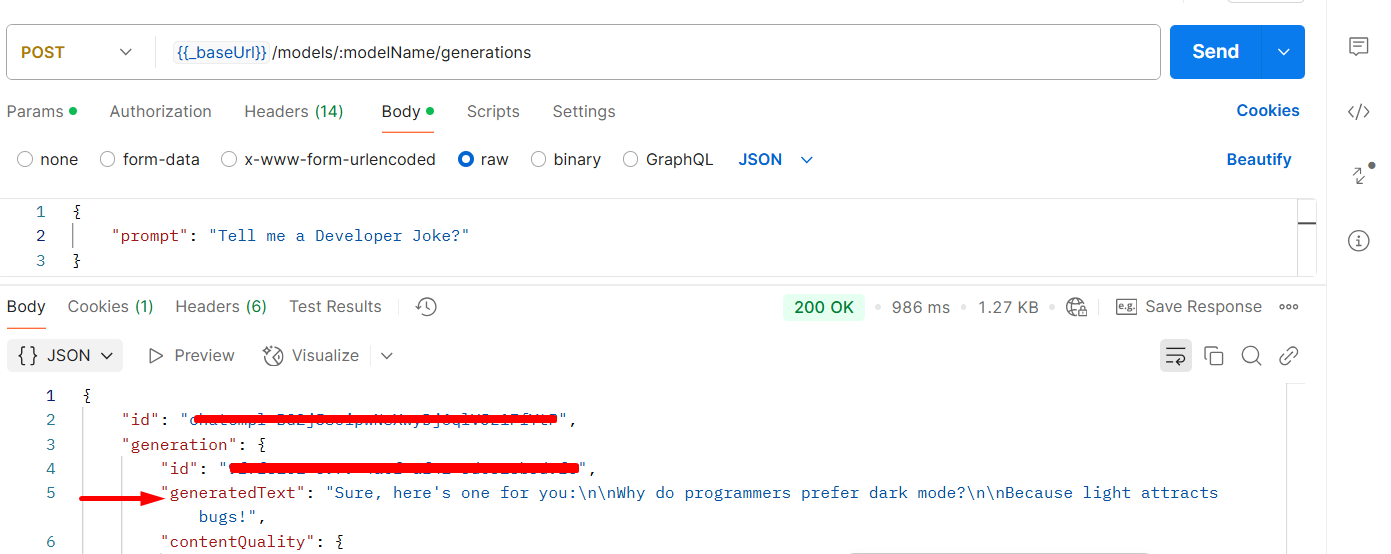
2. Generate chat (conversation with context)
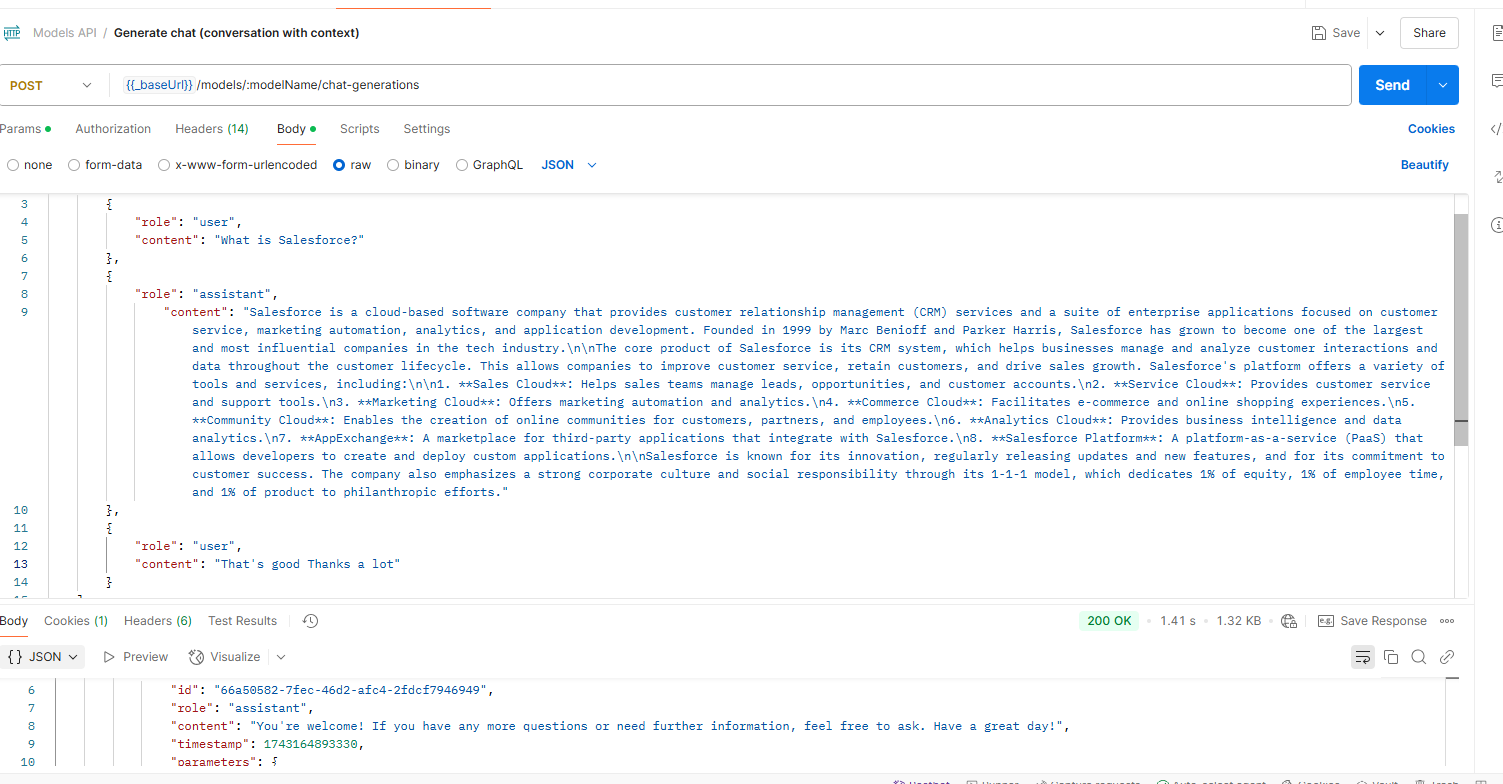
In this, you will have a conversation with the chatbot, and the model will consider the previous chat and reply accordingly.
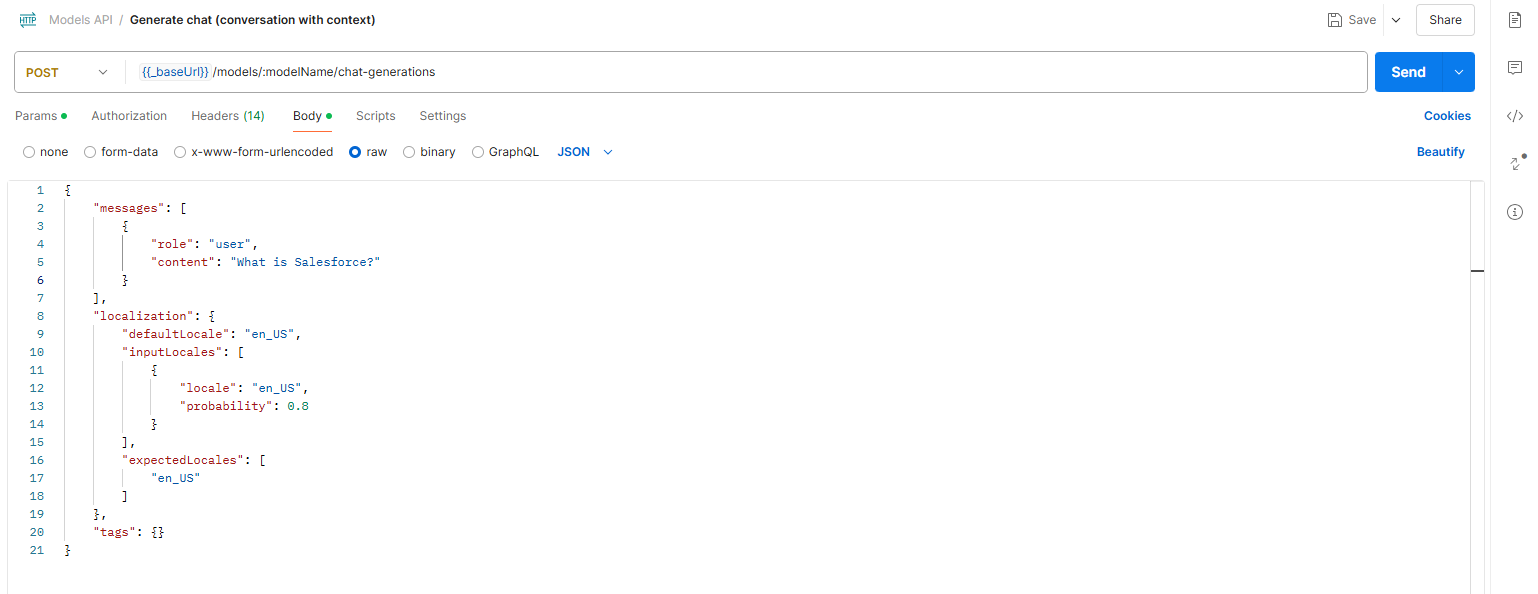
As you can see, the chatbot has replied accordingly, but this is only 1 message and its reply, so what now? Now we can use the result it gave us and add our message.
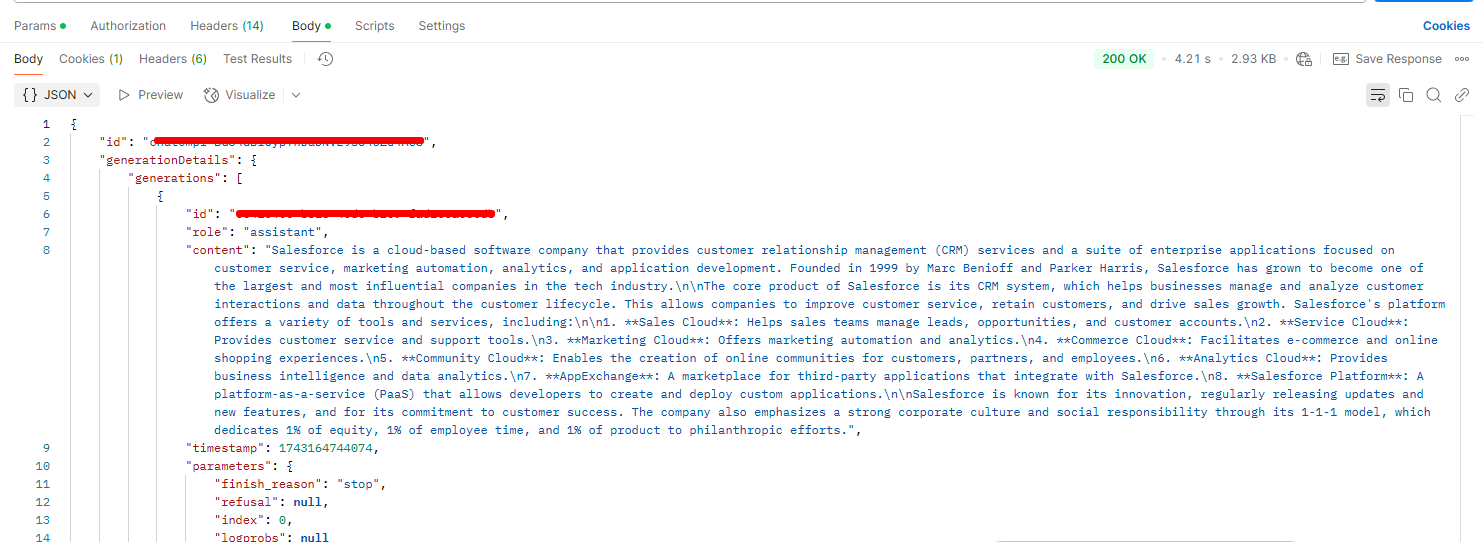
I have added the response from the assistant and gave my following message as well; now it will reply accordingly.
3. Generate embeddings
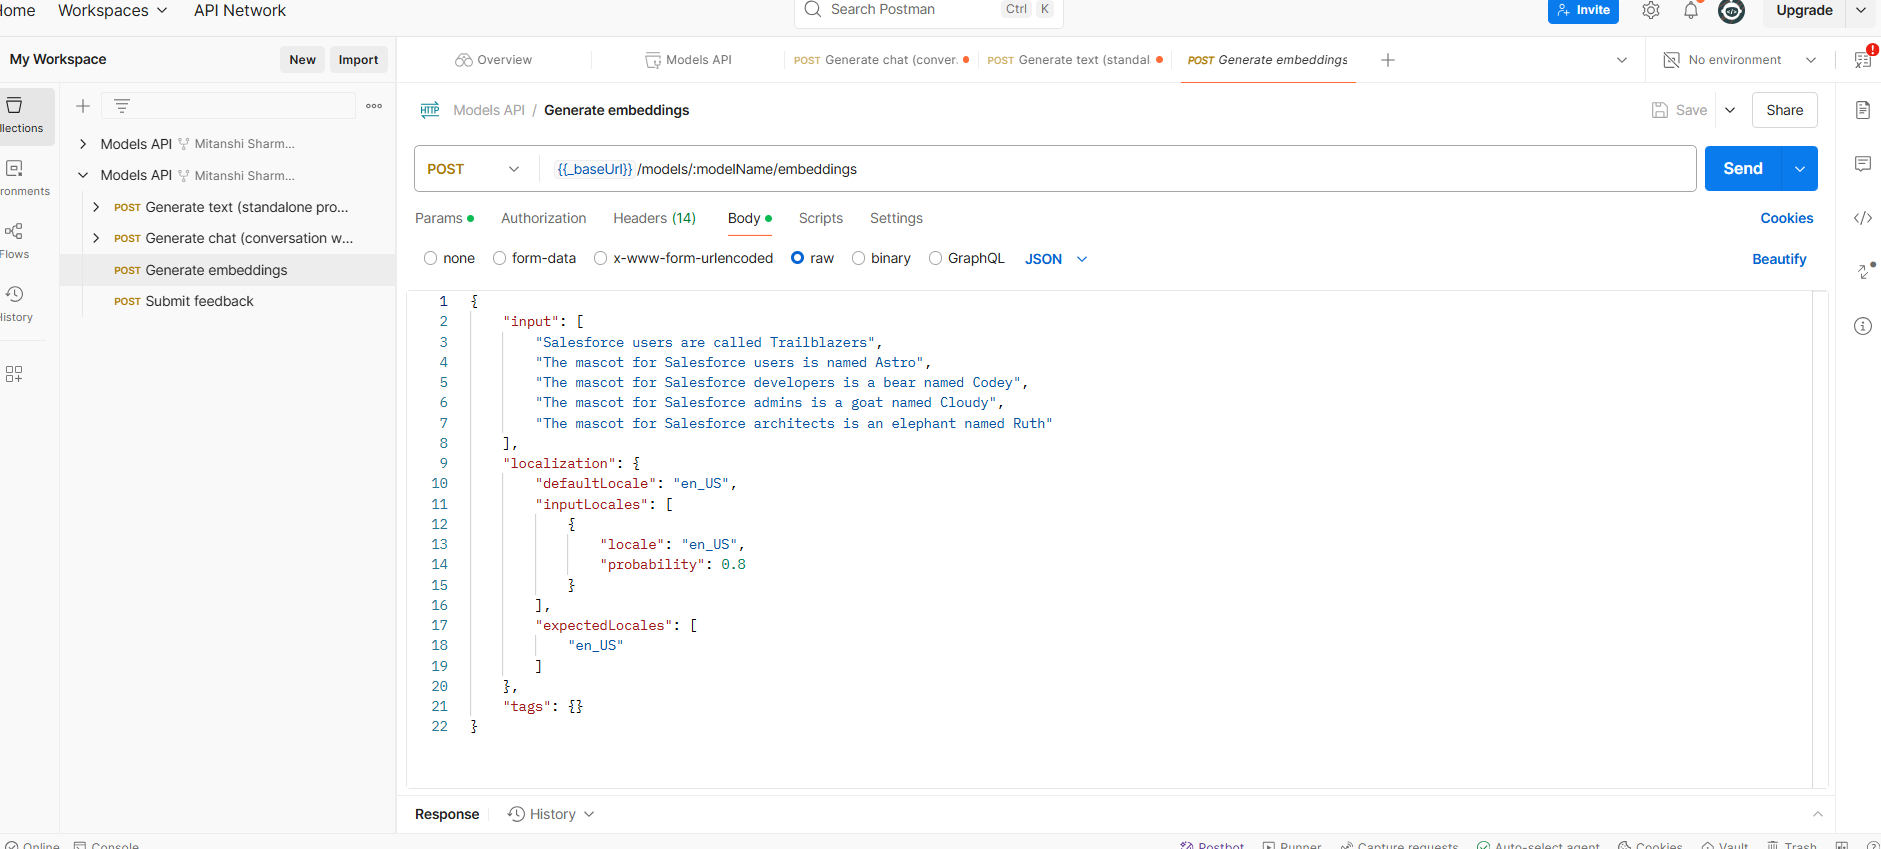
An embedding is a numerical representation of a chunk of content. Sometimes an embedding is called an embedding vector. To measure the semantic similarity between two chunks of content, you can use mathematical operations on their embedding vectors, such as cosine similarity, Euclidean distance, or dot product.
Submit Feedback
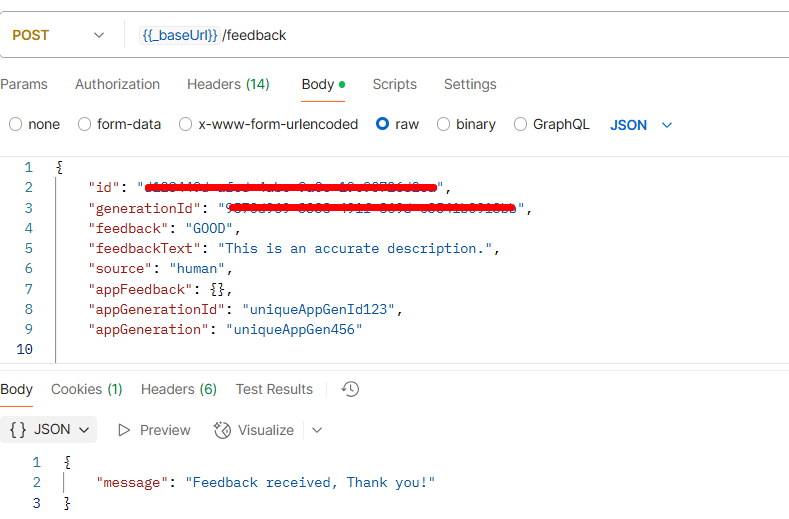
This is based on the above text or chat, we can provide feedback if the chat is good or bad.
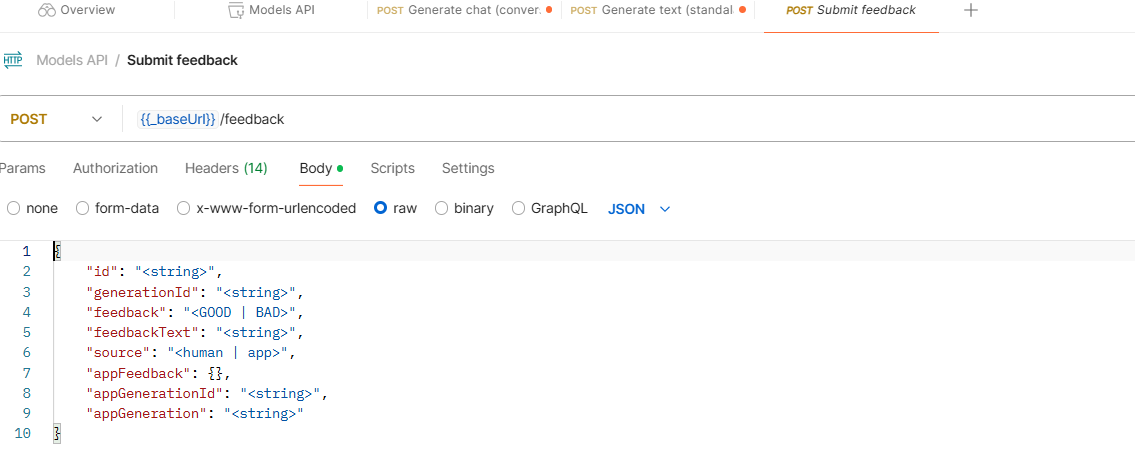
We need to fill in the following details. In this example, we will provide the selected field and the ID from the above text.
5.1 Create Apex class and Lightning component which uses the models API:
Now that we know how to use these models, we can create an intuitive UI to display the data.
For that, we need a lightning web component and an apex class.
- Create Lightning Web Component (LWC). Open your Visual Studio Code and create a project, and in that:
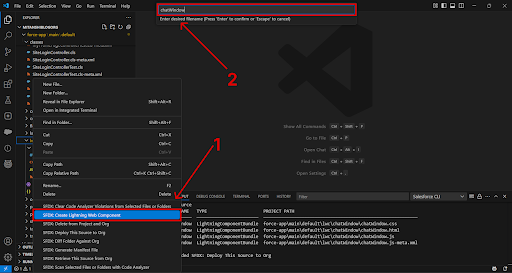
- Create Apex Class in a similar way (Apex class name callModelAPIdata and Lwc name chatWindow).
- Now copy the entire code.
- LWC
- CSS
- JS
- Apex code
Step 6: The Final Output
Now that we have put all the pieces together, we can finally see what it looks like.
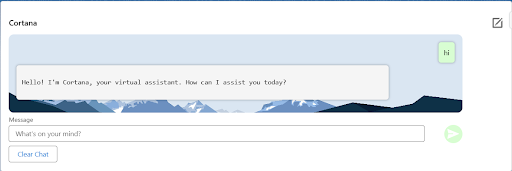
- The green bubble represents the message sent to us, while the blue bubble represents the API’s response in a conversation format.
- I have put this component on the Account record page, but you can put it on any page depending on your preference.
Demo Video
https://youtu.be/rEV3O9YcaO0