

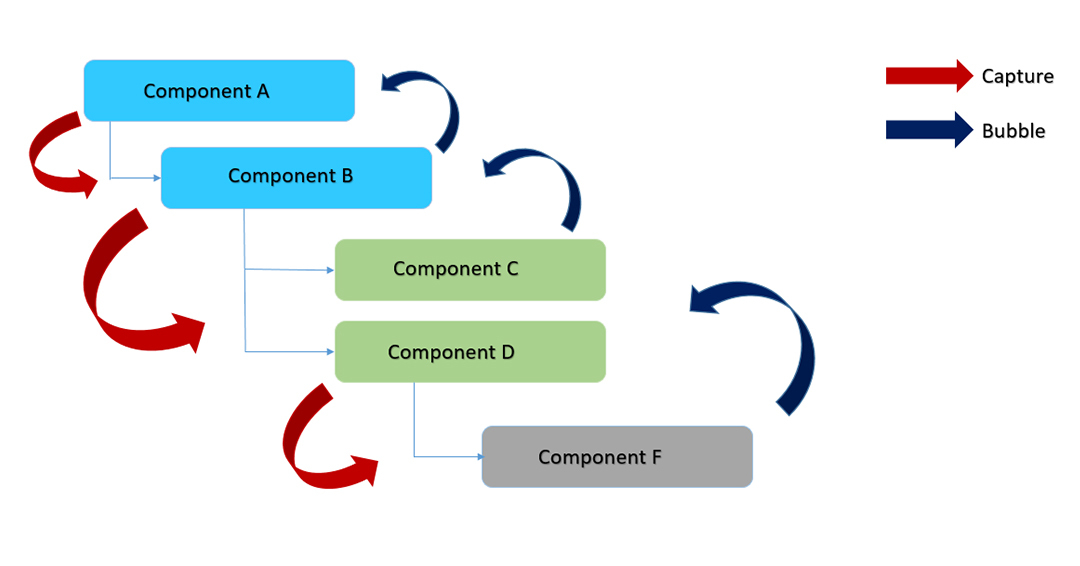
In LWC, the event that propagates up through the components(bottom to top) is the Bubble Phase, and events that propagate down through the components(top to bottom) are the Capture phase. The capture phase is rarely used in event Handling.
In the below diagram, the red arrow represents the movement of events from top to bottom through the components i.e., the Capture Phase. The Blue arrow represents the movement of events from bottom to top through the component i.e., Bubble Phase.
We’ll discuss more about the event handling in LWC through Bubble and Capture phase as we move further with the article below.
Bubbles Propagation using Bubbles and Composed
In this Article, We’ll see how the events bubble up through DOM and how they communicate within different lightning components in the DOM hierarchy.
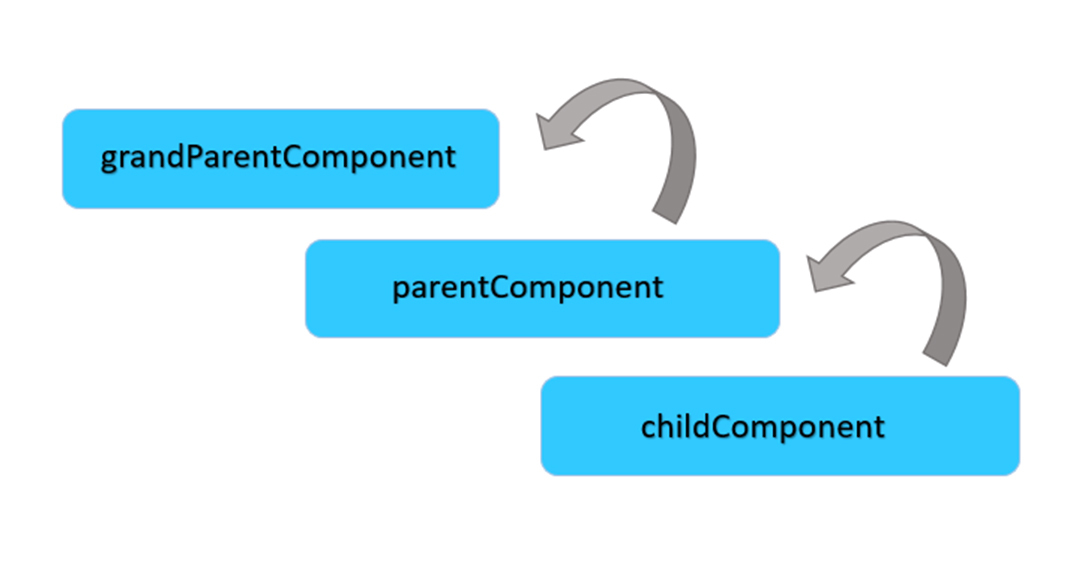
When an event bubbles up, that means the communication will happen from Child to Parent to GrandParent. The child component will be at the bottom which will dispatch the Event to the Parent and then to the Grand Parent making a tree-like structure, sending custom events up through the component tree.
To know how the bubbling works, let’s learn about the Shadow DOM first.
Shadow DOM
Every Web Component DOM is encapsulated in a Shadow DOM which isn’t visible/accessible to the other components. Shadow DOM is mainly used for encapsulation and rendering isolating components. It is not the exact representation of the DOM, instead, it adds a subtree of DOM elements into the rendering of a component without adding it into the main component’s DOM tree.
It mainly depends on the point of view if it is a Light DOM or a Shadow DOM. It is considered a Light DOM from the separate component’s point of view. Outside components can’t view/access them. And, it is considered a Shadow DOM from the point of view of its own Javascript class.
Encapsulation protects the elements from getting manipulated by HTML, CSS & JavaScript. One lightning component is not affected by the other lightning components due to the Shadow DOM.
Some key components of the Shadow DOM are:
- Encapsulation: It encapsulates the HTML, CSS, and JavaScript code within a boundary to prevent it from manipulation from the rest of the components and vice versa.
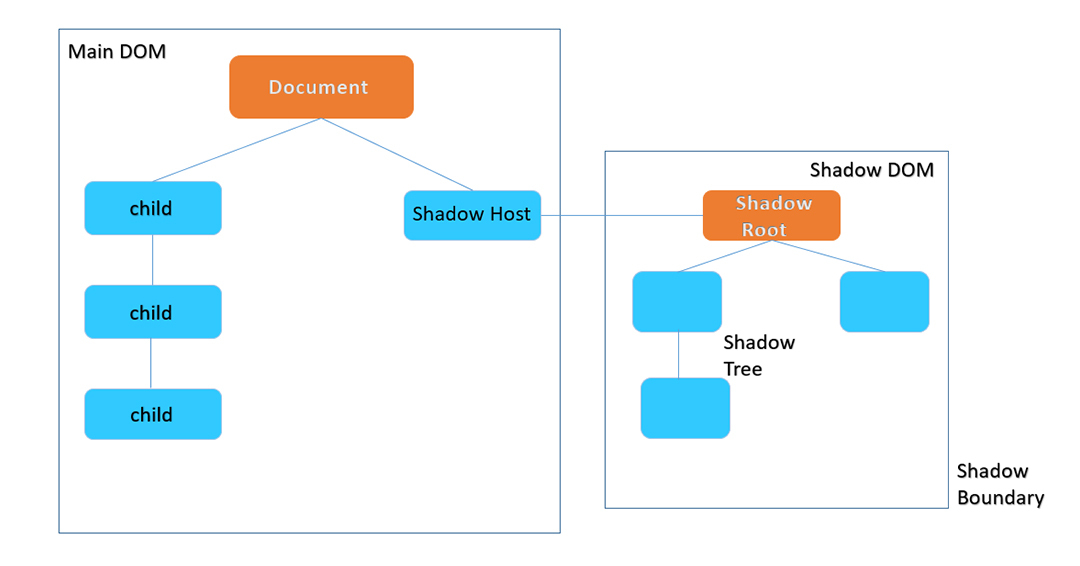
- Shadow Tree: Within the Lightning Web Components, the Shadow DOM creates a hidden DOM tree that has its own structure, behavior, and style known as a ‘shadow tree’. It is different from the main DOM tree.
- Shadow Root: It is the topmost node of the Shadow tree. It serves as a separating element for the Shadow DOM and the regular/light DOM.
- Shadow boundary: It is the line of separation between the Shadow DOM and the outer DOM. It’s where the Shadow DOM ends and the Light DOM begins. It can’t escape the CSS styles, internal structures, and behavior of a component from the outer components, hence, creating an encapsulation.
Custom Events
Let’s create custom Events that will dispatch from the child component to the Parent component followed by the Grand Parent. To create a custom event in LWC, use the ‘CustomEvent’ interface which is based on the main ‘Event’ interface.
On creating custom events, use two properties ‘bubbles’ and ‘composed’. If the ‘bubbles’ property is set to true it means the component is enabled to bubble up through the DOM which is by default the ‘bubbles; property is set to ‘false’. If the ‘composed’ property is set to ‘true’, it means the event is allowed to pass through the ‘shadow boundary’ which is also set to ‘false’ by default.
Let’s create simple three Lightning components establishing the communication between them using Custom Events & ‘bubbles’ and ‘composed’ properties.
First Component is the ‘childComponent’ which will be the lowest in the hierarchy. Second component is the ‘parentComponent’ which will be the parent of the Child Component. Third will be the ‘grandParentComponent’ which will be the GrandParent to the Child component but Parent to the Parent Component.
Let’s follow the steps to implement this.
Condition 1: {bubbles: true, composed: true}
Step1: Create an LWC component of the name ‘childComponent’.
childComponent.html
Here, we’ve added a button and defined an onclick event.
Step 2:
childComponent.js
Here, we’re dispatching a custom event ‘buttonclick’ and setting the properties ‘bubbles’ and ‘composed’ to true. This means this custom event is now enabled to bubble up through the tree and is allowed to cross the shadow boundary as well. The ‘detail’ property is now accessible to the topmost LWC Component, i.e., grandParentComponent.
Step 3:
parentComponent.html
Step 4:
grandParentComponent.html
Step 5:
grandParentComponent.js
Step 6: Set the target where you want to add this component. Add the grand Parent Component to the Home Page or your selected target.
grandParentComponent.js-meta.xml
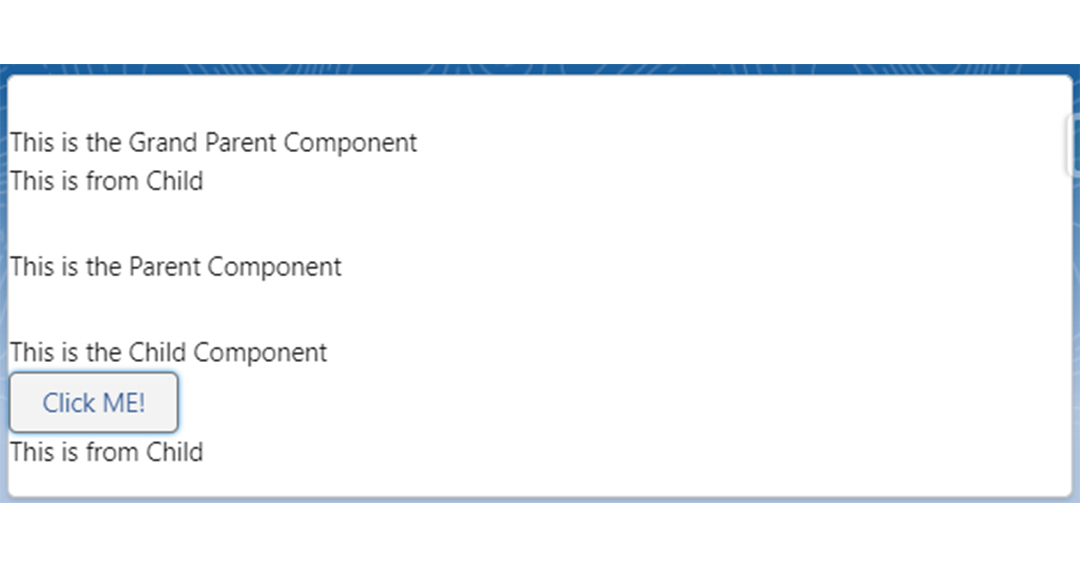
Step 7: These are the results! As soon as you click the button, the value of ‘messageFromChild’ will appear on the GrandParent component i.e., ‘This is from Child’ which came from the child Component following these steps!
Condition 2: {bubbles: true, composed: false}
The event bubbles up through the DOM, but doesn’t cross the shadow boundary. Let’s see this through the following example considering the same three components:
Step1: Create an LWC component of the name ‘childComponent’.
childComponent.html
Step 2:
childComponent.js
Step 3:
parentComponent.html
Step 4:
parentComponent.js
Step 5:
grandParentComponent.html
grandParentComponent.js
Step 6: Set the target where you want to add this component. Add the grand Parent Component to the Home Page or your selected target.
grandParentComponent.js-meta.xml
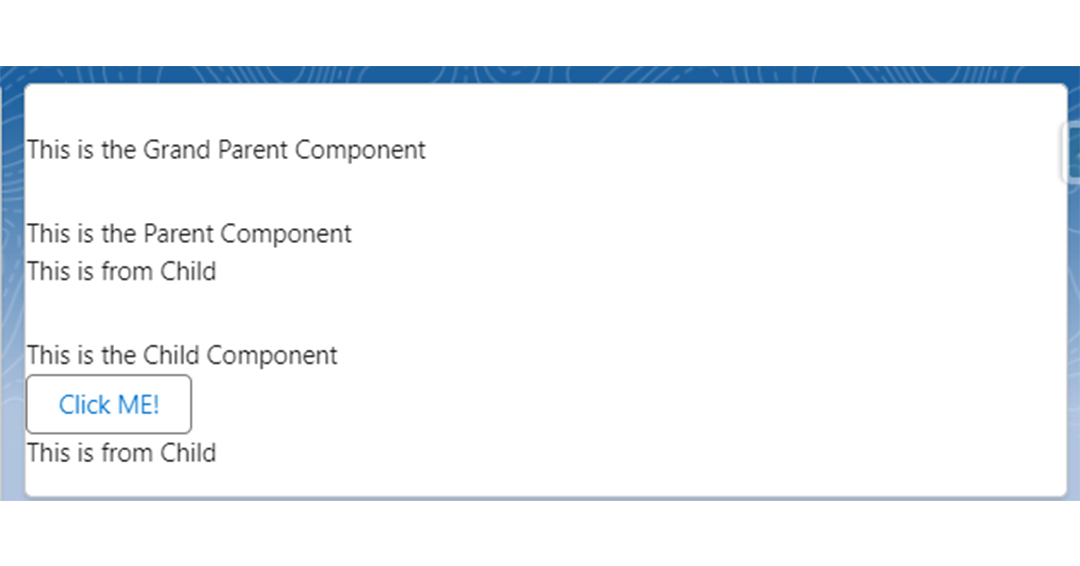
Step 7: See the Results! When you click on the button, It dispatches the ‘buttonclick’ event from the child Component where bubbles are set to ‘true’ and composed is set to ‘false’. The Parent component listens to the Event and the Message from the Child Component i.e., ‘This is from Child’ is only propagated to the Parent Component and doesn’t Propagate to the GrandParent because it won’t leave the shadow DOM. Shadow DOM prevents the event from crossing the shadow boundary.
ChildComponent creates a Shadow DOM of itself which creates a shadow boundary between the Shadow DOM and Actual DOM, which will not be crossed by the event as composed in set to ‘false’ here.
Condition 3: {bubbles: false, composed: false}
This is the default configuration. The custom event will propagate according to its true nature. A custom event will dispatch from the child component and propagate to the Parent component. The event won’t bubble up through the DOM or cross the shadow boundary.
This propagation is best recommended as it is the least disruptive condition.
Condition 4: {bubbles: false, composed: true}
This condition is not applicable in Lightning Web Components.
Event Handling in LWC Through Capture Phase
In the Capture Phase, an event moves from top to bottom of the DOM hierarchy.
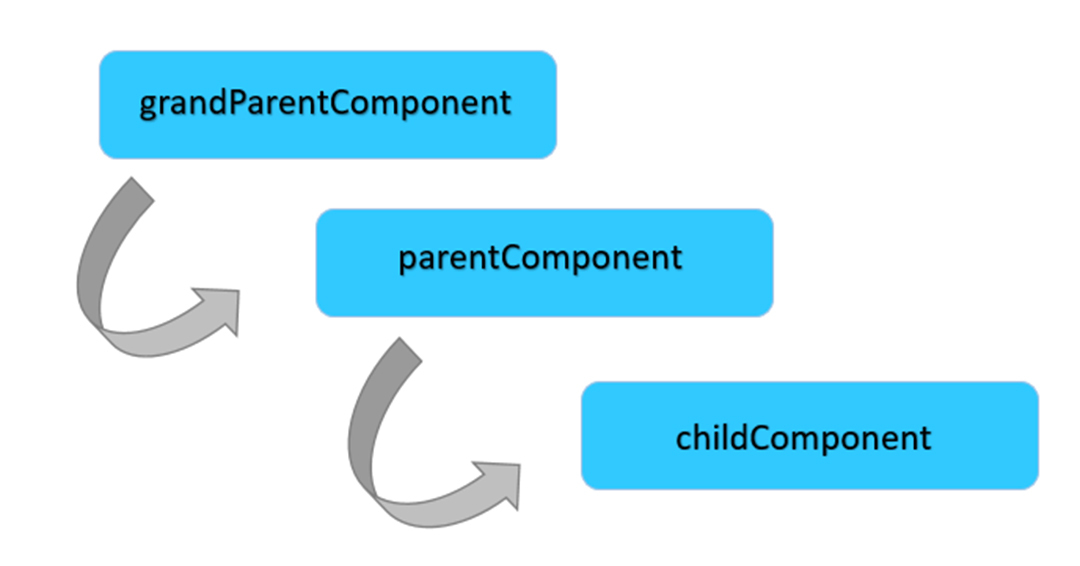
Here, we’ll again consider three LWC components, childComponentCapturing, parentComponentCapturing, and grandParentComponentCapturing. Let’s follow these steps to understand the Capture Phase better!
Step 1:
In the child component, we’ll dispatch a custom event.
childComponentCapturing.html
Step 2:
In the child component’s js file, we’re setting ‘bubbles’ and ‘composed’ properties to true because here, we’re going to capture the ‘detail’ property in the GrandParent component.
childComponentCapturing.js
Step 3:
Let’s see how to capture the ‘detail’ property into the GrandParent component. The ‘parentComponentCapturing’ will only serve as a middle component here.
parentComponentCapturing.html
Step 4:
grandParentComponentCapturing.html
Step 5:
grandParentComponentCapturing.js
In the js code of GrandParent, we’ll capture the ‘detail’ property of the ‘buttonclick’ event dispatched by the child component. For this, the primary method to capture events is by setting the third argument of the ‘addEventListener’ as ‘true’. AddEventListner is the recommended way to manage event listeners and phases. By this, it indicates that we’re capturing events during its capture phase as it moves from the top to bottom in the DOM hierarchy. It is necessary when we want the topmost component(Here, GrandParent) to capture the event dispatched by the bottommost component(Here, Child).
this.template.addEventListener(‘buttonclick’, this.handleButtonClick.bind(this), true);
Step 6:
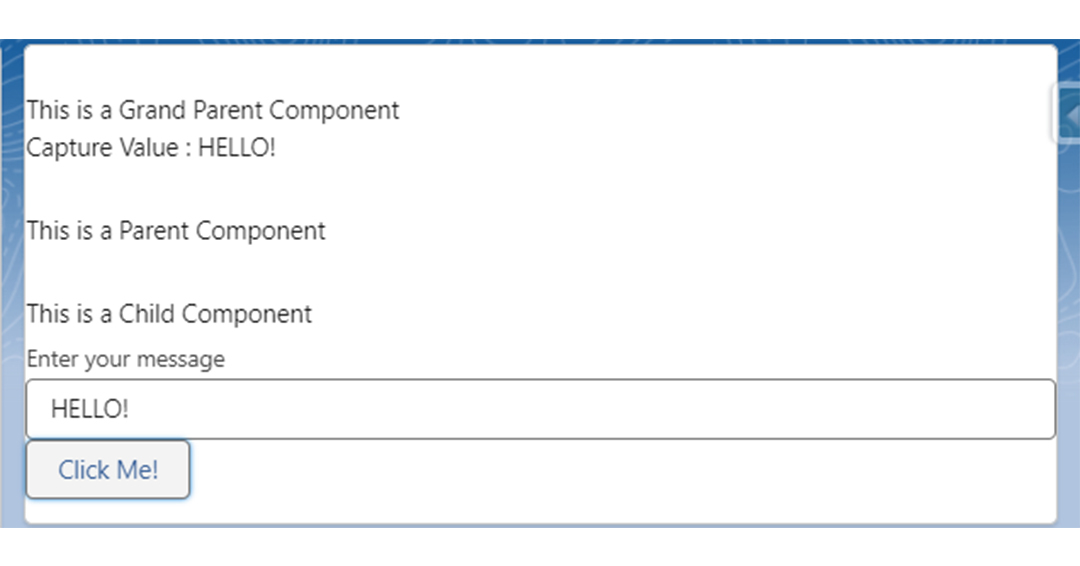
As a Result, ‘The Capture value :’ will print anything you write in the input box of the child component. Event Capturing only works for top to bottom event propagation in LWC through DOM.
Conclusion
So, here it is, our strategic guide to ‘Event Handling in LWC through Bubble and Capture Phase’.
Please check out this link hicdemo-dev-ed.my.salesforce-sites.com/bubbleAndCapturePage to try out in Real time.
Check the checkboxes to set bubbles and composed properties to ‘true’ and try out the results for the Bubble and Capture phase.
Try out the solution and share your experience with us. Also, stay hooked to our blogs for more interesting Salesforce development solutions. Catch you on the next one. Happy Learning!.





