

Salesforce Platform events provide a means to integrate business operations with external sources by exchanging real-time event data. It offers a secure and scalable solution, allowing you to customize event data by defining fields.
Salesforce’s enterprise communication platform is built on an event-driven architecture, which enables apps to communicate seamlessly within and outside of Salesforce.
Think of a platform event as a custom object that is exclusively used for external services to connect with Salesforce. For instance, if a system uploads data to a Salesforce endpoint, you can either write lengthy code to continuously retrieve and process data, or you can wait for the data to be posted, triggering an event that automatically executes the next steps.
So, in this blog today, we will demonstrate how to create a platform event trigger flow that will be triggered when any Salesforce platform event is published.
Steps to Create a Salesforce Platform Event
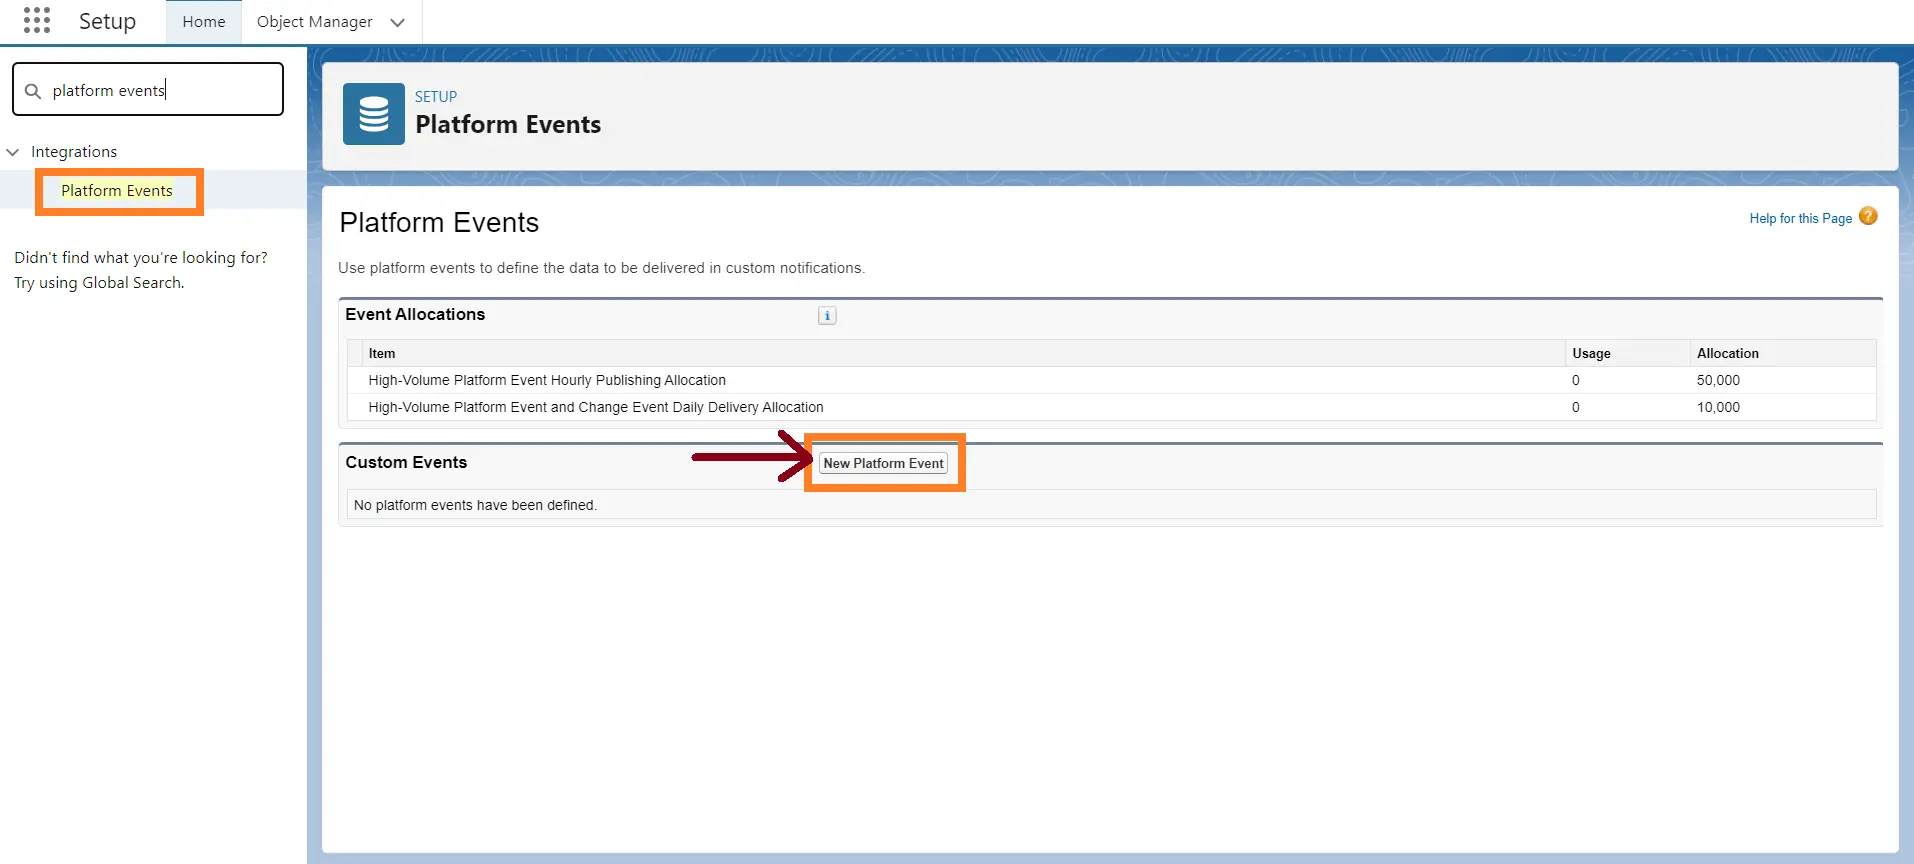
Step 1. Go to the SF org and in the setup
Quick Find Box → Platform Events → New Platform Event
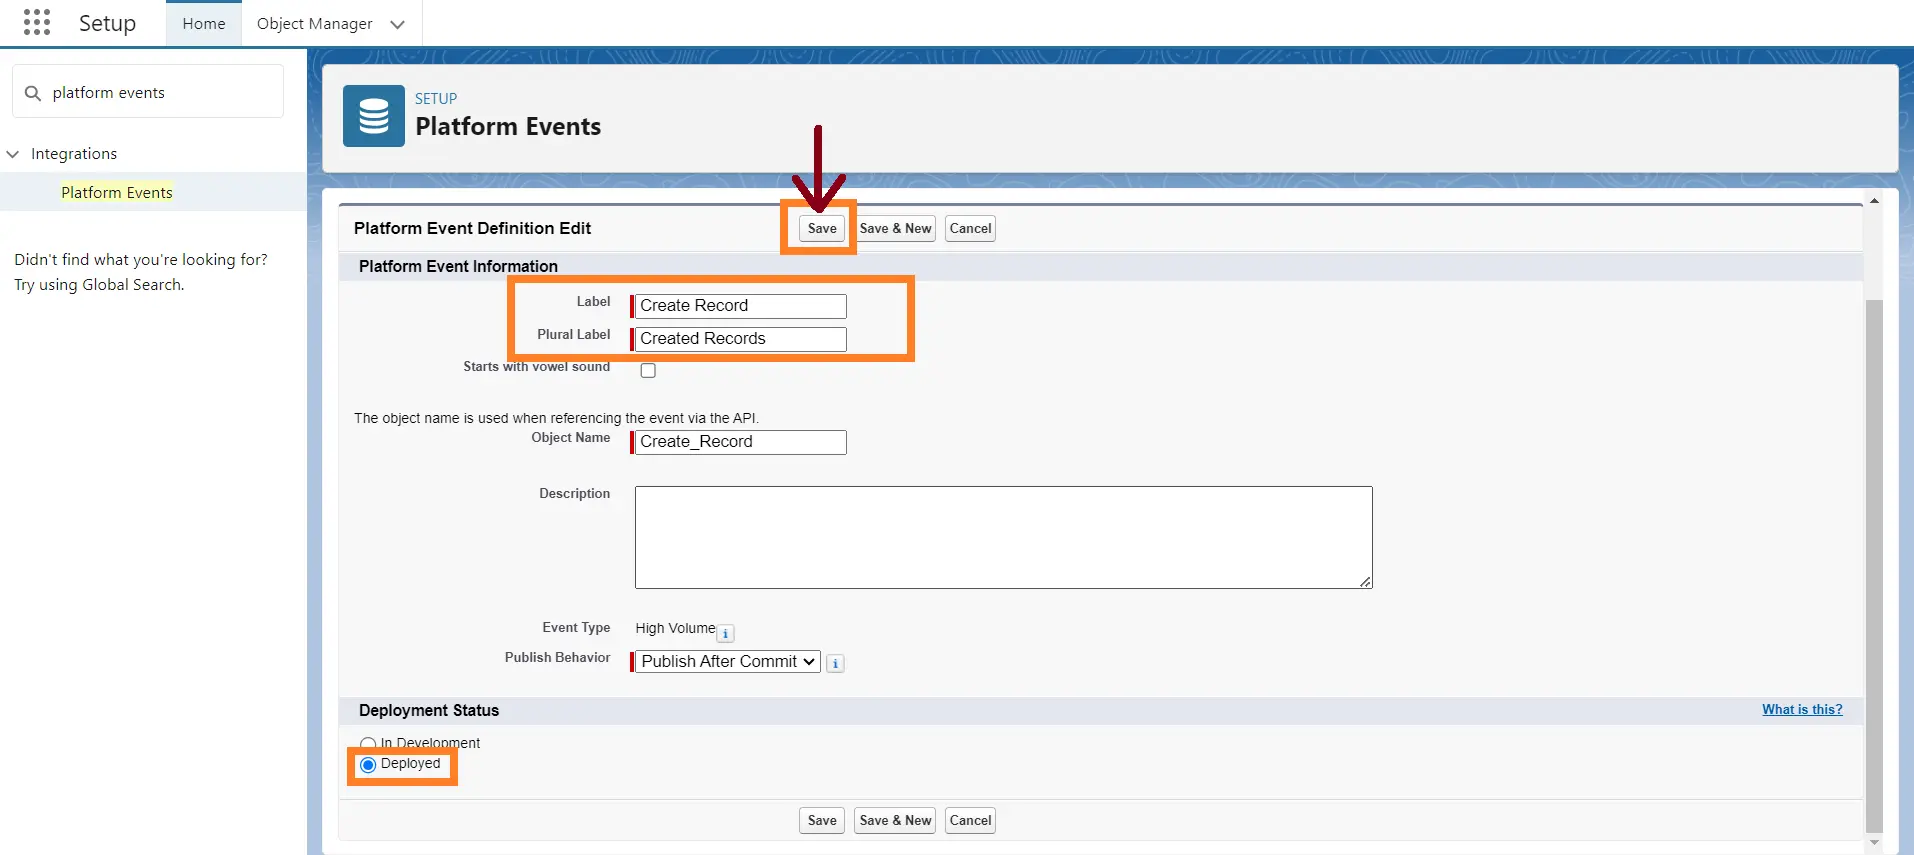
Step 2. New Platform Event → Fill in the Required detail
Make sure the Deployed Checkbox is checked.
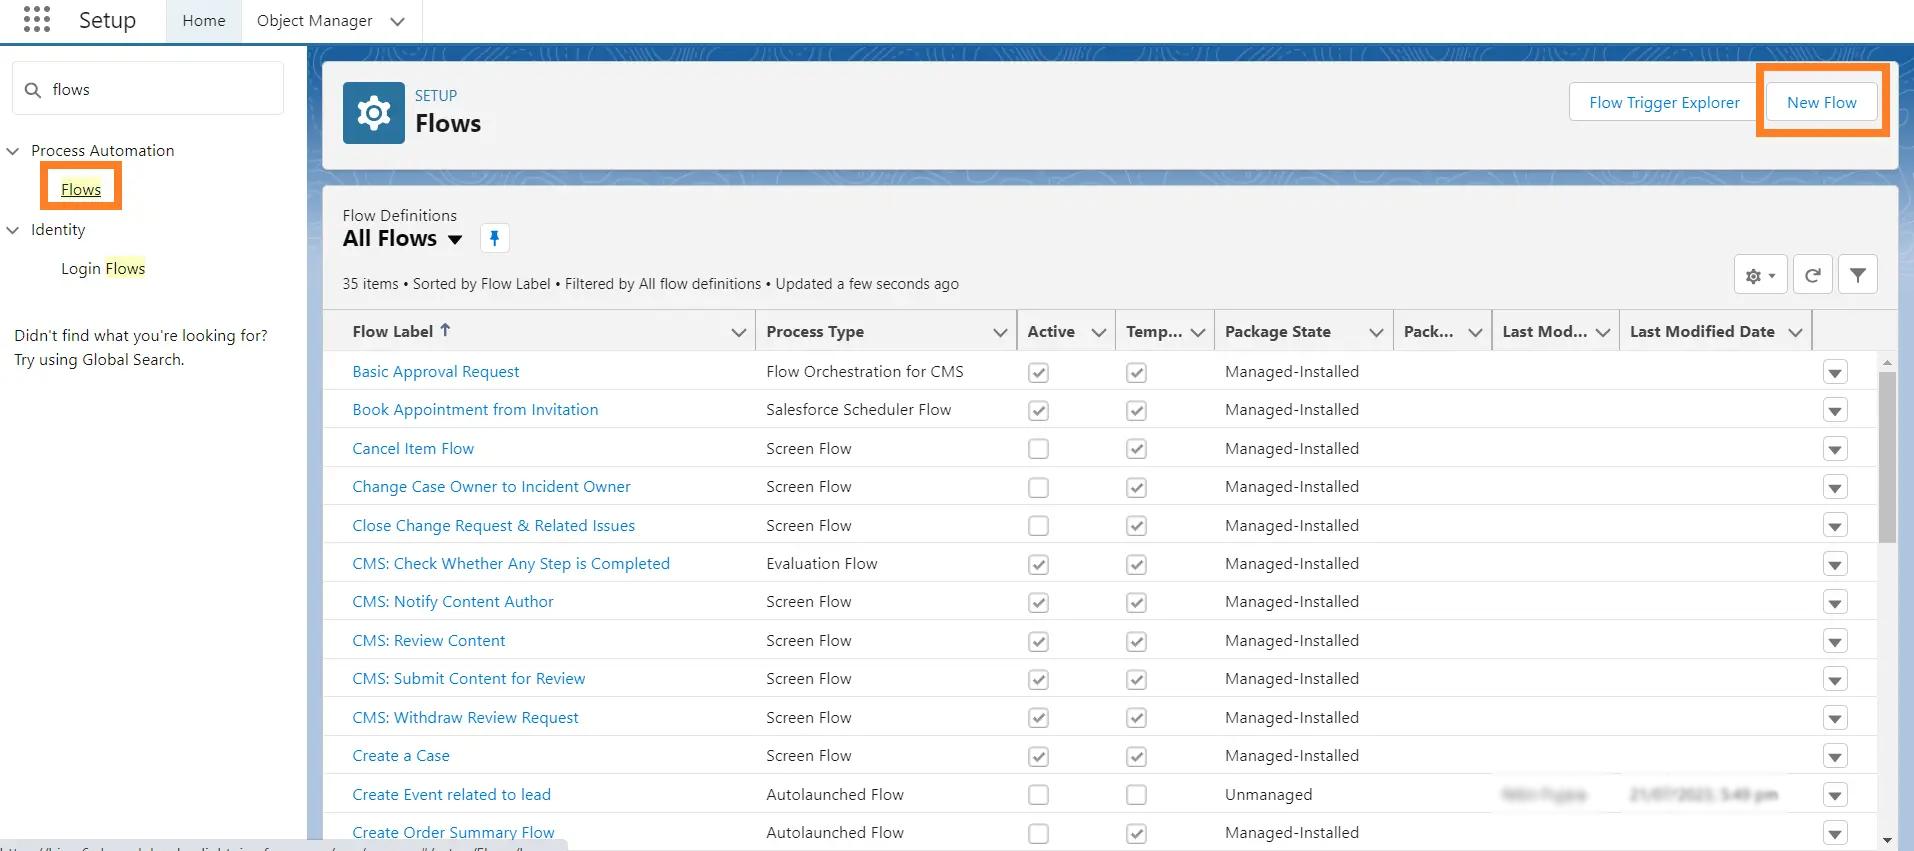
Step 3. Create a flow
Setup → Quick Find Box → Flows → New Flow
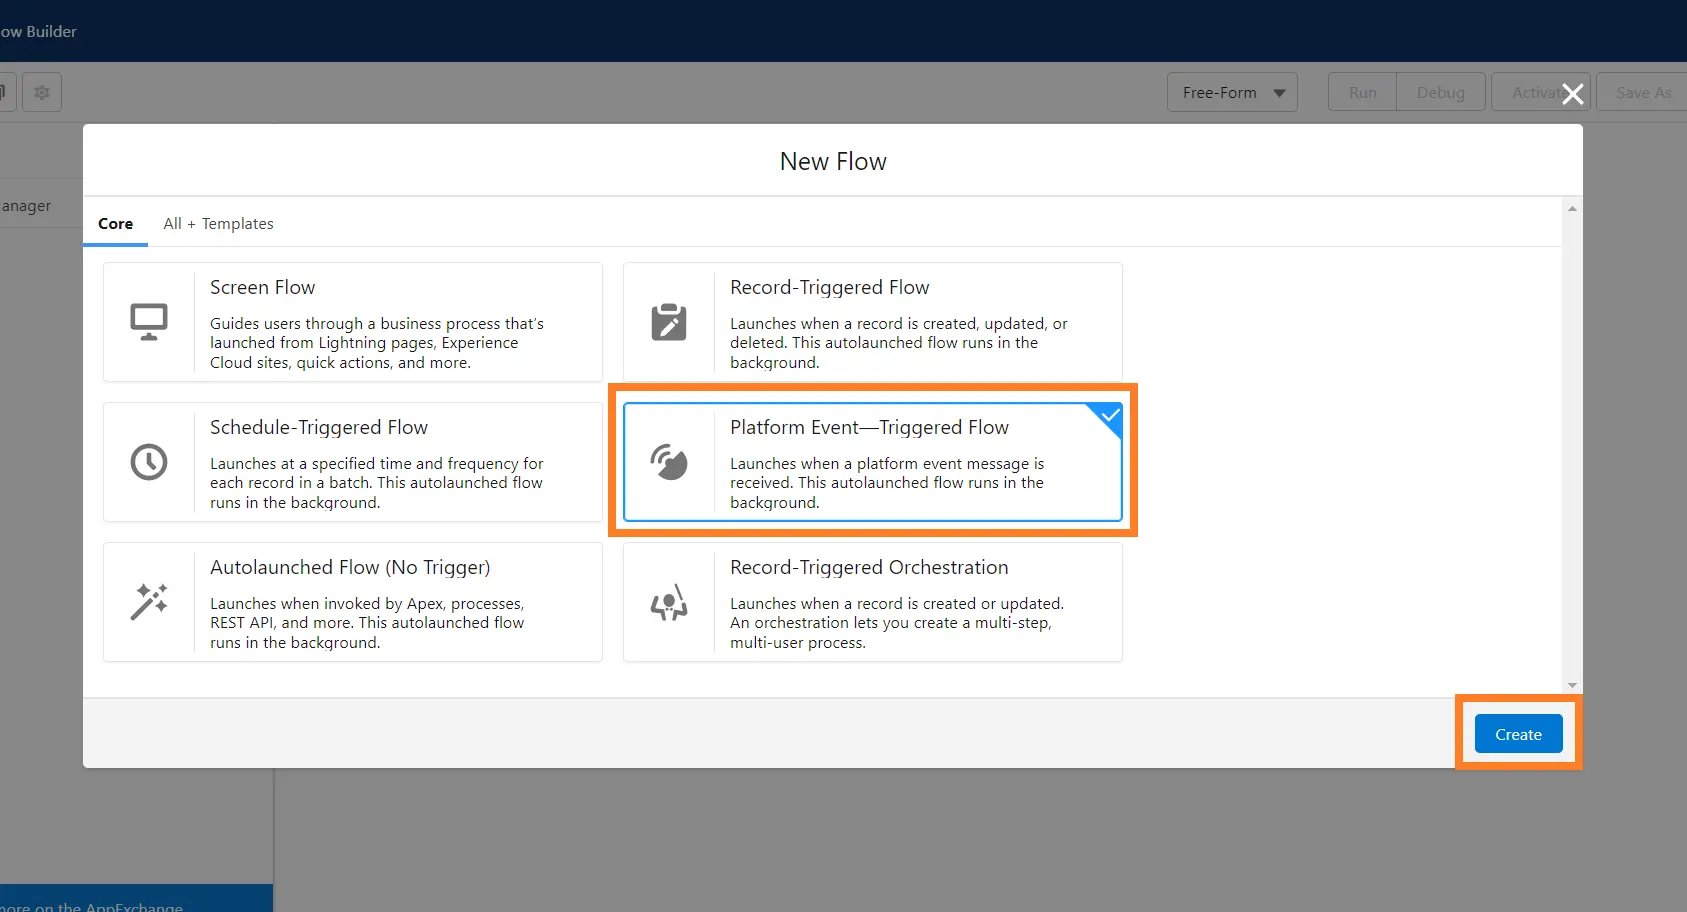
Step 4. New Flow → Platform Event Triggered Flow
Step 5. Choose the Platform Event That you created in Steps 1 & 2. and click on Done.
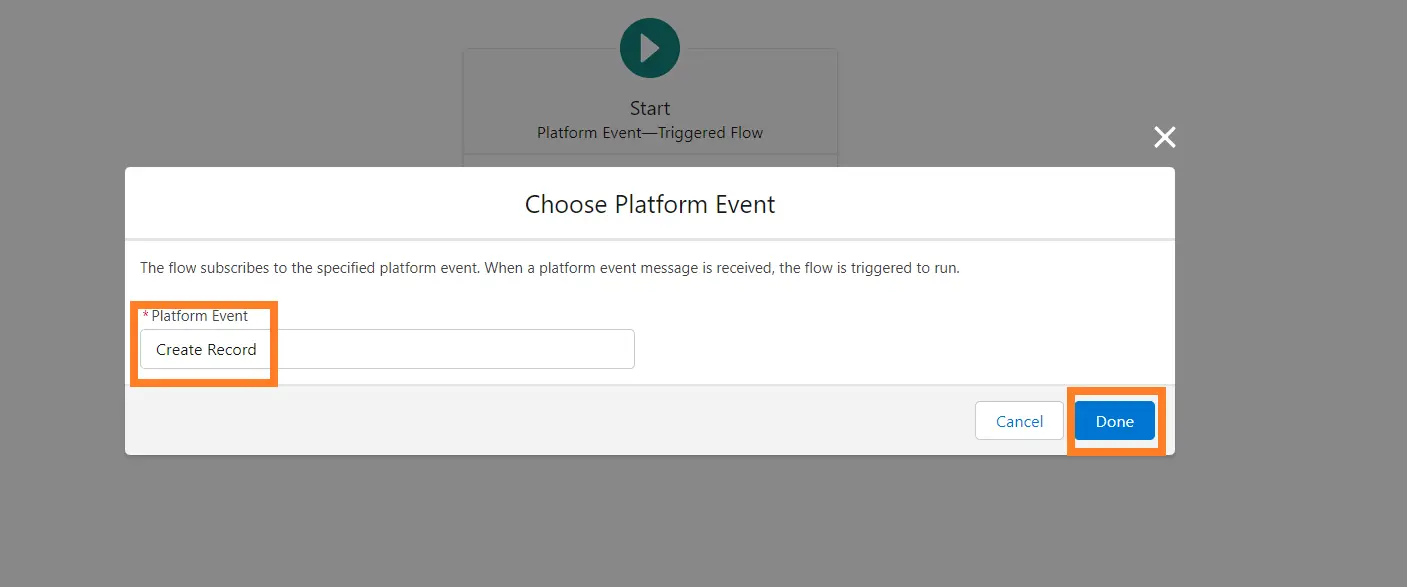
Step 6. Next, Click on + sign select the Action element, and Select Contact from the right side in the Action input text select “New Contact” and provide the Label & API_Name.
and fill in the required details which you need in the contact information.
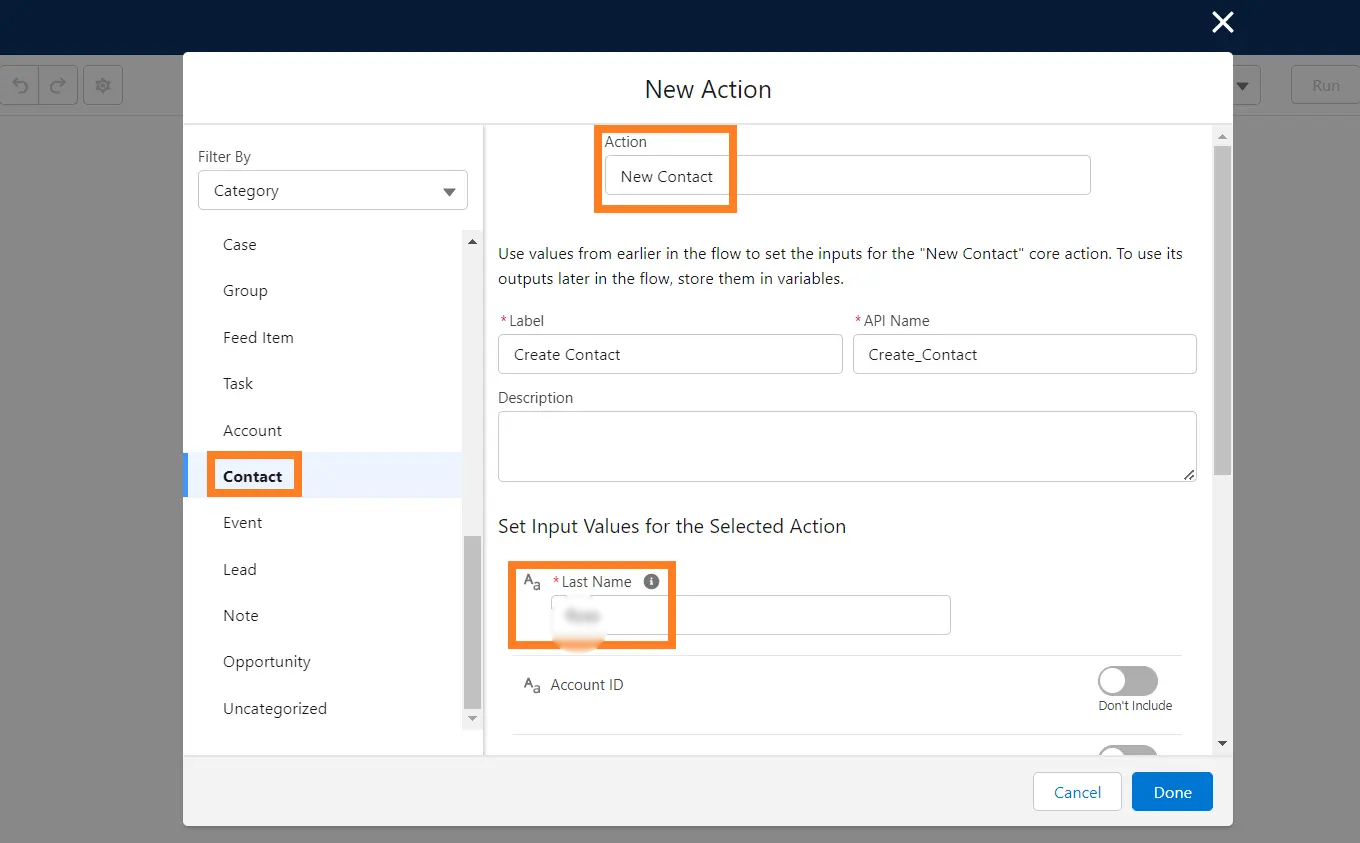
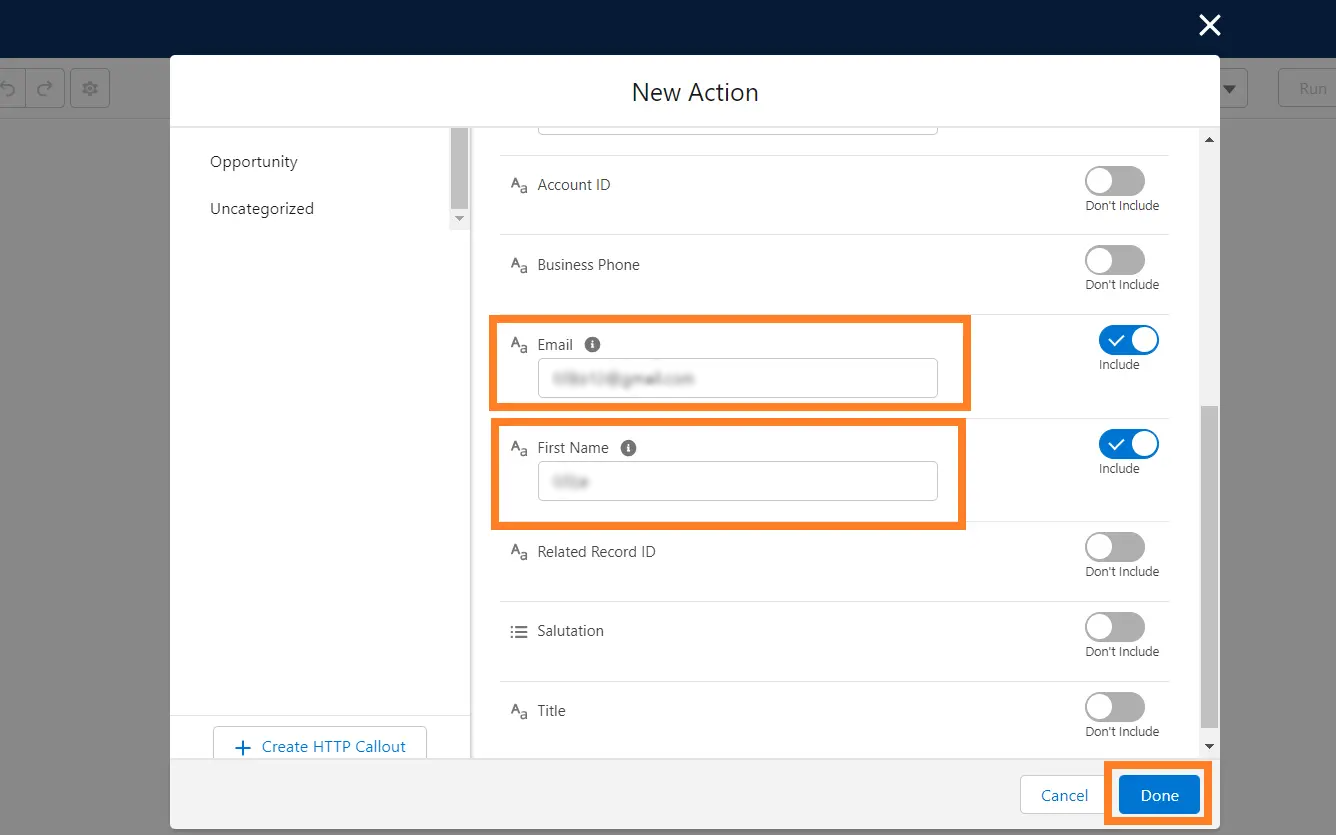
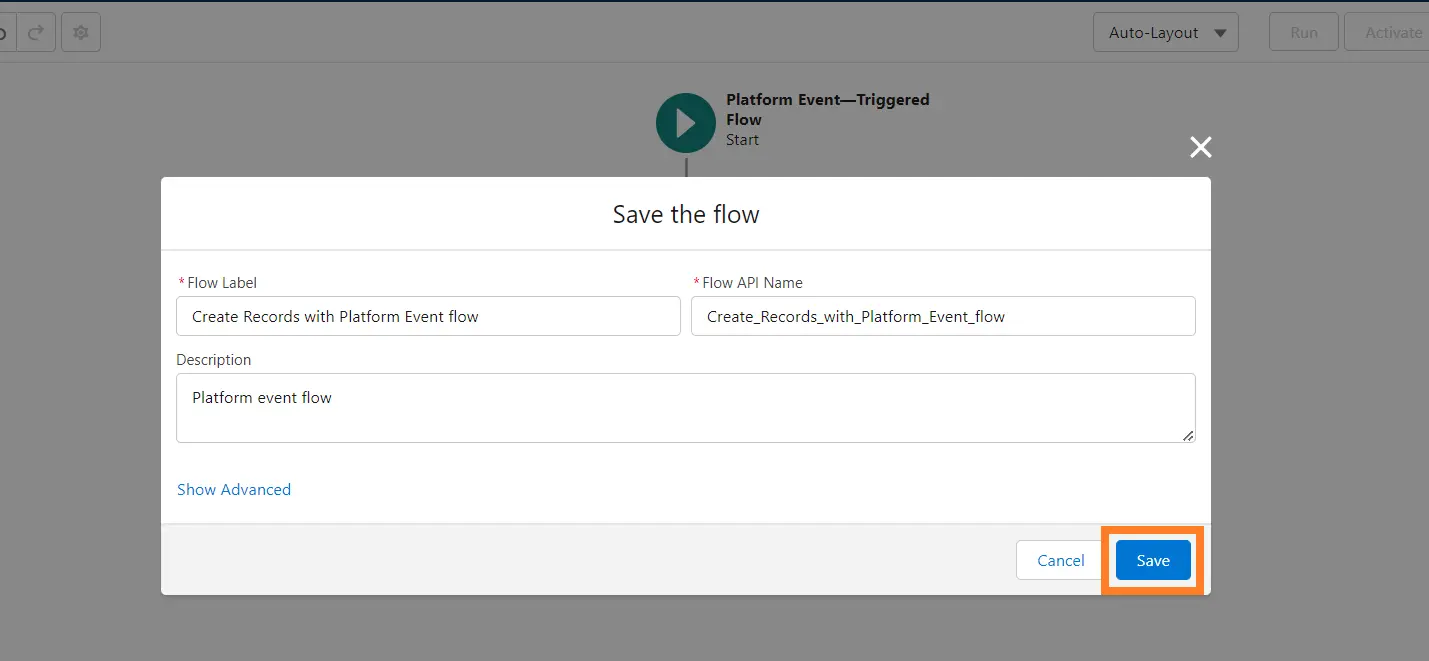
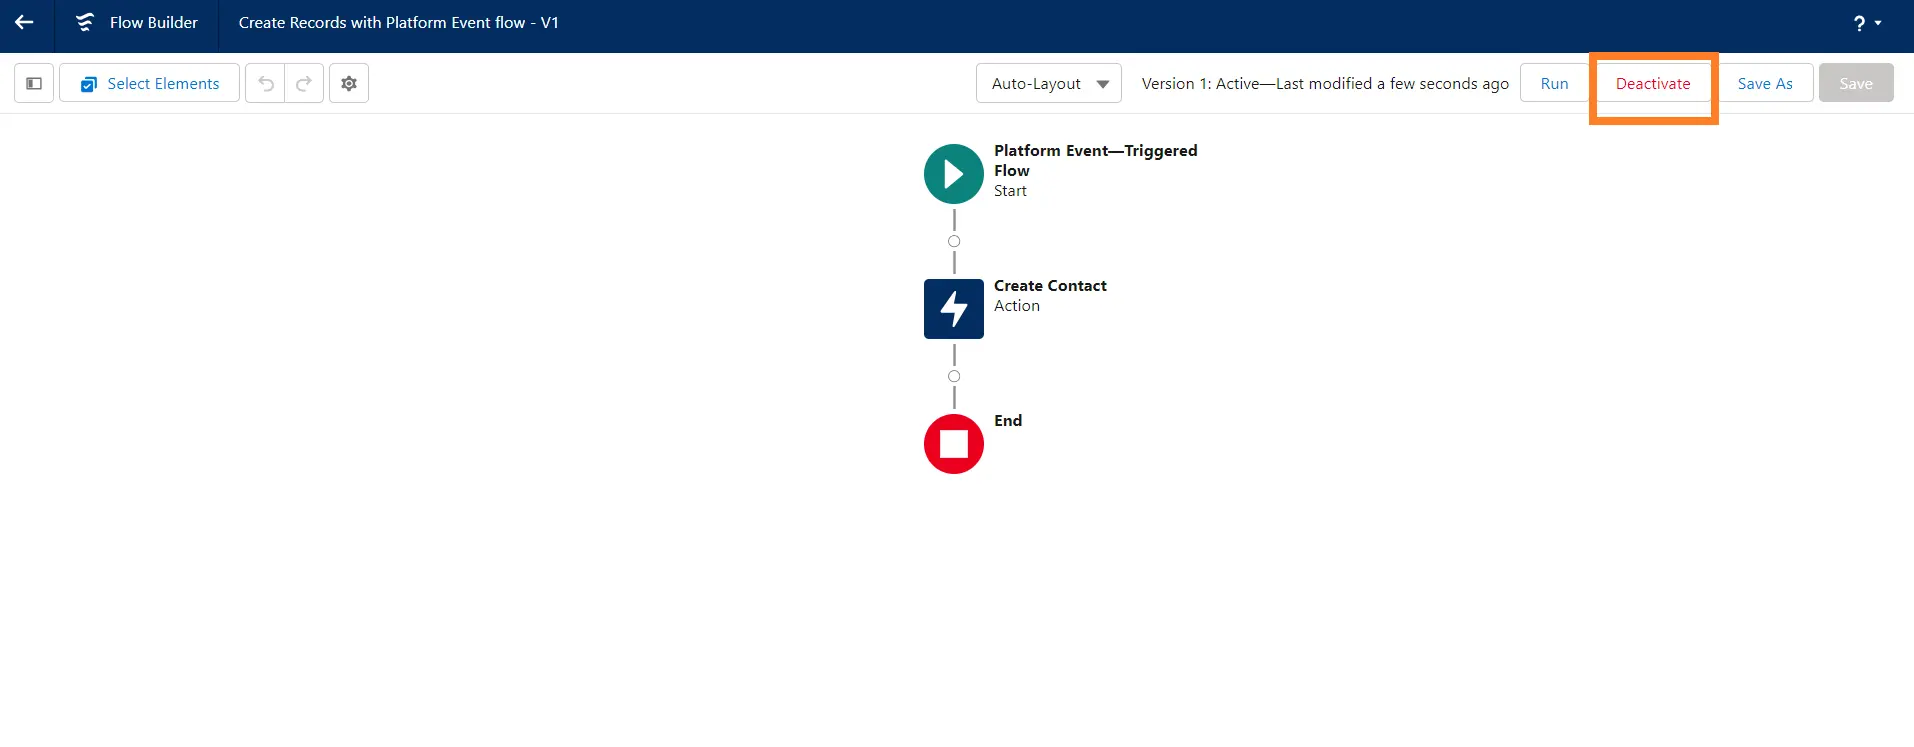
Step 7. Save the Flow and Activate it.
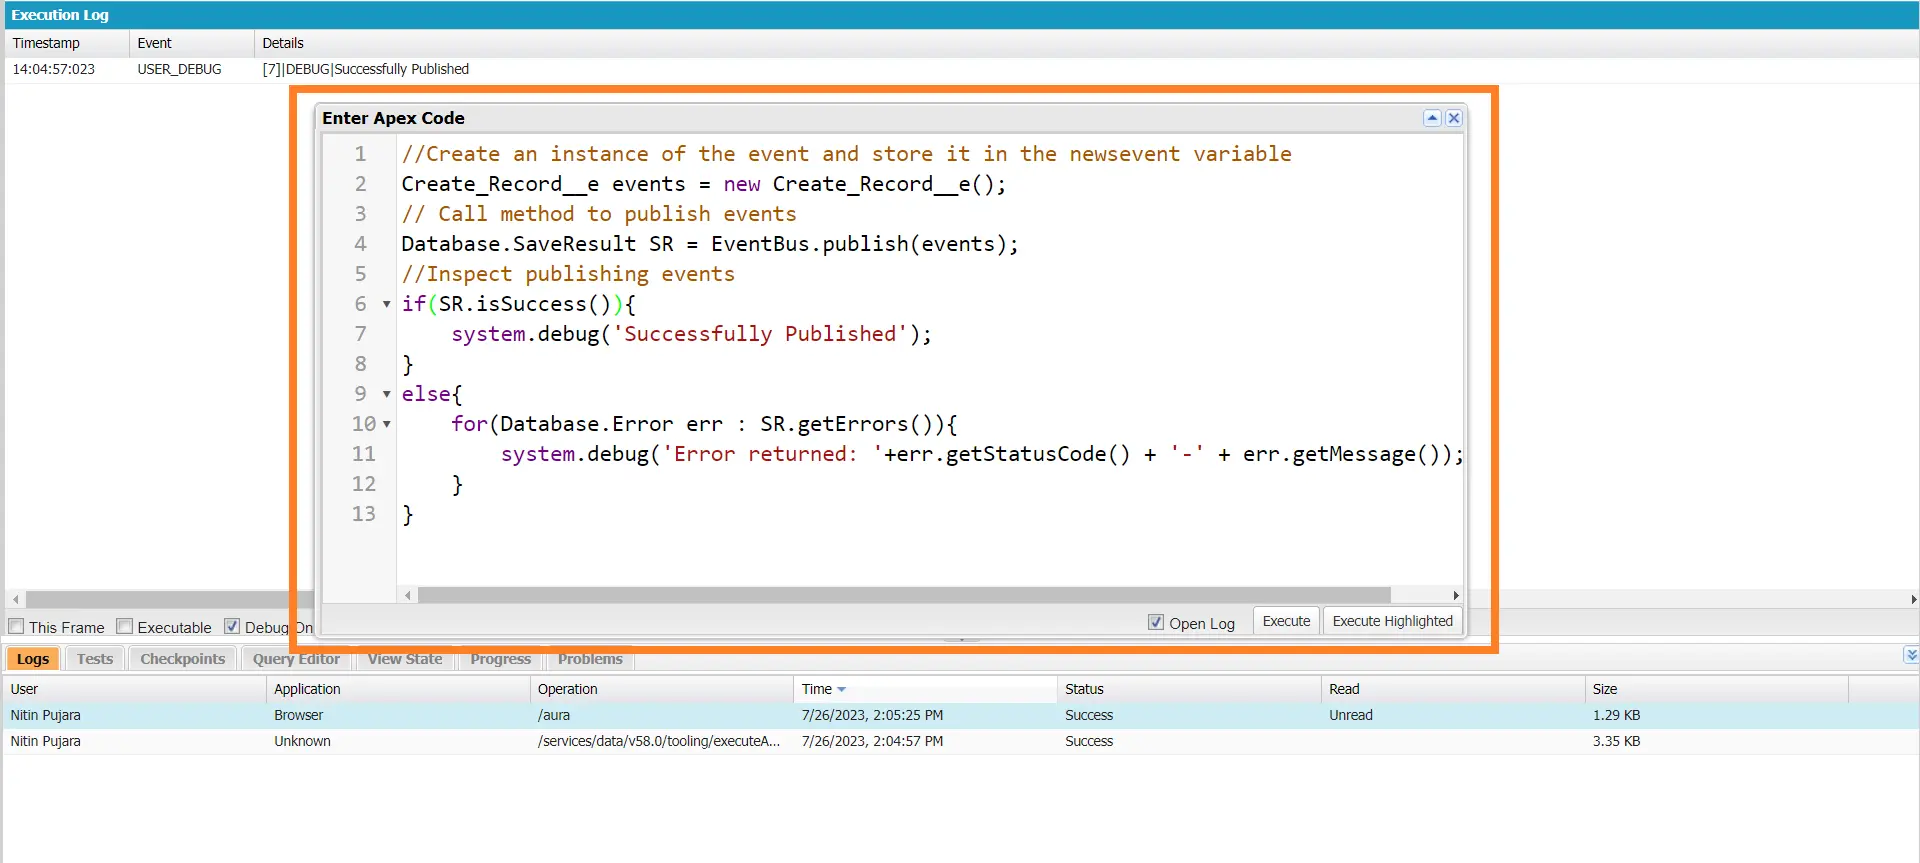
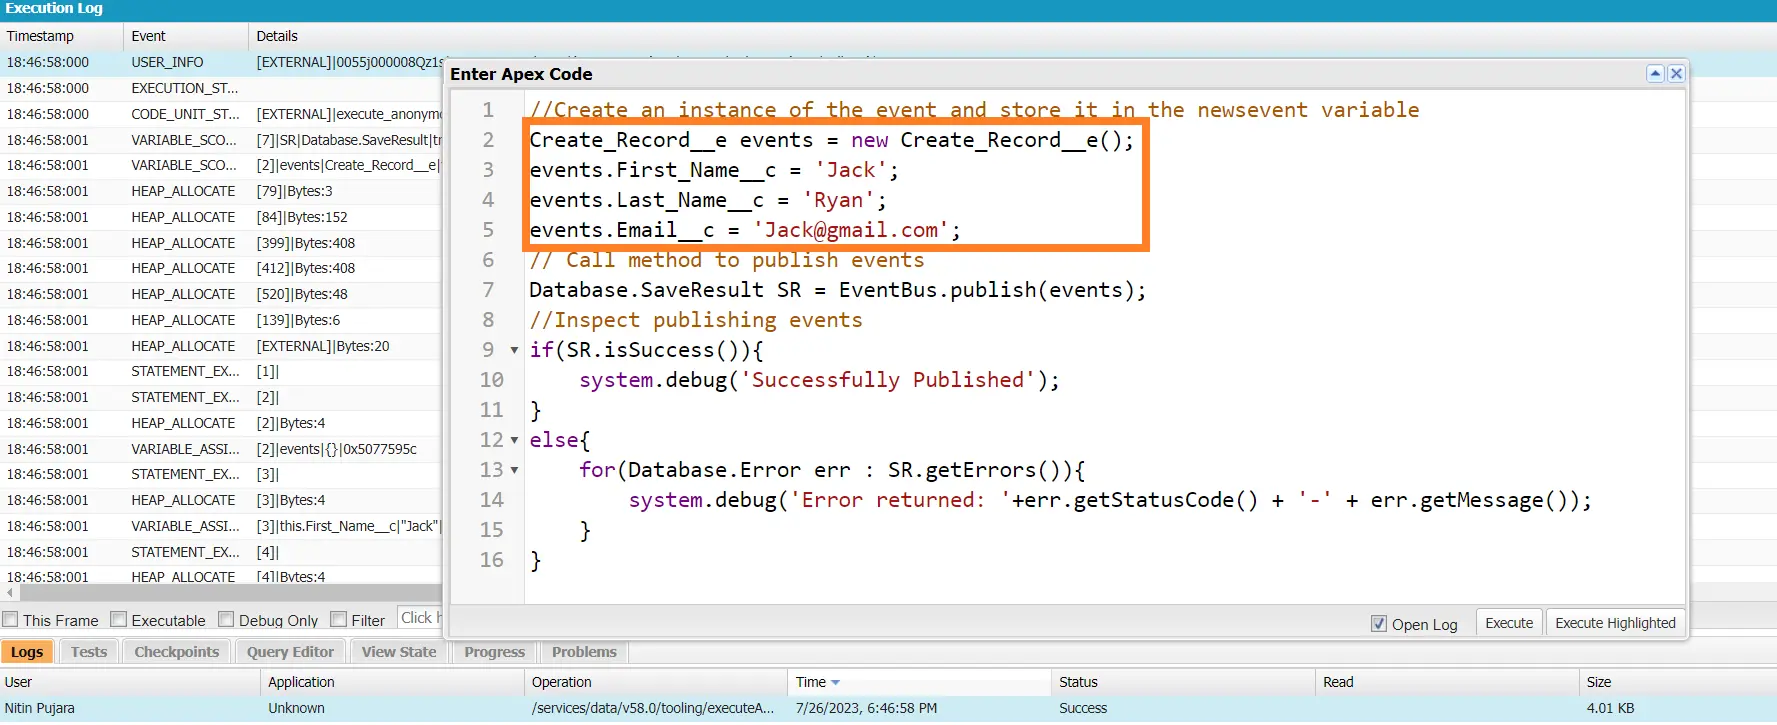
Step 8. Now open the Developer Console and Execute it from the Anonymous window by writing the below code. where “Create_Record__e” is the API name of the Platform Event that you created in Steps 1 & 2.
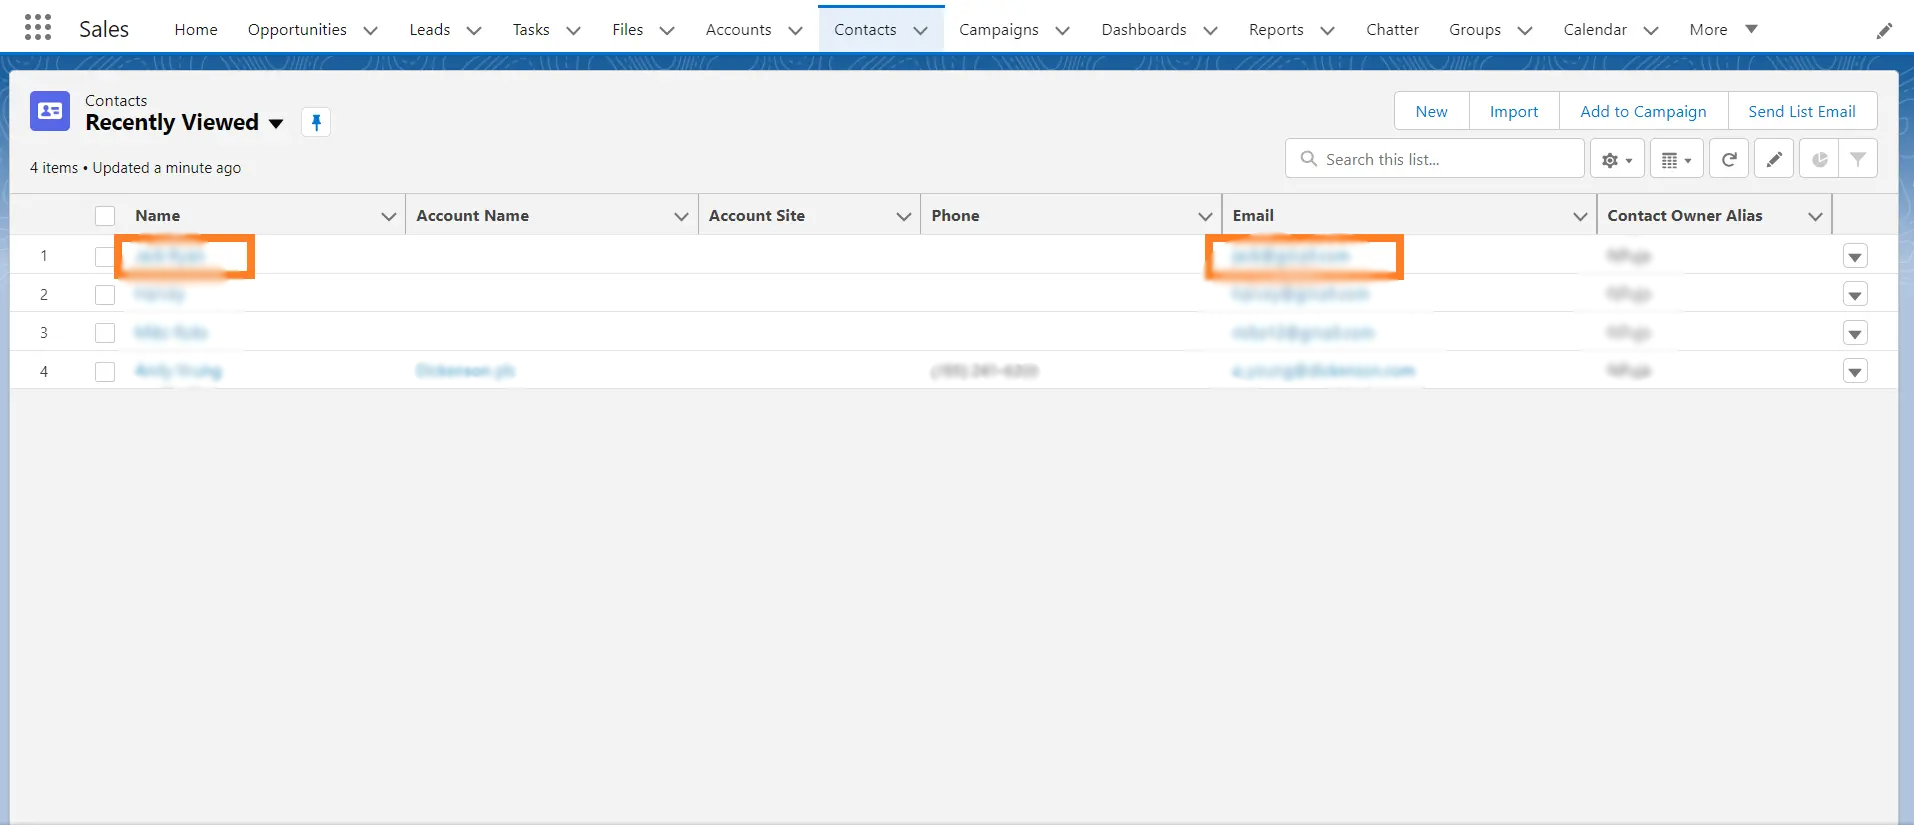
Step 9. Now Check the Contact Screen and there you will see one contact has been created in the Records with the name which you have given in the “Action Element” in the Flow.
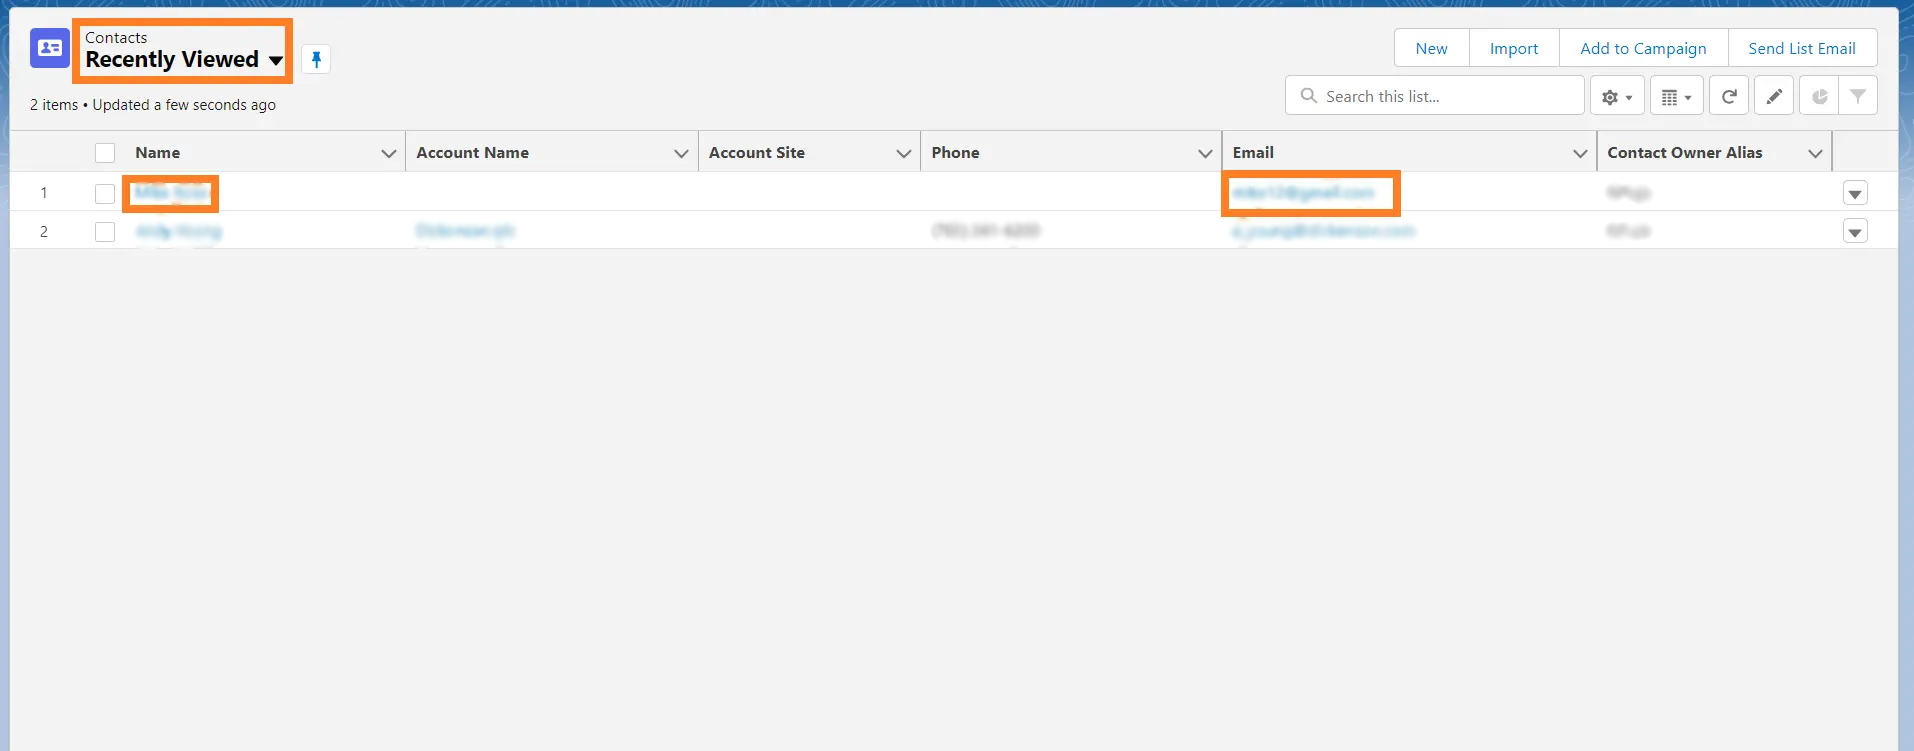
Creating Contact Records using Platform Event Trigger Flow
We can also use Custom fields & Relationships from the Platform Events to Create Contact Records.
Here are the steps to achieve this:
Step 1. Create some custom fields in the Platform Event which is created in the first step above.
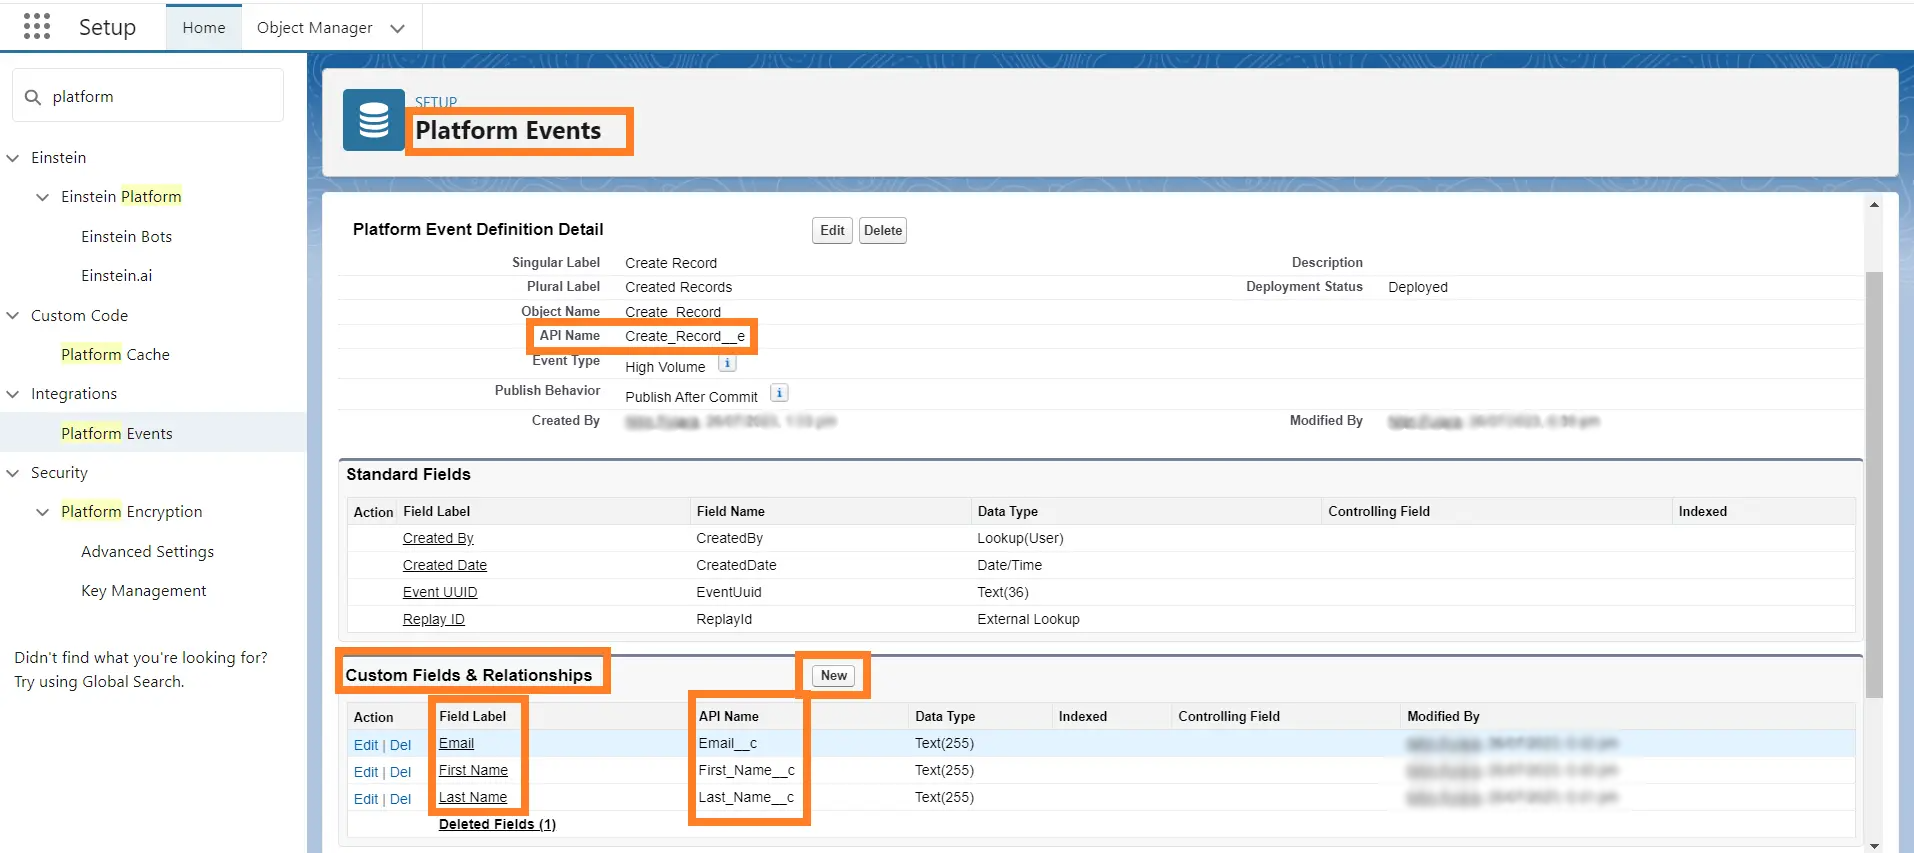
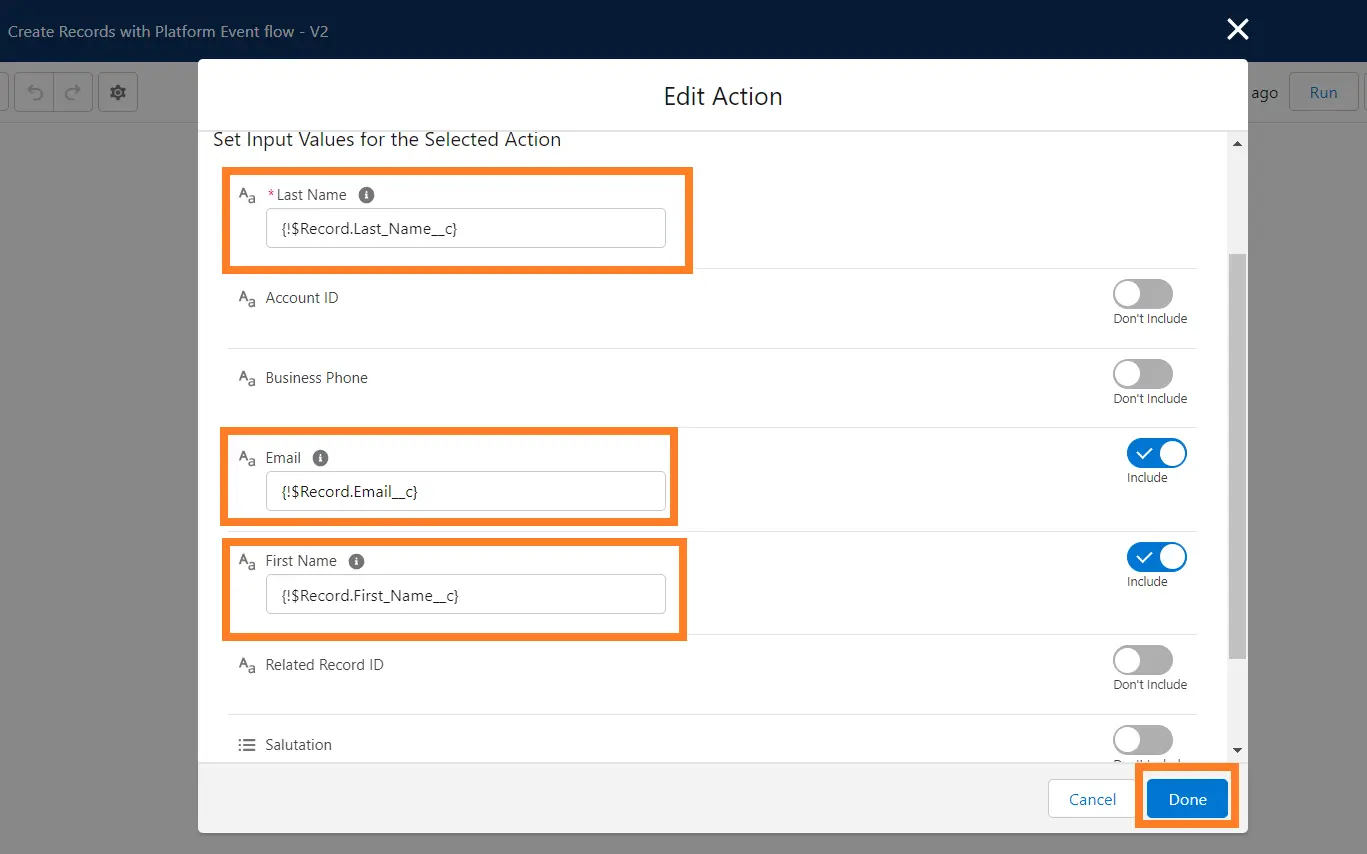
Step 2. Now do some changes in the flow (Platform Event Triggered Flow) “Action element”.
In the Action Element select “Record.Last_Name”, “Record.First_Name”, “Record.Email”.
Step 3. After saving the flow. Now Execute it from the Developer Console Anonymous Window.
Step 4. Check the Contact Screen Record in the SF org. If the Records is being made it or not.
Conclusion:
Platform event trigger flows in Salesforce provide a powerful way to automate business processes and integrate systems across your organization.
By following the steps of this article, you can easily create a platform event trigger flow that will be triggered when a platform event is published.
If you liked the article or need help with any Salesforce development solution, contact us today!





