
If you’re wondering how to make your LWC component multilingual, you’re already ahead of the curve. Global users expect content in their native language, and Salesforce gives you the tools to deliver exactly that. With Custom Labels and the Translation Workbench, you can easily localize your Lightning Web Components without touching a single line of translation-specific code.
This guide will walk you through the entire process, step-by-step, with no dev-heavy detours, so your LWC component speaks every user’s language effortlessly. Let’s go step by step now!
Step-by-Step Guide: Making Your LWC Speak Multiple Languages
Step 1: First, create your LWC Component.
Let’s begin with the basics, create your LWC component as usual. Here’s a simple example:
HTML:
JS:
XML:
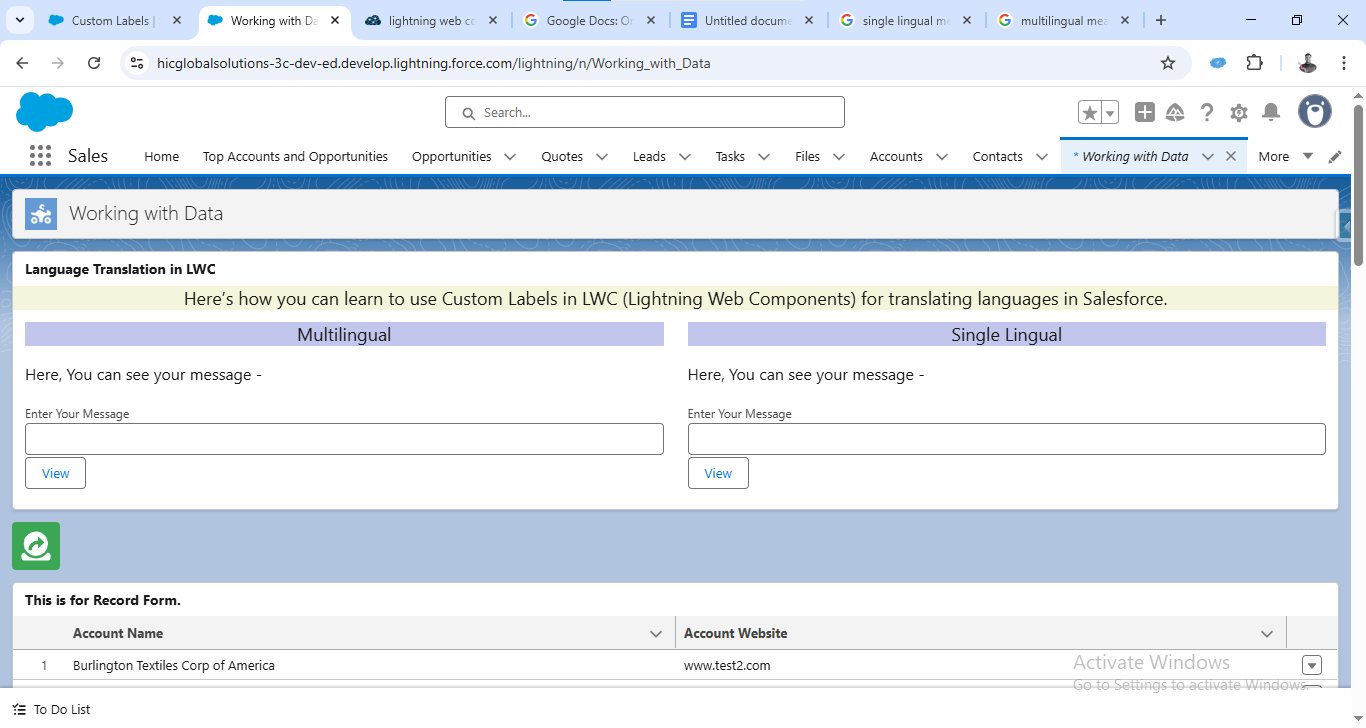
Step 2: To make it multilingual, you have to make Custom Labels in Salesforce for the text that is going to display on your screen of LWC Component.
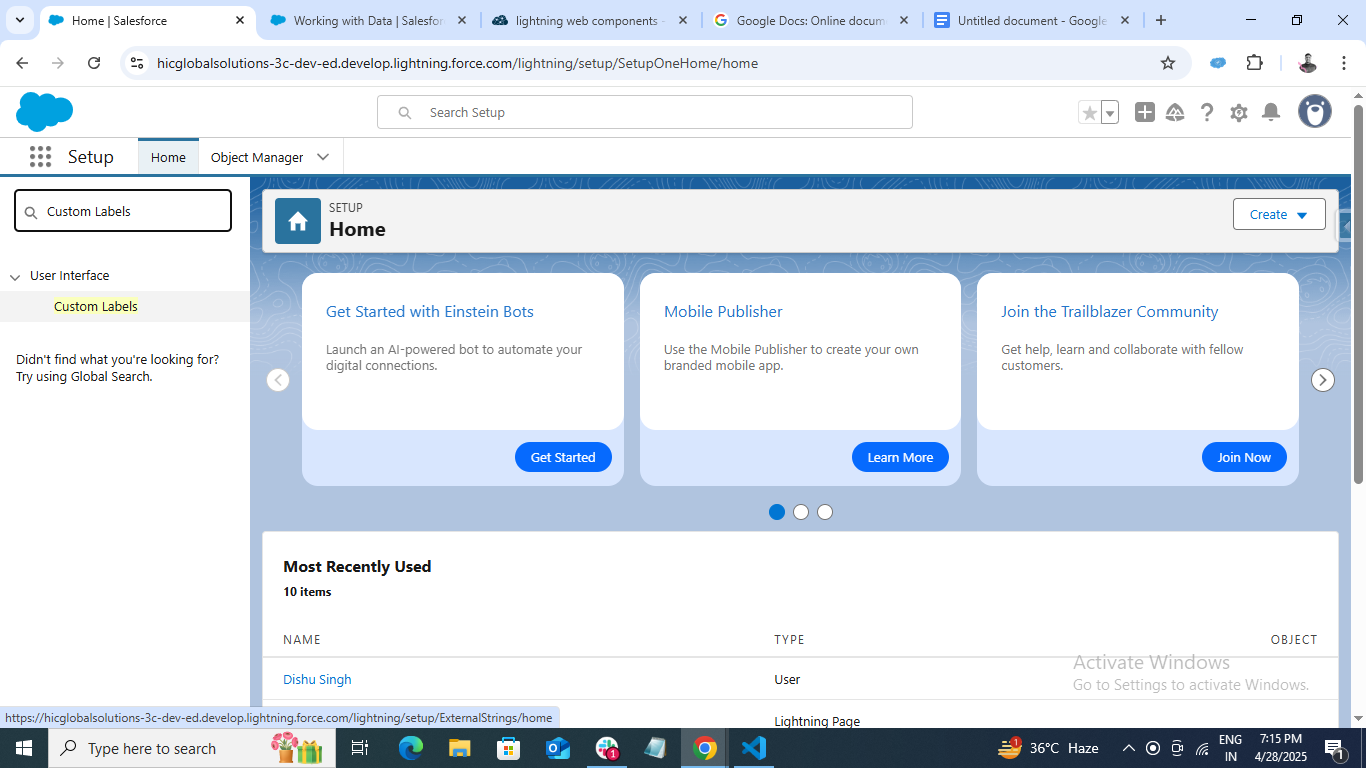
(i) Go to setup & search for Custom Labels in Quick Find and click on it.
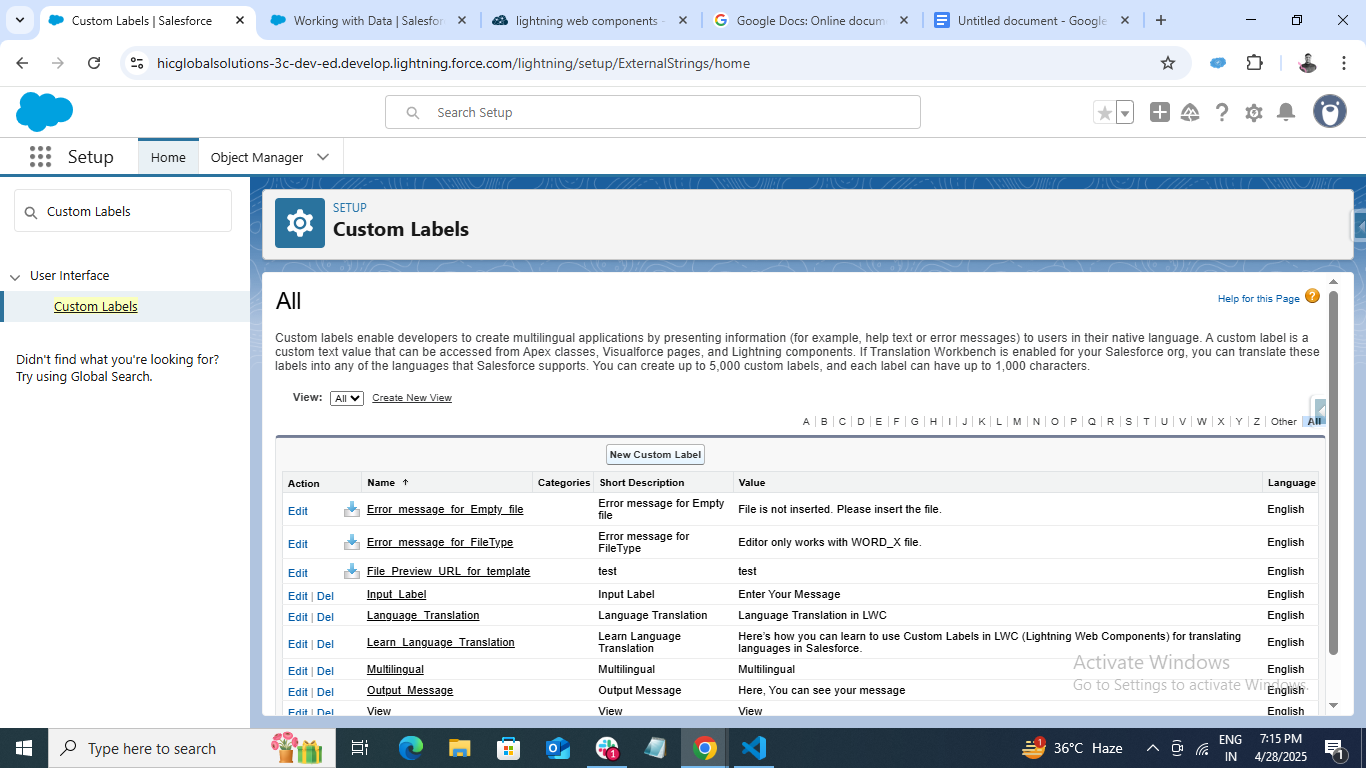
(ii) Click on New Custom Label.
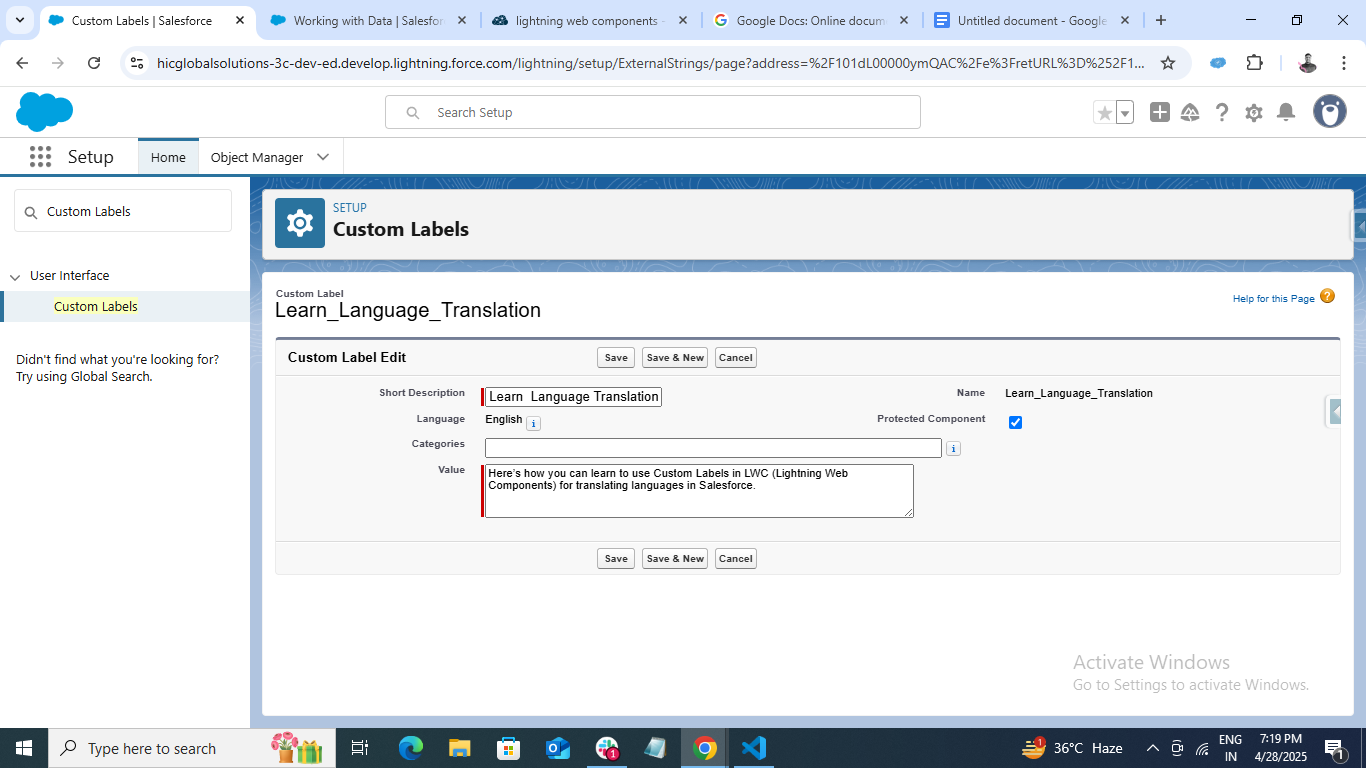
(iii) Create a custom label of the text that is used in your code and is going to display on screen & save it.
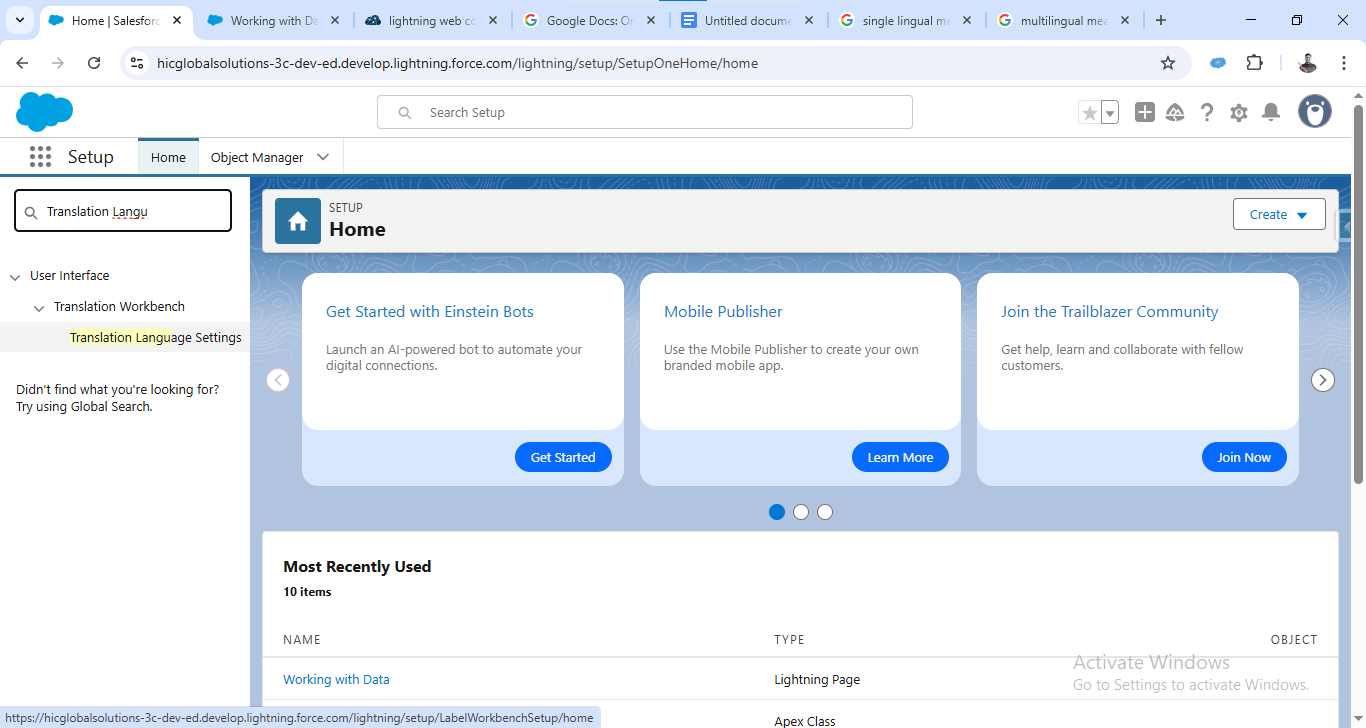
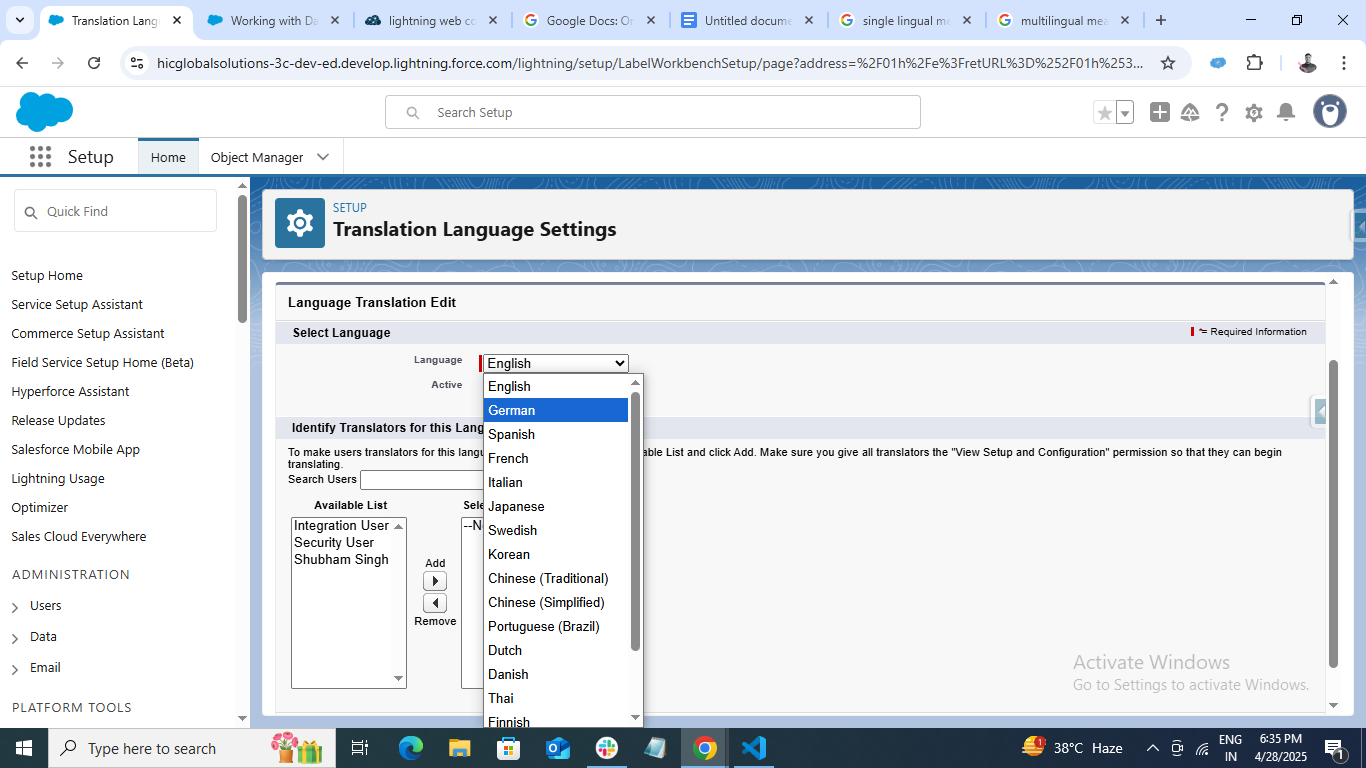
Step 3: Then, search for Translation Language Settings in Quick Find and click on it.
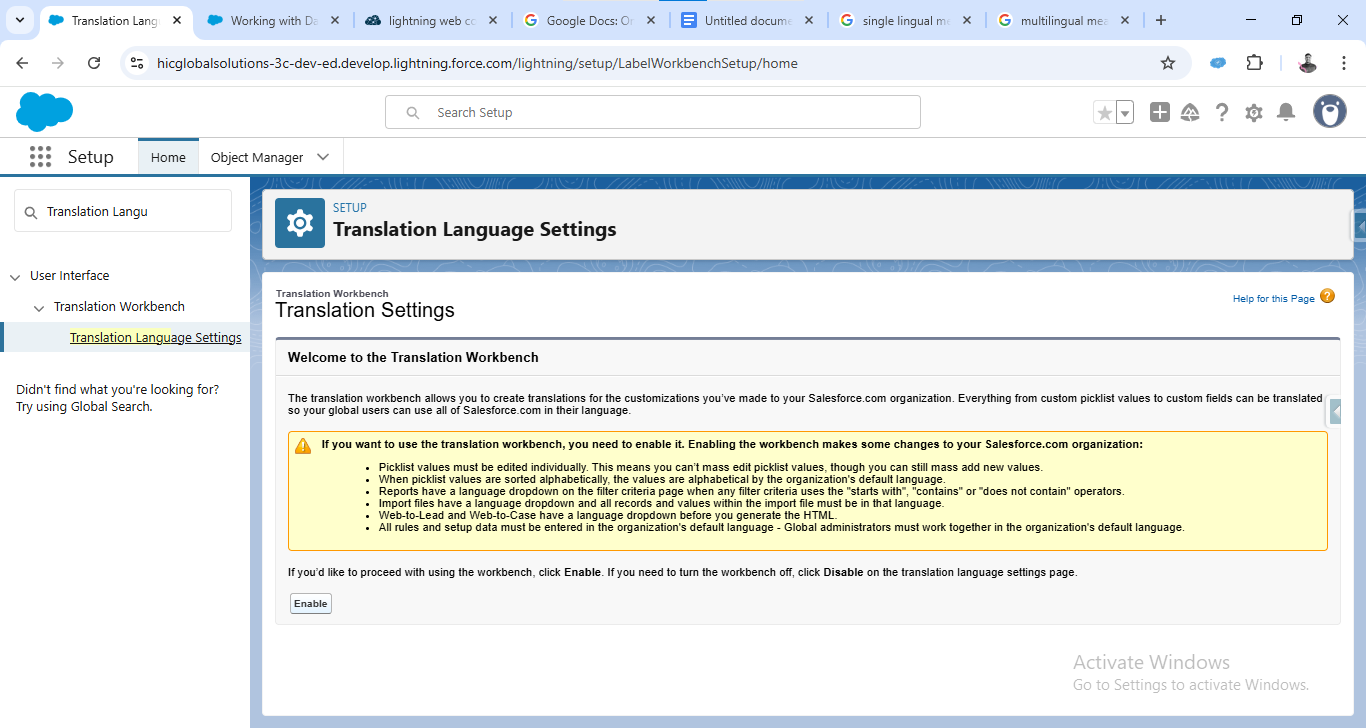
Step 4: Click on Enable and then click on Add.
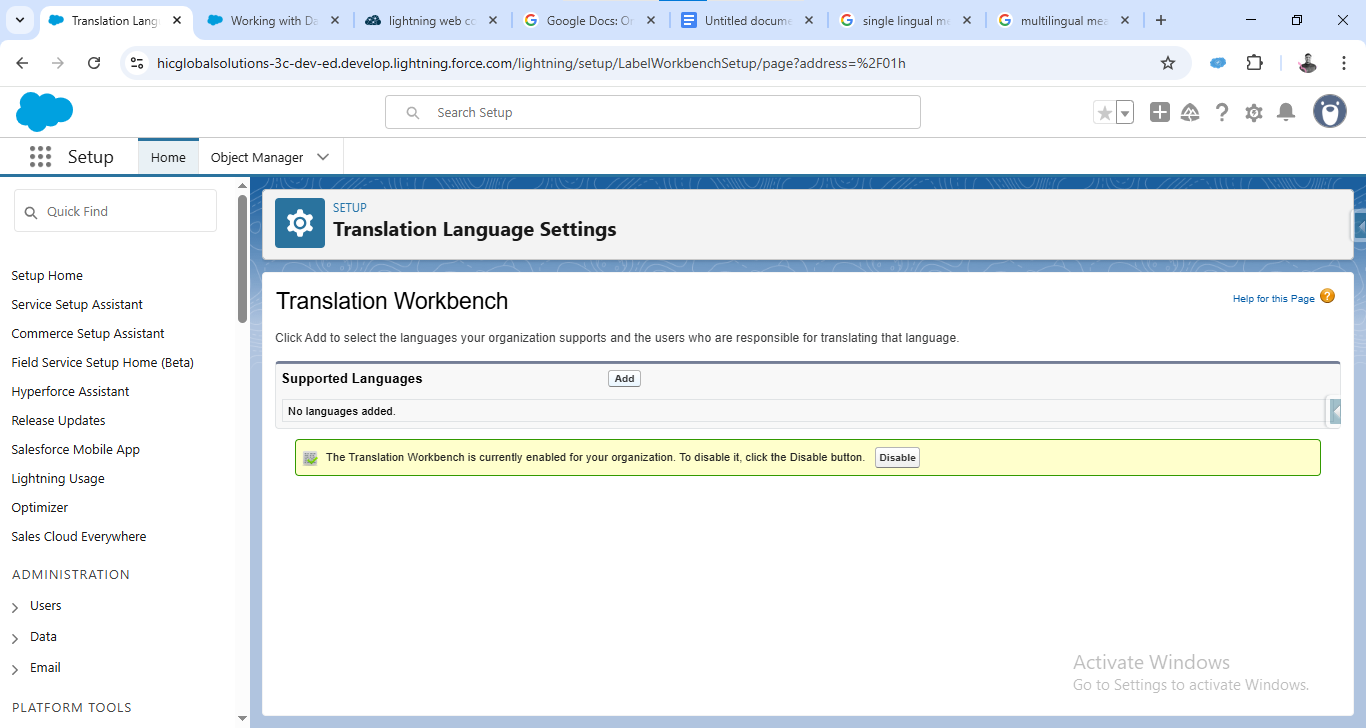
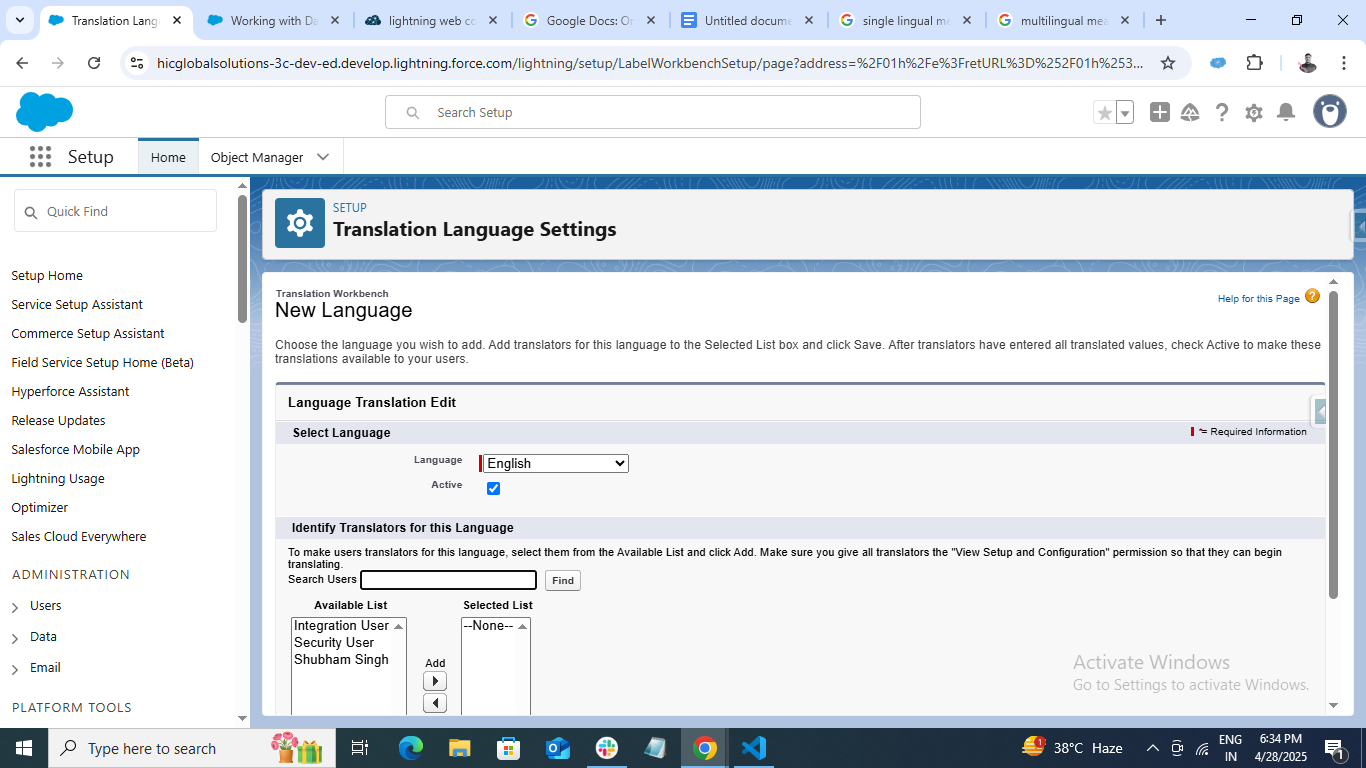
Step 5: Select any Language of your choice (Here we have selected German) and save it.
Step 6: Go back to the Custom Label that you just created.
(i) Open it.
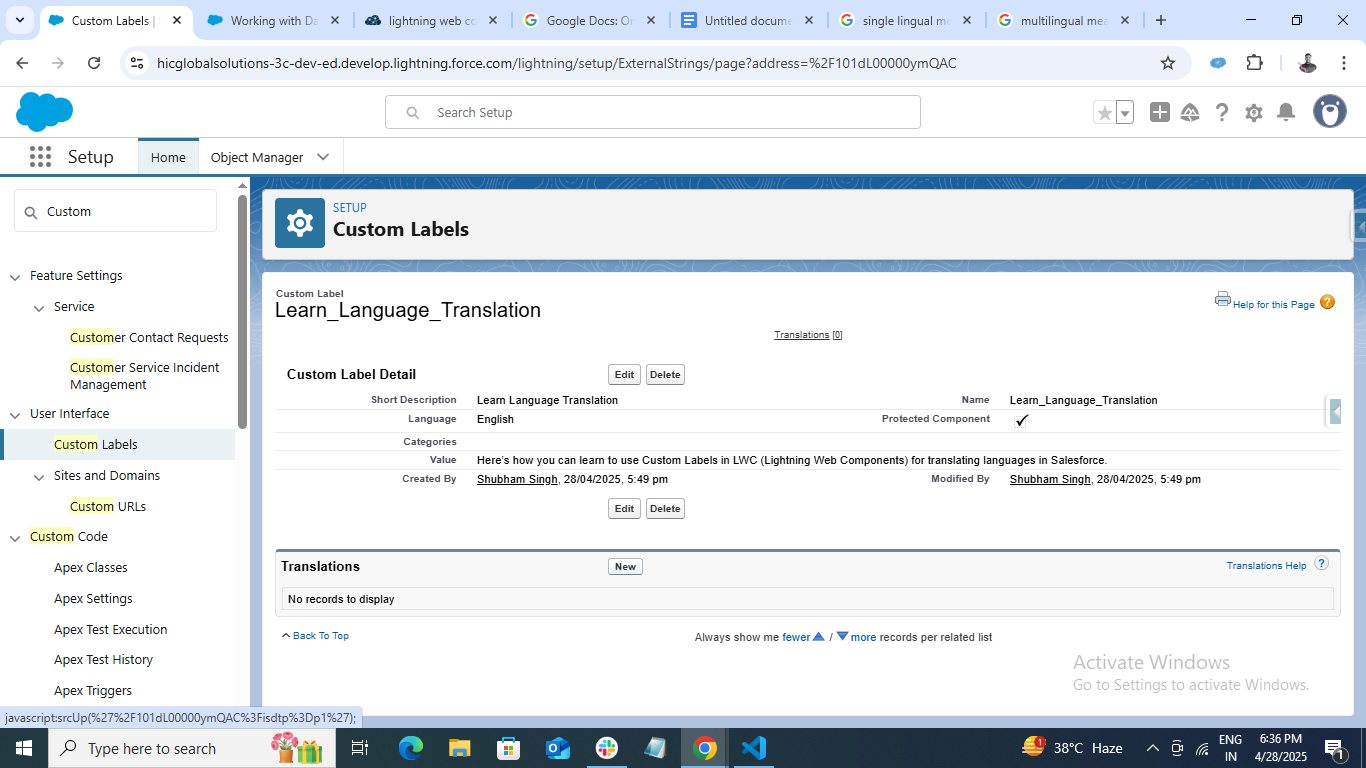
(ii) Click on ‘New’ in the Translation section.
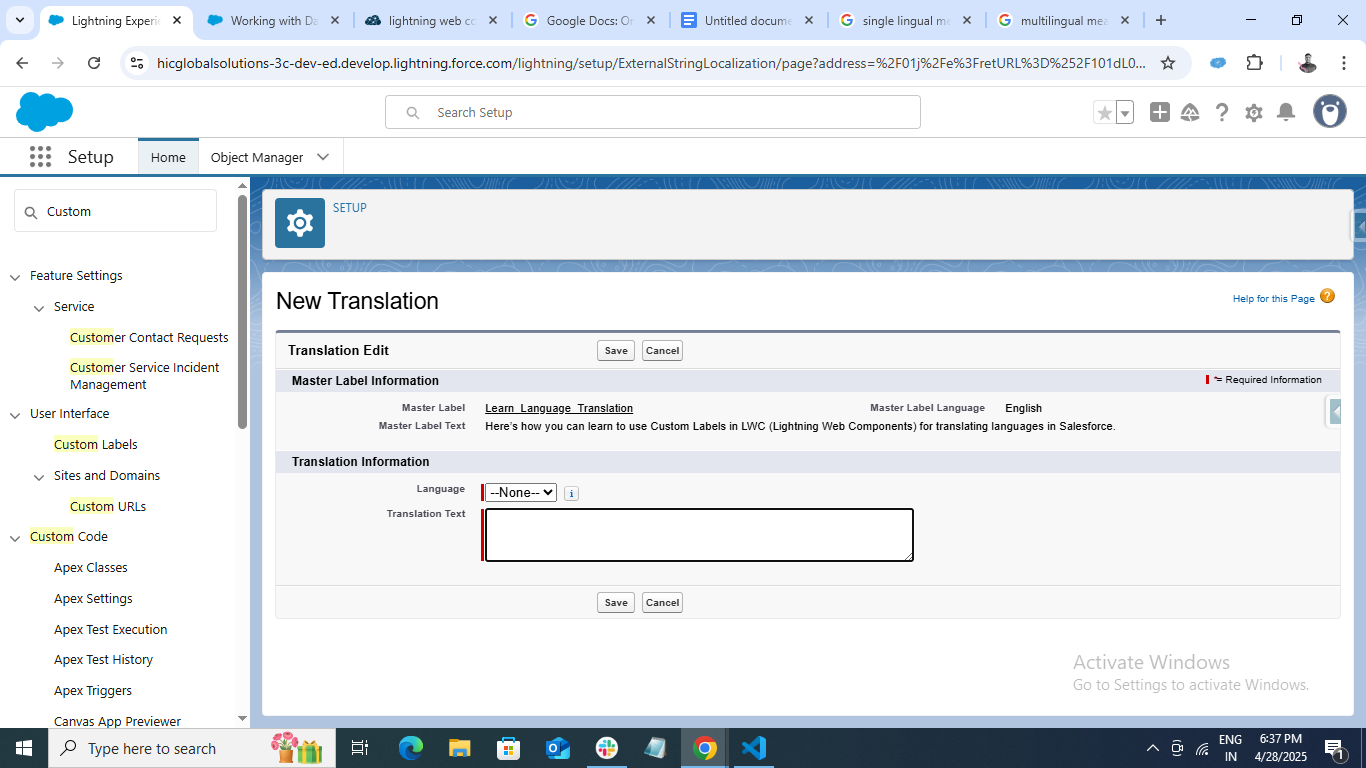
(iii) Select the language you just added in Translation Language Settings (Here, it’s German).
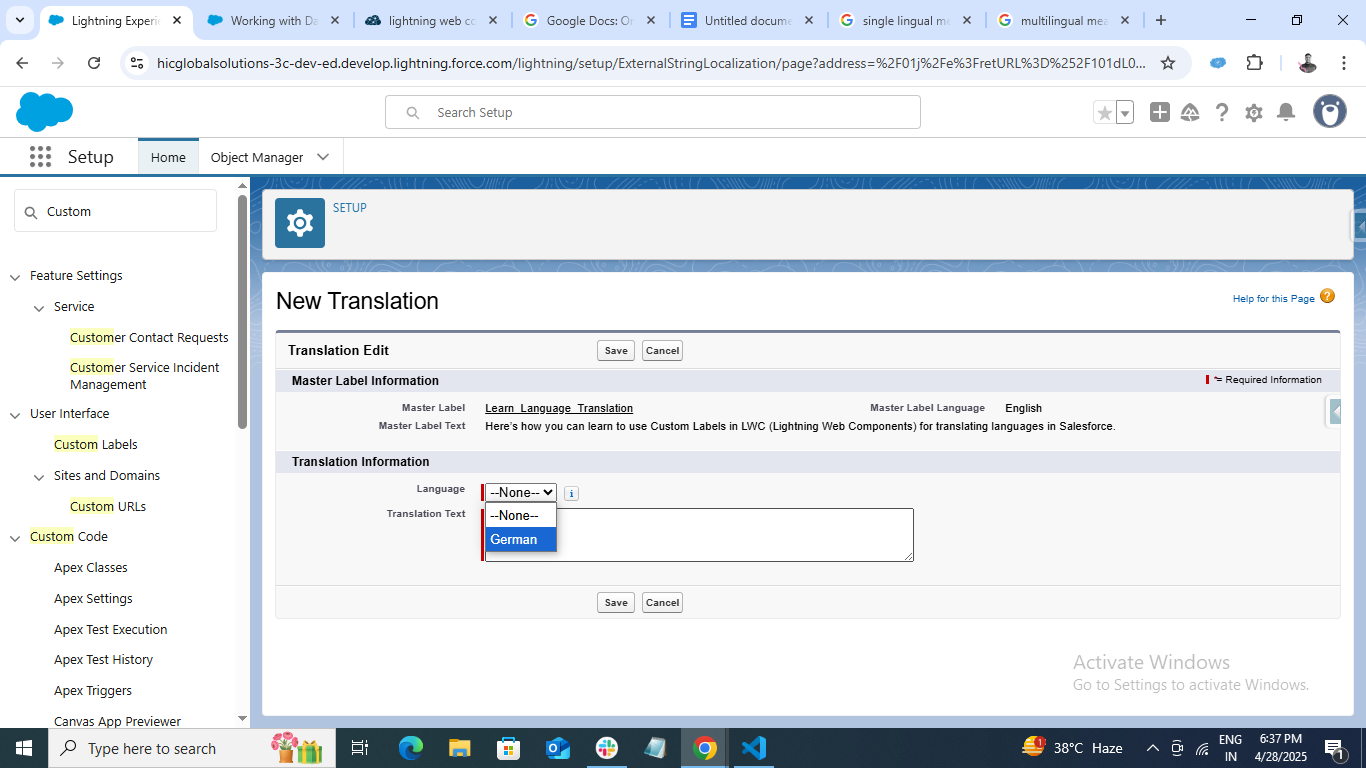
(iv) Copy the Master Label Text and translate it into German with the help of Google Translator.
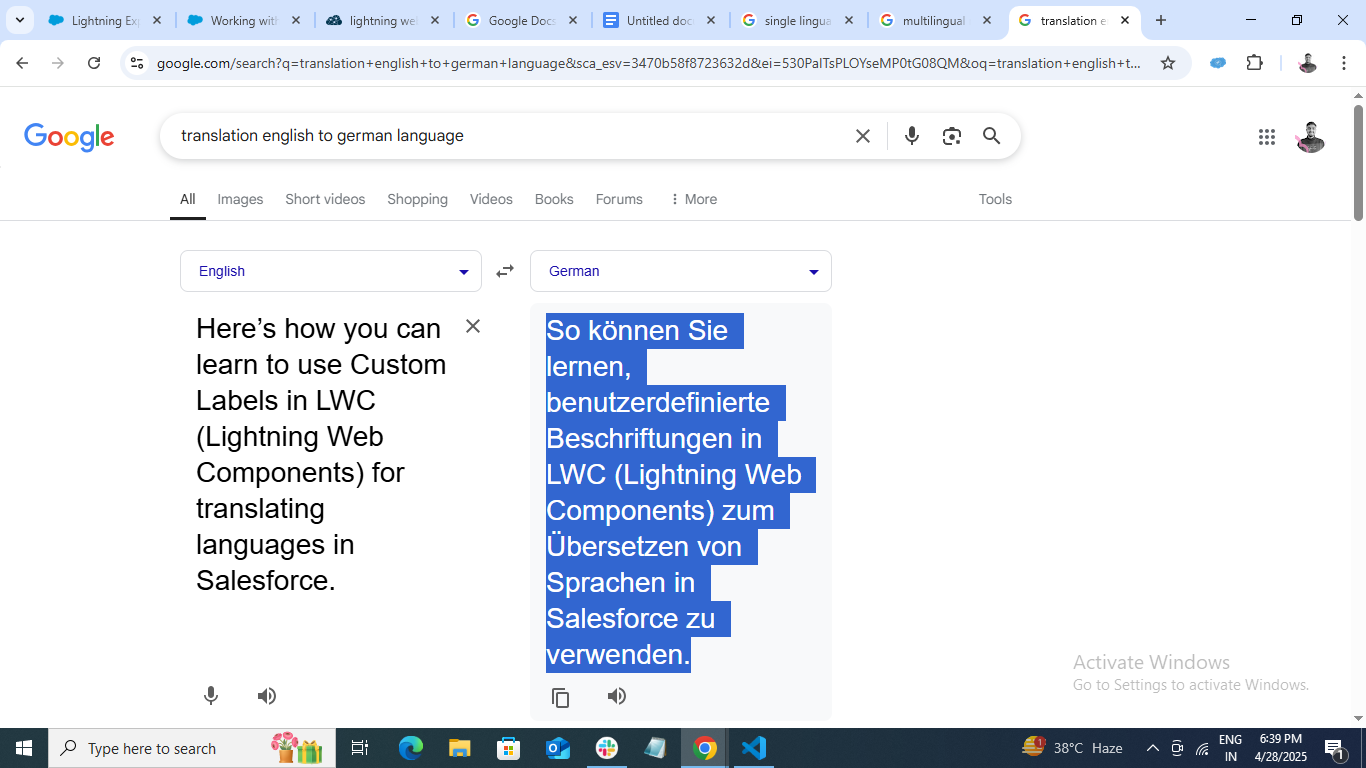
(v) Copy and paste the German Text in the TranslationText area.
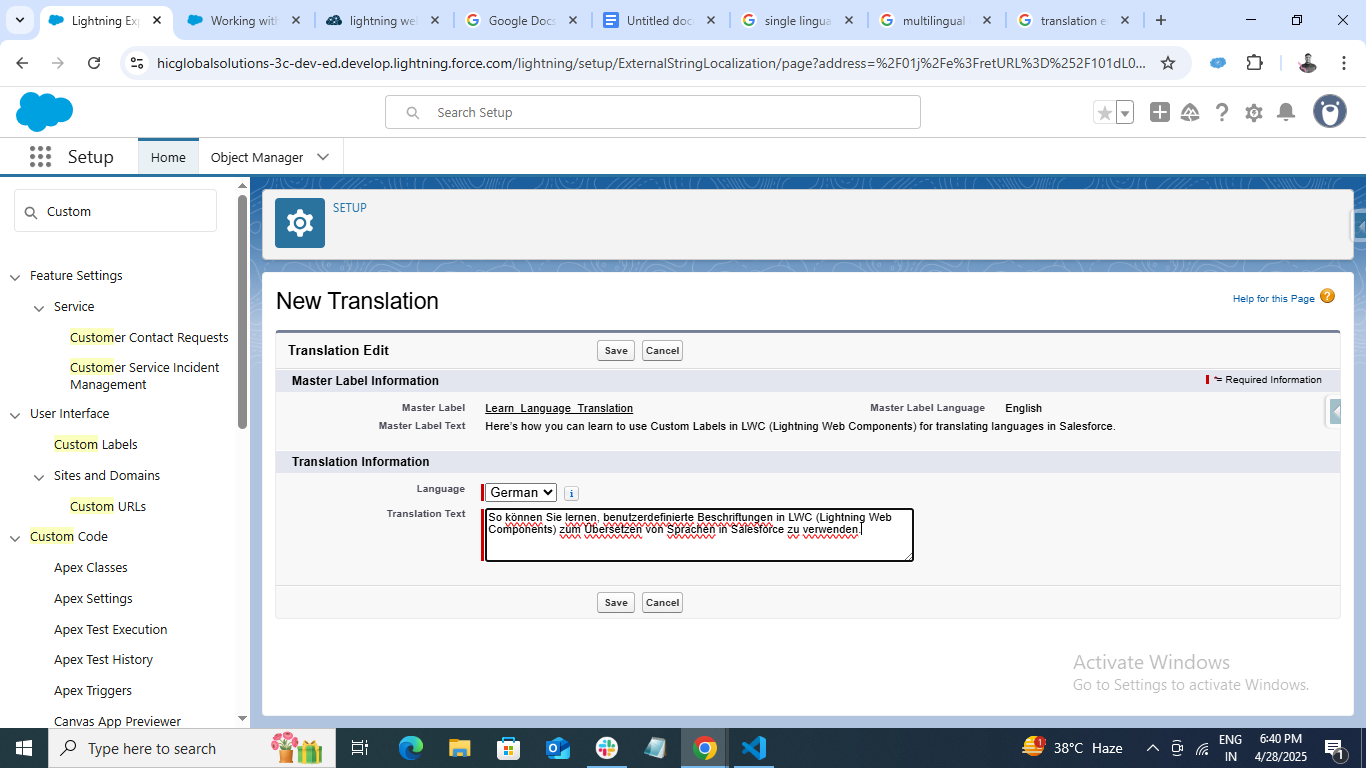
(vi) Click on Save.
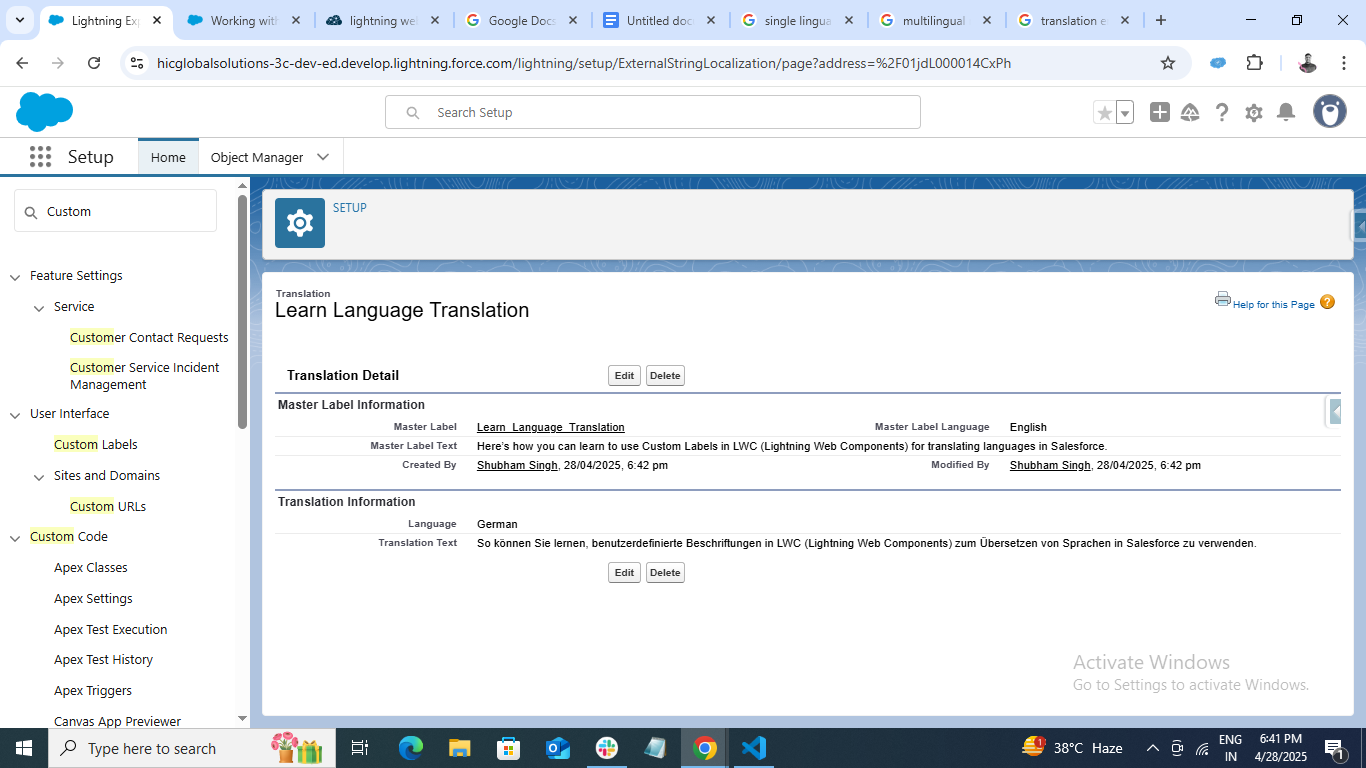
Result:
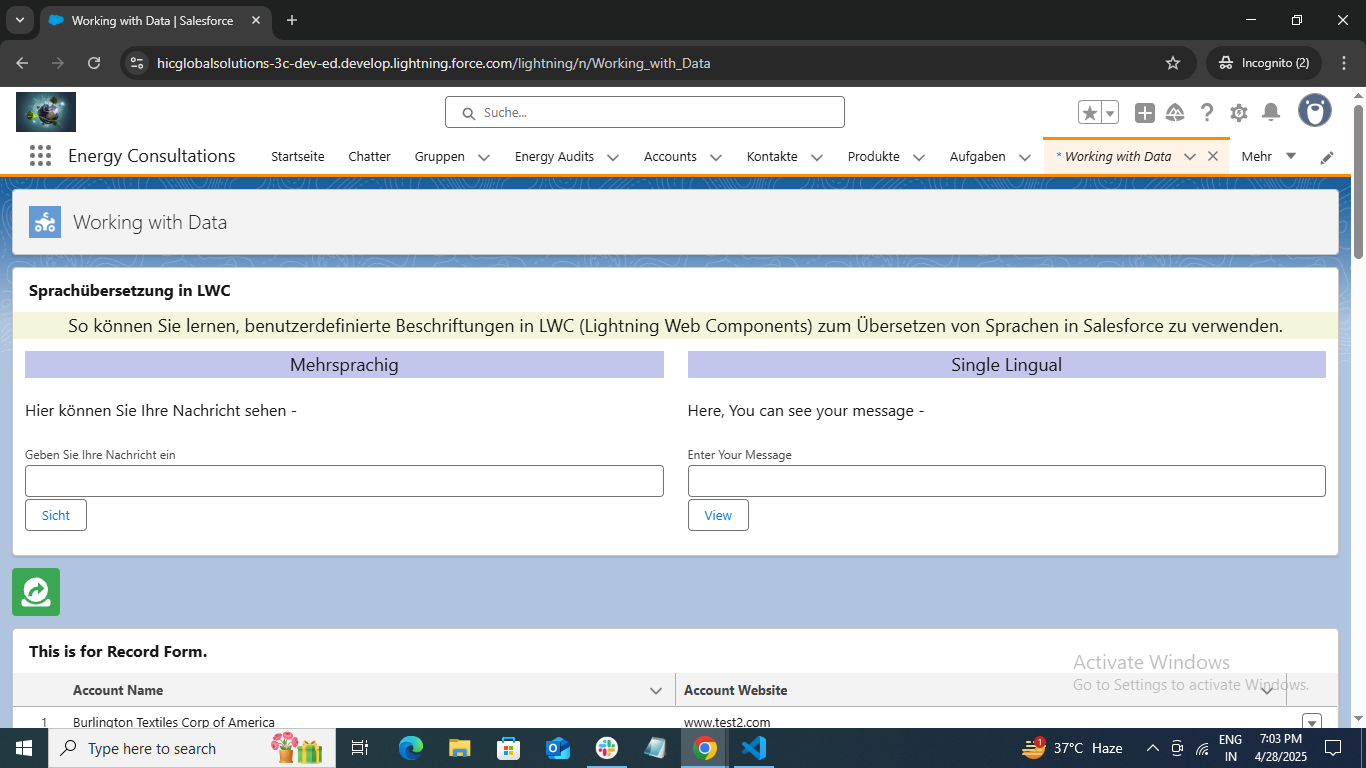
In the above snippet, you can see the result.
In LWC Component (Left Side ) – you can see the German Text because we use a Custom Label with Workbench Translation for text instead of hard-coded text.
In LWC Component (Right Side ) – you can see the English Text because we did not use Custom Label for text, there we use hard-coded text if you go through the above code you will find the difference .
Here is the Demo
https://www.youtube.com/watch?v=WKy5rDz_WdY
Conclusion:
By simply leveraging Salesforce’s built-in tools, Custom Labels and the Translation Workbench, you can build LWC components that are inclusive, scalable, and globally ready. It’s a smart move that adds big value with minimal effort.
So next time you’re building a component, skip the hardcoded text. Your future multilingual users will thank you.
Try out the solution and share your experience with us. Also, stay hooked to our blogs for more interesting Salesforce development solutions. Catch you on the next one. Happy Learning!