

Salesforce integration with Calendly is an easy and simple way to keep the information about meetings, leads, and customer interactions shared between these two platforms.
You can eliminate manual data entry, track all appointments in Salesforce, and improve sales strategies with this integration.
So, in this guide, we will walk you through the steps to integrate Calendly with Salesforce. Let’s begin!
What is Calendly?
Calendly is a cloud-based platform that enables users to schedule meetings, create events, and sync with calendars. This offers flexibility and convenience as users can manage their schedules on the go.
The platform is an ideal choice for scheduling any kind of meeting, be it one-to-one or group meetings. With the help of Calendly, one can have smooth workflow management, embed a scheduling page & route forms, and integrate with other apps seamlessly.
Install Calendly from AppExchange:
Here is the Link
Step-by-Step Process of Integrating Calendly with Salesforce
Step 1: Account Creation
In the first step, Create a Calendly account.
Step 2: Adding Salesforce Connector
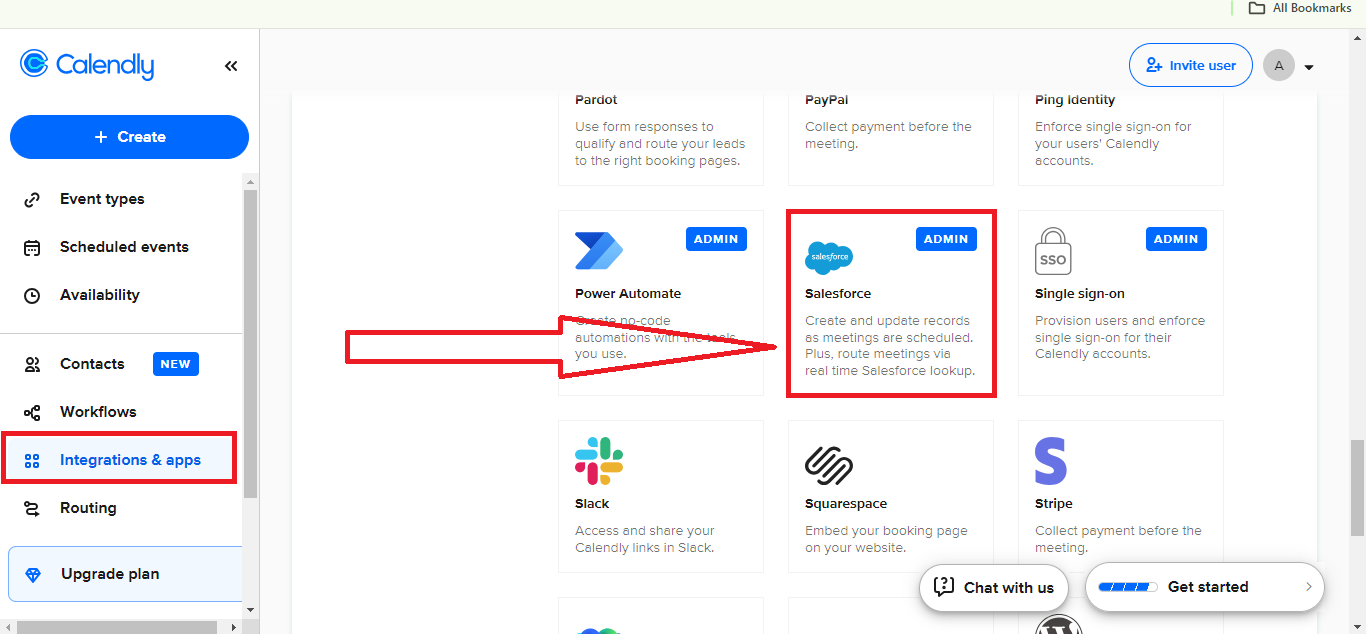
In the left corner, click on Integrations & Apps to add a Salesforce connector to connect the Salesforce account. For more reference check the screenshot below.
Step 3: Connecting Salesforce Account
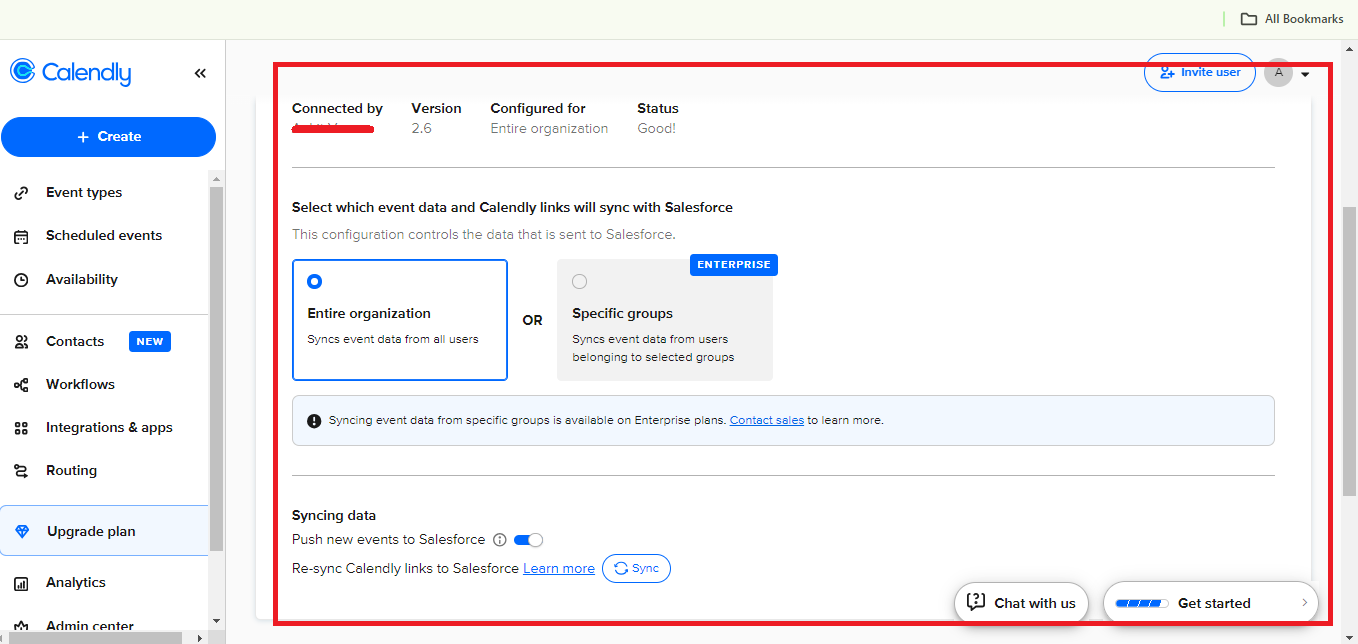
The next step is to connect your Salesforce account by clicking on “Connect”.
Step 4: Installing the Calendly Package
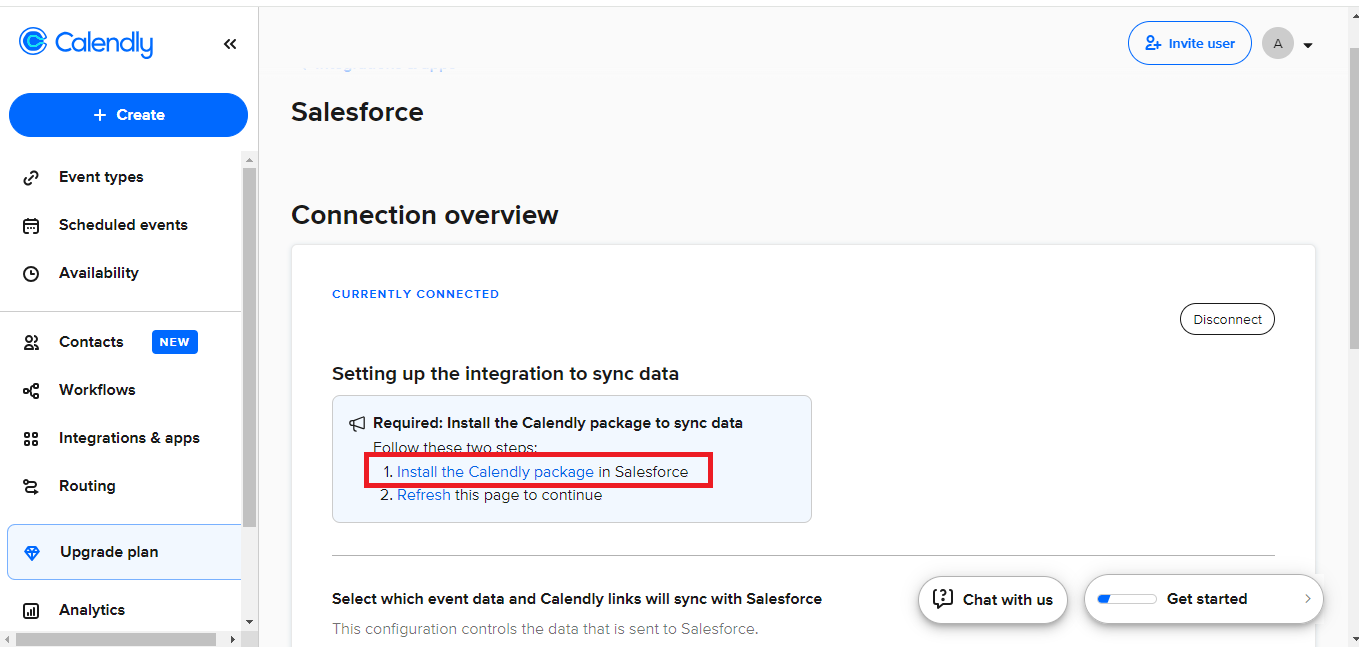
In this Step, install the Calendly Package into Salesforce. Click on “Install the Calendly Package”.
For reference check the screenshot below.
Step 5: Activating Calendly Flows
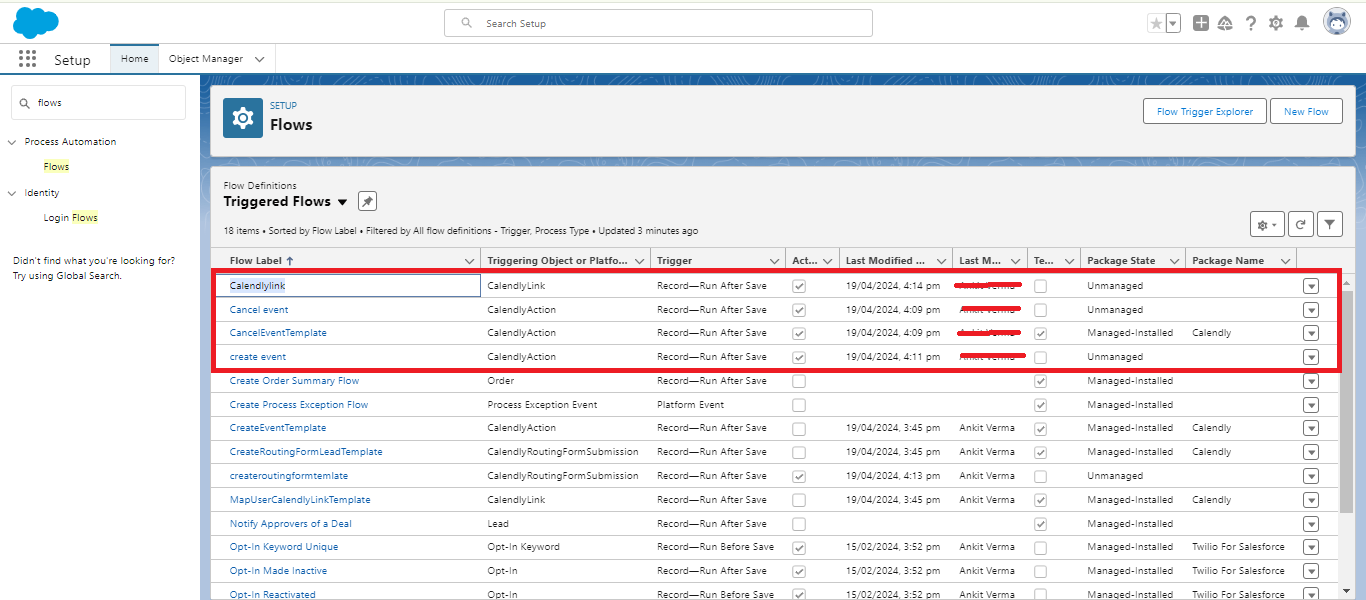
After installing the Calendly package in Salesforce, search for “Flows” in the Quick Find box, and activate the Calendly flow to automate syncing Salesforce with Calendly.
Activate the following Calendly flows:
- Calendly Link
- Cancel Event
- Cancel Event Template
- Create Event.
Step 6: Creating an Event in Calendly
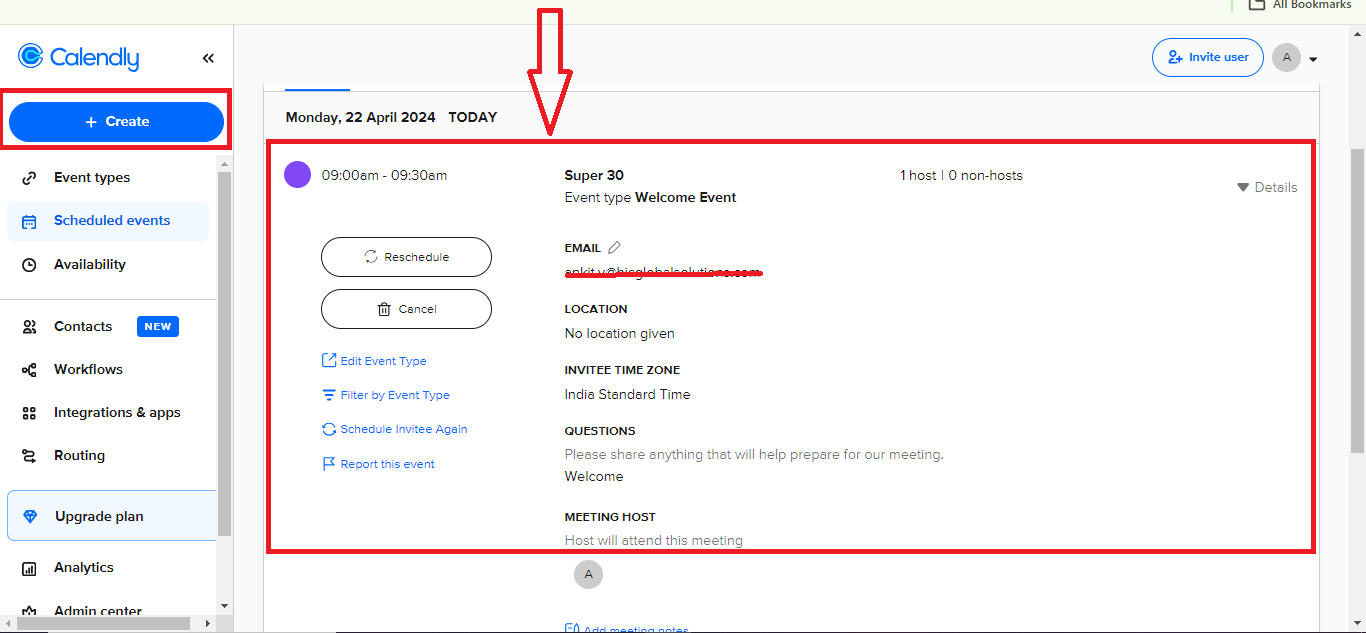
Now, create an event in “Calendly”, and automatically add it under the lead when the same email address is present in the lead object. While creating an event and adding an email, click on “Create” in the top right corner and schedule an event.
Step 7: Auto addition of Lead
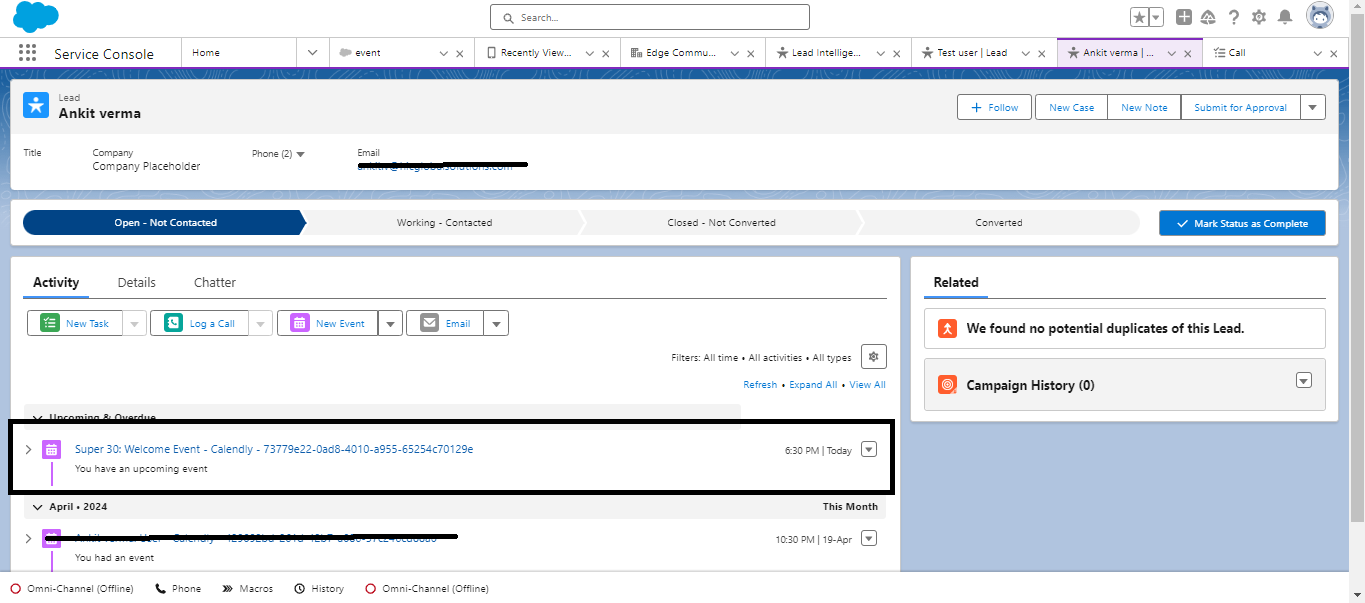
Once you have created and scheduled the event in Calendly, it will be automatically added to the lead.
See the screenshot below for better understanding.
Conclusion:
In conclusion, Calendly syncs with Salesforce to automate events and creates new events mapped with Salesforce.
With Calendly and Salesforce integration, organizations can provide a more streamlined and personalized customer experience by scheduling events directly within Salesforce and maintaining a comprehensive view of customer interactions.
We will be back with more such crucial Salesforce integrations for your business. Stay Tuned!





