

Surveys are tools that help gather feedback and information from your users or customers. They’re made using an easy editor. Your organization’s system saves the data you gather from people who take the survey. With Salesforce, you can look at this survey data, make reports and visual dashboards, and share important findings with your company.
In this blog today, we will how to create a Salesforce survey and send surveys from Salesforce when an opportunity is Closed won. But before that, let’s take a look at the prerequisites and limitations to send surveys from Salesforce.
Prerequisite of Salesforce Survey:
- Create a Community site in your Salesforce org.
- Enable Salesforce Survey.
- Select domain creation in the first step.
Limitations:
- Each Salesforce org includes features upto 300 surveys.
How to create a Salesforce survey
Step 1: Create a Community site
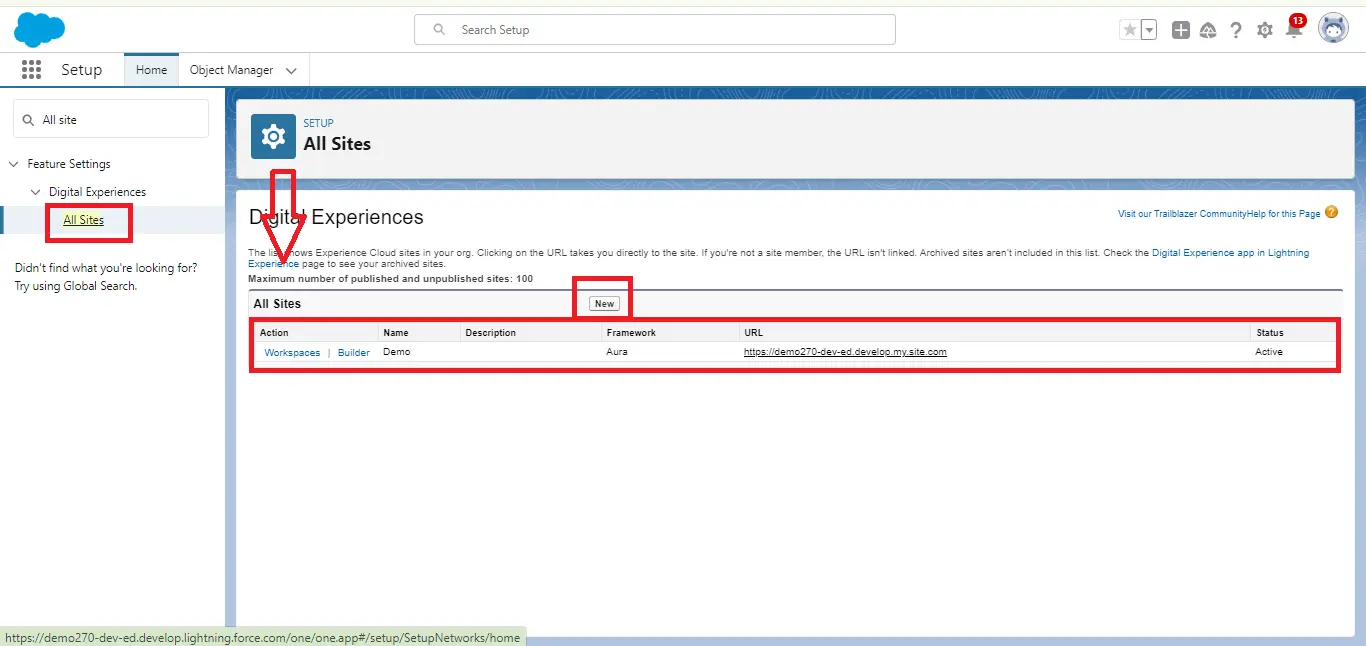
First, create a Community site if you haven’t already already. Search All sites in the Quick Find box and then Create a new community site. For reference check the below screenshot.
Step 2: Enable Survey
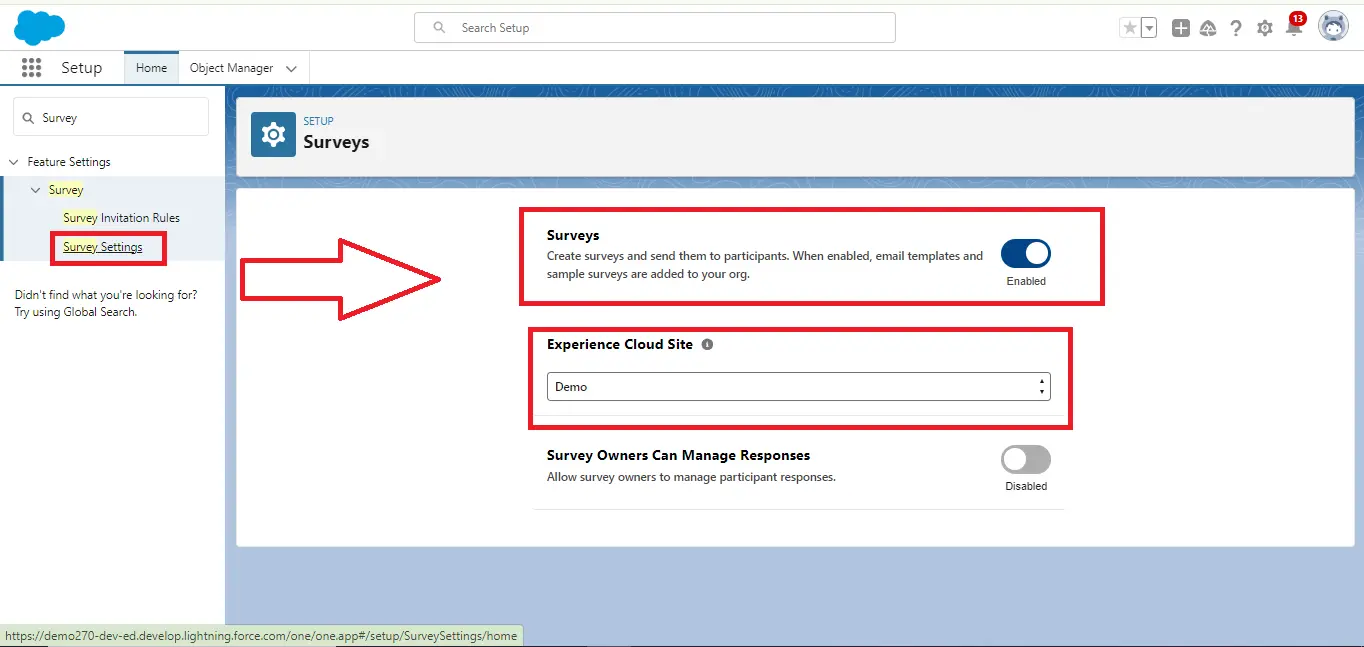
In the Quick Find box, search Survey settings and then enable Survey under Survey Add Experience Cloud site, which we created in Step 1.
Step 3: Create a new Salesforce survey
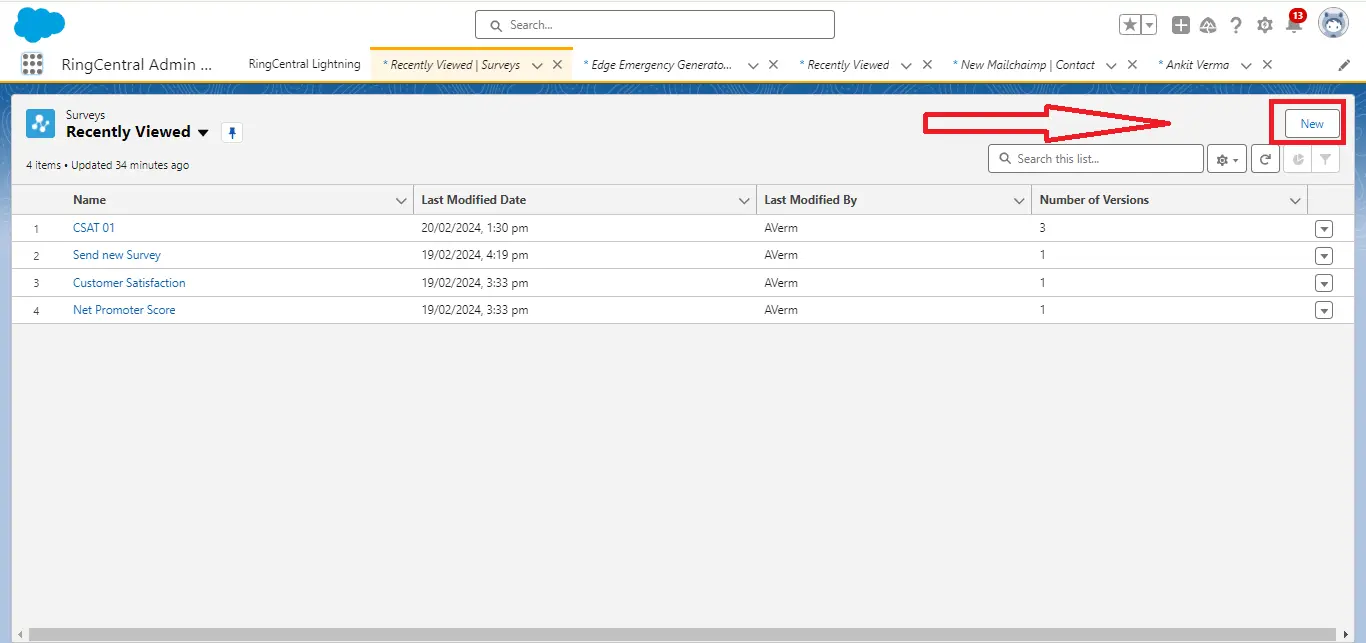
Now, Click on App launcher, search Surveys, and then click on New to Create a new Survey.
Step 4: Customize the Salesforce survey
Click on “New” to create a Salesforce survey. Then, add a new page and customize it according to your requirements. if you add a rating to your Survey first click on add page then Click on Add Question and add a rating.
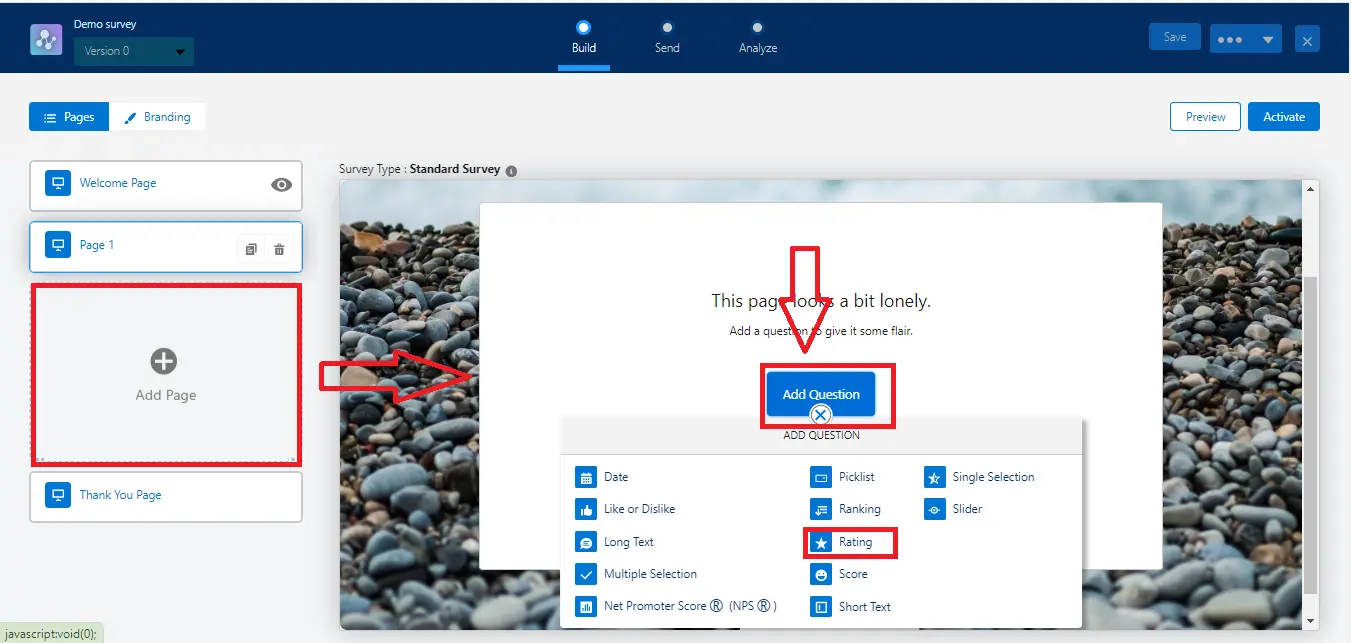
You can add multiple Questions to different Pages. Also, add logic to your Salesforce survey template. ex: Date, like or dislike, picklist Long text, etc.
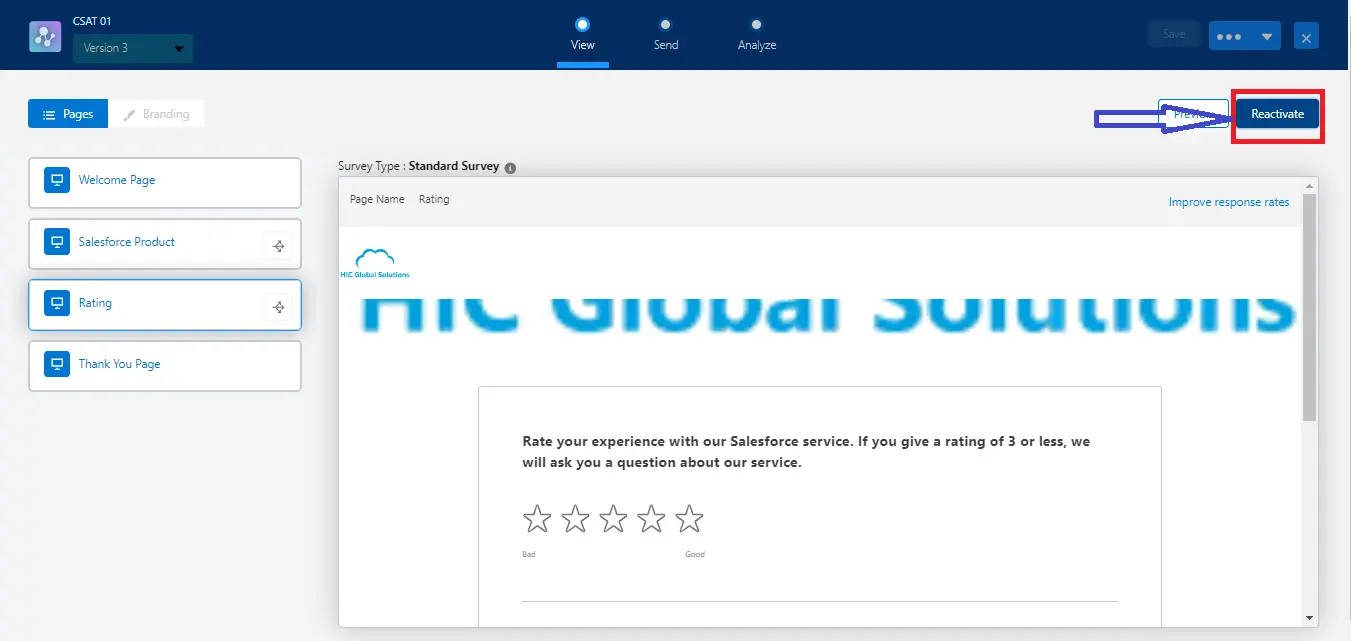
Step 5: Activate the Survey
After Creating a Survey click on the top right corner to activate it.
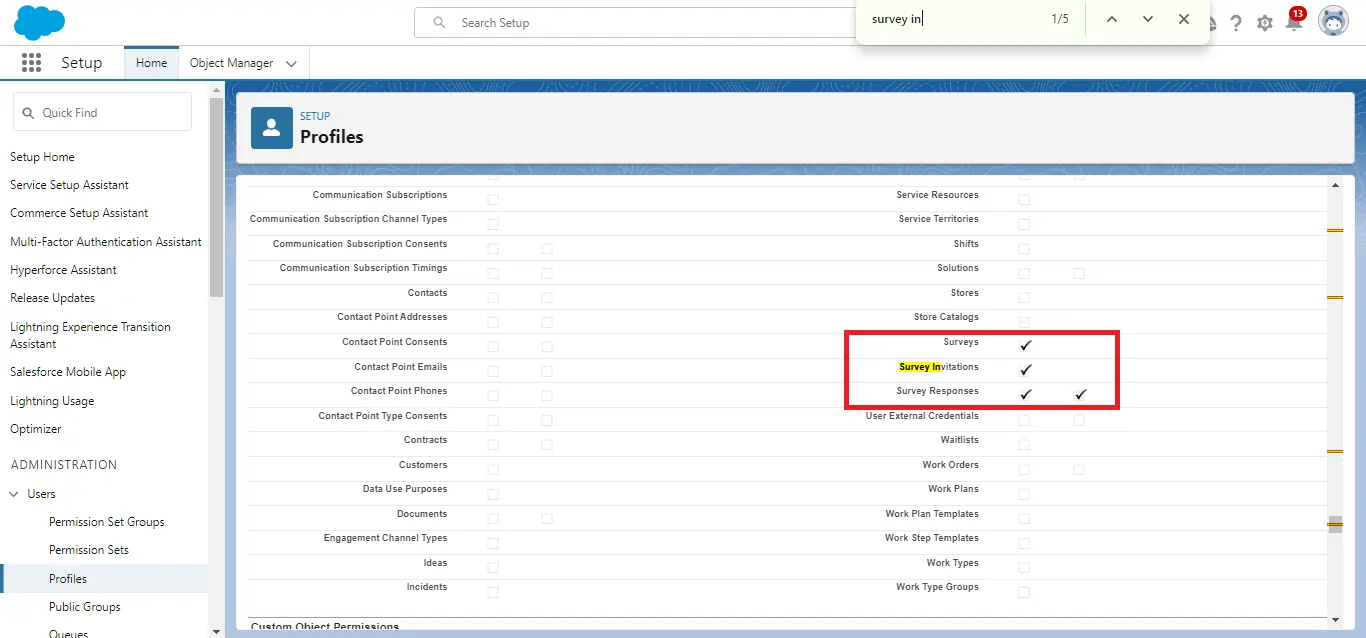
Note: Assign permission to the guest user profile to see the Survey to the community user and customer to access the survey. a.) Open the guest user profile and check the checkbox for surveys, survey invitations, and survey responses.
After completing this step customer can access the survey and give feedback.
Create a flow to automate Survey upon opportunity closed won:
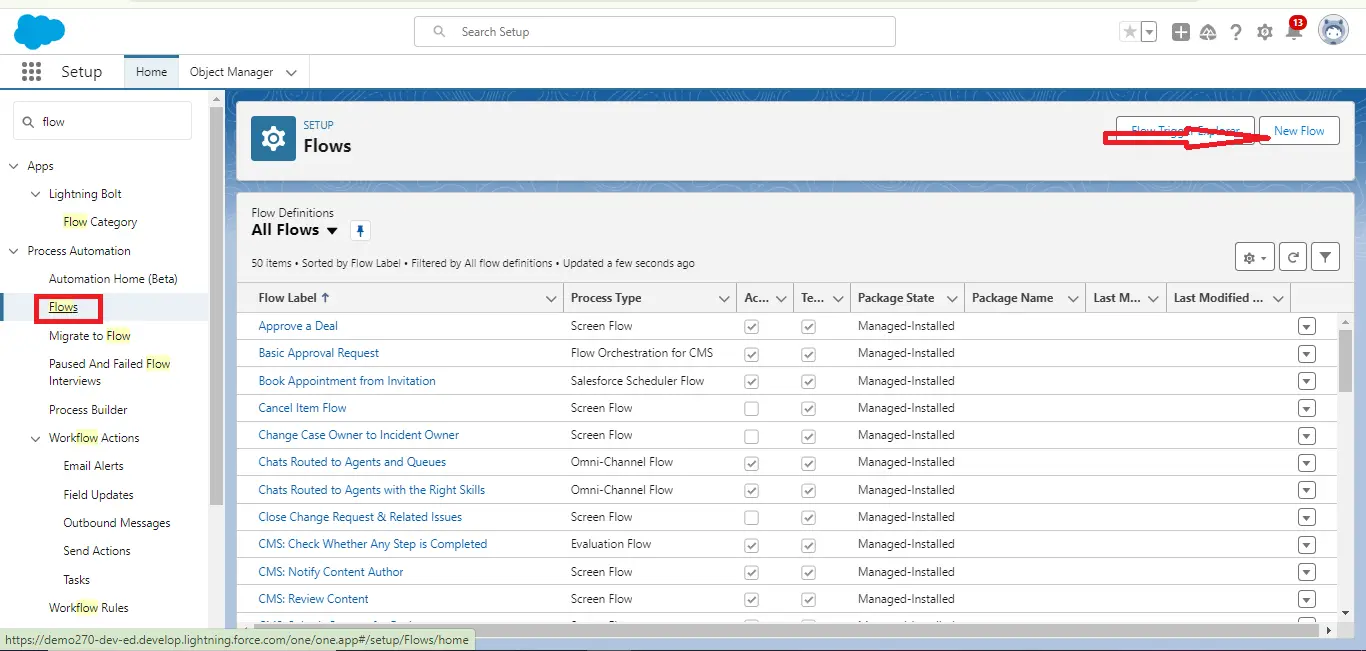
- In the Quick Find box, search Flow and click on new and then create a new record trigger flow.
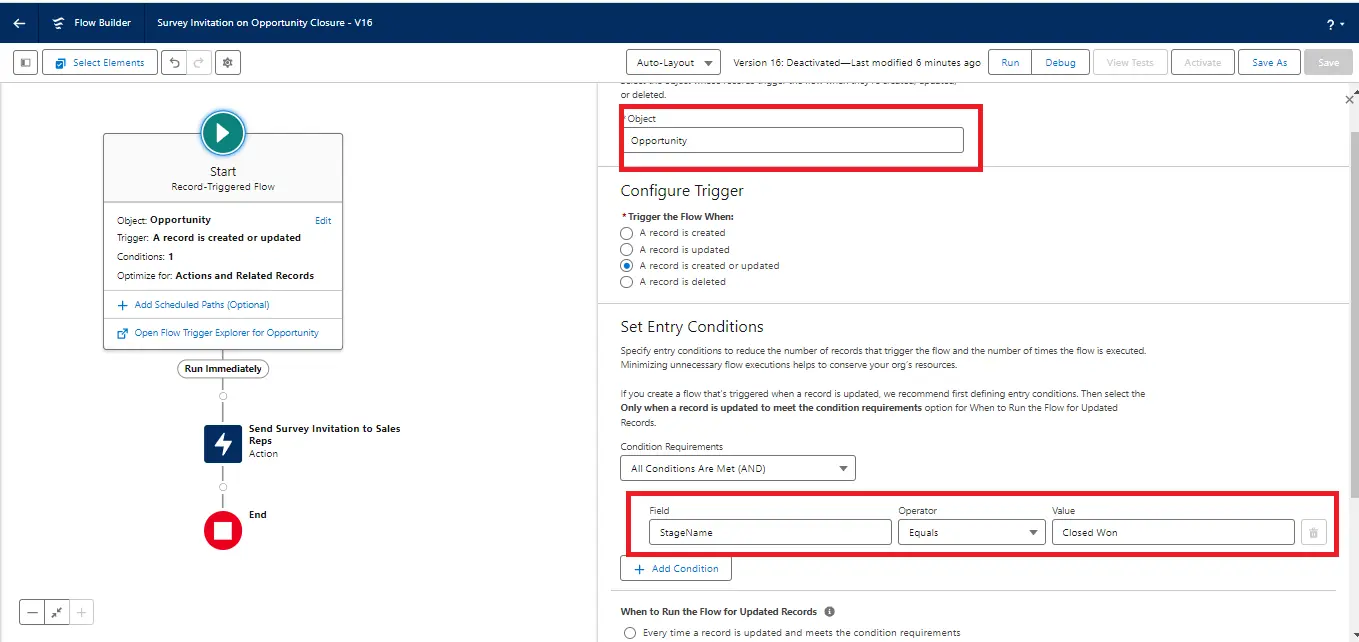
2. Select object as “Opportunity” and All condition meet(AND) Opportunity stage as Closed won.
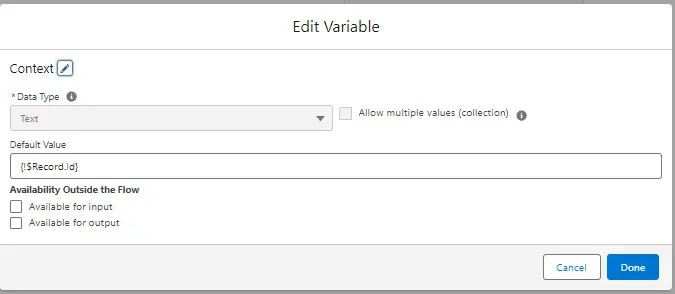
3. Create a new resource , select type variable give API name as select data type as text. In default value enter {!$Record.id}. Create a another resource for owner select variable and give API name and data type as text. in default value enter {!$Record.owner.id}. for reference check below screenshot.
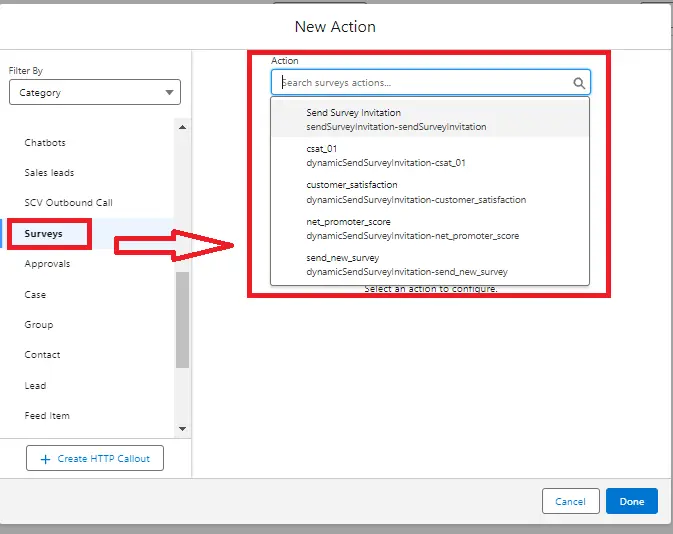
4. Add “Action” as survey. Survey action name same as survey which you have created in step 3.
5. Now, add an action to provide the survey subject, referencing the resource created above using {!$Record.id}. Also, specify the recipient type as ‘User’ or ‘Contact’
(Note: ‘User’ has already been added in the org, you may also consider adding ‘Contact’).
After that, select the checkbox for ‘Unique Link’ and ensure ‘Don’t Require Authentication‘ is checked
(Note: if you add contact then enable the “Don’t Require Authentication” checkbox).for reference check the below screenshot. If you click on the ‘Don’t Require Authentication’ checkbox, there is no need to authenticate to give feedback to the Salesforce Survey.)
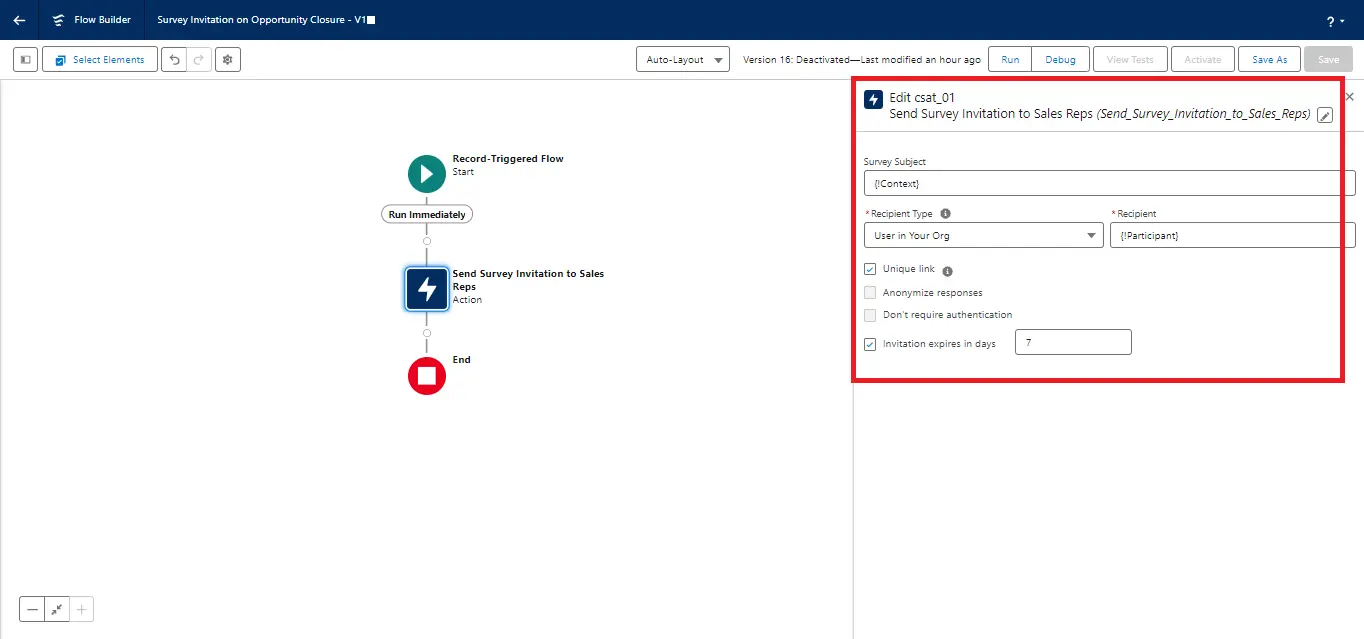
Now, save and activate the flow.
Step 6: Add Survey Invitations and Responses
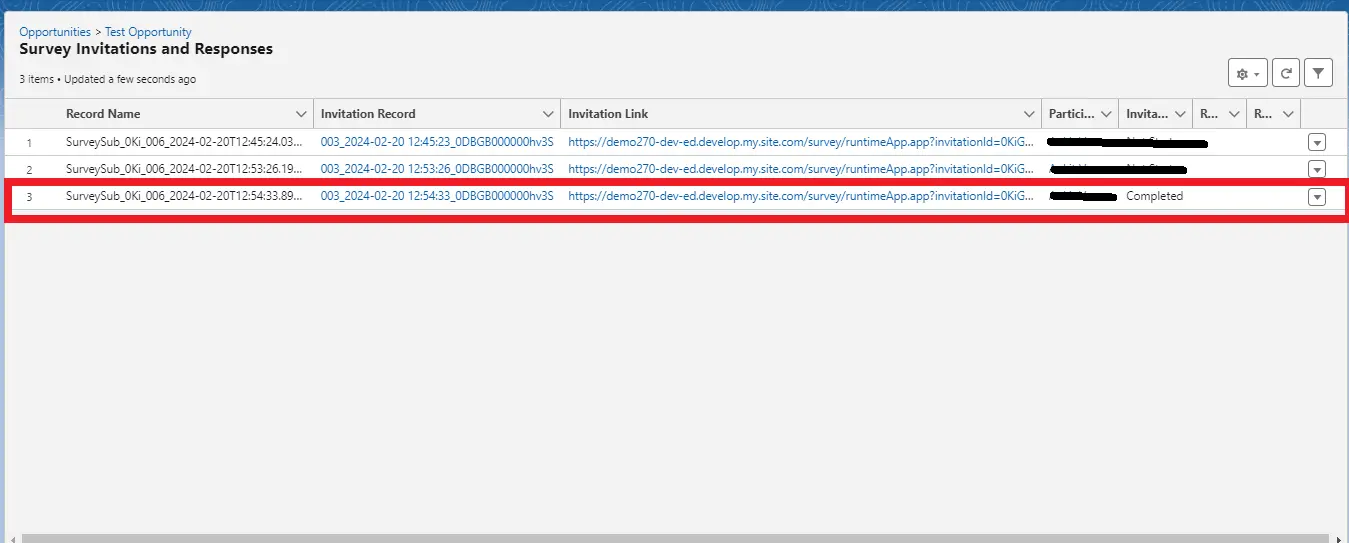
Now, go to Object Manager and search for ‘Opportunity.’ Under the Opportunity layout, click on ‘Related Lists’ and add ‘Survey Invitations’ and ‘Responses’.
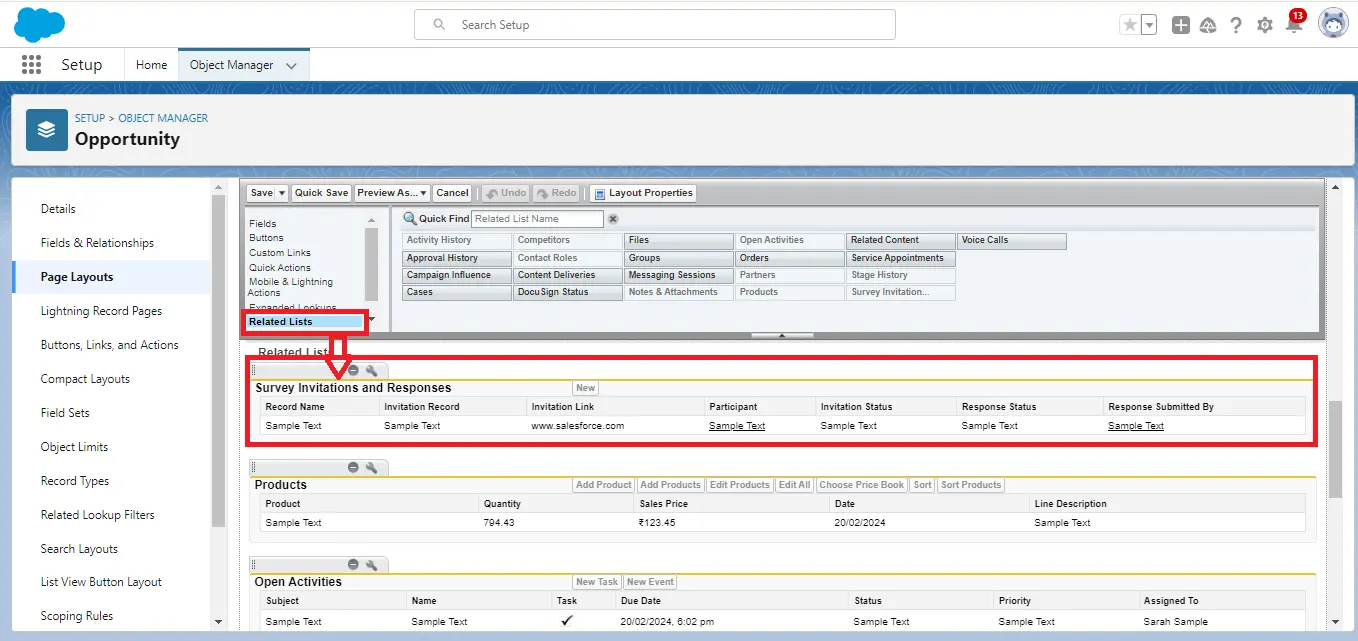
Step 7: Create or update Opportunity and stage set as closed won. Survey send automatically to the recipient.
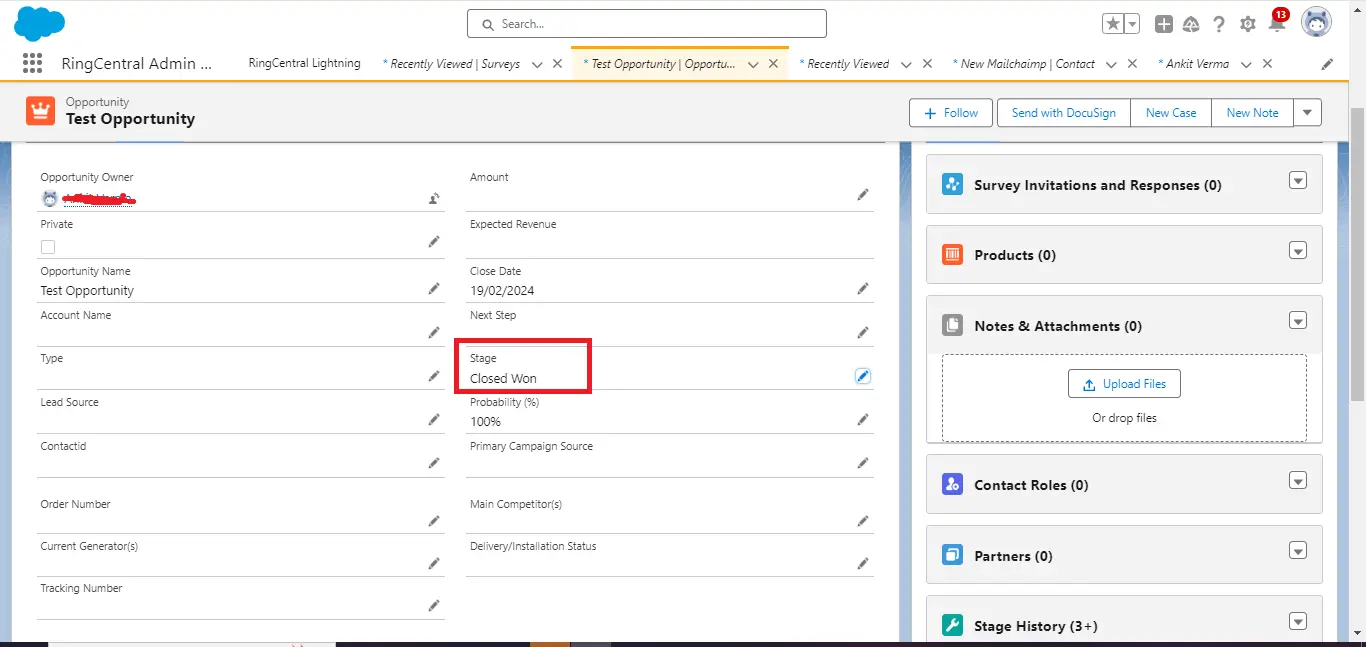
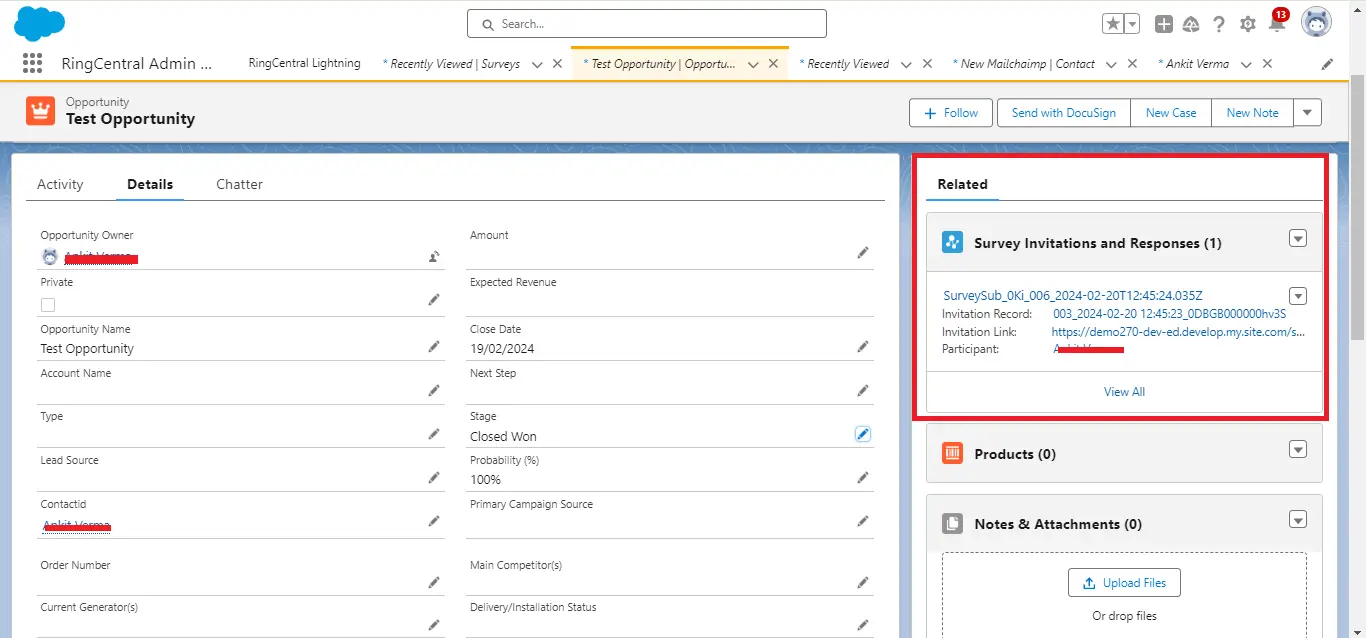
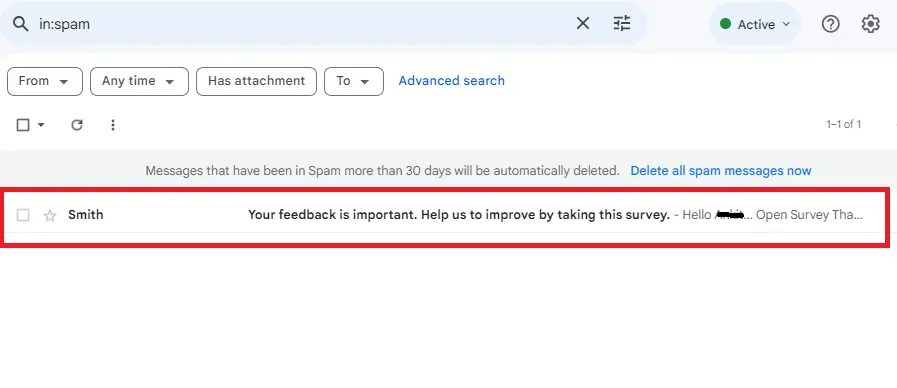
Step 8: Check if the survey has been successfully sent to the recipient’s email.
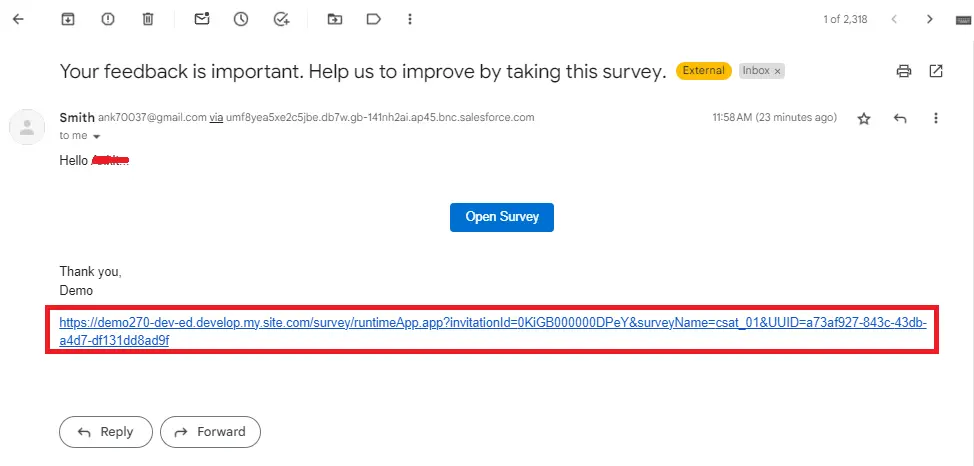
Step 9: Open this email and click on the link and redirect to the survey. For reference check the below Screenshot.
Step 10: Now, Open the Survey and complete it step by step.
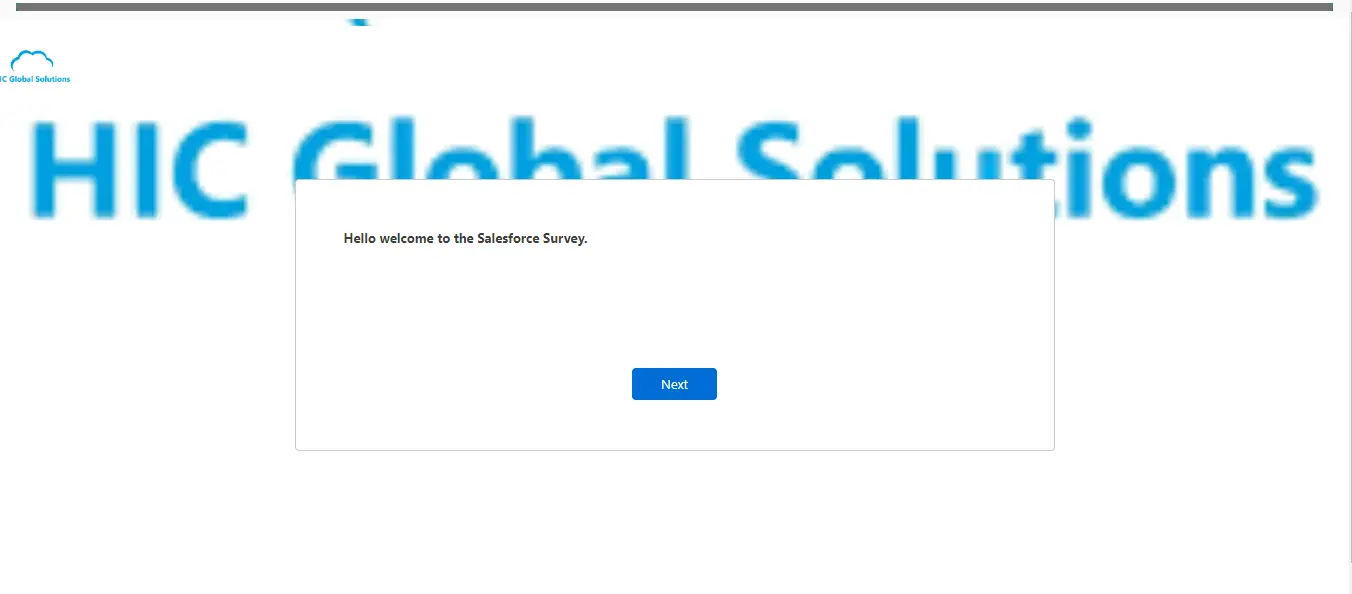
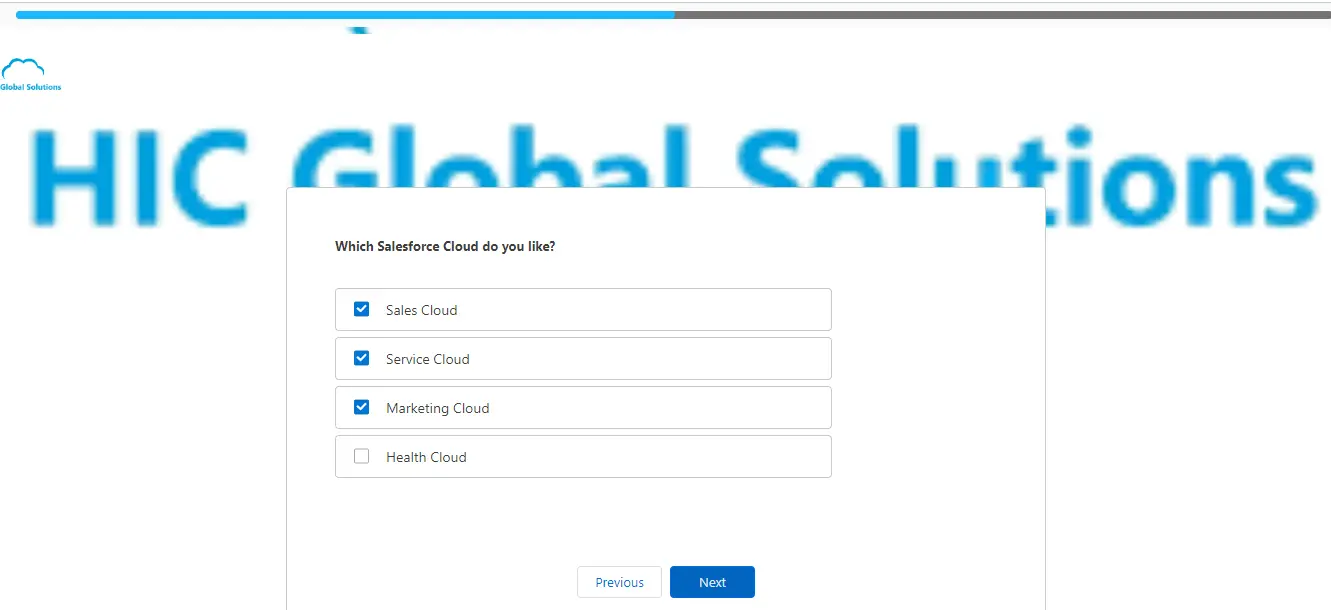
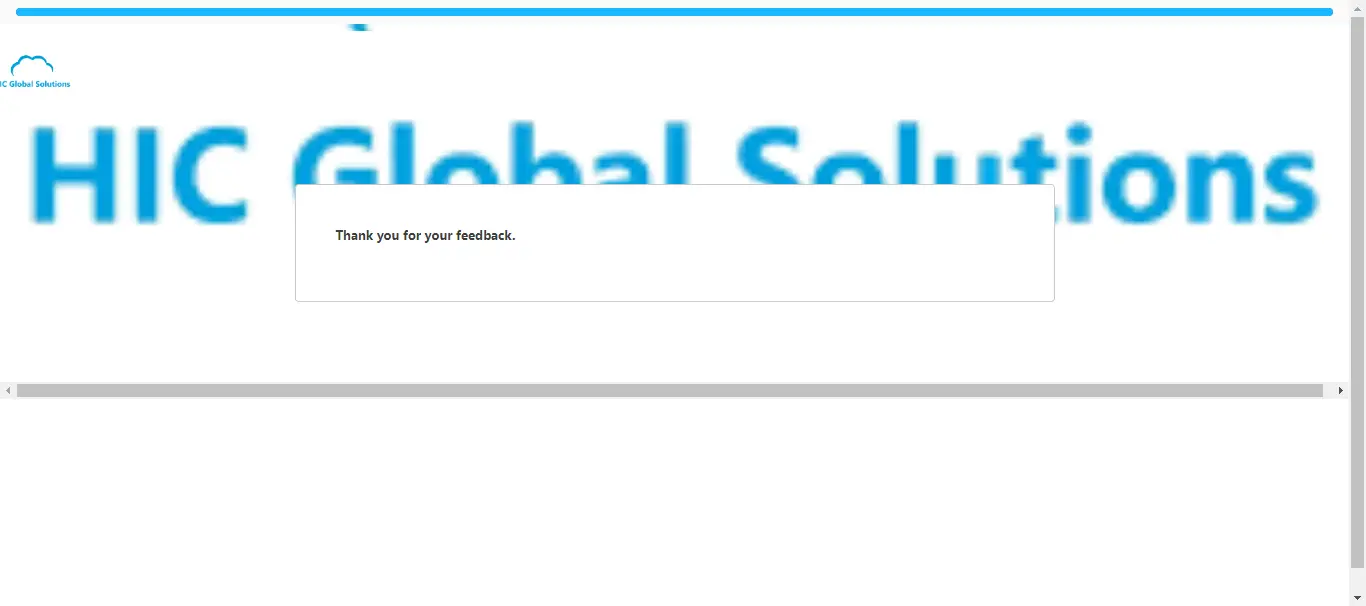
Step 11: After providing feedback successfully, the survey response status will be automatically marked as ‘Complete’.

Conclusion:
Salesforce Survey is a powerful tool that enables businesses to gather valuable feedback and insights from their customers. By leveraging customizable survey templates and intuitive design features, organizations can create and send surveys from Salesforce tailored to their specific needs and objectives. Through seamless integration with Salesforce CRM, surveys can be automatically triggered at key touchpoints in the customer journey, such as after an Opportunity is won or a support case is closed.
Hope you liked the blog. Stay tuned for more such Salesforce solutions and get in touch if you need help implementing these solutions in your business.





