

In this concluding blog on BitBucket integration in Salesforce, we’ll proceed with the final step of pushing changes to the Bitbucket Repository for the ultimate deployment. The steps of creating the Apex class and LWC component for final deployment were covered in the previous blog.
So, Let’s get started with the final process without further delay.
Adding Repository variable in Bitbucket repository
After you have configured the BitBucket Pipeline file as shown in the previous blog, Click on Source control from the left sidebar.
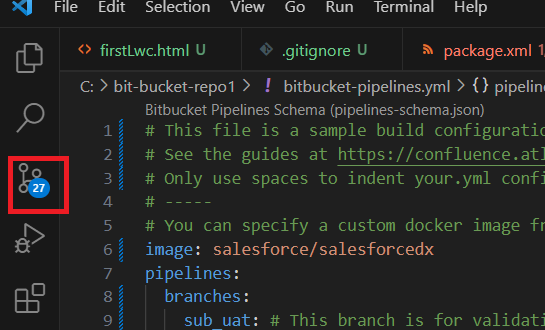
Generally Vs code automatically opens the repository available in the parent folder
If It does not open automatically, you will get a text like “A Git Repository found in the parent folder of the workspace or the open file” . Click on Open Repository.
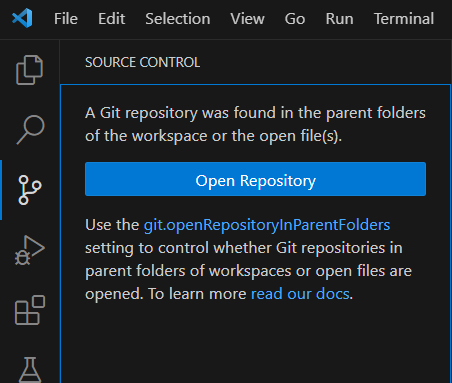
- Click on bit bucket repo1.
- Here you see all the changes in the repository
- Enter any comment in the Message field. We are writing “Created lwc, apex with test class and yaml file configuration”.
- Click on the drop-down on the right side of the commit button. Click on commit and push.
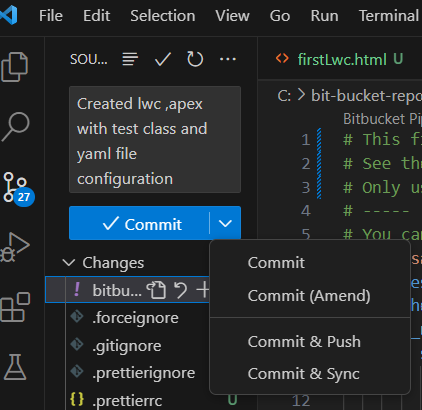
It will push all the changes of bit bucket repo1 in the repository of Bitbucket. You can verify it by opening the bitbucket repository. It looks like below:
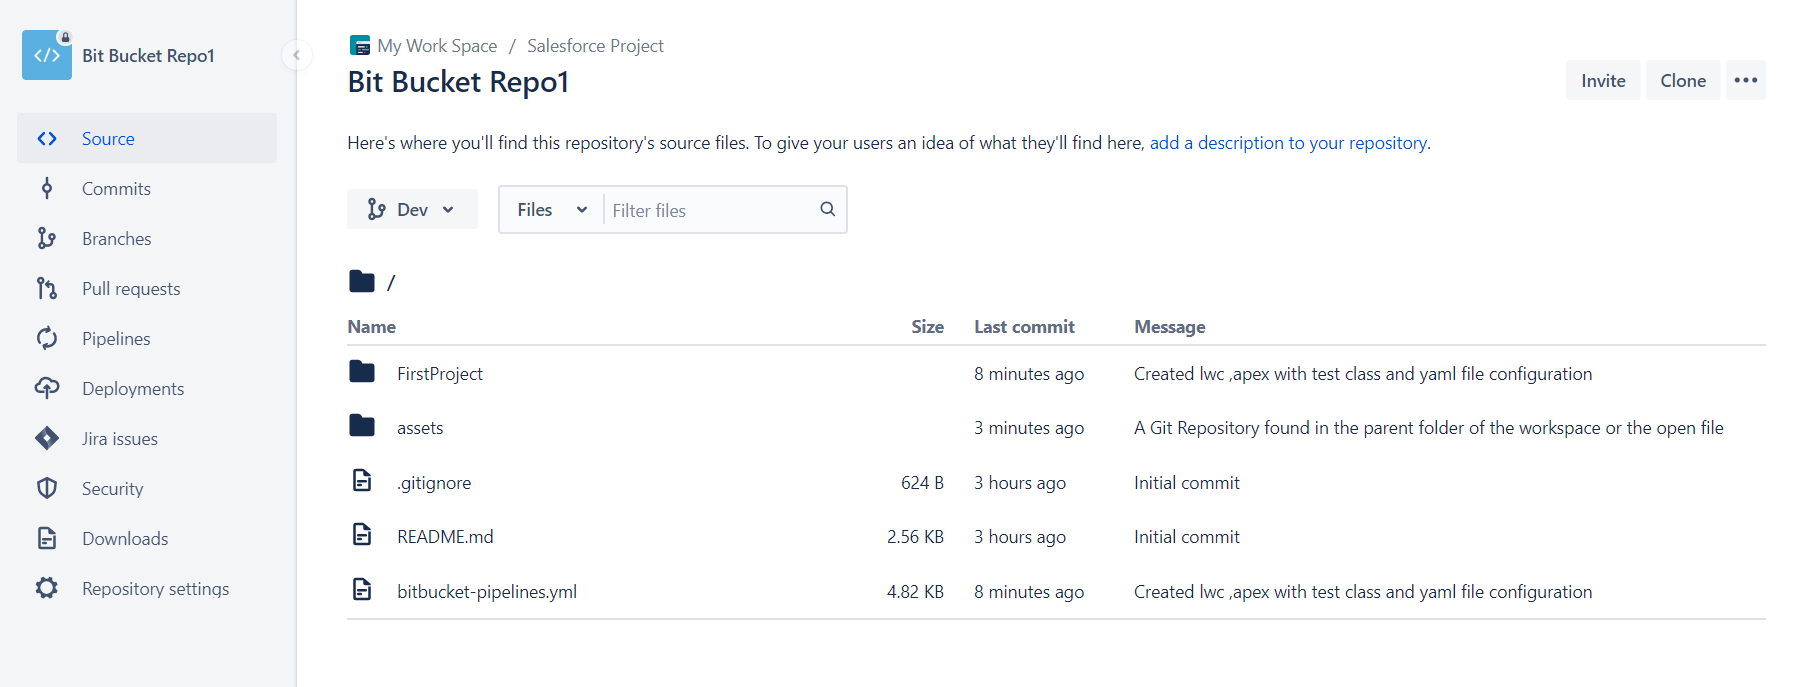
Open your Bitbucket repository left side menu and click on Repository settings. Scroll the left menu bar and click on the Repository variable.
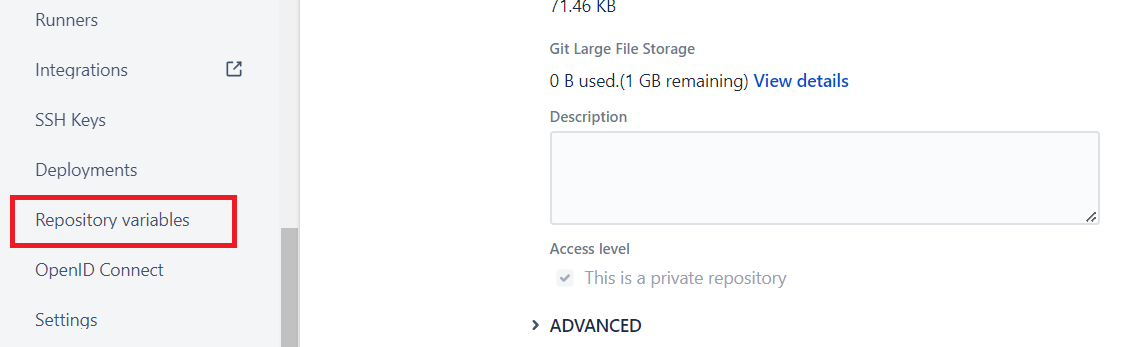
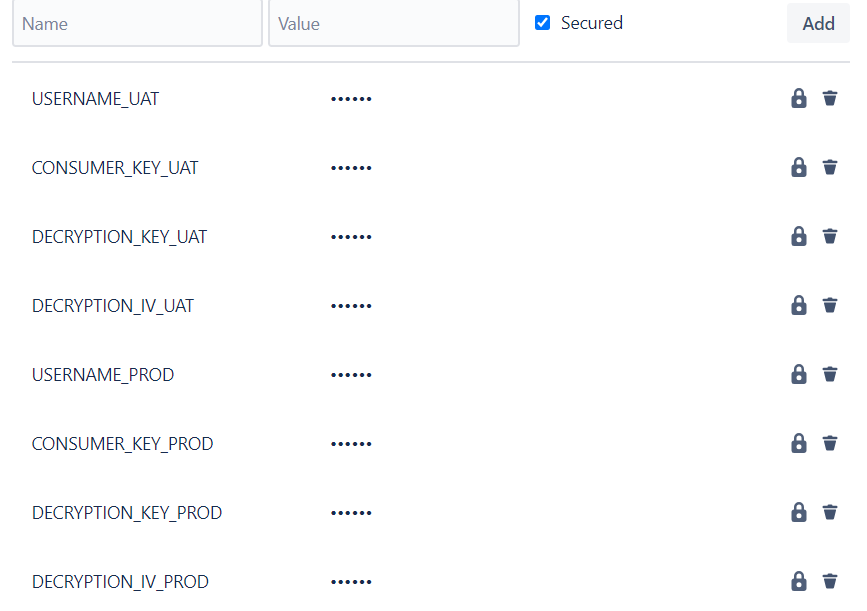
Now, Add these value in Name and Value fields respectively andthe check secured check box for every value:
Name
- USERNAME_PROD
- USERNAME_UAT
- CONSUMER_KEY_UAT
- CONSUMER_KEY_PROD
- DECRYPTION_KEY_UAT
- DECRYPTION_KEY_PROD
- DECRYPTION_IV_PROD
- DECRYPTION_IV_UAT
Value
- PROD username
- UAT Sandbox username
- UAT’s Consumer Key of ConnecTed app
- Production’s Consumer Key of Connected app
- Key generated to encrypt server.key for UAT
- Key generated to encrypt server.key for PROD
- Iv(initialization vector) generated to encrypt server.key for PRO
- Iv(initialization vector) generated to encrypt server.key for UAT
After adding all values it looks like below
Validate and Deploy Apex and LWC from Dev to UAT:
- We have created two Branches for UAT, sub_uat and main_uat.
- If we want to validate changes in UAT then we should merge Dev Branch to sub_uat.
- After successfully validating the changes in UAT, we will deploy those changes in UAT by merging the sub_uat branch into main_uat.
Validate changes in UAT:
- Open your Bitbucket repo1 Repository.
- Click on Pull request in the left side menu bar. Click on Create pull request.
- For Source Branch choose Dev and for Destination Branch choose sub_uat
- Enter Title Dev To sub_uat.
You can add a Description and also add a reviewer who will review your code or changes.
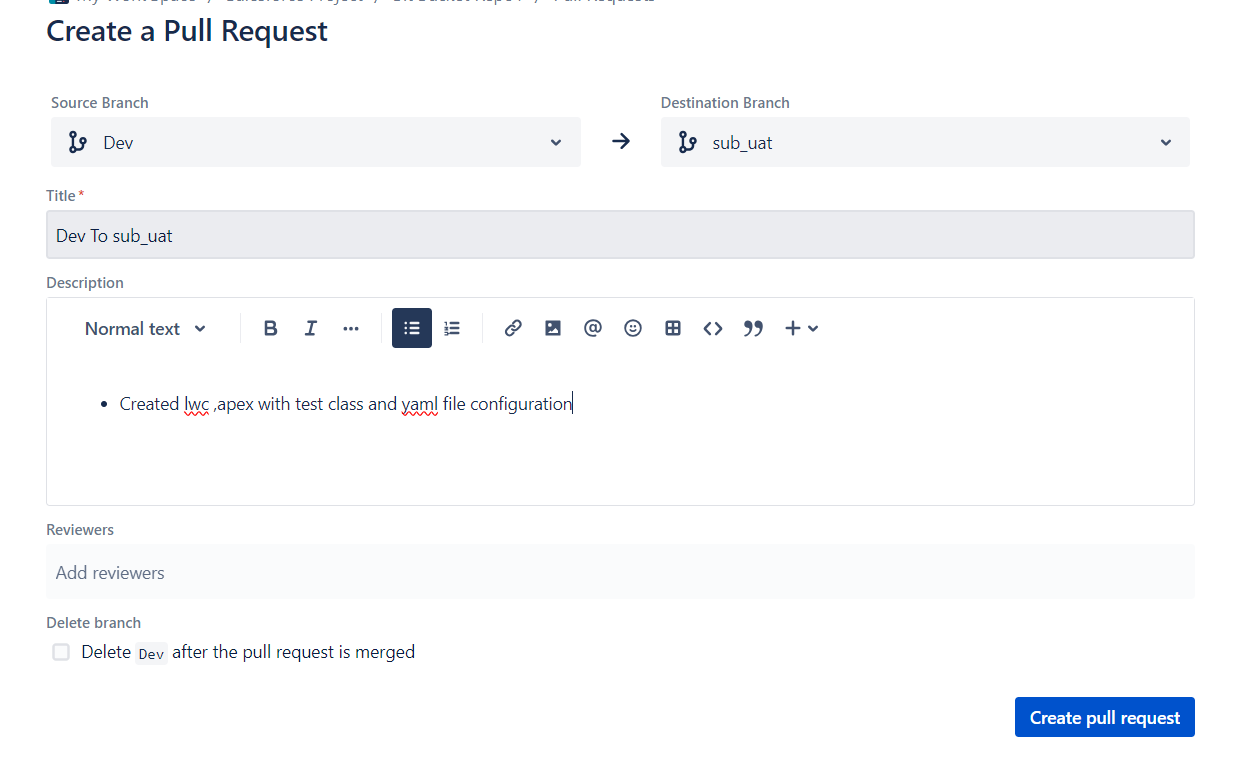
Click on Create Pull Request.
A new Pull Request is created because here we don’t have any reviewers so we have to approve and merge the code by clicking on Merge.
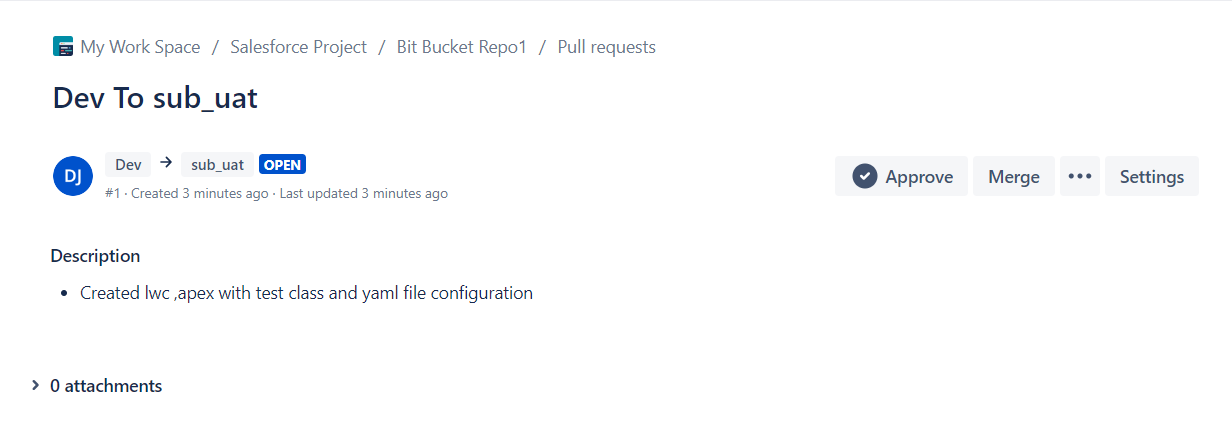
When Merge is completed pipeline will run automatically.
- Click on Pipeline.
- Click on Merged in Dev (pull request #1) Dev To sub_uat you can see it will do things one by one.

After some time validation will be successful.
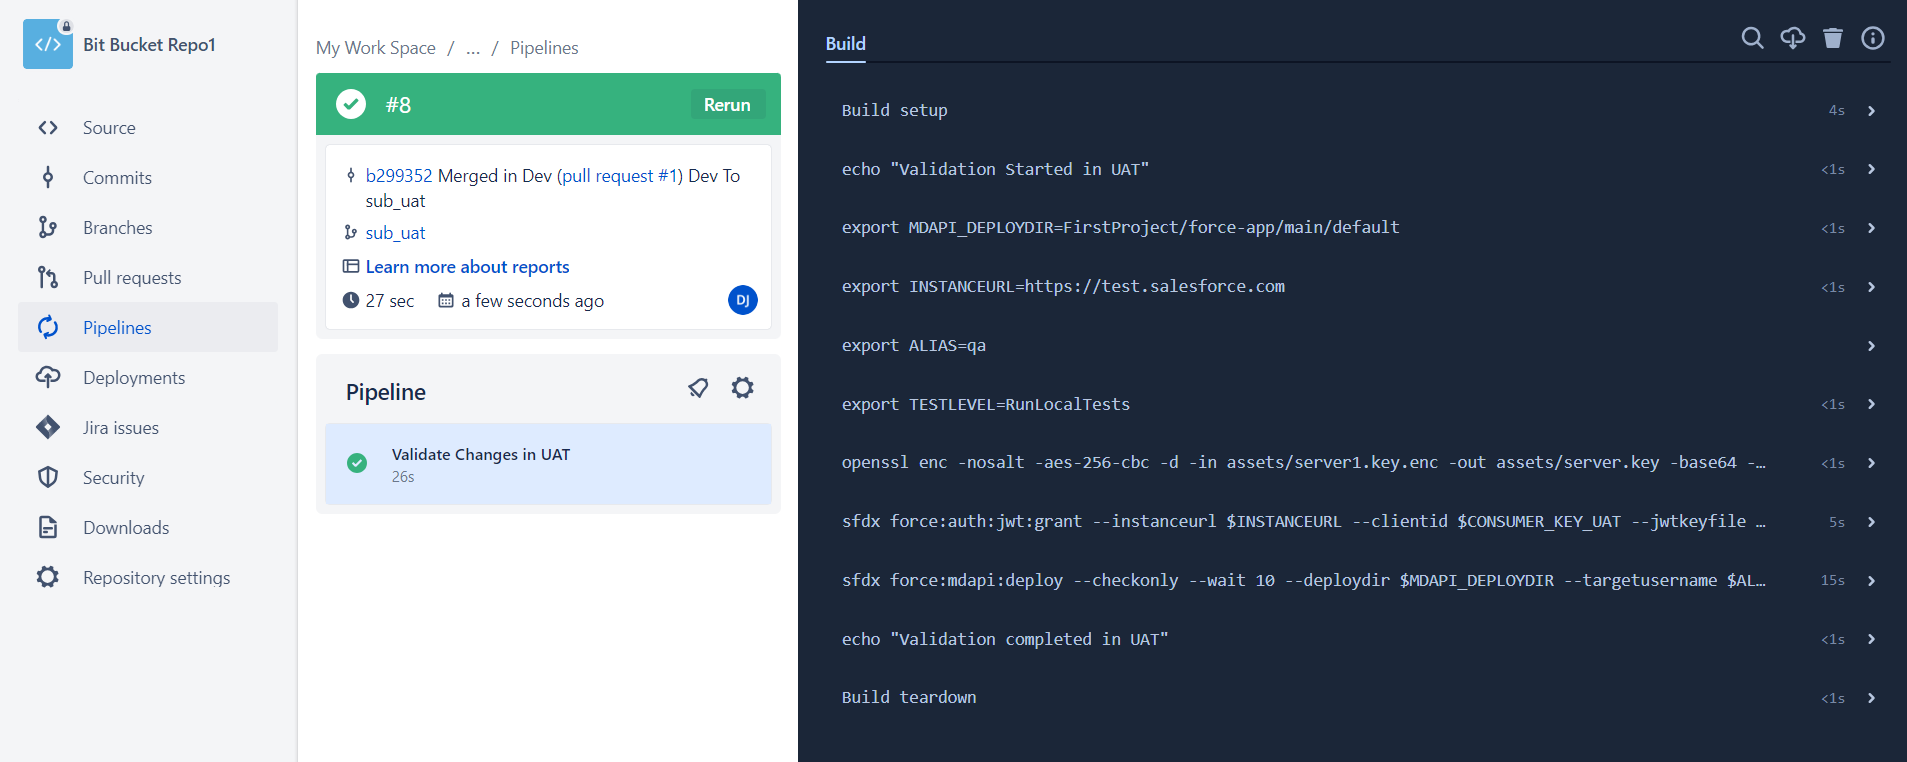
- Now log into the Uat environment and from Setup>Deployment status.
- Click on Deployment status and in the Succeeded section you will see deployment with Validate: succeeded status.

Deploy the changes in UAT:
- Open your Bit bucket repo1 Repository.
- Click on Pull request in the left side menu baR. Click on Create pull request.
- For Source Branch choose sub_uat and for Destination Branch choose main_uat.
- Enter Title sub_uat To main_uat.
You can add a Description and also add a reviewer who will review your code or changes.
- Click on Create Pull Request.
- A new Pull Request is created because here we don’t have any reviewers so we have to approve and merge the code by clicking on Merge.
When Merge is completed pipeline will run automatically.
- Click on Pipeline.
- Click on Merged in Dev (pull request #2) sub_uat To main_uat you can see it will do things one by one.
After some time Deployment will be successful.

- Now log into Uat environment and from Setup>Deployment status.
- Click on Deployment status and in Succeeded section you will see deployment with Deploy: succeeded status.

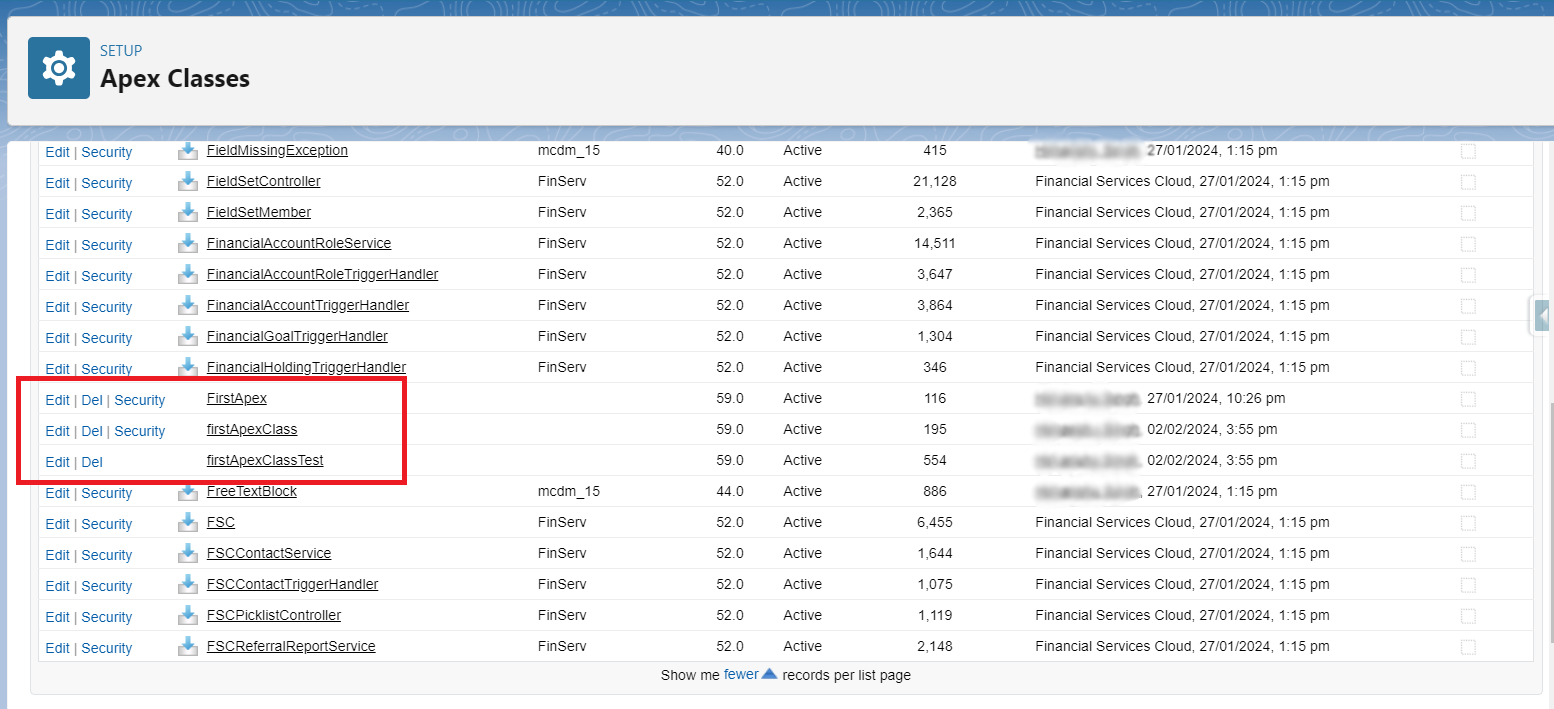
Now Apex class “firstApexClass” and its test class will be available in Uat. You can verify it from setup>Apex classes and there you will see your deployed apex classes.
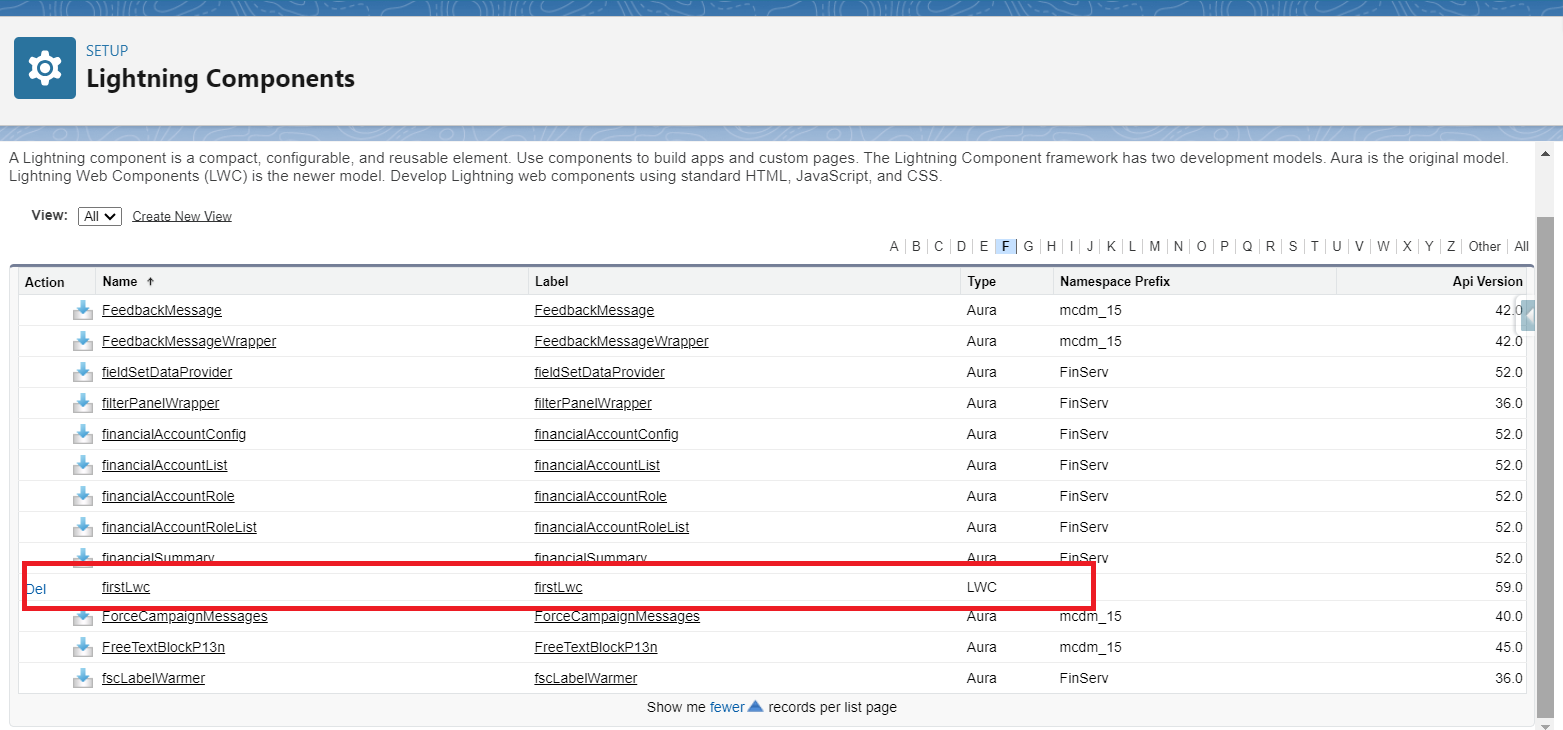
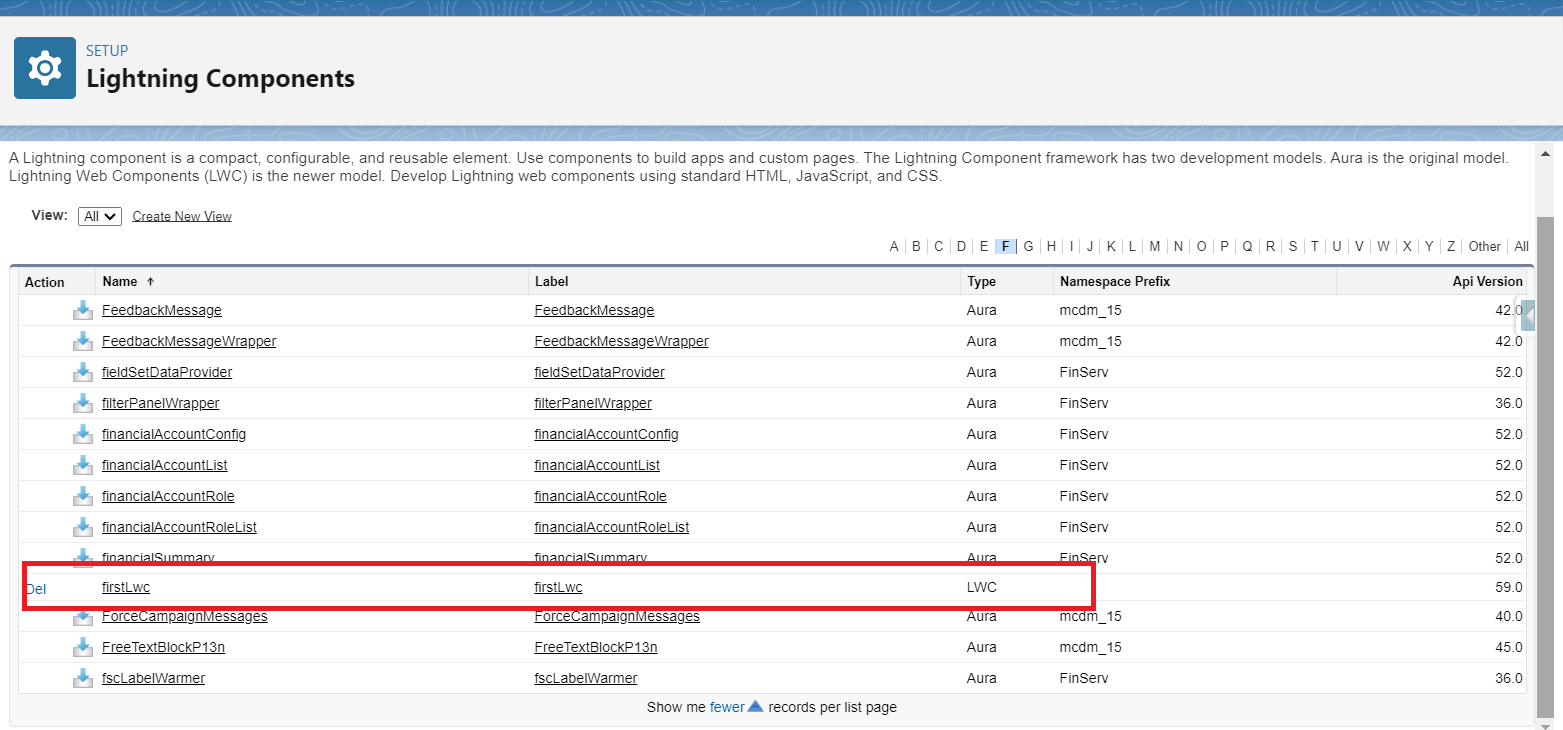
For verify LWC from Setup>Custom Code>Lightning Components. And there you will find your deployed LWC.
Finally, Validate and Deploy in the Production environment:
- We have created two Branches for Production, sub_main and main.
- If we want to validate changes in Production then we should merge main_uat Branch to sub_main.
- After successfully validating the changes in Production to deploy changes in Production we will merge the sub_main branch into the main.
Validate changes in Production:
- Open your Bit bucket repo1 Repository.
- Click on Pull request in the left side menu bar. Click on Create pull request.
- For Source Branch choose main_uat and for Destination Branch choose sub_main
- Enter Title main_uat To sub_main.
You can add a Description and also add a reviewer who will review your code or changes.
- A New Pull Request is created because here we don’t have any reviewers so we have to approve and merge the code by clicking on Merge.
- When Merge is completed pipeline will run automatically. Click on Pipeline.

- Click on Merged in Dev (pull request #3) main_uat To sub_main you can see it will do things one by one.
- After some time Validation will be successful.

- Now log into the Production environment and from Setup>Deployment status.
- Click on Deployment status and in the Succeeded section you will see deployment with Validate: succeeded status.

Deploy changes in Production :
- Open your Bit bucket repo1 Repository.
- Click on Pull request in left side menu bar . Click on Create pull request.
- For Source Branch choose sub_main and for Destination Branch choose main
- Enter Title sub_main To main.
- You can add Description and also add reviewer who will review your code or changes.
- Click on Create Pull Request.
- New Pull Request is created because here we don’t have any reviewer so we have to approve and merge the code by clicking on Merge.
- When Merge is completed pipeline will run automatically. Click on Pipeline.

- Click on Merged in Dev (pull request #4) sub_main To main you can see it will do things one by one.
- After some time Deployment will be successful.
- Now log into the Production environment and from Setup>Deployment status.
- Click on Deployment status and in the Succeeded section you will see deployment with Deploy: succeeded status.
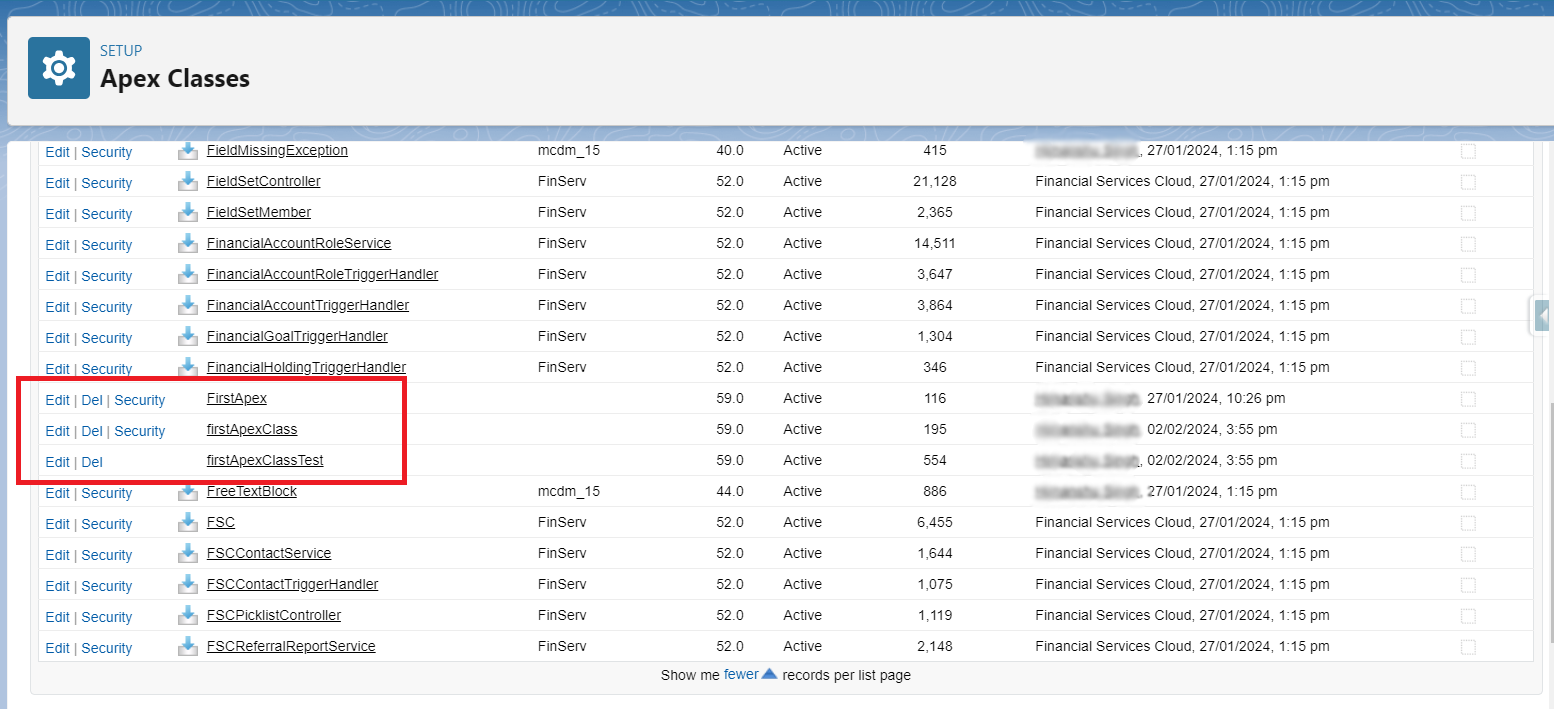
- Now Apex class “firstApexClass” and its test class will be available in Uat. You can verify it from setup>Apex classes and there you will see your deployed Apex classes.
For verify LWC from Setup>Custom Code>Lightning Components. And there you will find your deployed LWC.

Conclusion:
Bitbucket is a powerful and flexible tool that can help you streamline your Salesforce development workflow and deliver better code faster. Compared to other version control tools such as GitLab or GitHub, Bitbucket offers more features and integrations for Salesforce developers, such as native support for Salesforce DX, Salesforce CLI, SFDX Scanner, and more.
Try out the solution in your org and feel free to contact us for any Salesforce Development solution!





