

Building on our previous exploration of how to integrate Salesforce to Google Sheets using apps in a comprehensive blog, we are back again to guide you through the intricacies of integrating Salesforce to Google Sheets utilizing Google APIs.
Emphasizing the utilization of APIs for real-time data synchronization, this integration promises to revolutionize the way you handle and collaborate on data. It streamlines data management and enhances collaboration by ensuring that your Salesforce data is seamlessly accessible and synchronized with your Google Sheets.
So, let’s begin and demonstrate how to update contact records in Google Sheets, created in Salesforce through APIs.
Set up a Google Cloud Platform Project to Integrate Salesforce to Google Sheets using API
- Head to the Google Cloud Console.
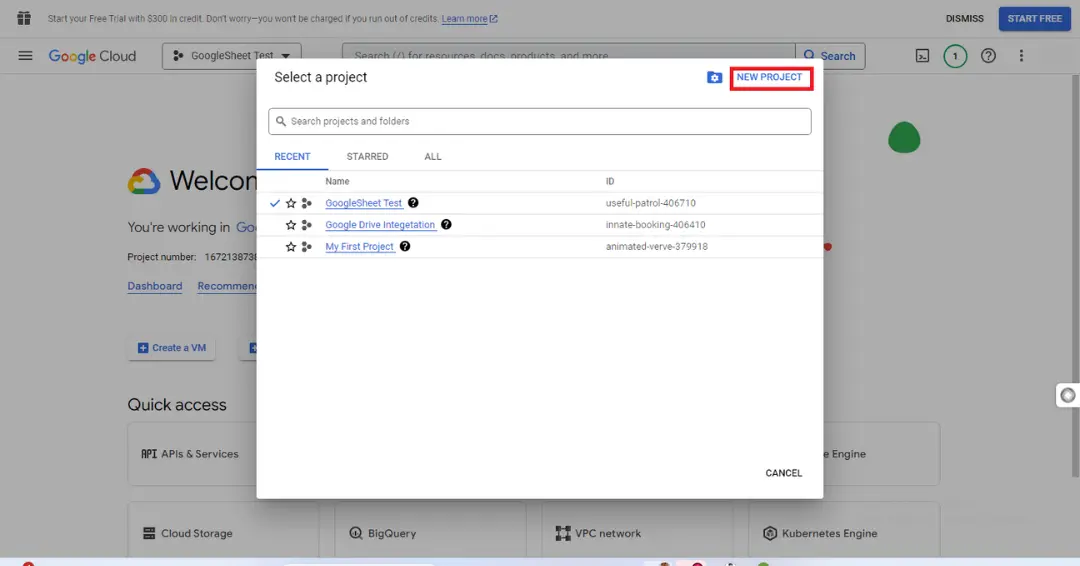
- You can either select a new project or choose an existing one.
- Next is enabling the Google Sheets API for your project.
- Create credentials for a service account, and download the JSON key file.
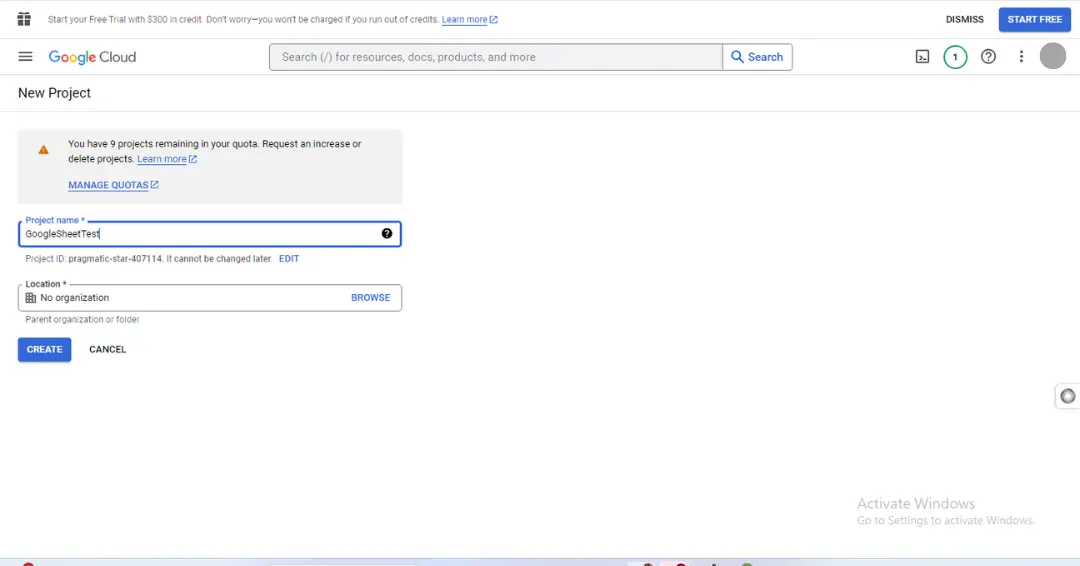
>> Provide the desired Name for Project here, Here I’ve given the name Google Sheet Test.
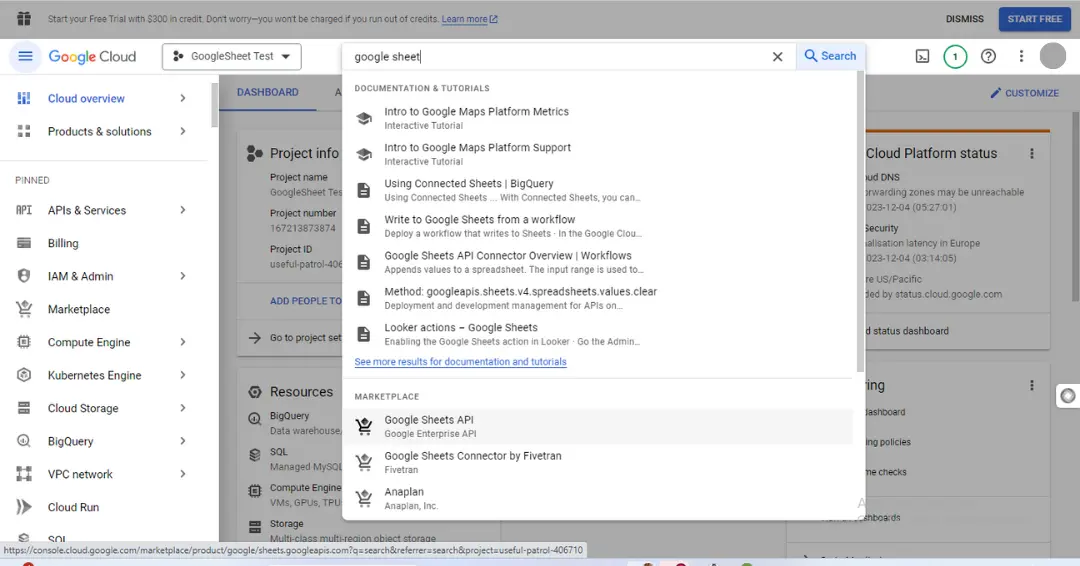
>> In the search box, write Google Sheet and select the Google Sheets API option.
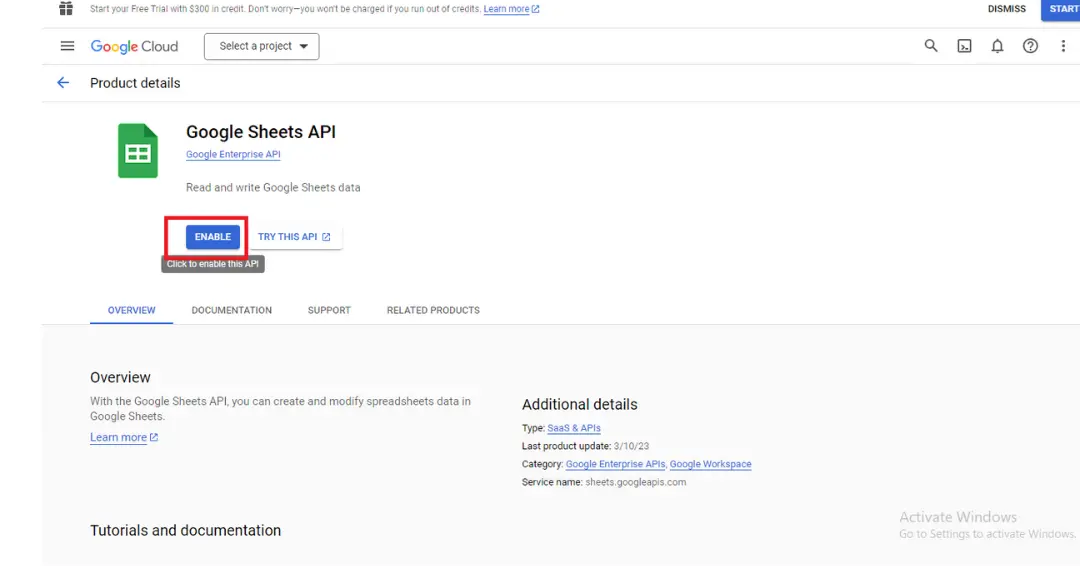
>> Click on Enable API
>> Click on the left corner, then click on API & Services, once the box will get opened click on Credentials and then click on Create Credentials.
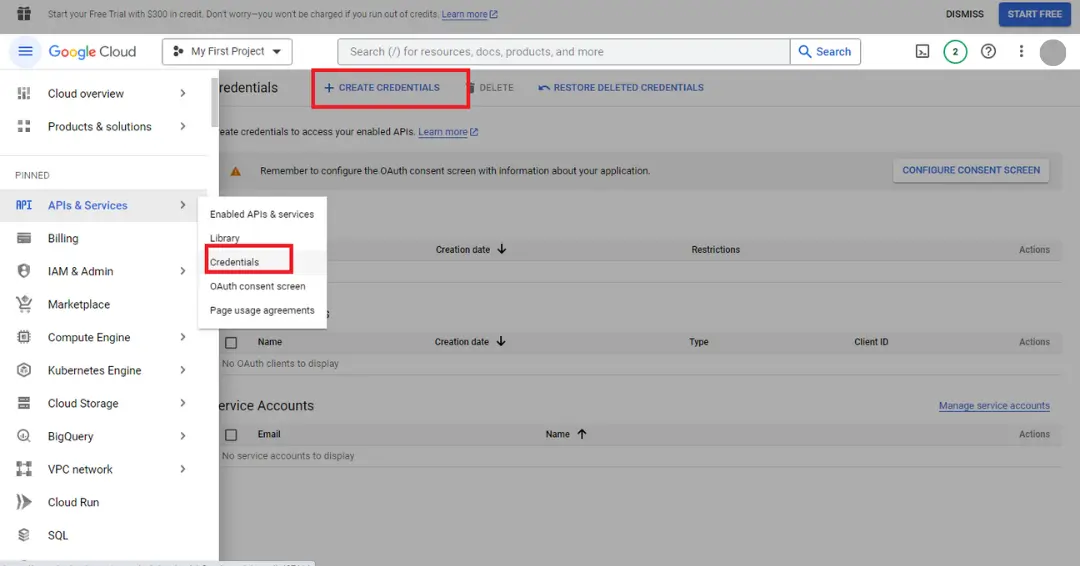
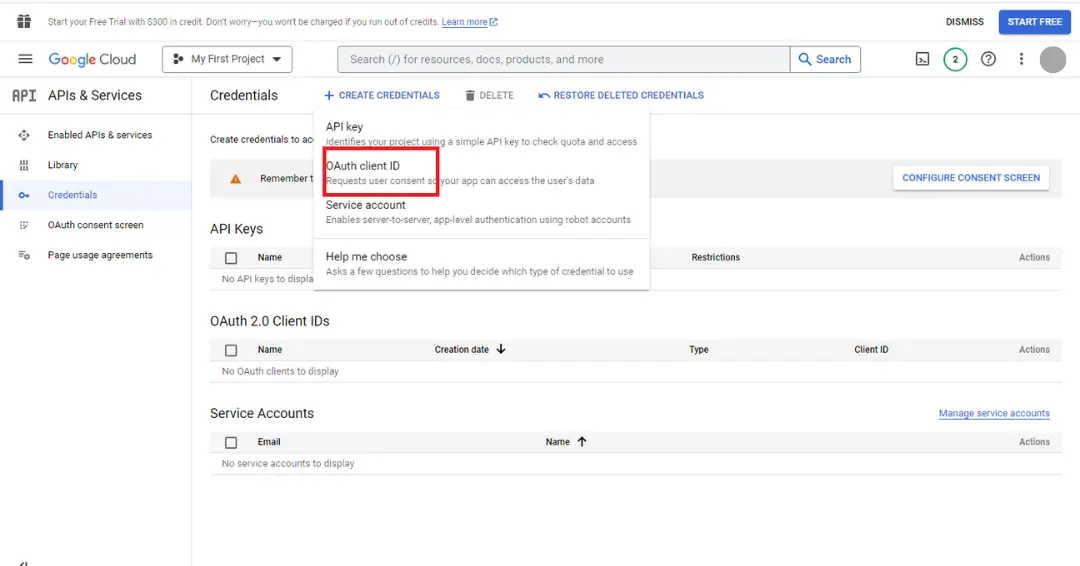
>> As the Create Credentials box opens, Click on OAuth Client ID.
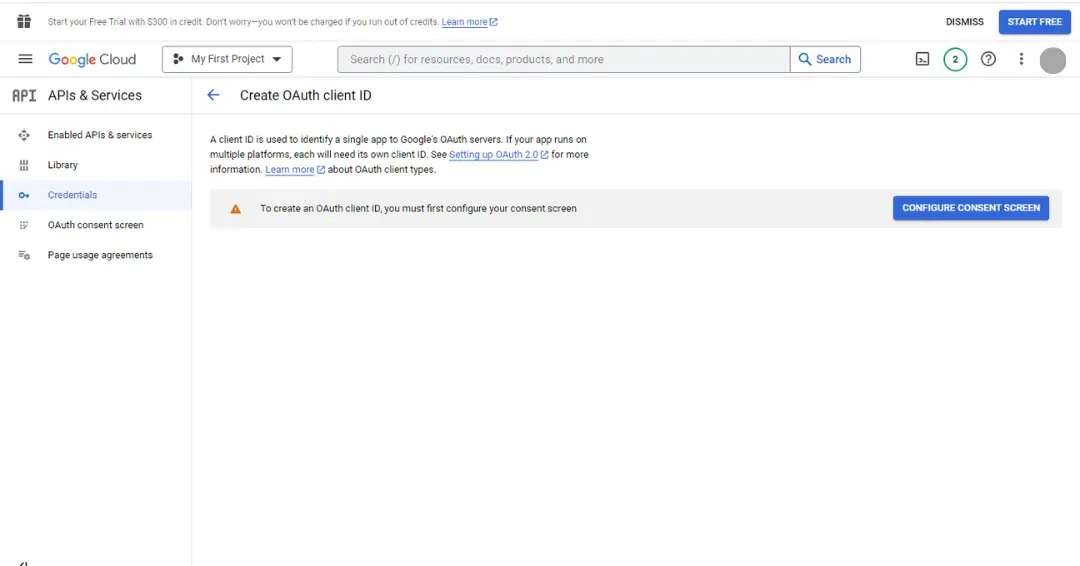
>> To create an OAuth client ID, we need to Configure Consent Screen.
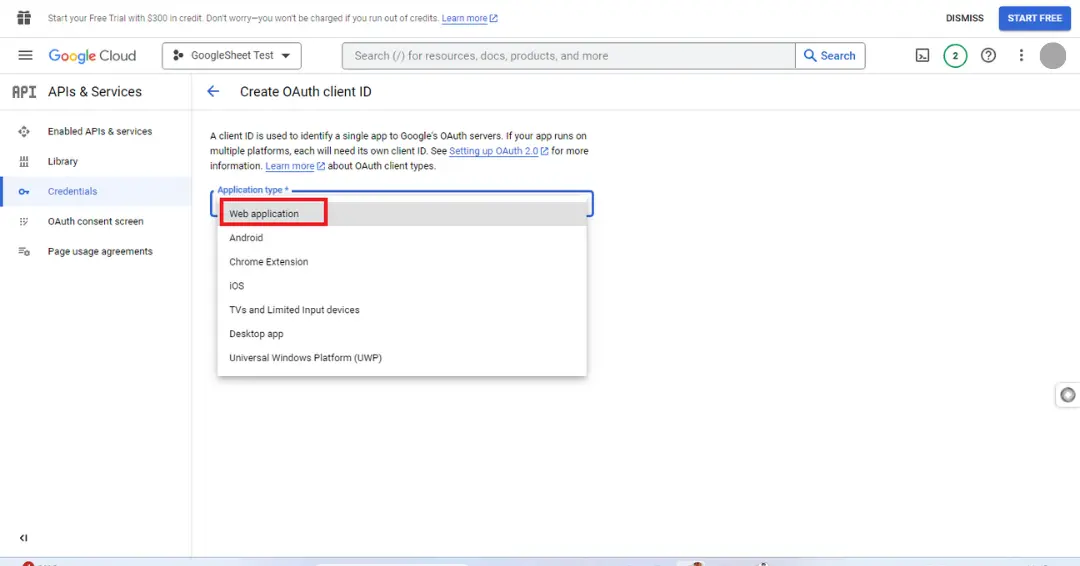
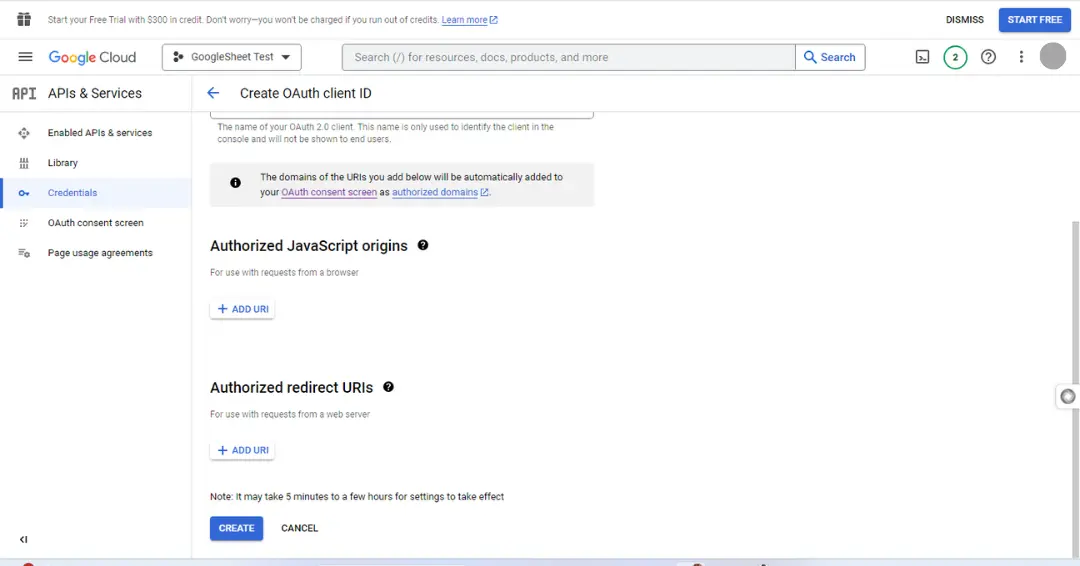
>> In Authentication Type, Select Web Application.
>> Provide the ‘Name’ for your OAuth Client ID and Create it.
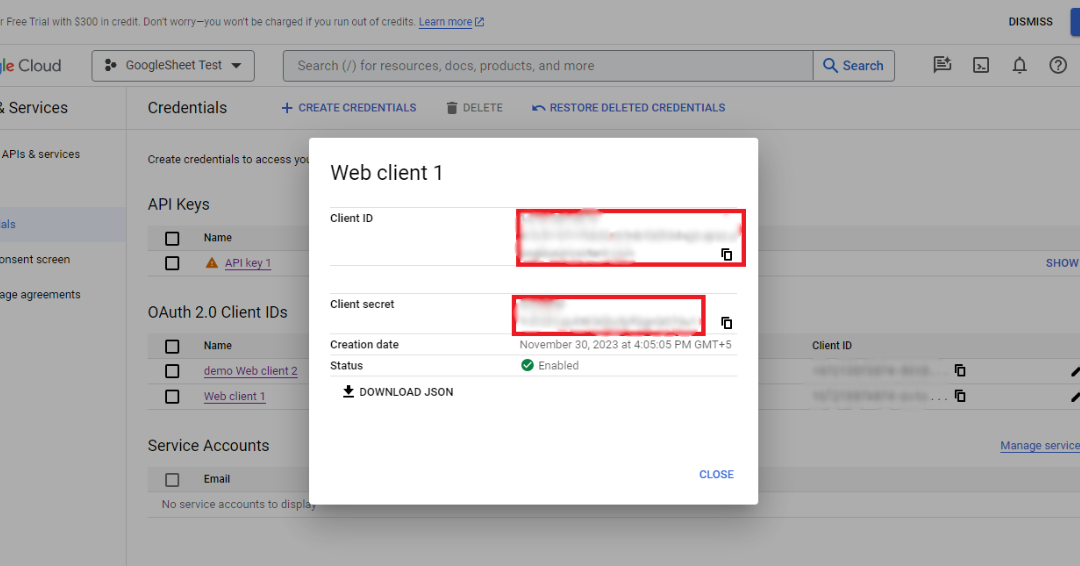
>> Once the OAuth page opens, Copy the Client Id and Client Secret.
> In Salesforce Org
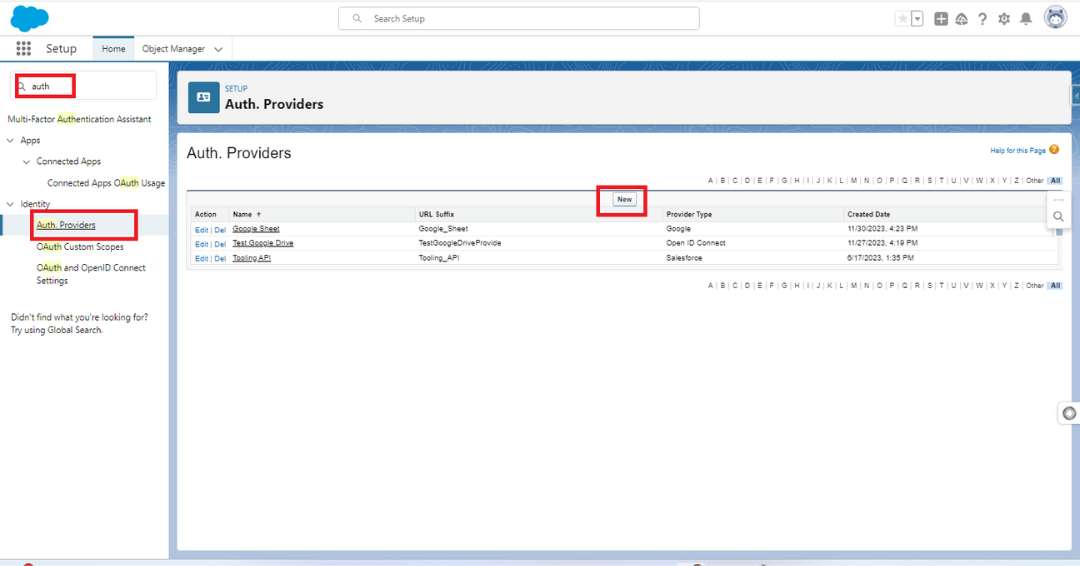
Setup >> Quick Find Box >> Enter Auth >> Click on Auth Provider >> Click on New.
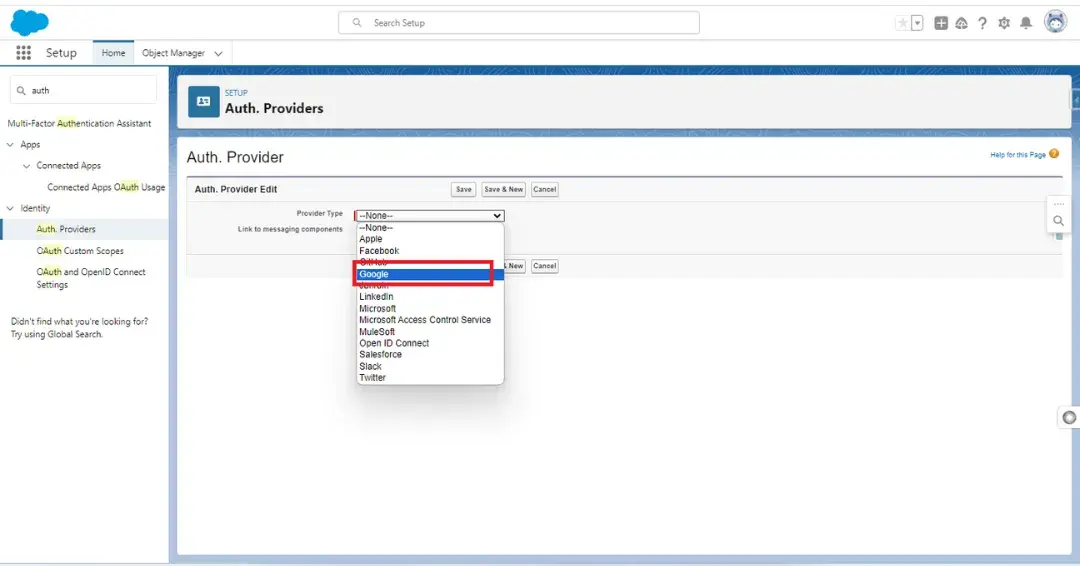
>> In Provider Type, Select Google.
>> Following Box will be opened.
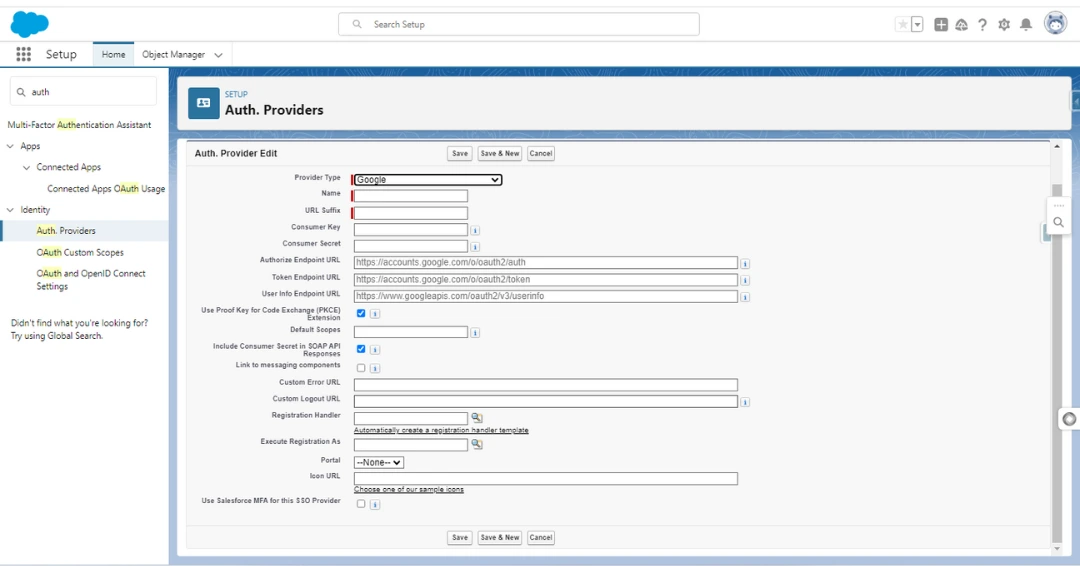
>> In consumer key, Mention the copied OAuth client Id and In consumer Secret, Mention the copied client secret.
Authorize Endpoint URL
https://accounts.google.com/o/oauth2/auth?access_type=offline&approval_prompt=force
Token Endpoint URL
https://accounts.google.com/o/oauth2/accessToken
Default Scopes
https://www.googleapis.com/auth/spreadsheets
In Authorize Endpoint URL, Token EndPoint URL and Default Scopes mentioned above Url. Once you will save the auth Provider, the callback Url will be generated so, copy the callback url.
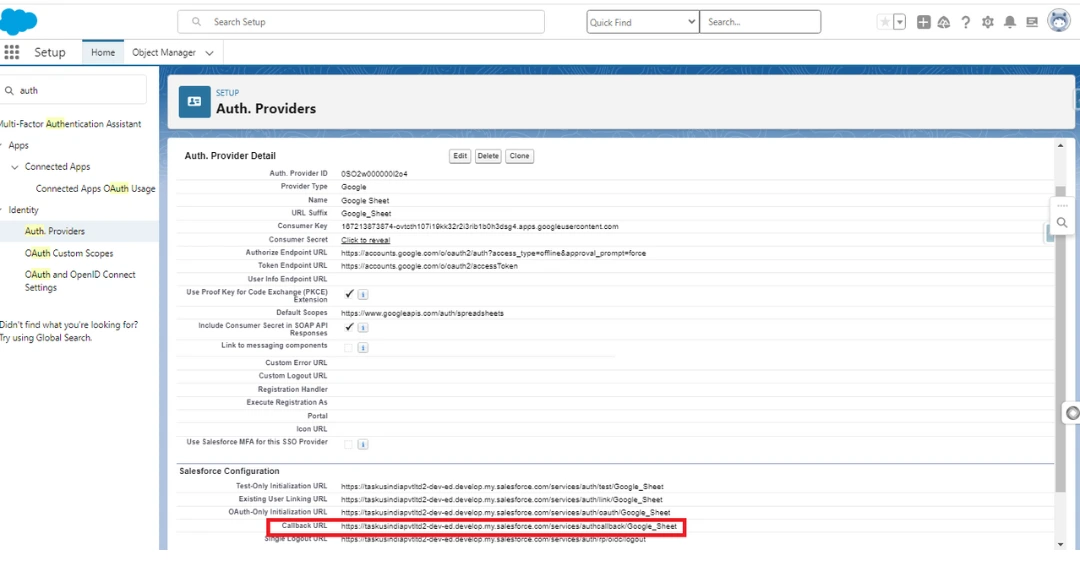
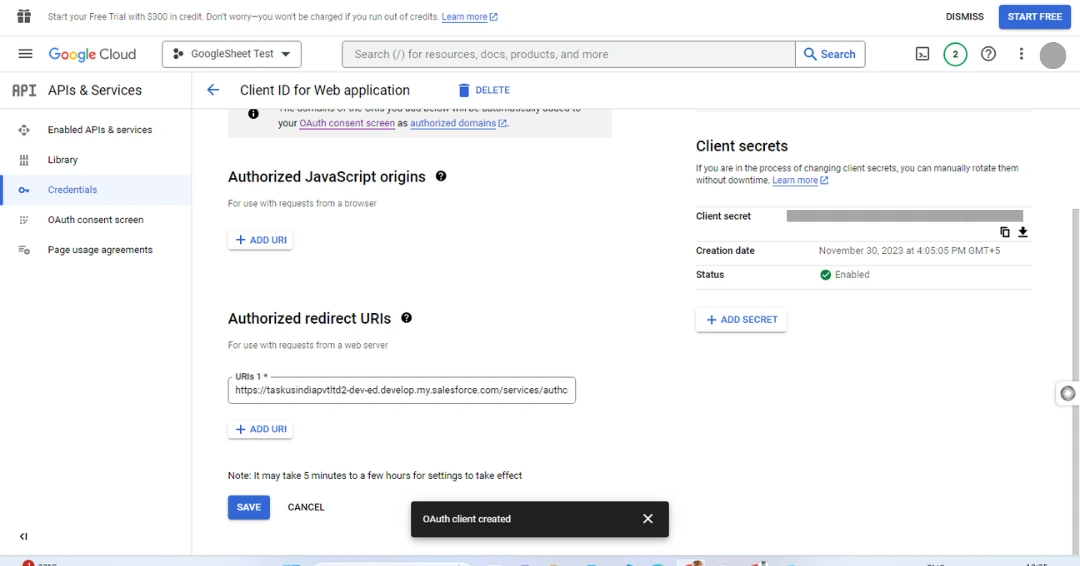
>> Mention the callback Url in OAuth Client Id.
>> In the Quick Find Box, Enter Named Credentials in the left corner. Click on the drop-down box and click on New Legacy.
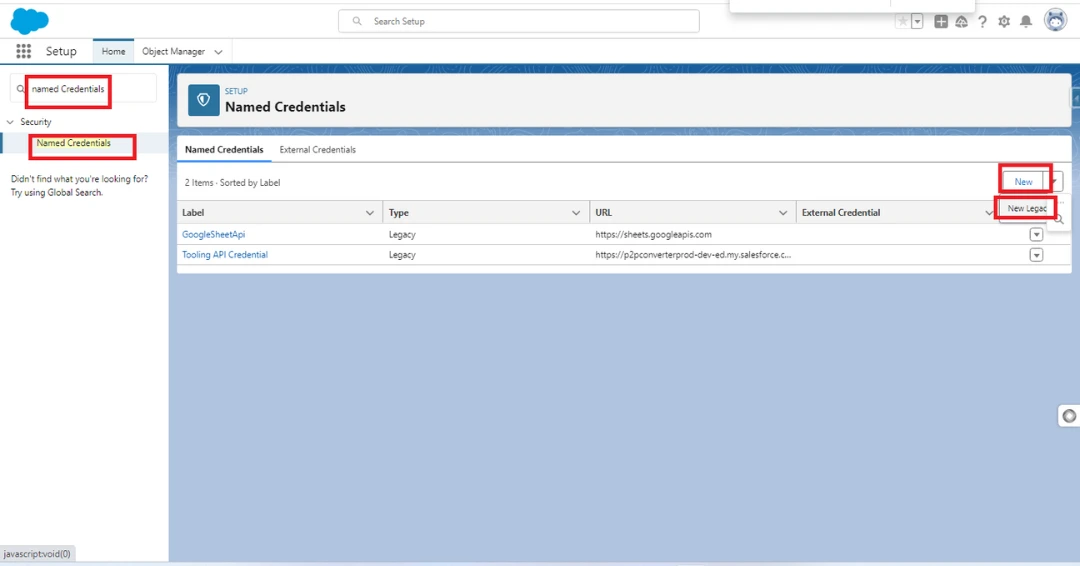
> For creating new Named Credentials provide the desired Label, In the URL, mention this URL –
https://sheets.googleapis.com
In Identity type, select Named Principle, and In Authentication Protocol, Select OAuth 2.0.
For Authentication Provider, Click on the glass icon, Select the Authenticator Provider which you have created in Auth and Click on ‘Save’ button.
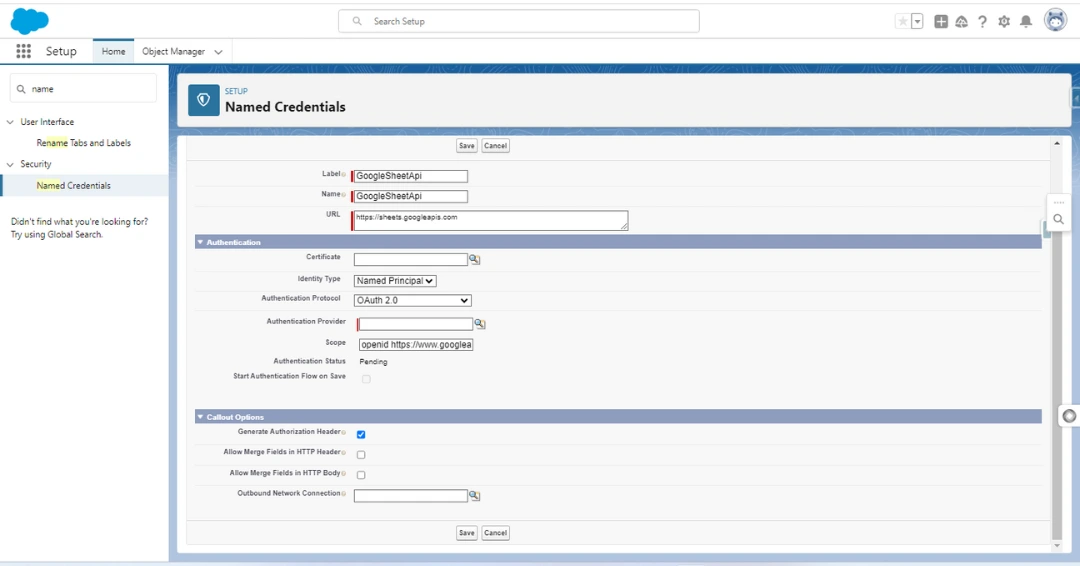
>> As you click on ‘Save’ button, It will redirect you to verify your email.
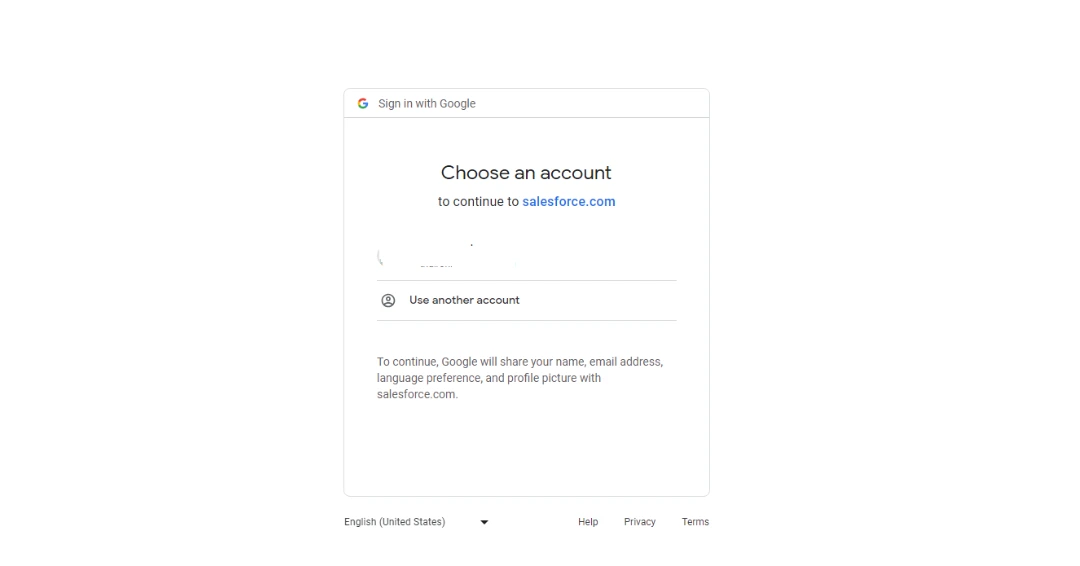
>> Click on Continue.
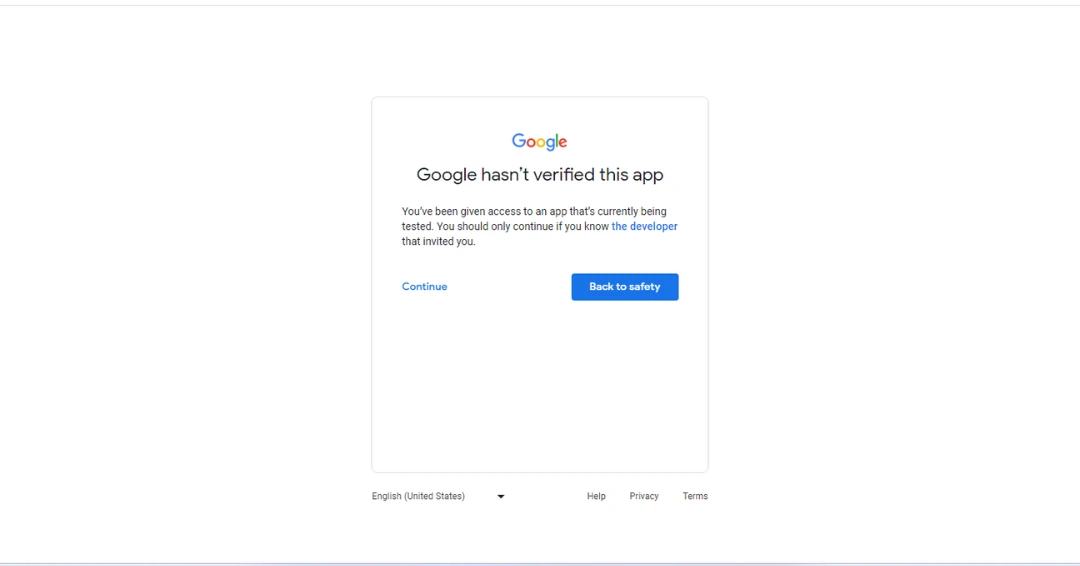
>> Again, Click on Continue.
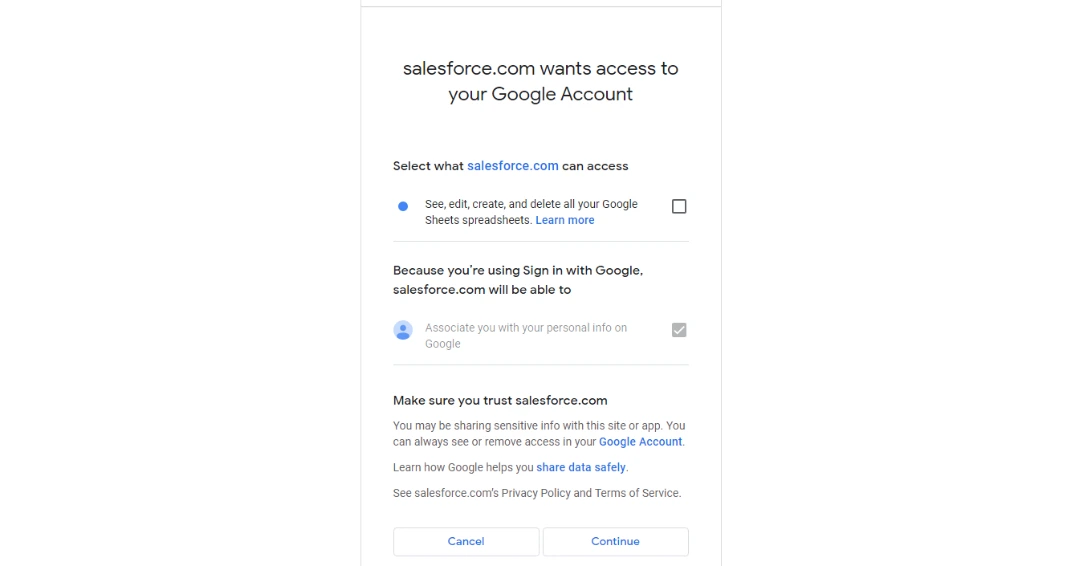
>> Once you process all the steps, it will redirect you back to your Salesforce org.
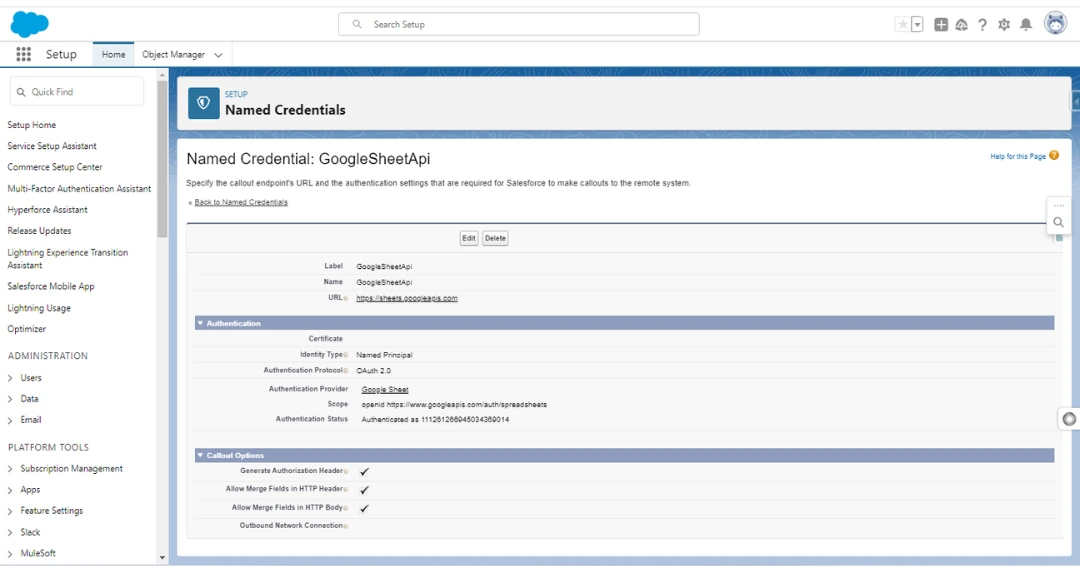
> Once we have completed all the above mentioned steps for authentication, we have to create a custom button and we have to set it on the contact record page as we will click on the button. It will sync your contact to google sheet and it will be appended on the sheet.
> Controller Class – GoogleSheetApi.cls
We have set the EndPoint –
req.setEndpoint(‘callout:GoogleSheetApi/v4/spreadsheets/1SyhGgtSdU9f8zeNKWCGBZ3om3D8pOo2uoKhOELASLvo/values/Sheet1:append?valueInputOption=RAW’);We have mentioned the sheet Id in the endpoint.
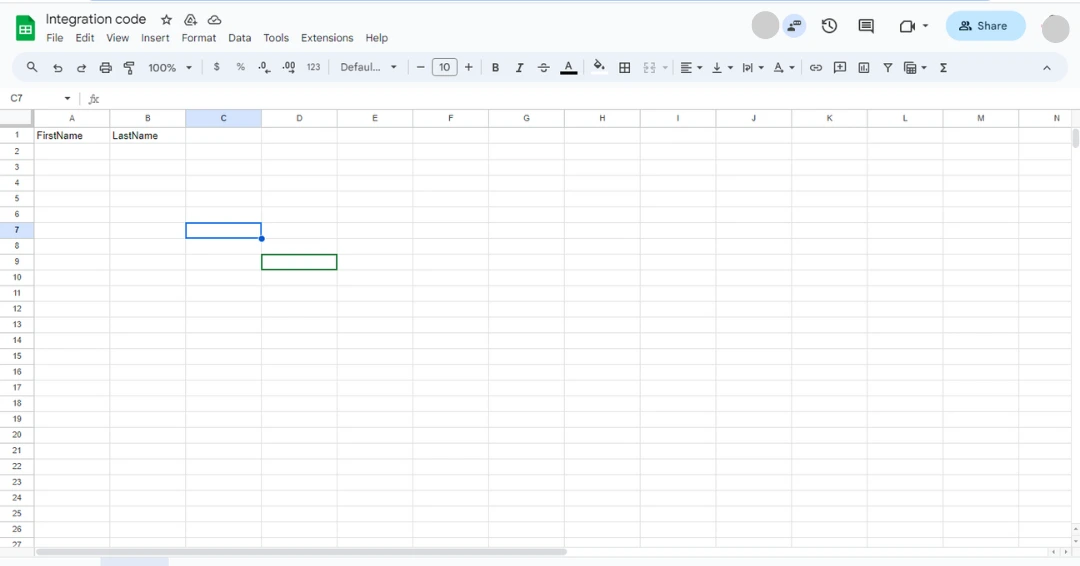
>> HTML Class – googleSheetTest.html’
>> Here, we have created a custom button on the page and added this component on the standard contact page, as you will click on the button, the contact will be synced with google sheet.
>> JS Class – googleSheetTest.js
>> In the Js file, we have imported controller class and method and also we have imported showToastEvent. Here we have used api,wire and track decorator. Api decorator will provide current page record Id and appendRowbyID is variable name for controller class.
>> We have added the button on the Standard Contact Page.
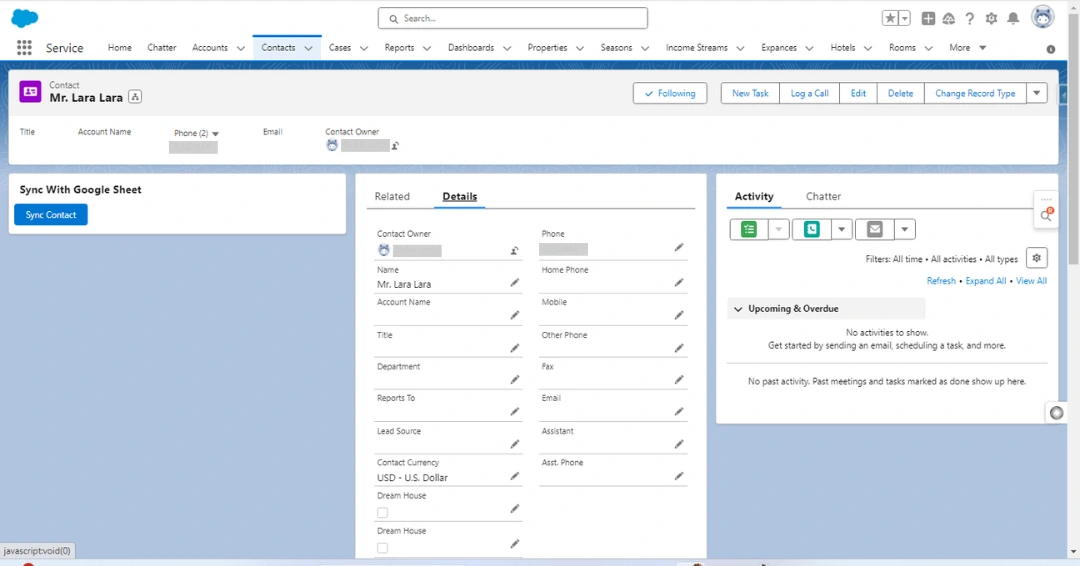
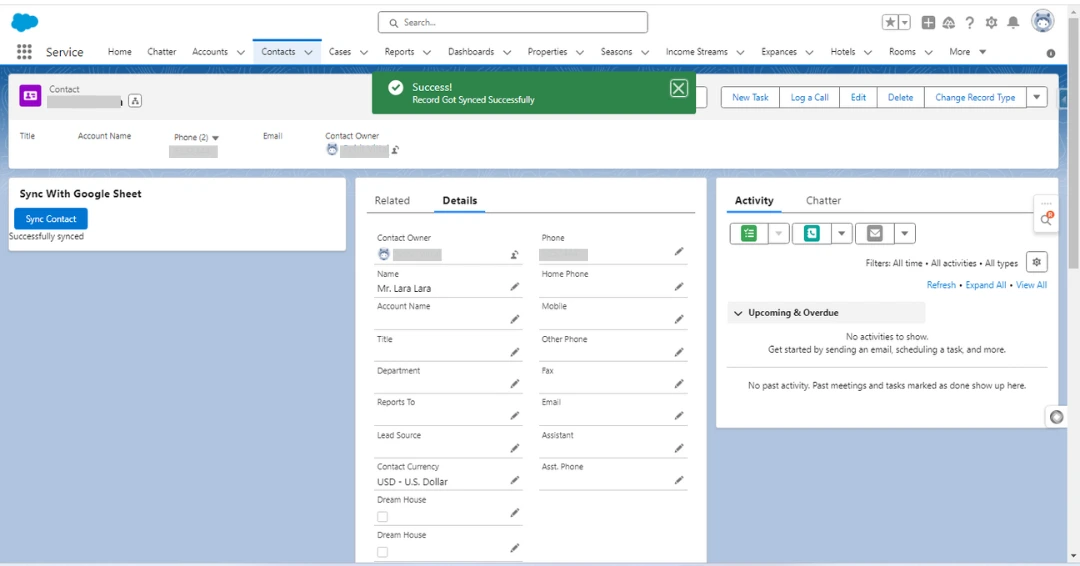
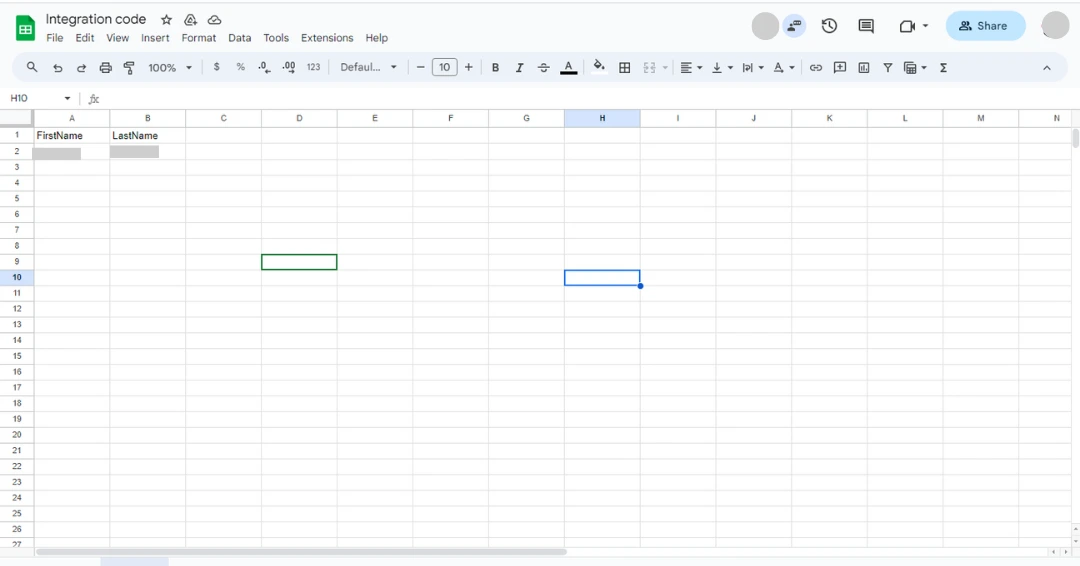
>> Once you click on the button, the contact will be synced with the sheet.
>> The Contact will be available on the sheet.

Conclusion
So, here it is! This is how we can seamlessly integrate Salesforce to Google Sheets and update contact records in it.
So what are you waiting for? Go ahead and try out the solution. Feel free to share your suggestions or reach out to us for any Salesforce development Services.





