

To create a WhatsApp channel in Salesforce Service Cloud for assisting customers over WhatsApp represents a significant step in delivering enhanced customer experiences. By enabling direct communication between agents and customers, regardless of the device they are using, businesses can create a seamless and accessible platform for issue resolution. Additionally, The 24/7 availability of agents ensures timely responses and efficient problem-solving, fostering a positive customer experience. In this blog today, we will explain how to create a WhatsApp channel In Salesforce Service Cloud. So, without any delay, let’s begin!
Prerequisite To Create A WhatsApp Channel in Salesforce Service Cloud:
- Messaging user License.
- Digital engagement Setup.
- Service cloud license.
- Meta Business account.
- WhatsApp business account.
Note: The number should not be used previously in any other WhatsApp account.
- You must enable Messaging in Salesforce>In Quick Find search>Messaging setting>enable.
Consideration to use WhatsApp in the service cloud:
Before Creating a WhatsApp channel in Salesforce review the most important considerations. Click here to learn about Consideration to use WhatsApp in the service cloud.
Channel Type:
In the Service cloud, there are 2 types of channels.
- Enhanced
- Standard
Now Set up the Standard WhatsApp channel so you can directly reach out to salesforce support.
Configuration to Enable:
- Omni channel setup.
- Digital engagement setup.
Omni channel setup
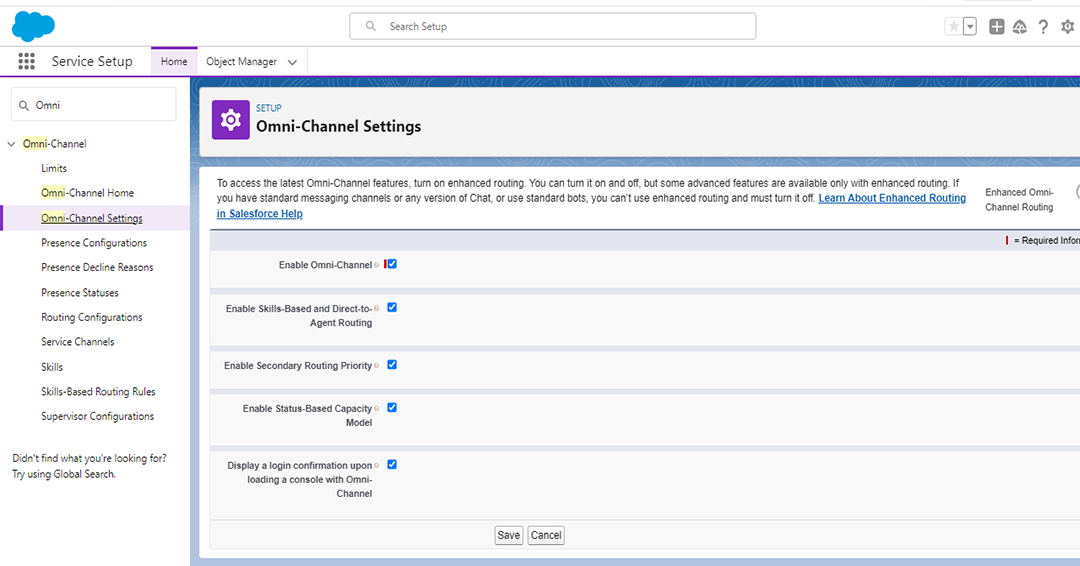
First, enable Omni-Channel in the Salesforce org. After enabling Omni-Channel, proceed to enable Skills-Based and Direct-to-Agent Routing. Then enable Secondary Routing Priority, Status-Based Capacity Model, and display a login confirmation upon loading a console with Omni-Channel.
Click Save after making these configurations.
Create a Routing Configuration.
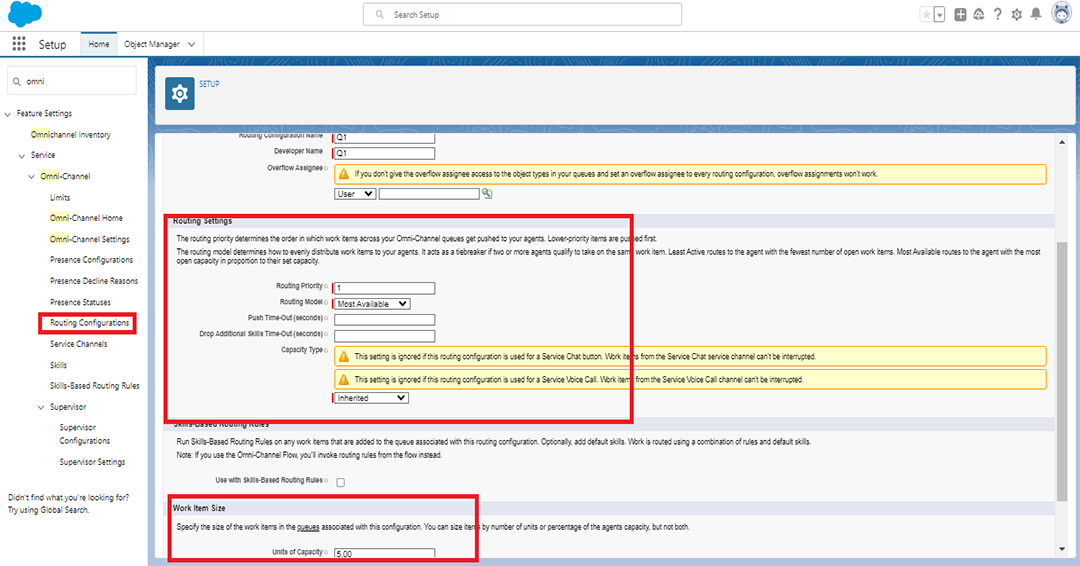
In the Quick Find box, search for ‘Routing Configuration.’ Click ‘New’ to create a Routing configuration. In the Routing section, set the priority, and for the Routing model, select ‘Most Available.’ Set the Work Item Size to ‘Units of Capacity’. Click save.
Create a Service Channel.
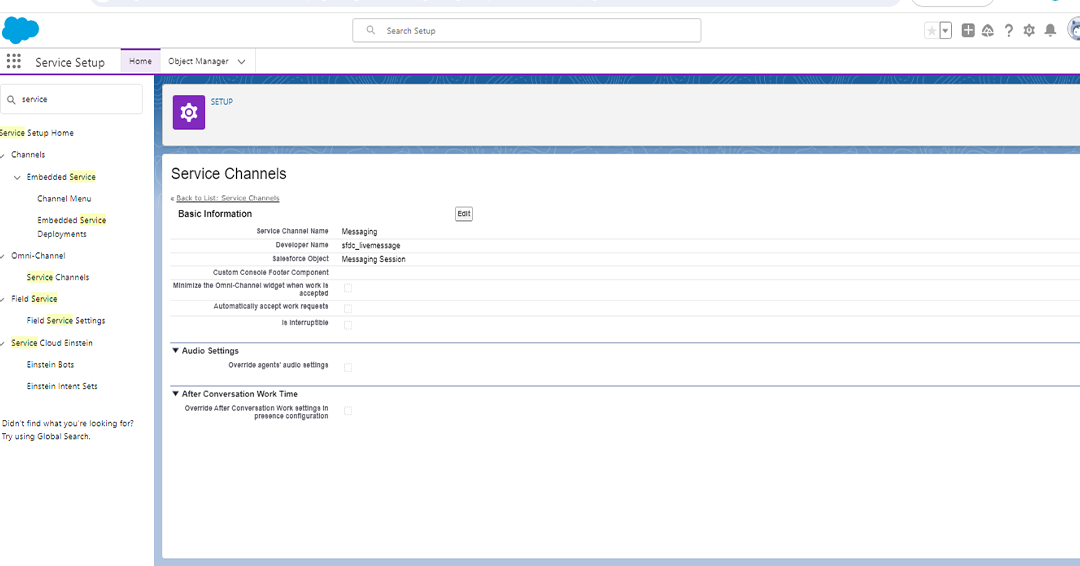
In Quick Find Box, search service channel, and Create a Service channel. Set developer name as sfdc_livemessage and Salesforce object as messaging session.
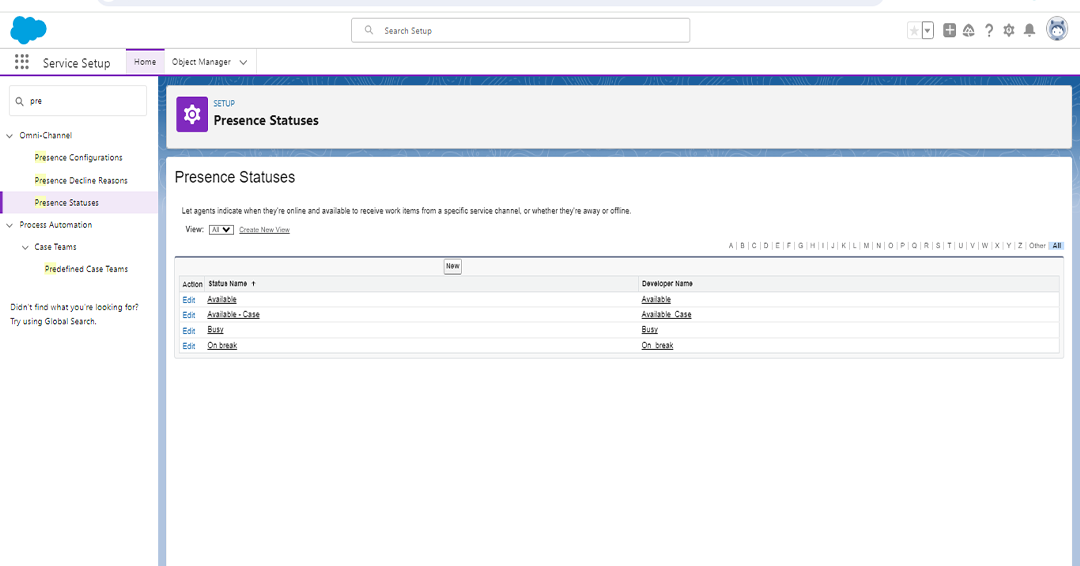
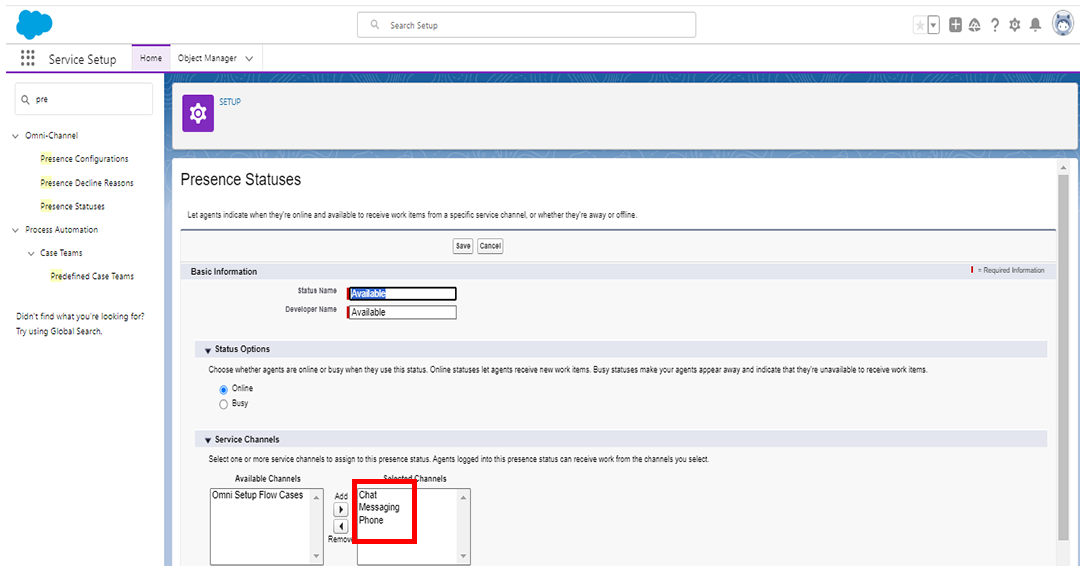
In the Quick Find box, search Presence Statuses. Create three Presence Statuses: Available, Busy, and On Break. Add Service channel that is created above.
Digital Engagement Setup:
Now, let’s dive into the details of setting up Digital Engagement.
For users planning to utilize these channels, follow these steps:
- Provide each user with the “Messaging User” Permission Set License.
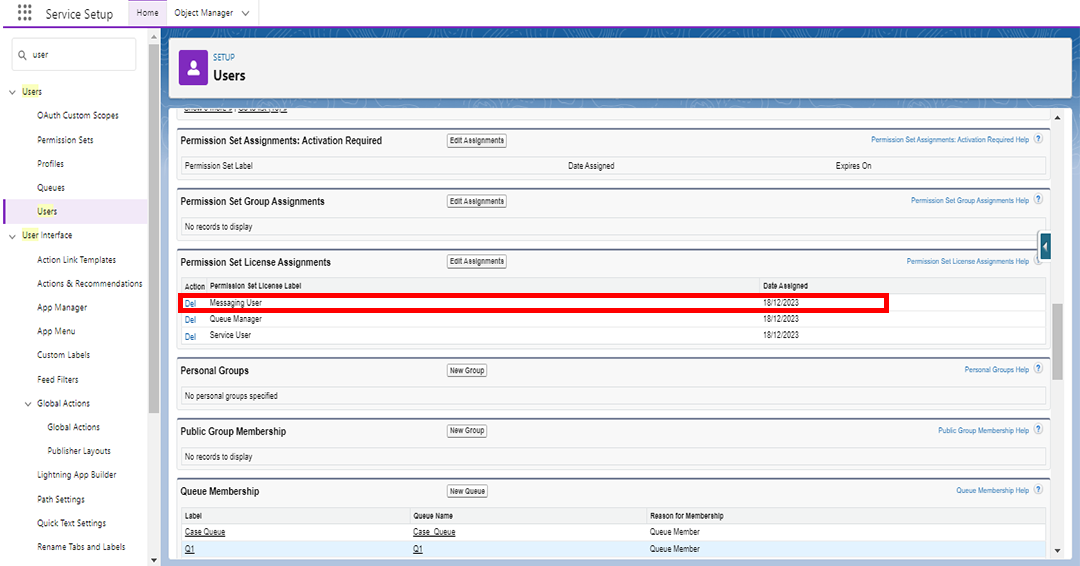
2. Create a Permission Set containing the following permissions and assign it to yourself as a system admin: Configure Messaging, Messaging Agent, End Messaging Session.
3. Create and assign a second Permission Set for your users, including Messaging Agent and End Messaging Session permissions.
Steps to create a WhatsApp messaging Channel:
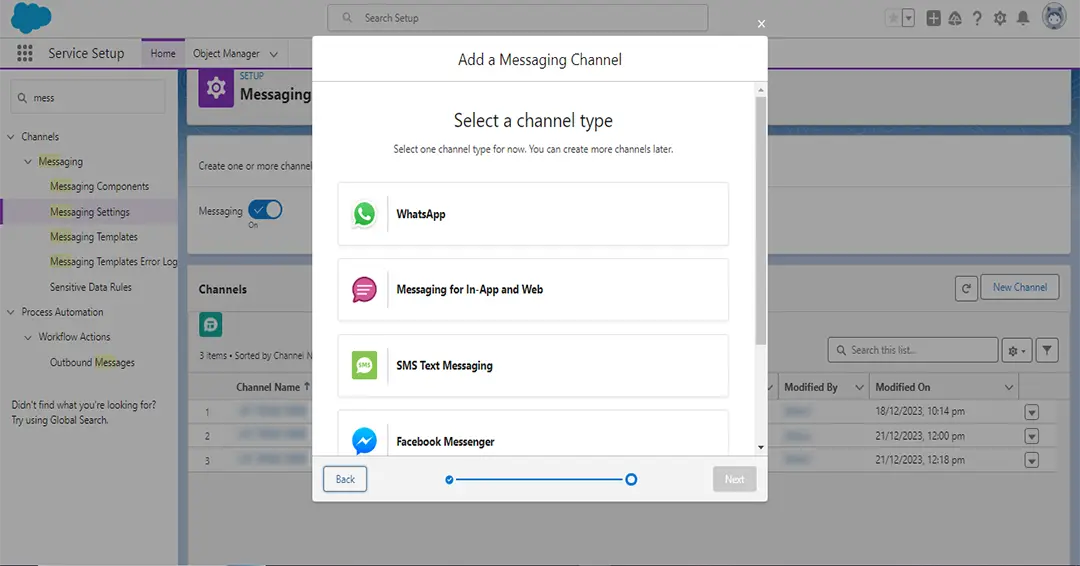
Step 1: After setting up Digital Engagement. Now create a WhatsApp channel in Salesforce org. In the Quick Find box Search>Messaging setting>Click new channel>Choose WhatsApp/past
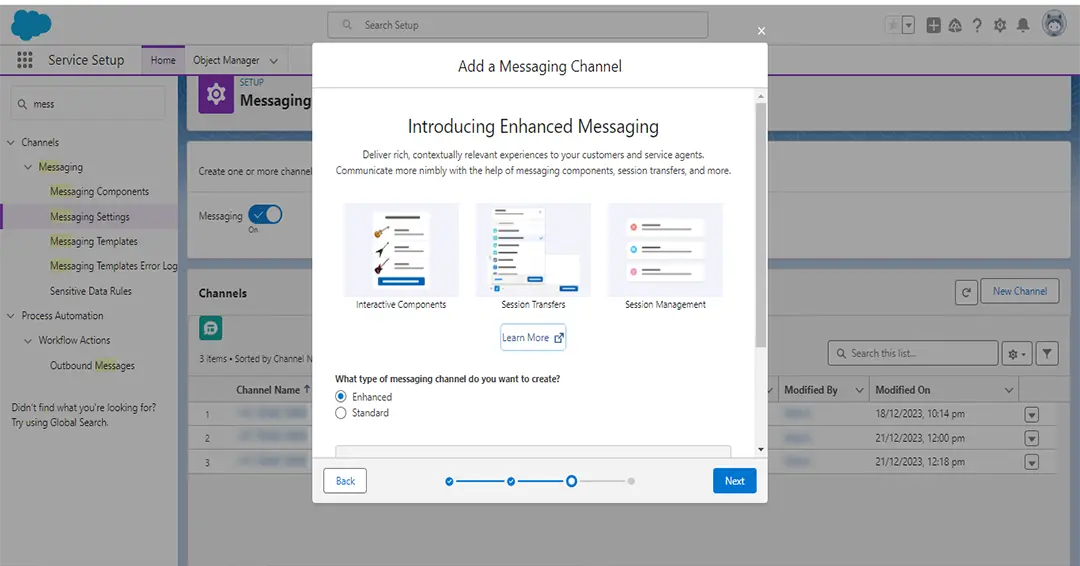
Step 2: Select the Enhanced type WhatsApp channel. If you choose Standard WhatsApp channel then connect with Support to Create a WhatsApp Channel.
Step 3: Click Connect to WhatsApp.
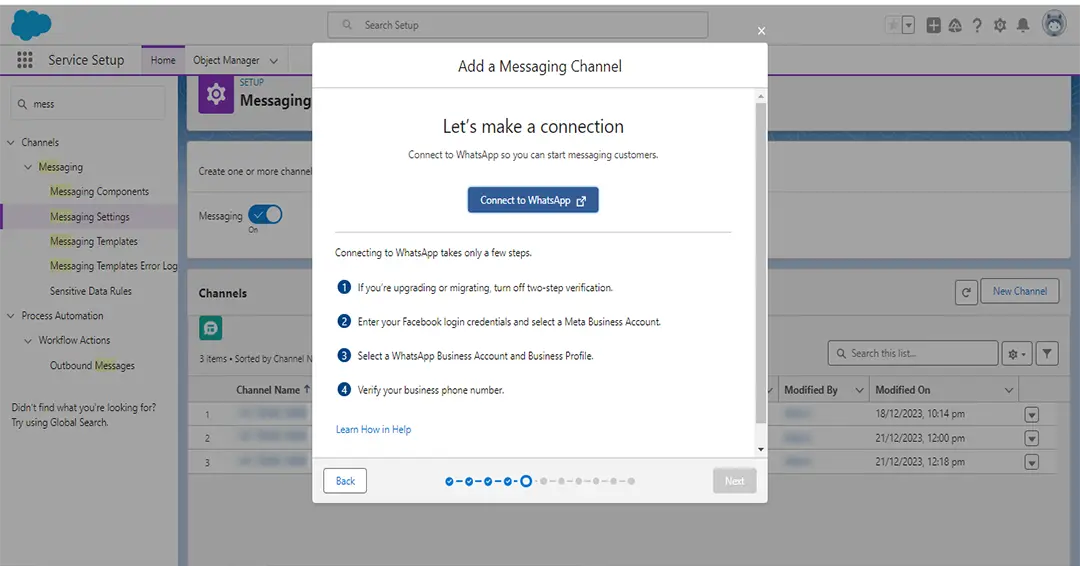
Step 4: After clicking “Connect to WhatsApp,” proceed to the Facebook Meta Business Account. Add a Business Account and Business name and Business or profile page.
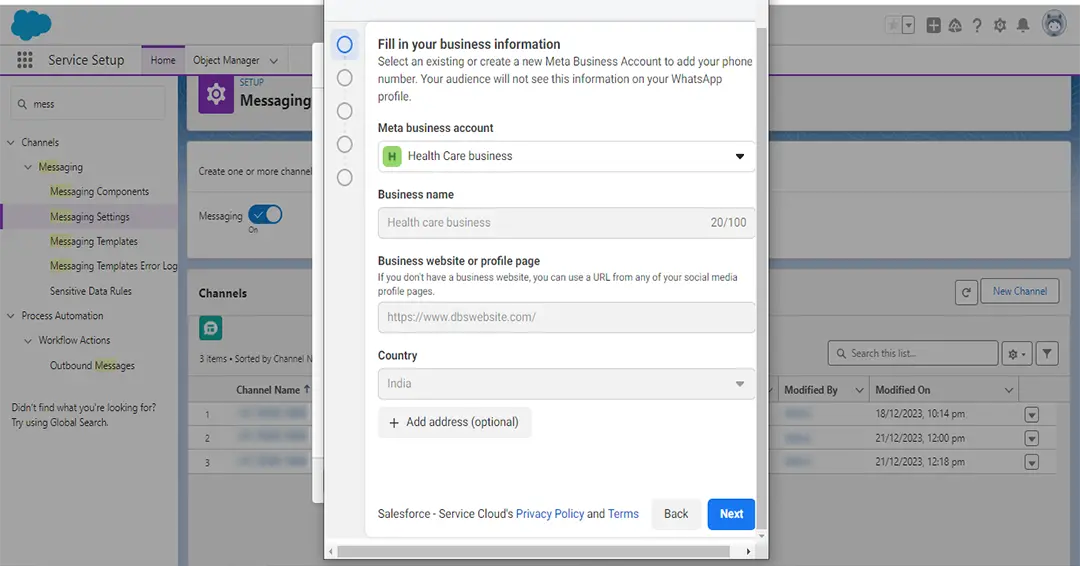
Step 5: Now, Click next. And Create or select WhatsApp Business Account. Select WhatsApp Business Profile.
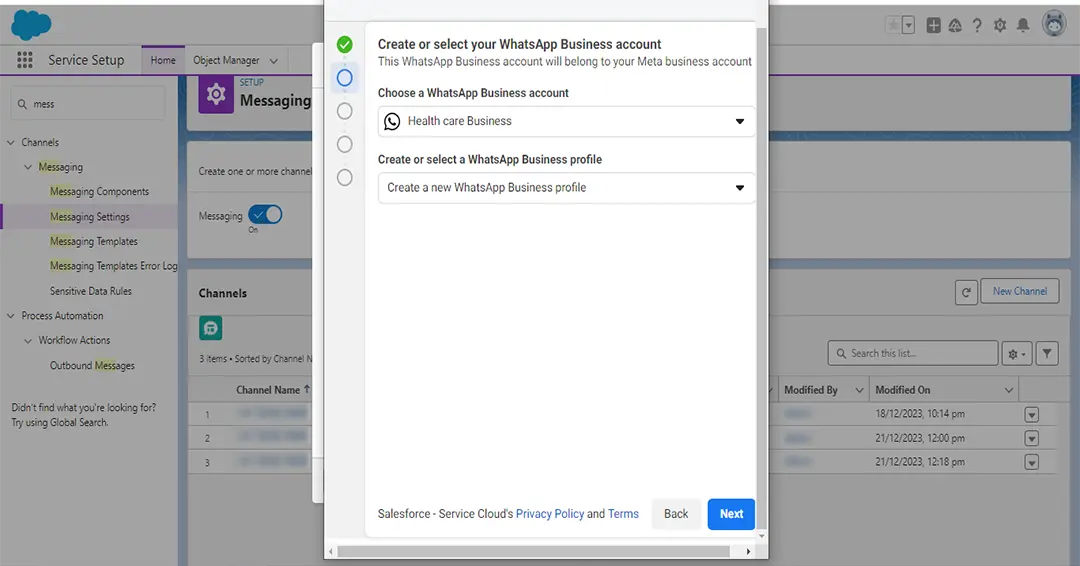
Step 6: Click next. Write the WhatsApp Business Account name. And WhatsApp Business Profile display name.
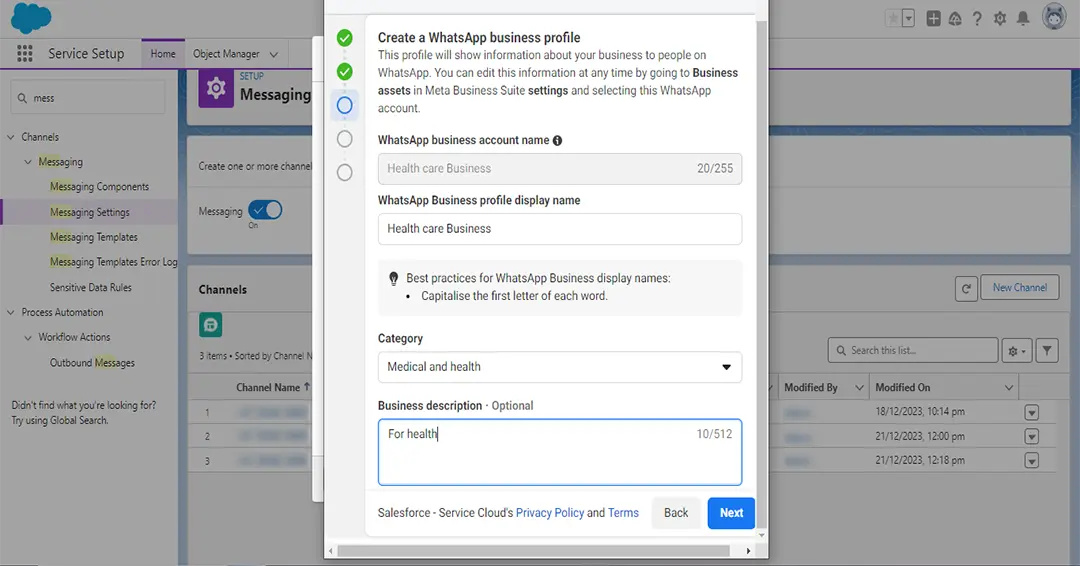
Step 7: Click “Next,” and add the WhatsApp number. Note that this number is not associated with any WhatsApp account. After creating the WhatsApp channel, proceed to create a WhatsApp Business Account.
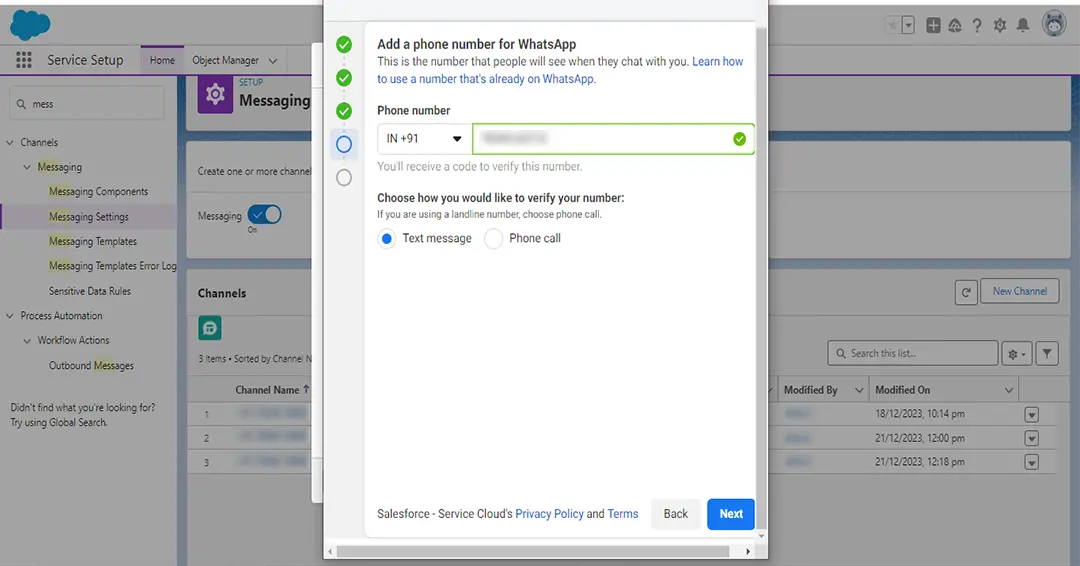
Step 8: After adding a number, you will receive a verification code for the WhatsApp channel. Once you enter this code, you can successfully create a WhatsApp Channel in your Salesforce org.
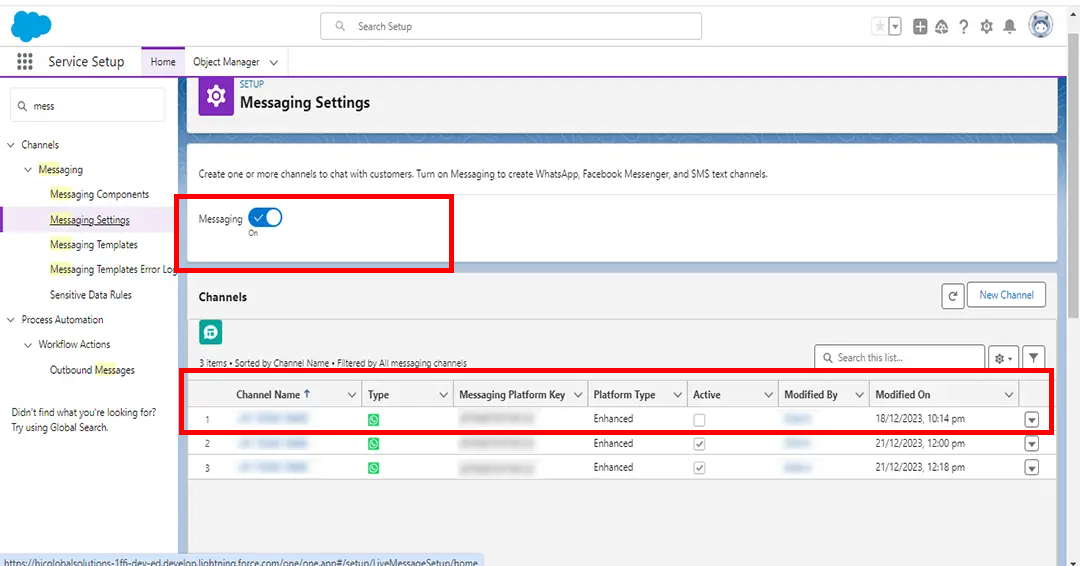
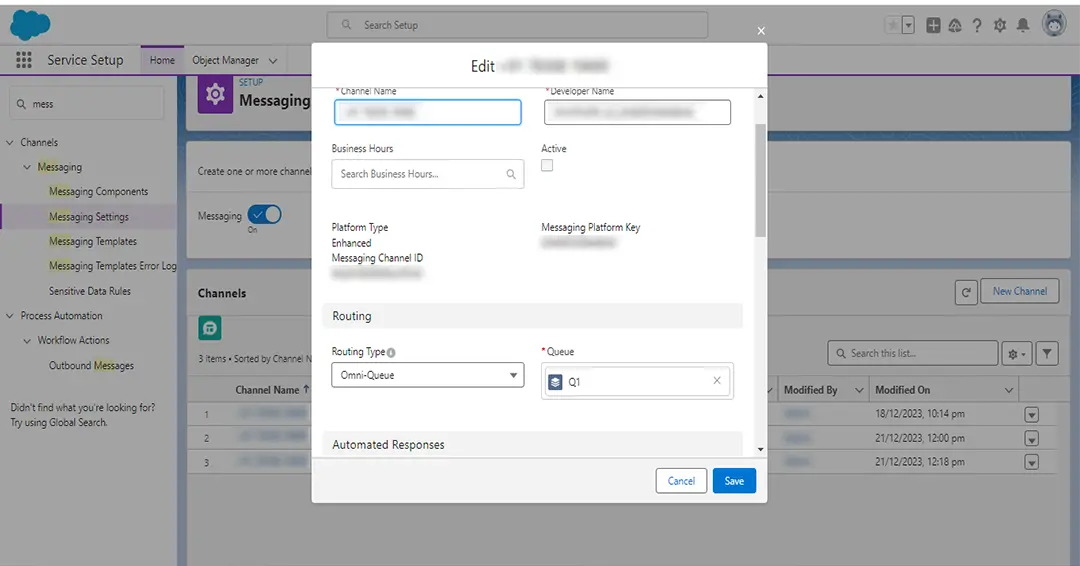
Step 9: Now, click on the channel name and Activate this Channel. Click on edit and add routing type as Queue name. Click on Save.
Step 10: Now, Open the service console. Click on App launcher and search Service console. if you have not set up your service console. First setup your service console.
Here is the link to how to set up the service console. Click here!
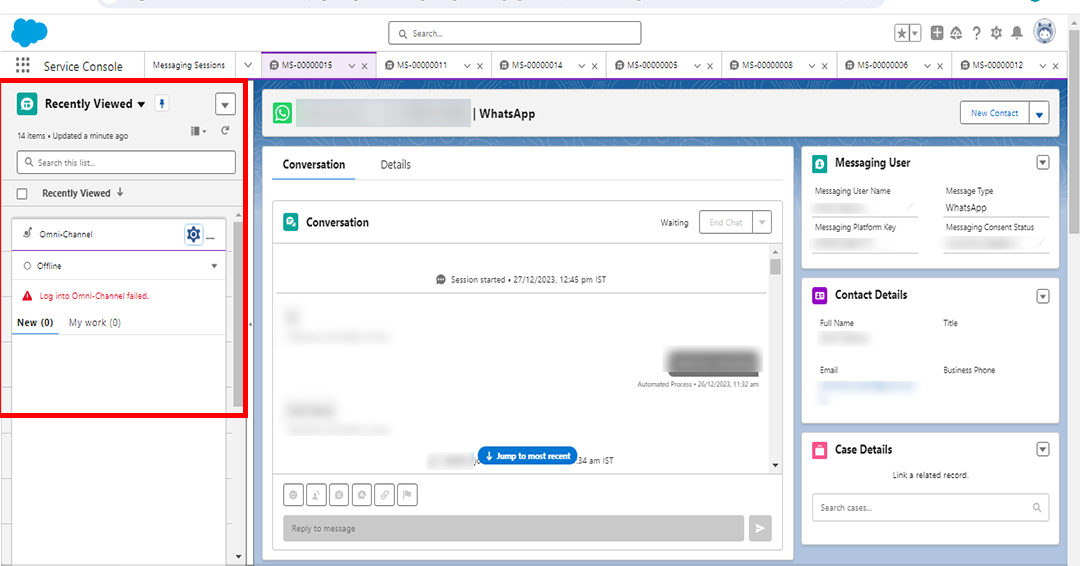
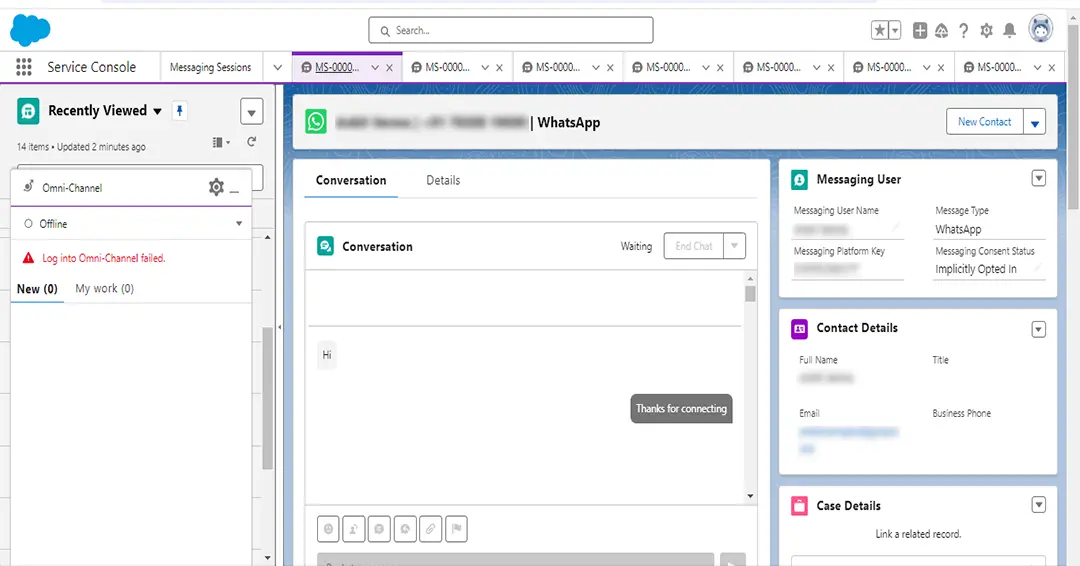
Finally, the WhatsApp channel is ready to chat between Agents and Customers.
Conclusion:
Hence, creating a WhatsApp channel in Salesforce Service Cloud is a pivotal strategy in enhancing customer support and engagement. Follow the steps mentioned above and seamlessly create WhatsApp channels in Salesforce for better engagement.
To read more about Salesforce development solutions, stay tuned to our blogs!





