

The Adobe Acrobat Sign for Salesforce application offers a straightforward and user-friendly approach to managing signature workflows, suitable for individuals or organizations.
With this application, users can effortlessly:
- Obtain Authentic Adobe eSignatures or Approvals by securely requesting eSignatures or approvals for any document directly within Salesforce
- Streamline Document Signing Processes, making it a valuable addition to your Salesforce environment.
In this guide, we will walk you through the steps to configure and set up Adobe Sign for Salesforce. But before we dive into the setup process, ensure that you have both “Adobe Acrobat Sign eSignatures for Salesforce” and “Adobe Acrobat Sign Document Builder for Salesforce” applications installed in your Salesforce organization.
You can find these applications on the Salesforce AppExchange:
Let’s get started with the configuration process to make the most out of Adobe Sign in Salesforce.
Steps to Configure and Set up Adobe Sign for Salesforce:
Step 1: Click on the Adobe Acrobat sign Admin Tab link your Adobe account to your Salesforce account.

Step 2: Link your Adobe account to your Salesforce account. If you already have an Adobe account then click “Sign in to Adobe”. If not create an account and click on “Sign up free trial account”. For Reference click this link to create Adobe Account https://account.adobe.com.

Step 3: After linking the Salesforce account to the Adobe account, link the Document builder to the Adobe account.
Click on App launcher>Document Builder Admin. Click on the Document Builder tab and connect Document Builder to your Adobe account.

Step 4 : Click on the Agreement Templates Tab and create an Agreement Template. For testing purposes, I have created a Template. Check the below Screenshot.

Step 5 : Inside the Test Template, we carefully set up and configured each step.
- when you click on “Template Details,” you can add a Salesforce object that represents the specific object record for which you want to create a document.

- After clicking “Next” on the “Template Details” page, you will be directed to the “Attachment” section. In this step, you can add the specific document that you want to obtain signatures for. if you wish to create a new document, simply click on “Create New Template” as shown in the screenshot below. This option allows you to initiate the document creation process.

Step 6 : Next Section – Recipients: Specify the Recipient to Whom You Will Send the Document for Signature.

To create a new template, simply click on the “Create a New Template” button. This action will initiate the template creation process, allowing you to set up a fresh template from scratch.
Steps to create a new Template
- Click on “Create a New Template,” and in the first section labeled “Sample Data,” you can add the specific record for which you want to generate a document. In this case, you can select the Opportunity record as shown in the screenshot below.
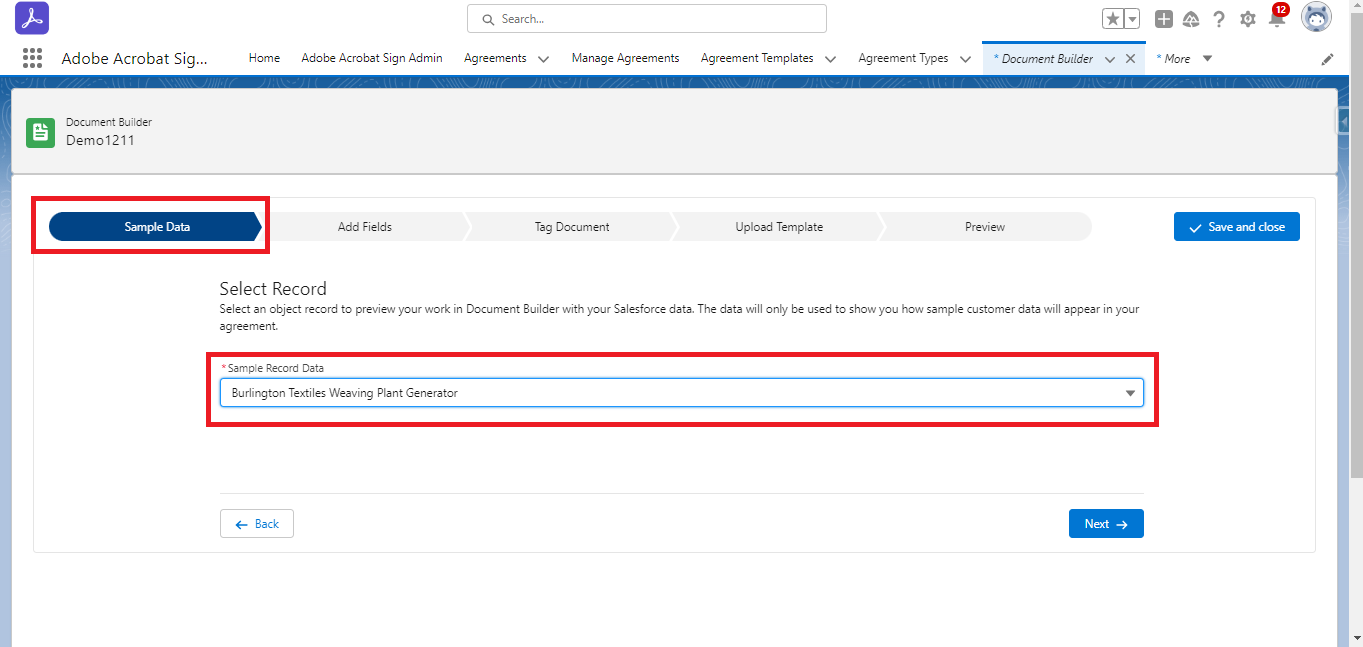
- The second section to “Add Fields” which Opportunity record fields you want to add to your document.
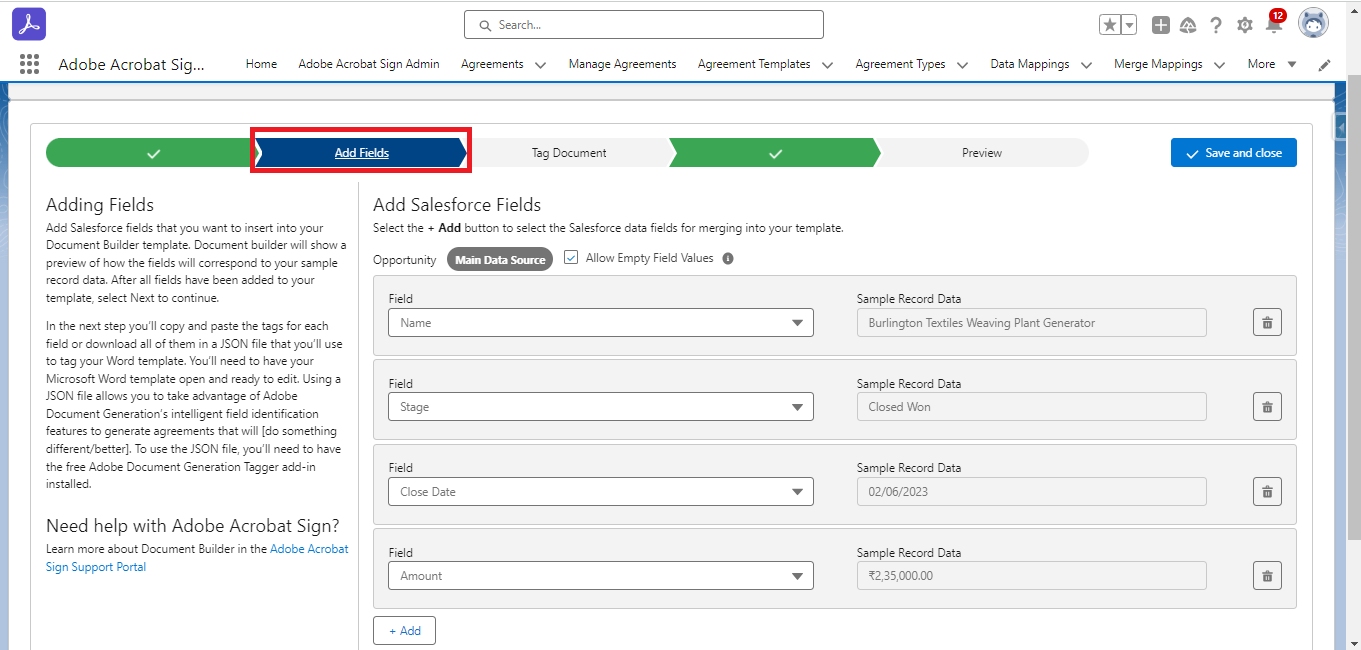
- Third Section is tag Document which fields you want to merge in your document. Only copy and paste into your document.

- Next Section – Upload Document with Merged Opportunity Fields:
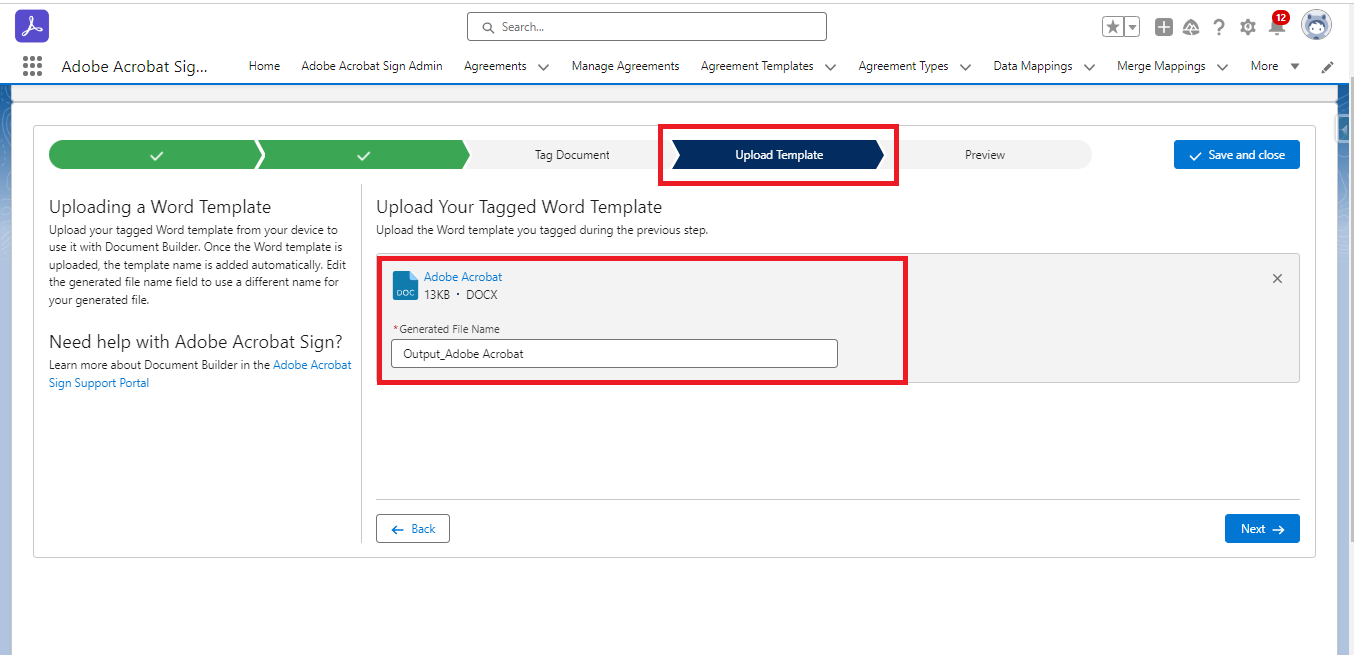
- Next Section – Preview: Please take a moment to review your document.

Creating a Custom Opportunity Button to Send Document for Signing.
Step
1. Click on object Manger>Opportunity>Click Button, Links, and Action.
2. Under Button, Links, and Action. > Click the new button and link. Create a button.

In this button, the template refers to the Agreement Templates ID.
3. Now, let’s proceed by clicking on “Page Layout” to add the custom button to your Opportunity page.

Now, let’s navigate to an Opportunity record to see your newly added custom button in action. When you open an Opportunity record, you’ll notice the custom button prominently displayed on the page layout.

To initiate the document signing process, click on the “Send with Adobe” custom button. This button has been specifically added to the Opportunity page layout for your convenience.
When you click on the “Send with Adobe” button, the document will be automatically sent to the specified recipients for signature. Now sign the document.

Now, open the agreement and sign the document. After signing, you may receive a confirmation email indicating that you have successfully signed the agreement.
Conclusion
Summing up, the Adobe Sign and Salesforce integration offers a streamlined solution for document management and eSignatures within Salesforce. Follow the steps above and get started with an effortless e-signing experience with Abode Sign for Salesforce.
To stay updated with more helpful guides and tips, stay tuned to our Salesforce tutorial blogs!





