

Salesforce Inbox is a powerful add-on that empowers sales reps to manage emails while seamlessly accessing relevant records efficiently. This tool provides complete communication control, email metrics monitoring, and the convenience of scheduling meetings and emails. By centralizing sales activities, teams can save time on data logging and access, making it an invaluable extension of standard Salesforce functionality.
Let’s explore in this blog how to set up Inbox in Salesforce with Einstein Activity Capture.
Steps to Enable Inbox in Salesforce
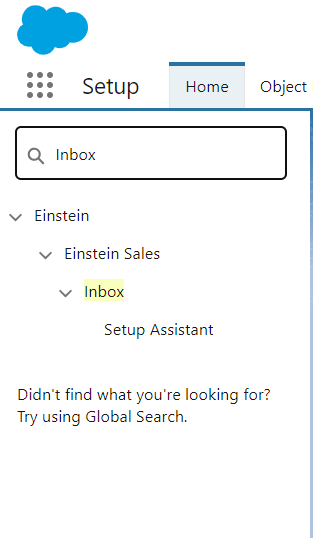
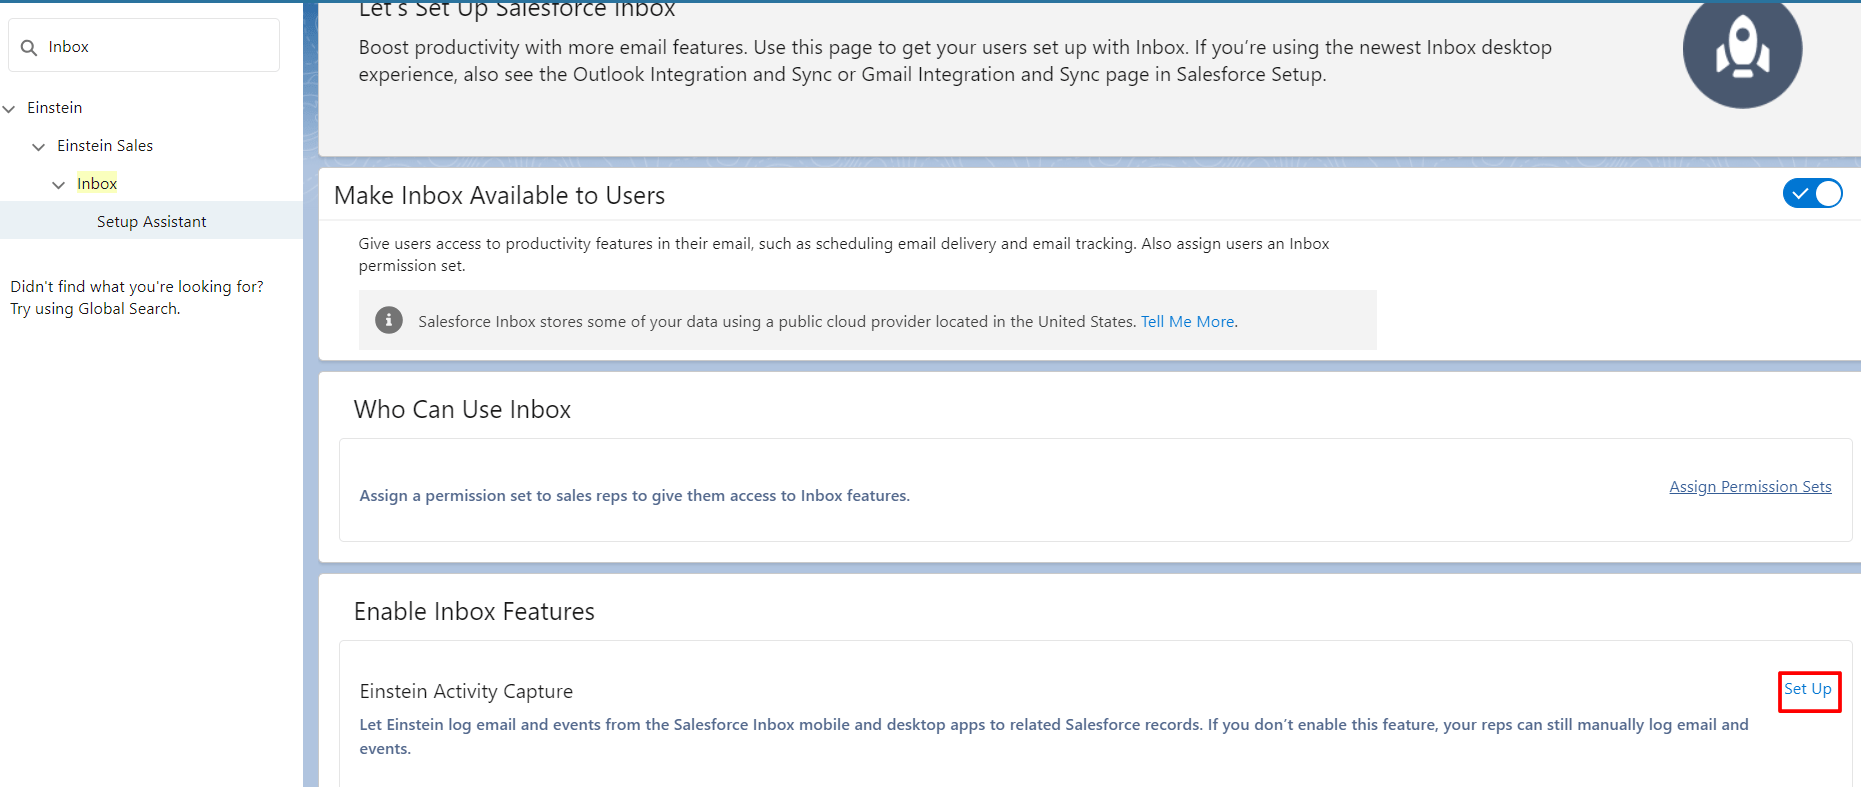
Step 1: Navigate to Setup, and in the Quick Find box, search for “Inbox.” Then, choose Setup Assistant under the Inbox section.
Step 2: Enable the option “Make Inbox Available to Users.”
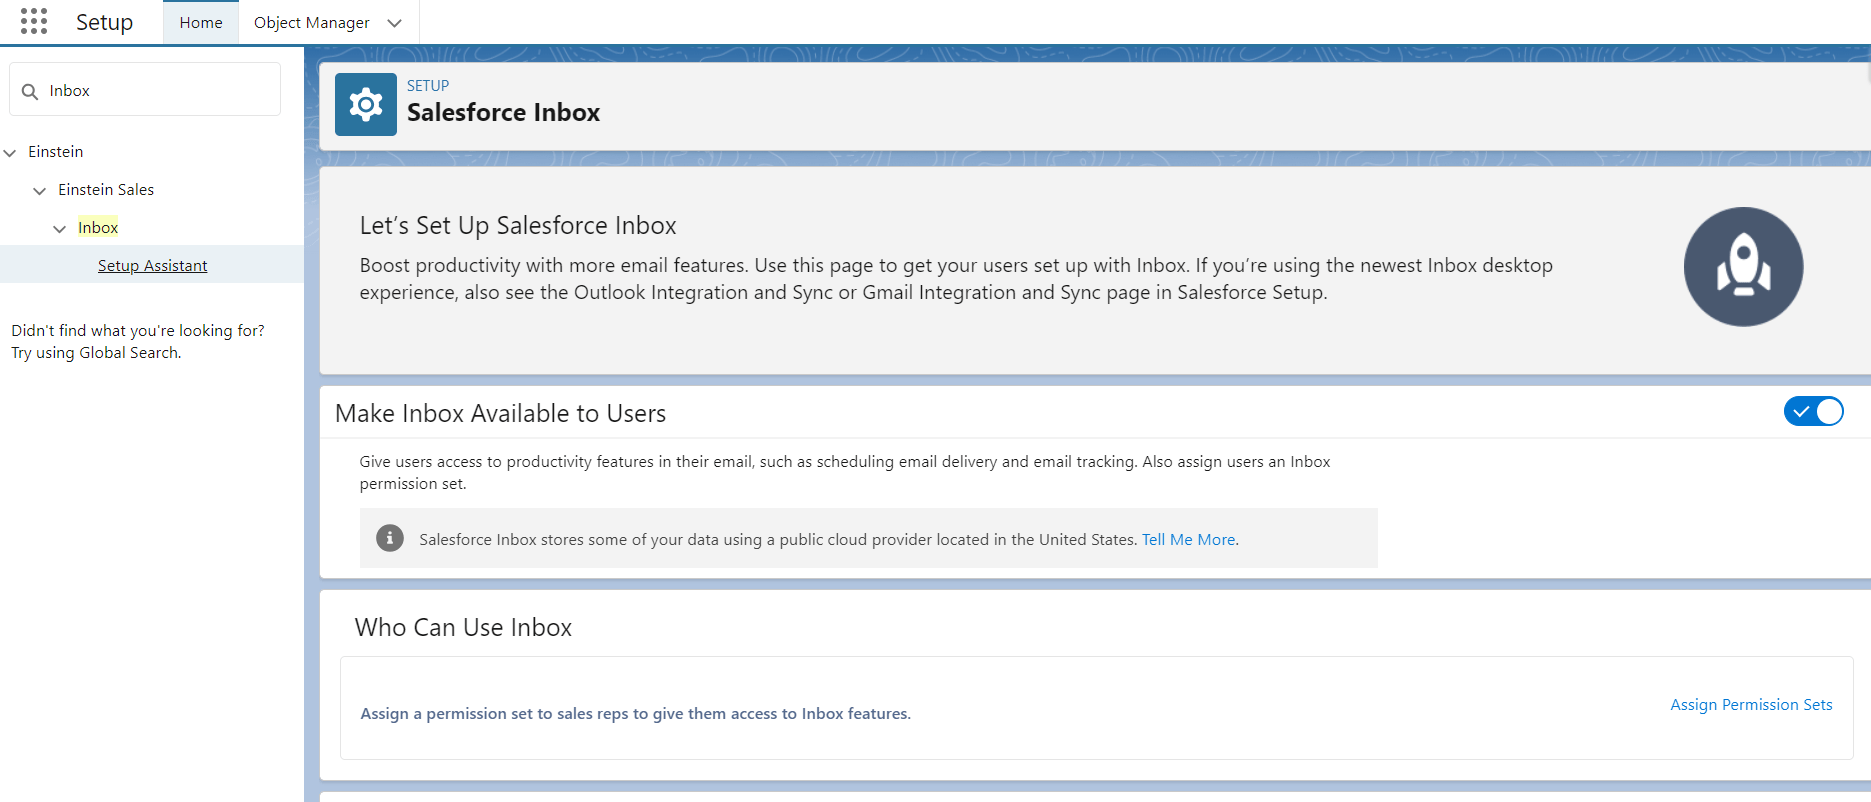
Step 3: Assign Permission set to users you want to give access to Inbox by clicking Assign Permission Sets.

Step 4: Permission sets window will open click on Inbox with Einstein Activity Capture.
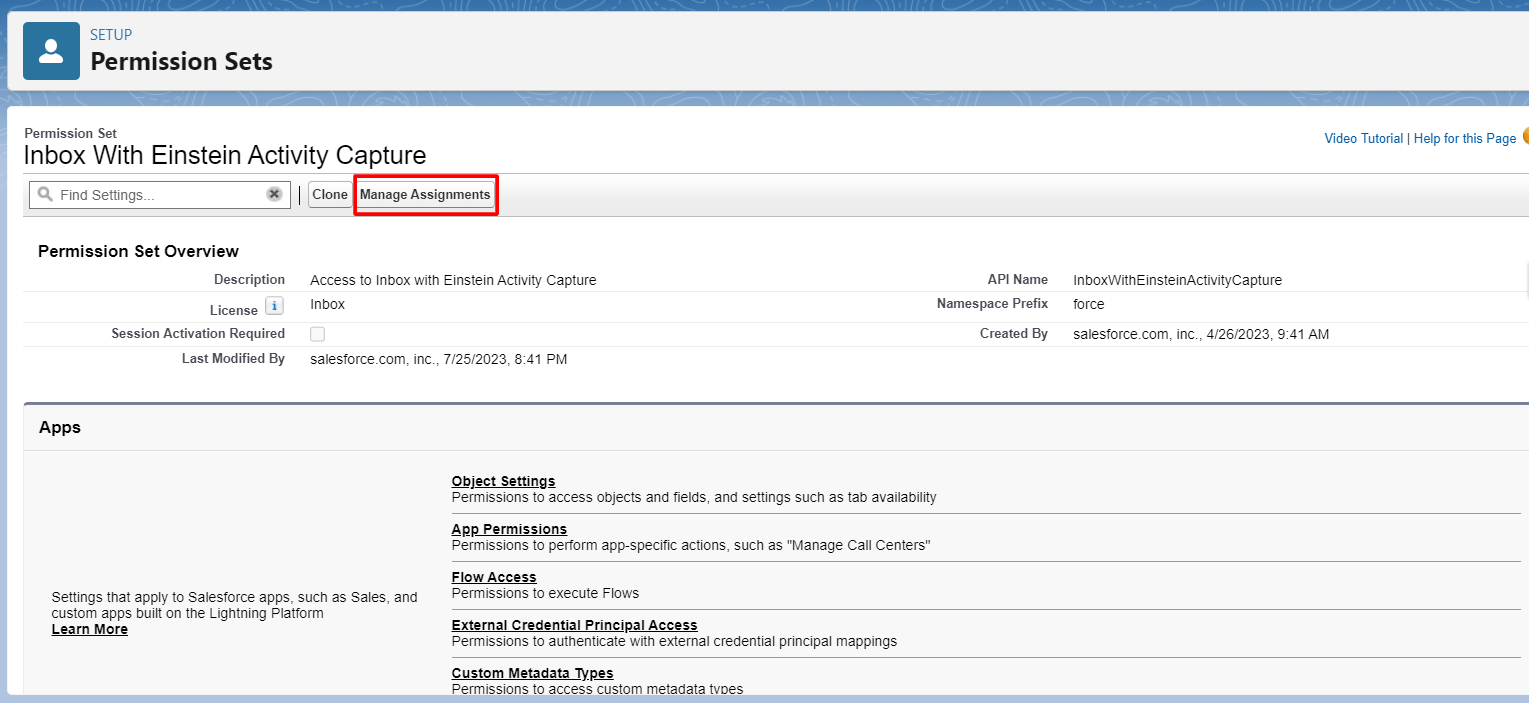
Note: Inbox comes with two Licenses
- Inbox with Einstein Activity Capture
- Inbox without Einstein Activity Capture
If you want an Inbox without EAC you can go for 2 permission sets and need not configure Einstein Activity Capture.
Step 5: Click on Manage Assignments.
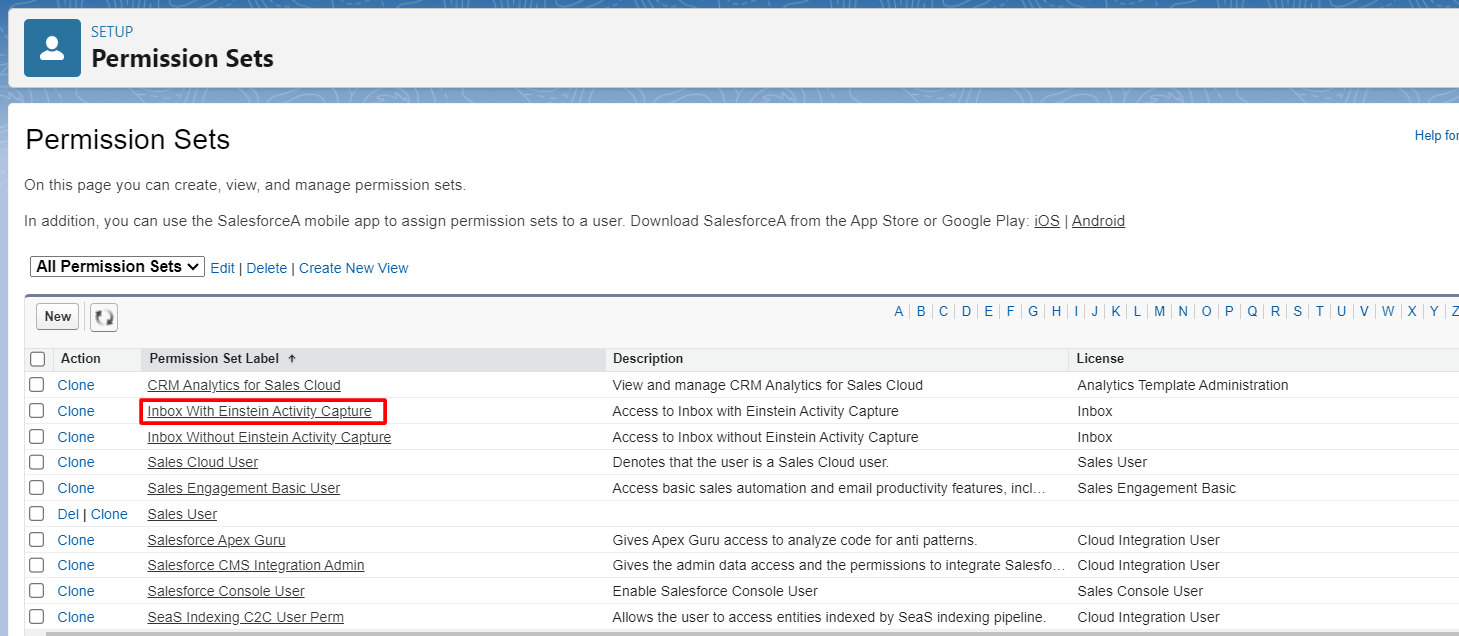
Step 6: Click on Add Assignment to add users

Step 7: Click on the checkbox next to the user name to add users —> Add —> Assign —> Done
Now it’s time to enable Einstein Activity Capture. To Configure Einstein Activity Capture follow the below steps.
Setup Einstein Activity Capture
Step 1: Click on Set Up next to Einstein Activity Capture from the Salesforce Inbox setup window. This will prompt to Einstein Activity Capture setup window.
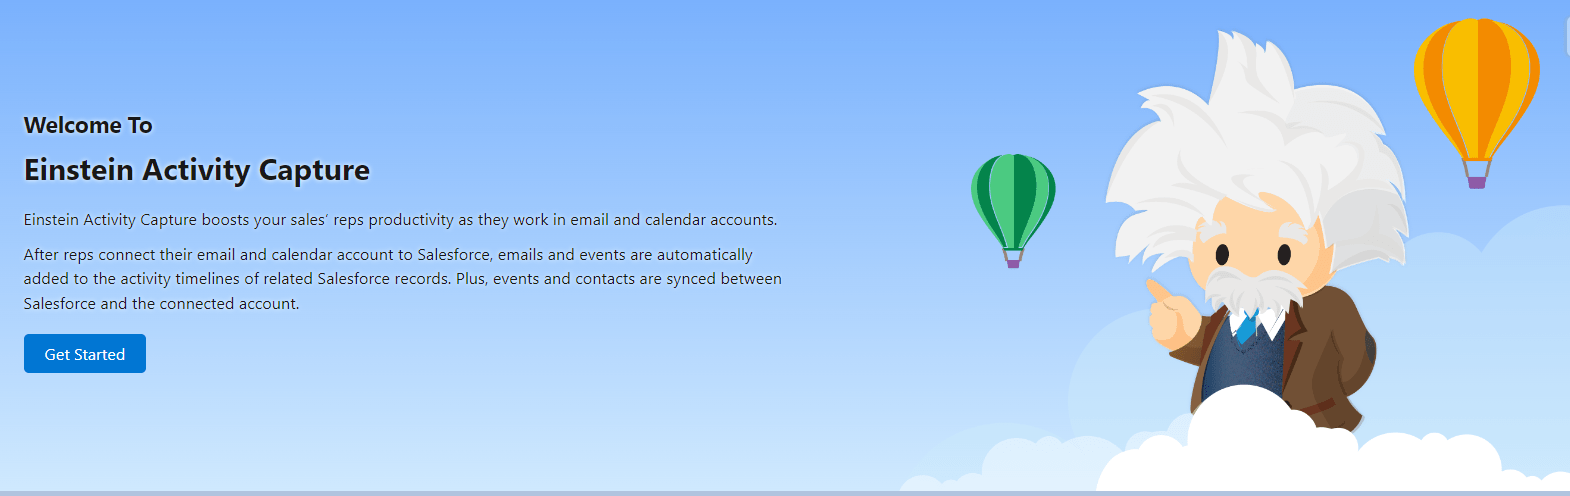
Step 2: Click on Get Started Button
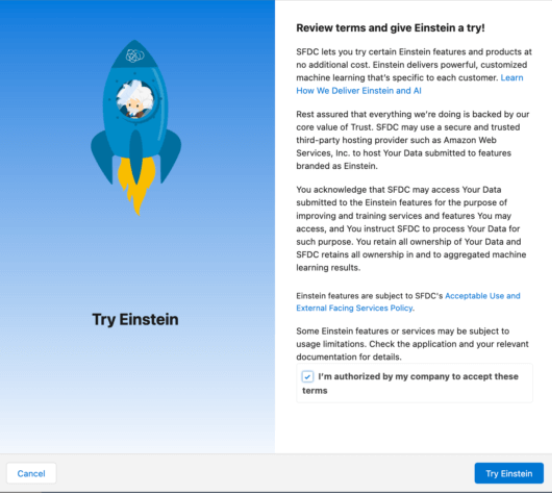
Step 3: Click on the Try Einstein Button
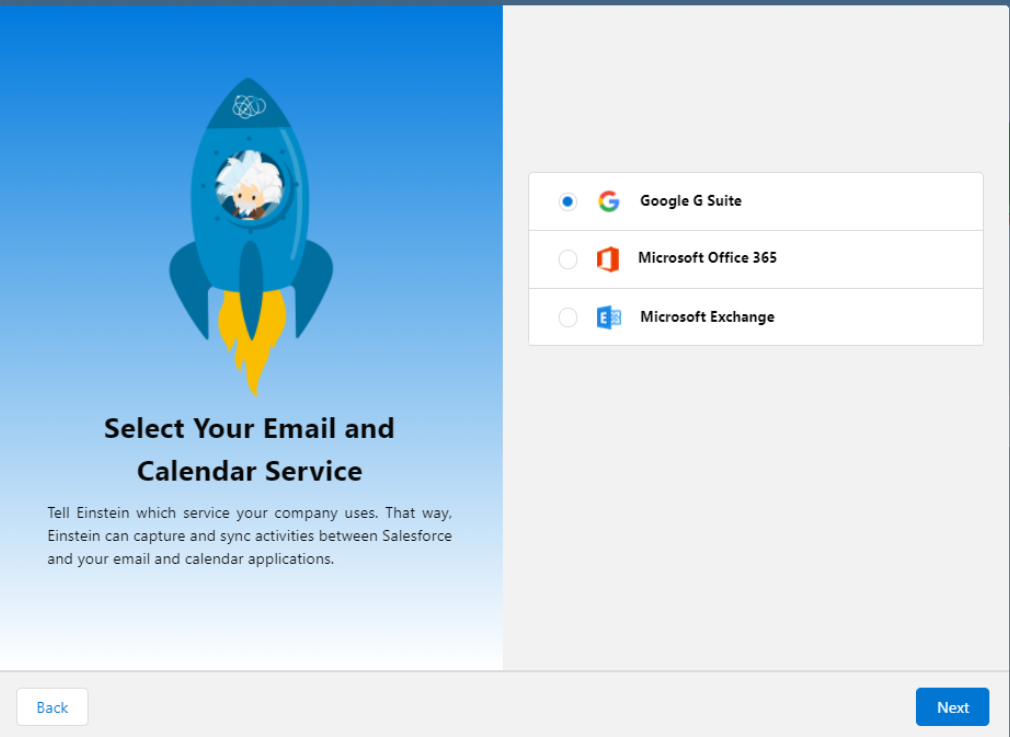
Step 4: Select your Email from this window. You can choose any one of these options. Then click on Next.
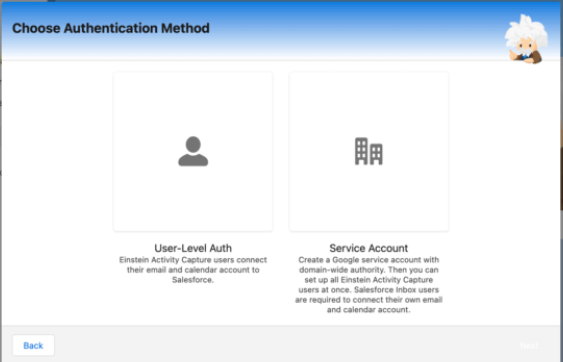
Step 5: Click on User-Level Auth
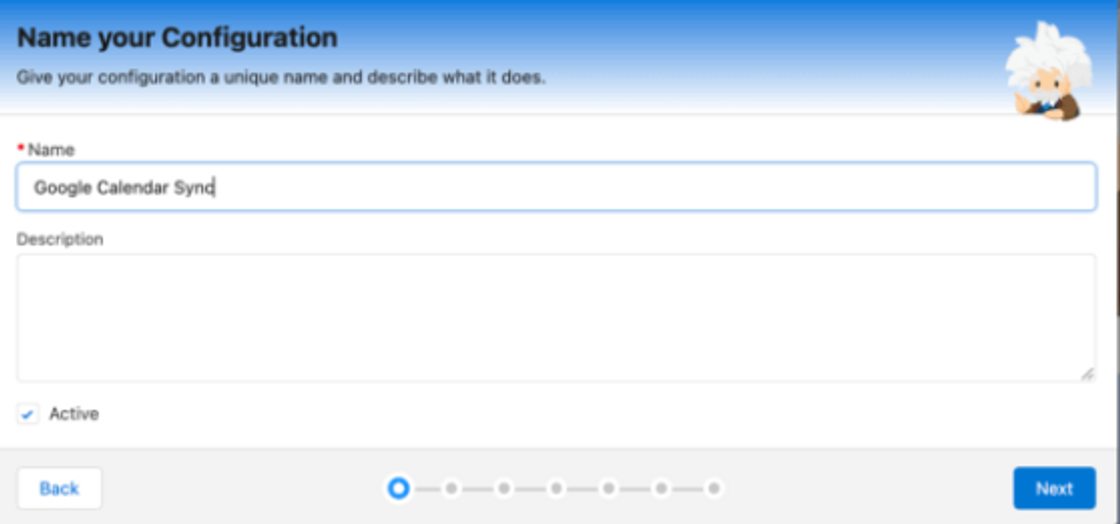
Step 6: Give a Name to your configuration —> Next
Step 7: Review your sync setting then click on the Next Button. From this, you can change your email, event, or contact sync setting.
Note: Don’t worry if you want to change setting later on you can also do this by clicking on Configuration —> Edit from Einstein Activity Capture —> Setting
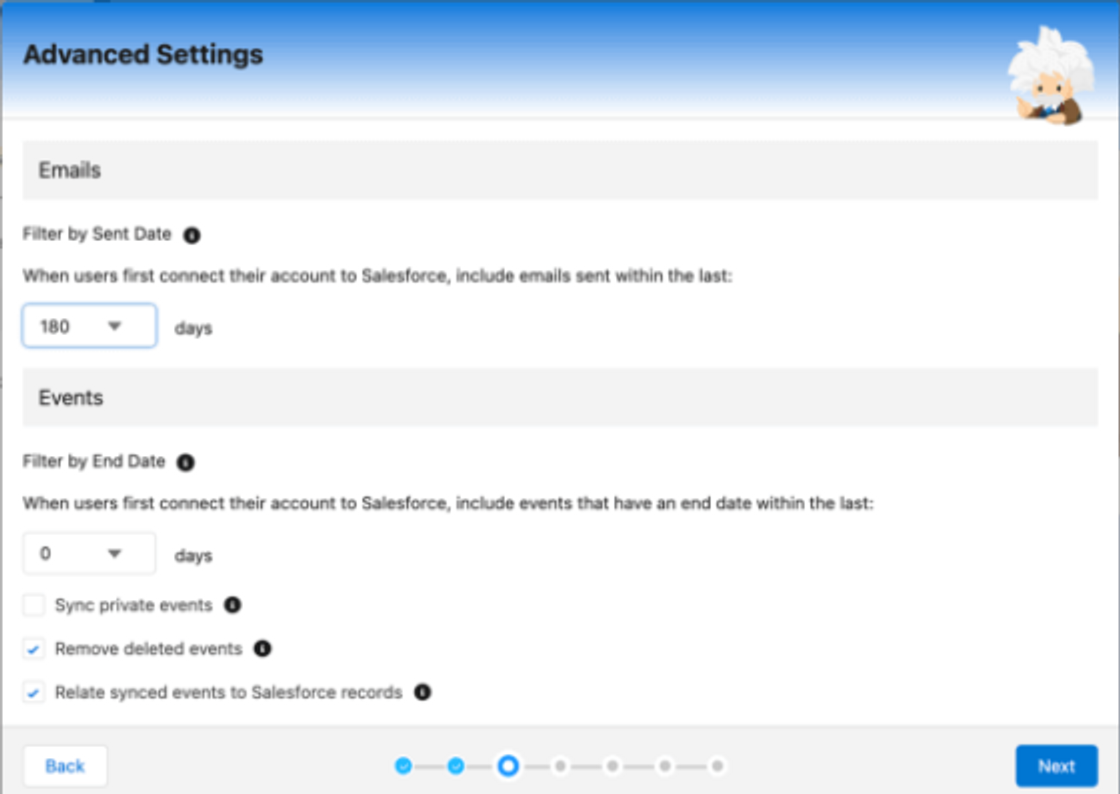
Step 8: Review your Advance setting for Email and Event sync then click on Next.
Step 9: From this Add Users and Profiles you can select Users or Profile of your choice and then click on Next.
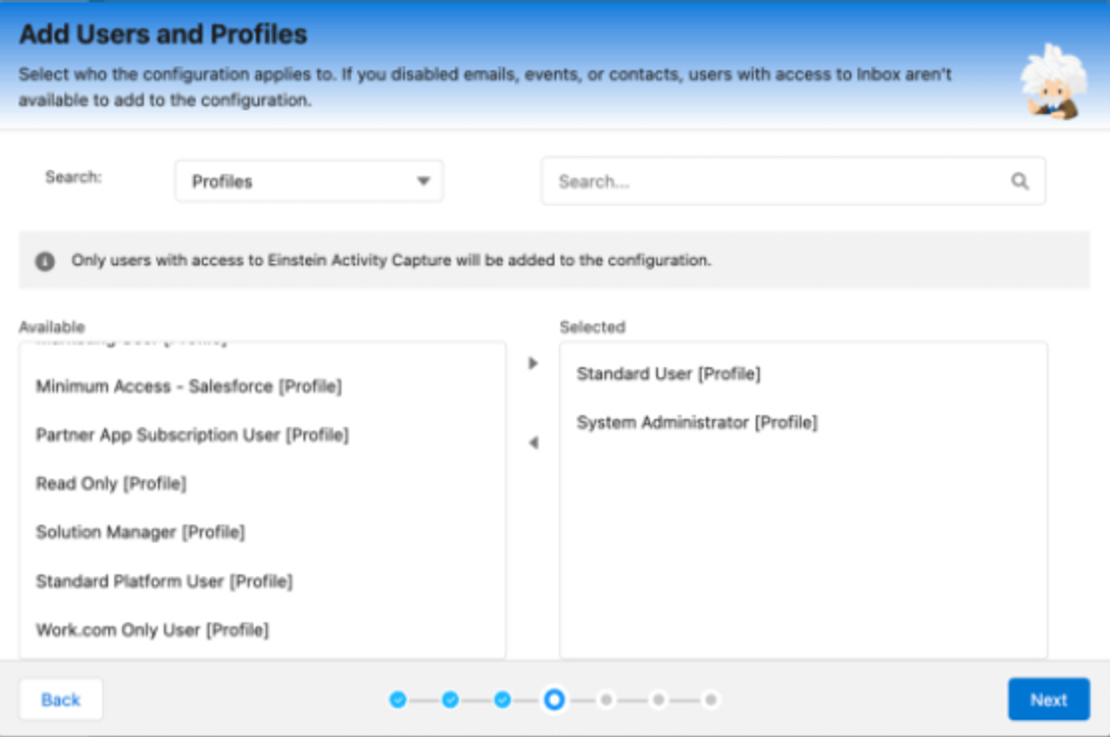
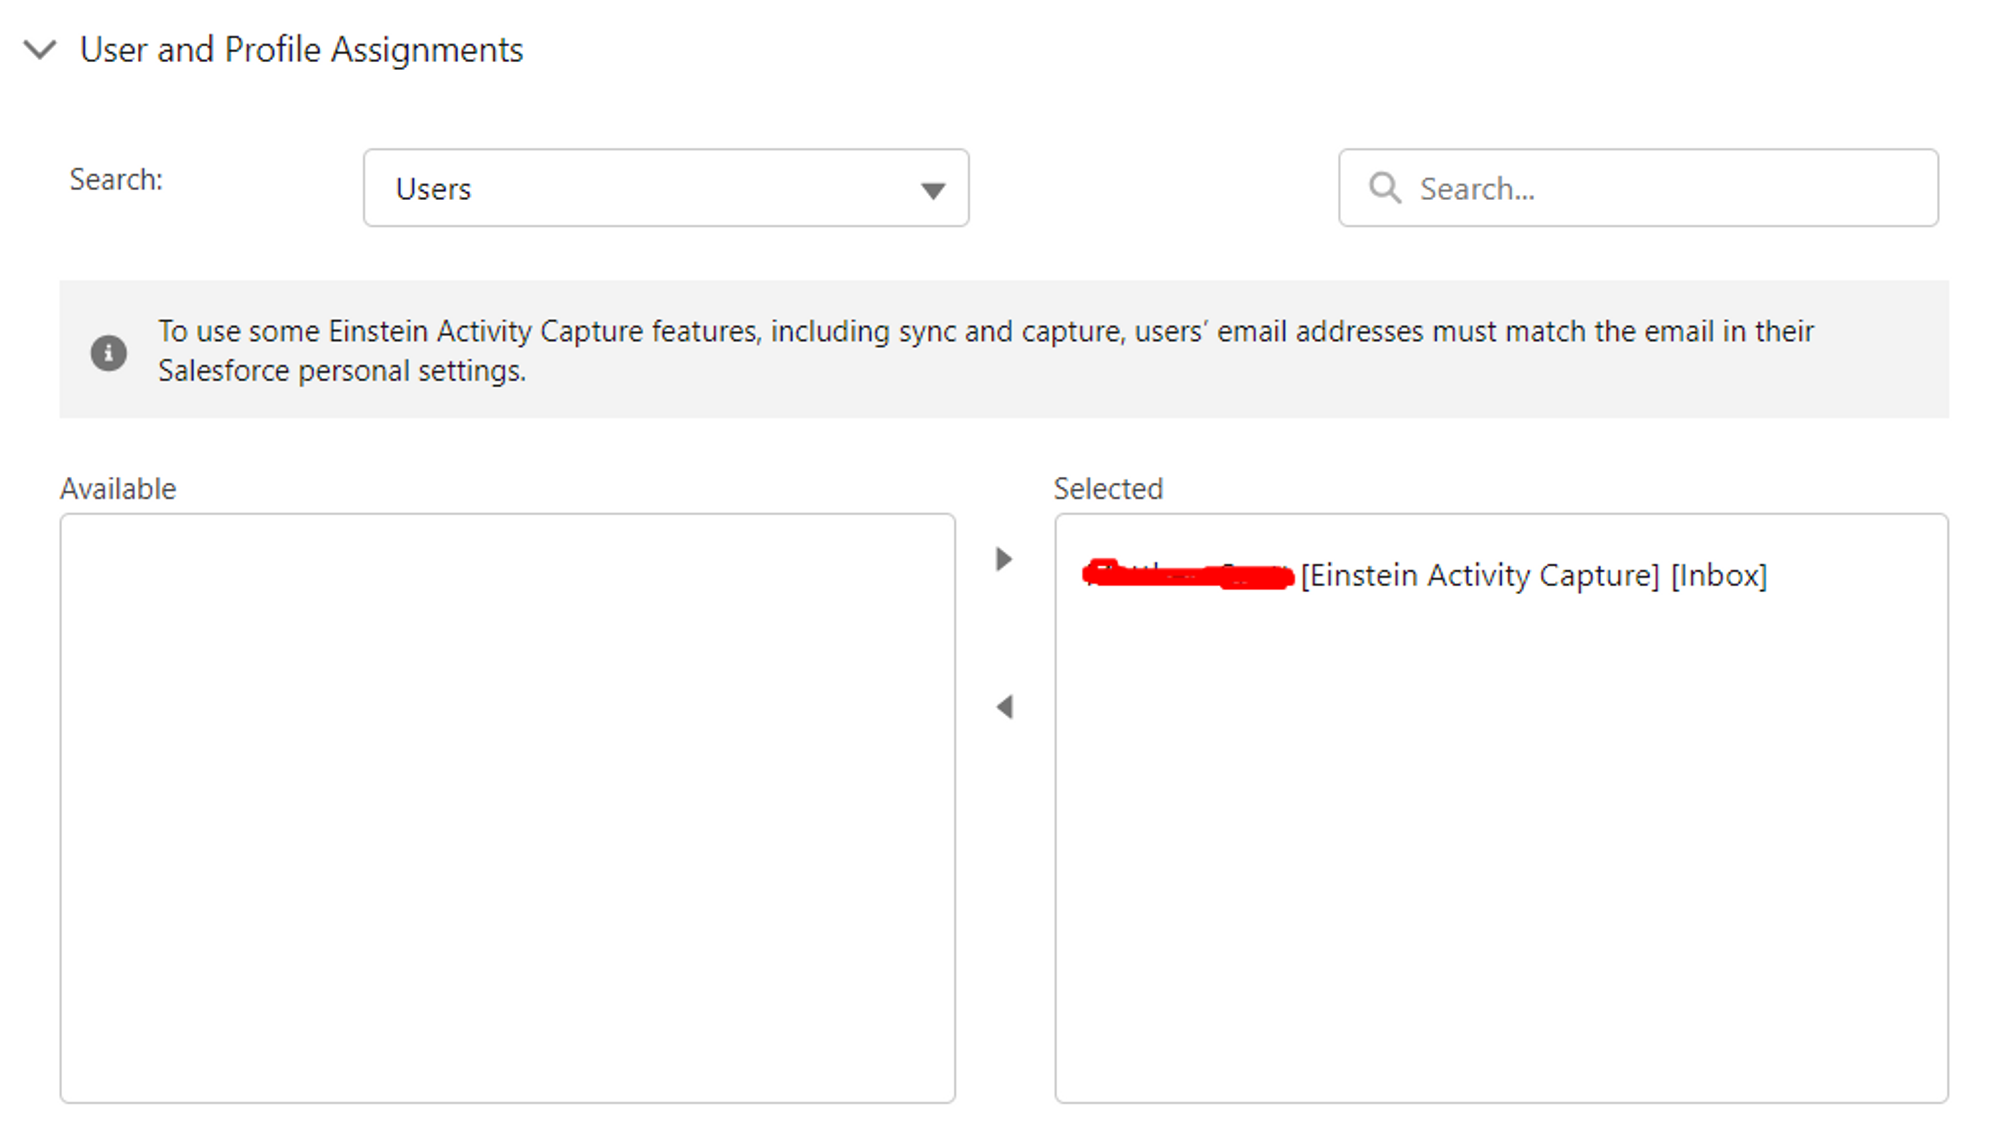
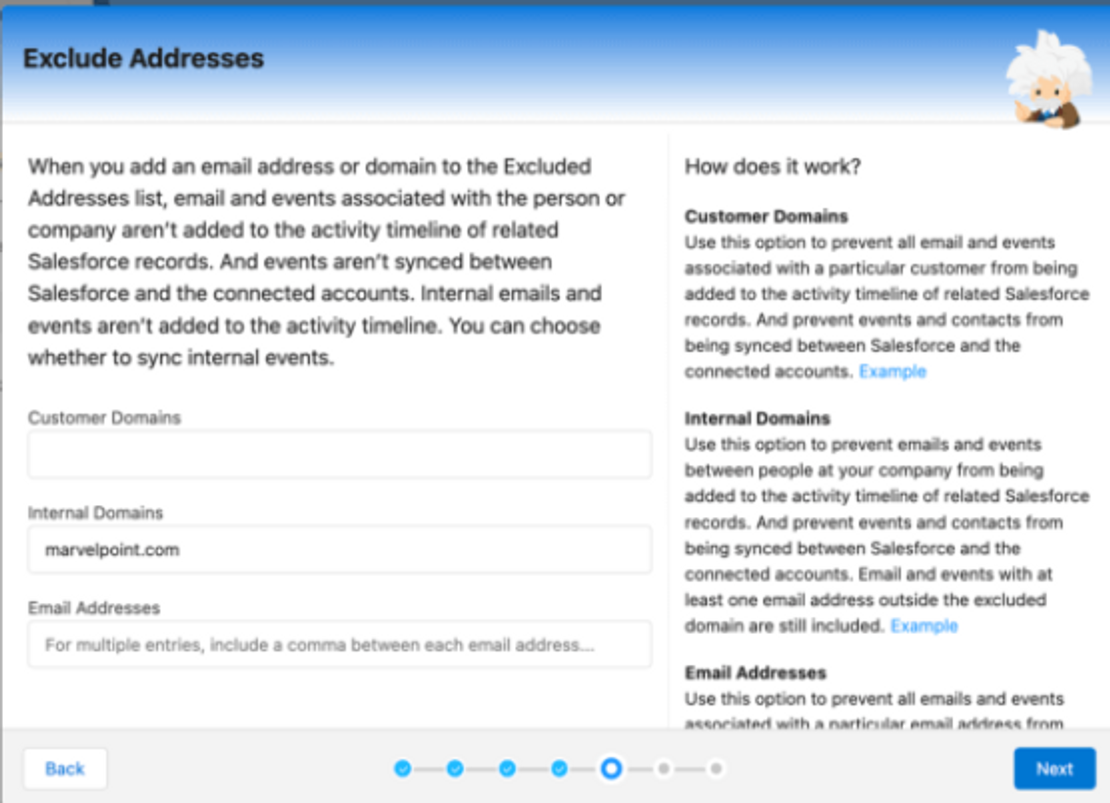
Step 10: If you want to exclude a particular email ID or domain from syncing you can add it here or you can do it later on. Click on Next
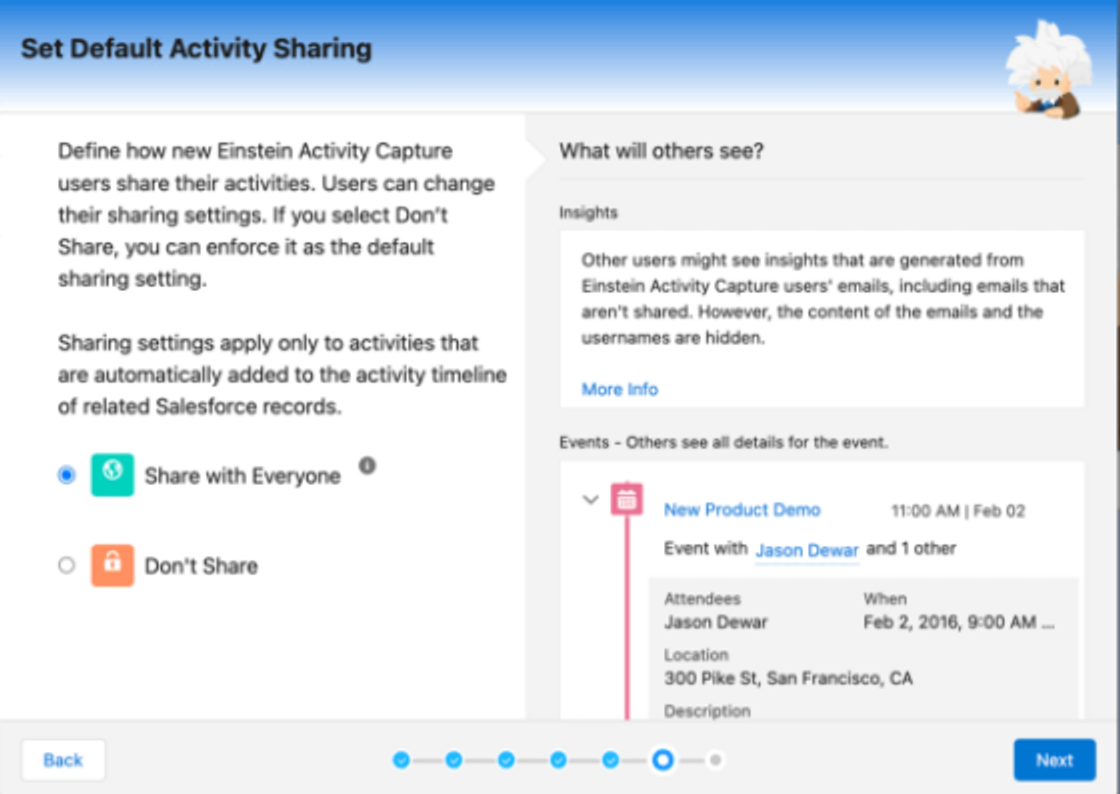
Step 11: Set the Default Activity Sharing setting from this window then click on Next
Step 12: Click on the Finish Button
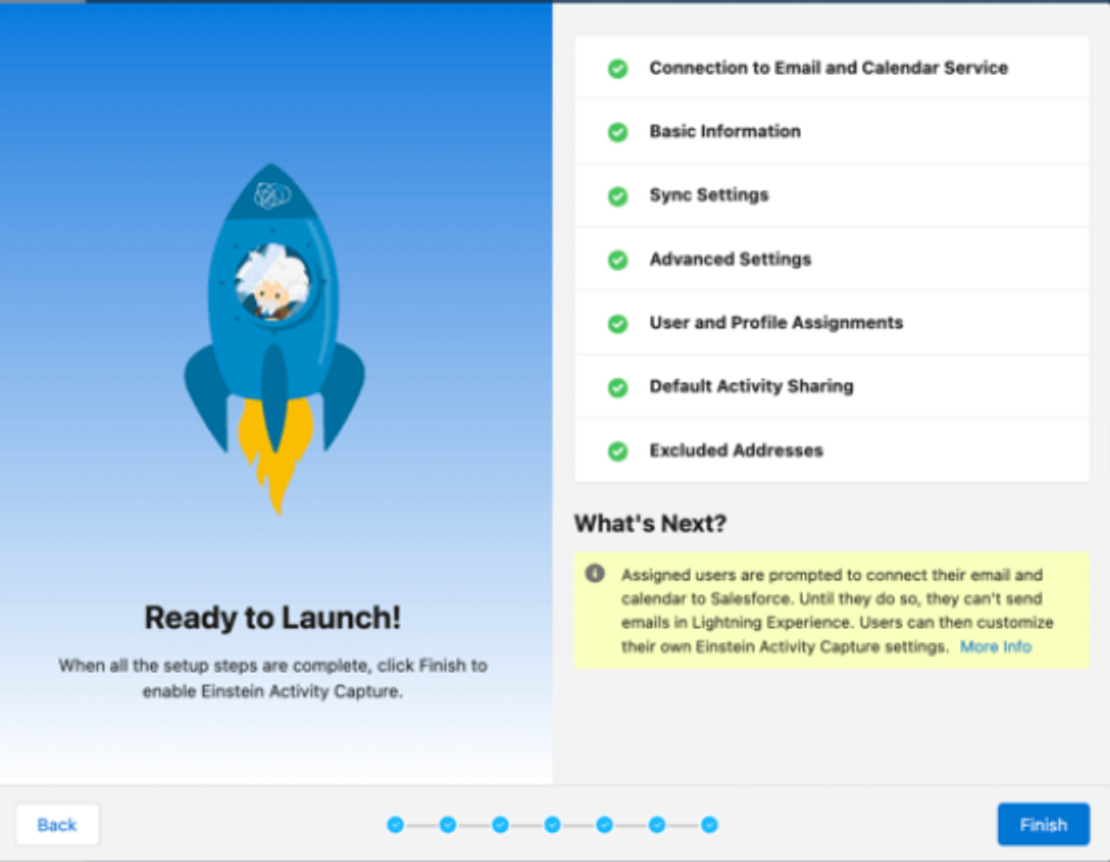
Step 13: Check if the user email ID is added to the Connected Account or not for this. Click on settings from your profile.
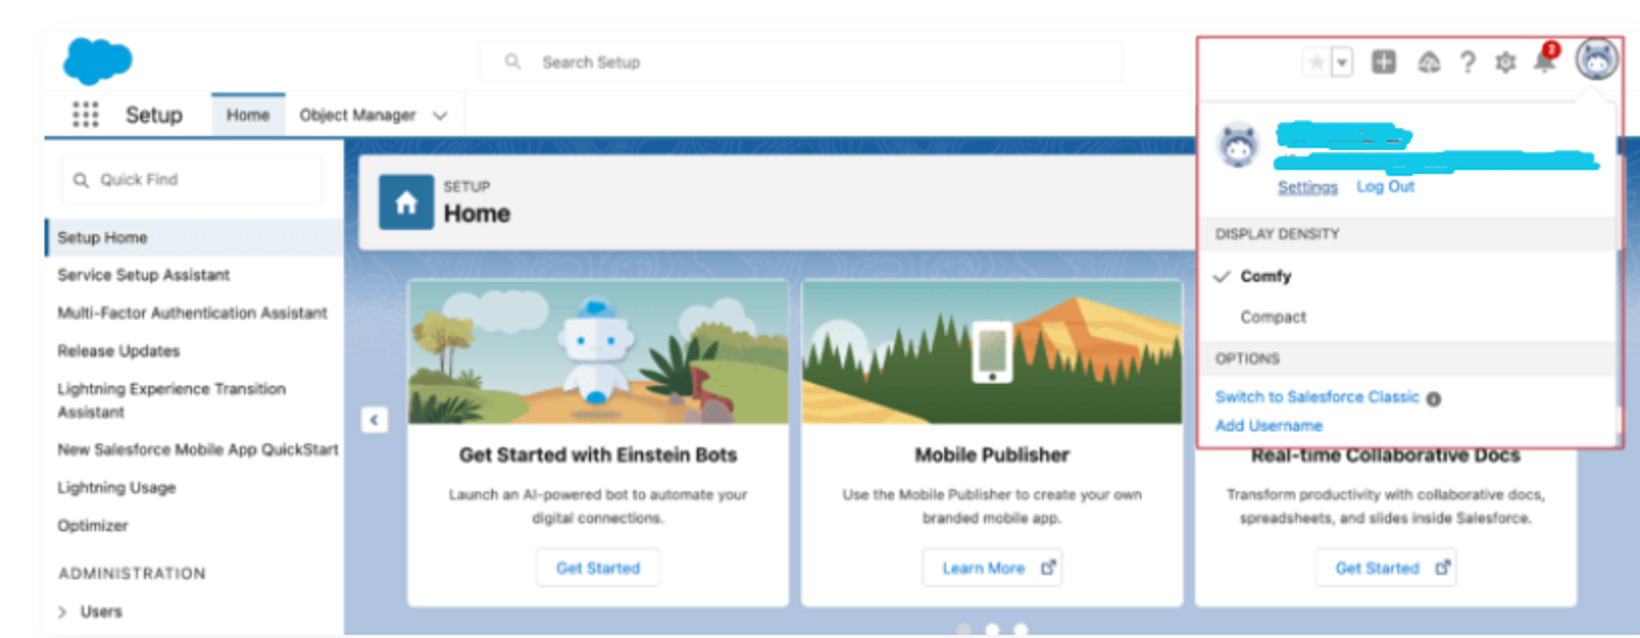
Step 14: Click on Connected Account and check whether the same email ID of the user you assigned Einstein Activity Capture is connected or not
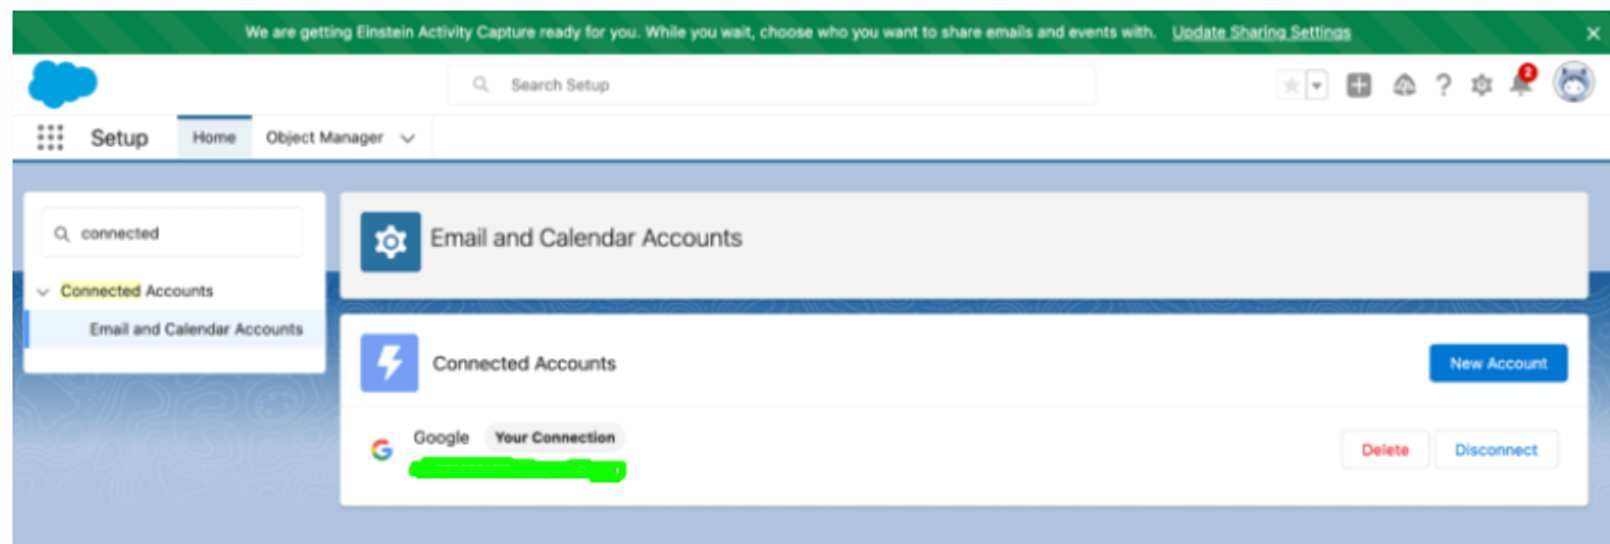
Note: If it is not connected then click on New Account and add the email account to it.
Great news! Inbox has been successfully configured with Einstein Activity Capture. Congratulations on completing the setup!
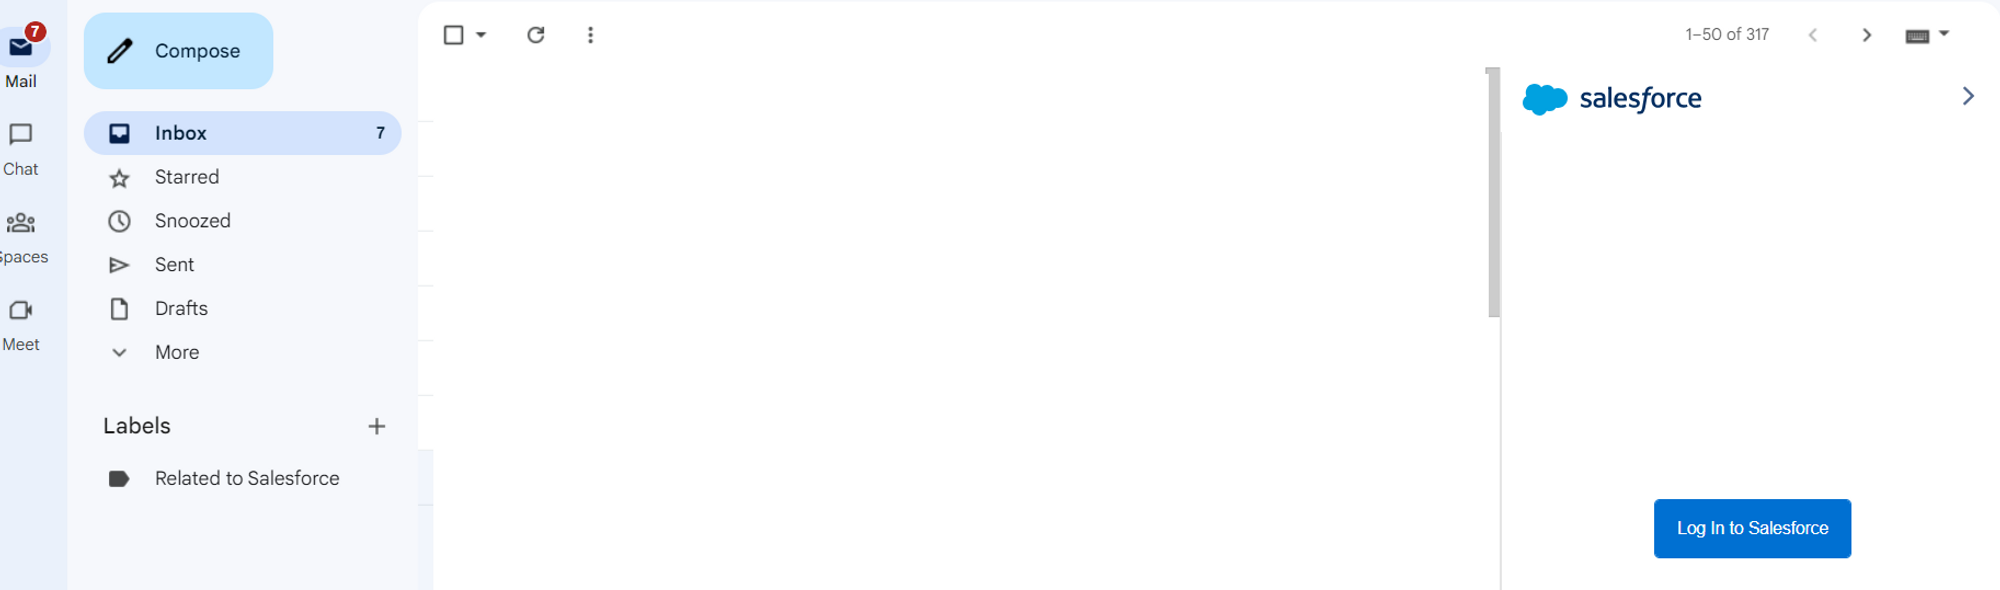
One last step is To enable email sync, you’ll need to add the Salesforce Extension for your browser. Click here to add the extension.
Once installed, you’ll find the Salesforce icon in your email. Click on it and log in to Salesforce using your credentials to initiate the email and calendar event syncing process.
Conclusion
By leveraging Inbox with Einstein Activity Capture, all sent and received emails and events automatically populate the activity timeline of associated records, such as Accounts, Contacts, Contracts, Leads, Opportunities, and Quotes. This integration enhances our productivity and ensures crucial information is readily available.
Liked the solution? Share your thoughts and get your hands on more such useful Salesforce development solutions just by staying connected with us. See you on the next one!





