



One of the great innovations in recent times, Einstein Chatbot is an AI-powered virtual assistant integrated with Salesforce’s CRM platform that has transformed customer service.
With its ability to engage with customers in real-time, the chatbot provides instant support and assistance through a conversational interface.
Using machine learning algorithms, it can understand and respond to customer inquiries with relevant information, making it an intelligent tool that can handle a wide range of tasks.
The benefits of using the Einstein Chatbot include
- 24/7 customer support,
- Reducing the workload of customer service agents, and
- Providing fast and accurate responses to inquiries.
In this issue today, we will explore how to create an Einstein Bot in Salesforce. So, let’s dig in!
Steps to use the Salesforce Einstein bot
Step 1: Define the Intent of the Bot
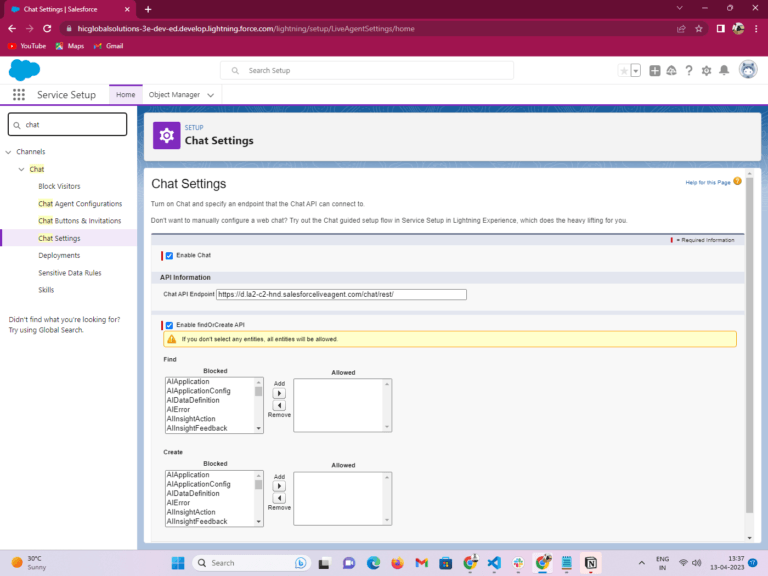
- Before using the Salesforce Einstein bot you must Enable chat in Salesforce org. To Enable chat in salesforce org search chat and click chat setting in salesforce org.
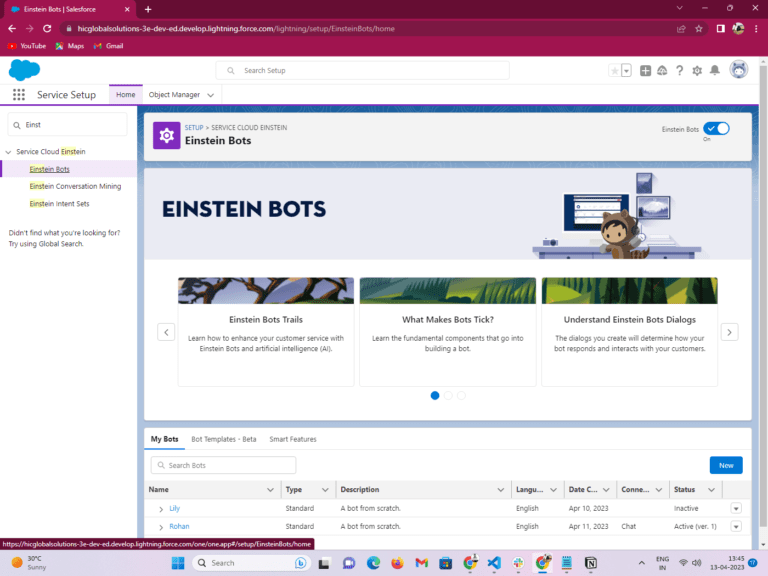
- Search for Einstein Bots in the Quick Find box and then click on Einstein Bots. After that toggle on Einstein Bots in the top Right Corner.
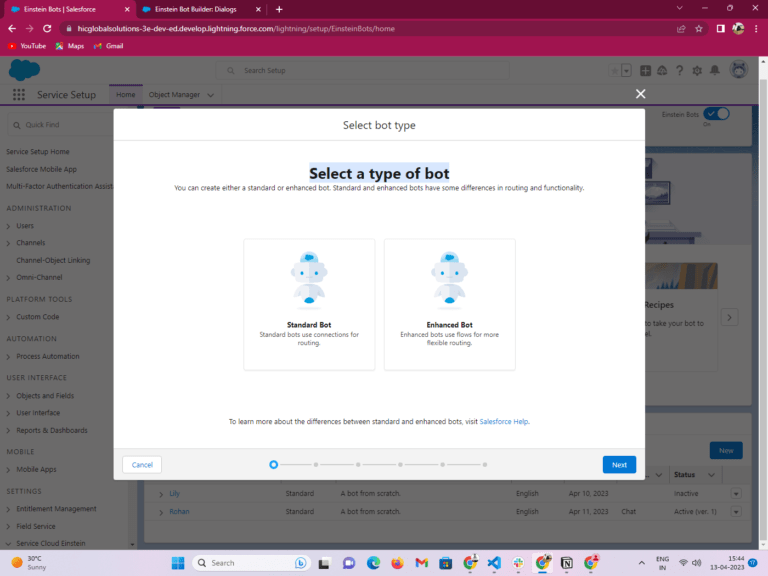
- Click the new Button to create new Bots.
- Select a type of boat
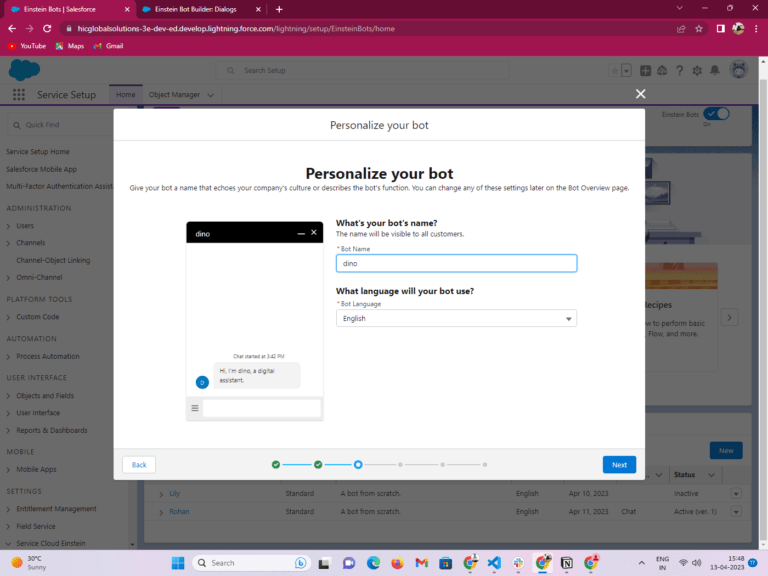
- Personalize Your Bot. In this step, enter Your Bot Name which will be visible to all customers.
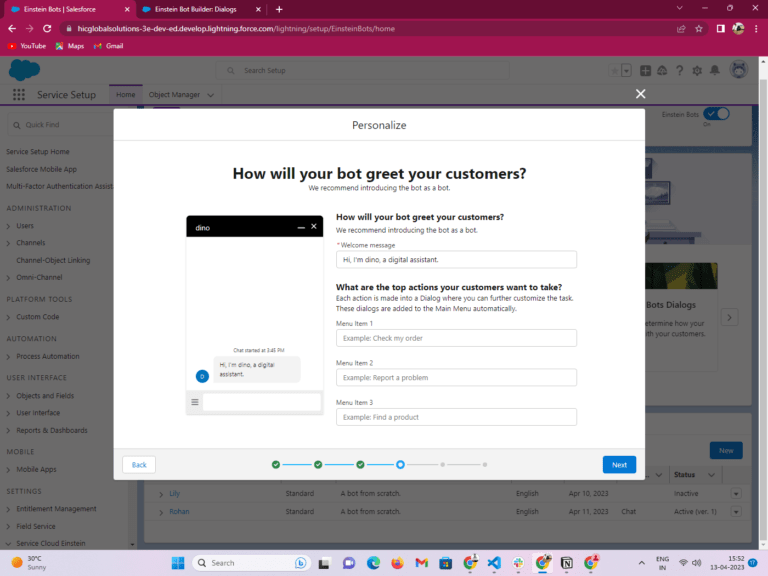
- Set how will your bot greet your customers.
- Click Proceed
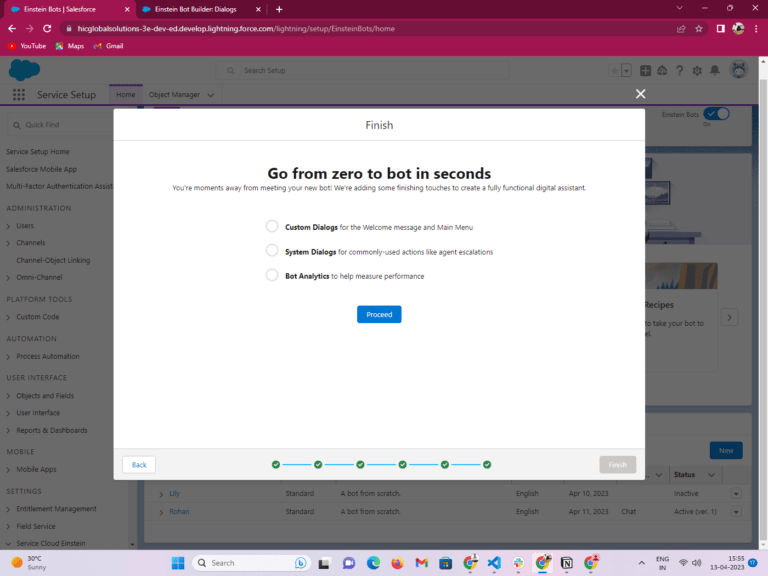
- Then Click Finish
Step 2: Create Dialogues
Once you have defined your bot’s intent, you can create dialogues for your bot. Dialogues are the interactions between the bot and the user. You can create dialogues using the Salesforce Dialog Builder, which is a visual tool for designing bot conversations. You can define the messages that the bot will send and the actions it will take based on user input.
Step 3: Configure Bot Actions
In addition to defining messages, you can also configure actions for your bot. Actions are tasks that the bot can perform, such as updating a record in Salesforce, creating a task, or calling an external API. You can configure actions using the Salesforce Bot Actions Builder.
Step 4: Train the Bot
After creating dialogues and configuring actions, you can train your bot. Training involves using Salesforce’s natural language processing capabilities to teach your bot how to understand and respond to user input. You can train your bot using the Salesforce NLP Trainer, which allows you to define sample user inputs and the expected bot responses.
Step 5: Deploy the Bot
After testing and refining your bot, you can deploy it to a Salesforce community, website, or other channels. You can customize the deployment settings, such as the appearance of the chat window and the availability hours of the bot, to suit your requirements.
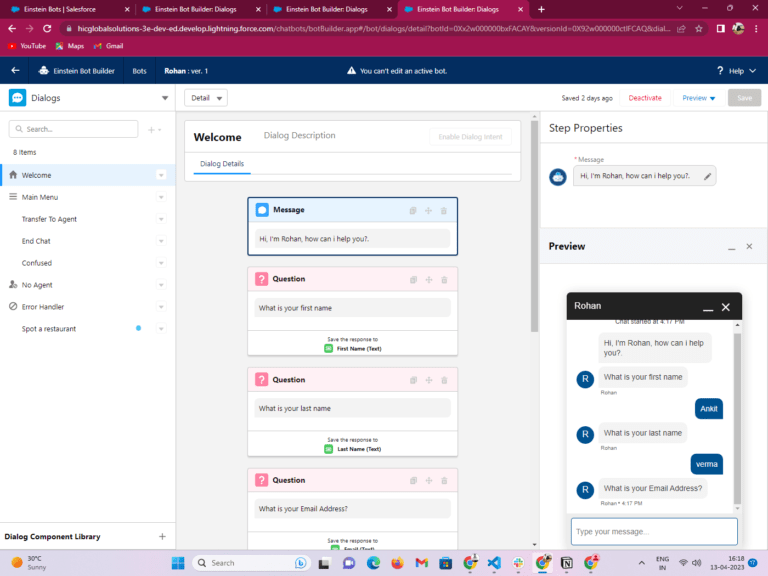
After completing this step your bot look like
Conclusion
Wrapping up, that’s a general overview of how to create an Einstein bot in Salesforce. The process may involve additional steps or configurations depending on your specific use case and requirements. It’s recommended to refer to Salesforce’s official documentation and resources for detailed instructions on creating Einstein bots.
Feel free to share your feedback and suggestions on this coverage and Stay tuned for more chatbot blogs coming soon!





