In today’s fast-paced business landscape, productivity hinges on streamlined workflows and intuitive interfaces. While Salesforce offers robust activity tracking capabilities, sometimes the standard components fall short of specific organizational needs.
That’s where a Custom Activity Component comes in—designed to tailor your activity management experience, boost user efficiency, and provide deeper insights into customer interactions.
In this blog, we’ll walk you through the key steps to create the Custom Activity Component:
How to Create the Custom Activity Timeline Component
Step 1: Create the Lightning Web Component (LWC)
- Open Visual Studio Code.
- Open the Command Palette by Ctrl+Shift+P for Windows
- Select SFDX: Create Lightning Web Component
- Create ActivityTimeline and ActivityTimelineItem as the component name.
- Press Enter to accept the default directory.
Note: I have attached the zip file, which has the code. Please extract it and add the LWC and Apex Code.
- Copy and paste the code into the LWC component.
- HTML in ActivityTimeline.html and ActivityTimelineItem.html.
- Javascript file code in ‘ActivityTimeline.js’ and ‘ActivityTimelineItem.js.
Step 2: Create the Apex Class
- Create an Apex Class:
-
- Create the Apex Classes and enter the code from the zip file.
- Save the Apex Class.
Step 3: Deploy both the LWC and Apex classes to your Salesforce org.
Step 4: Add the Component to the Account Page Layout
- Navigate to the Account Page Layout:
- From Setup, enter Object Manager in the Quick Find box and select Account.
- Select the record and edit the layout.
- Add the Custom Component:
Drag and drop the ActivityTimeline component onto the page layout.
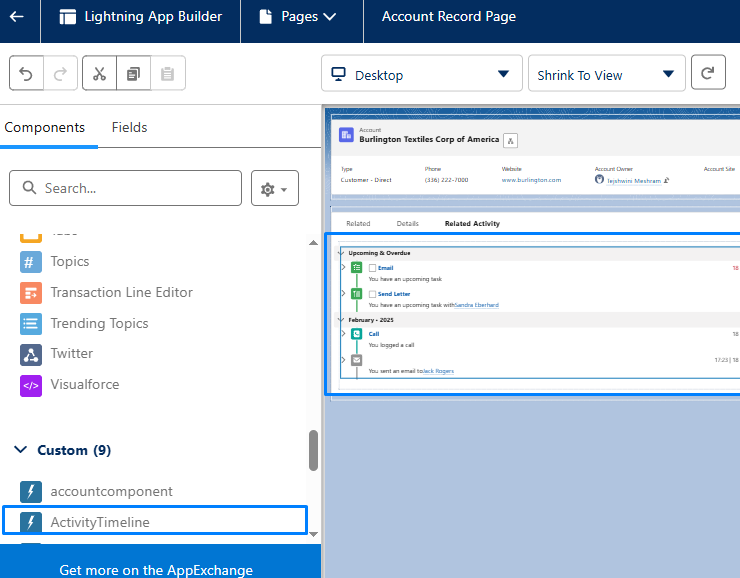
Save the Layout.
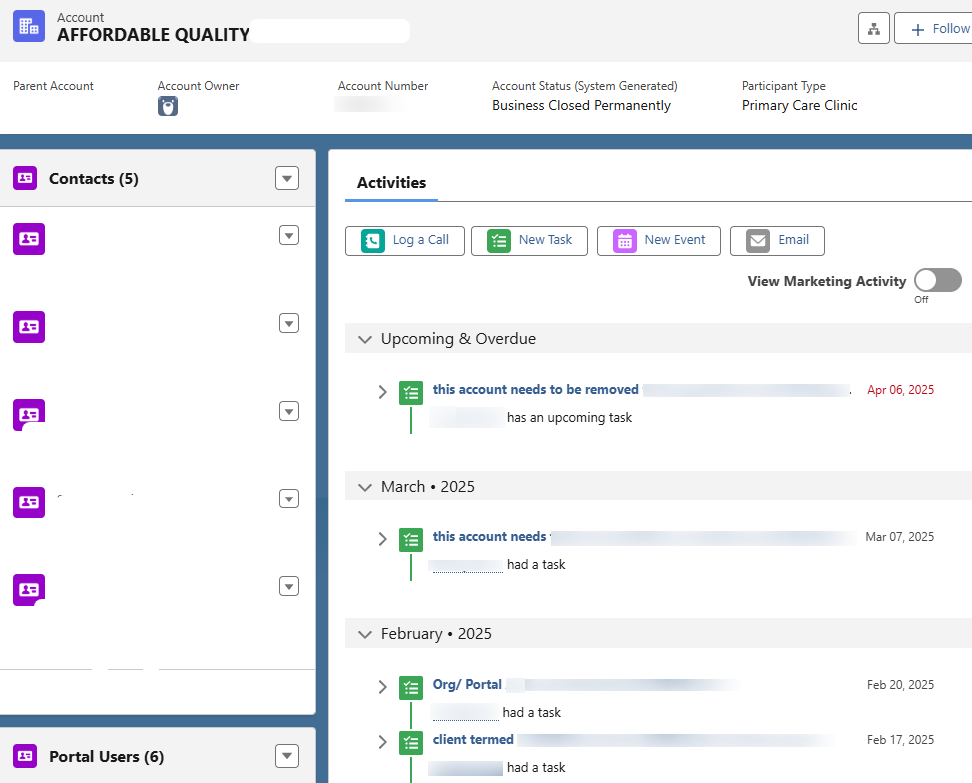
Test the functionality
To test the component, create a few activity logs with different owners or subjects. Use the filters to display or hide marketing activities to determine if they are functioning correctly.
Watch the Demo
https://www.youtube.com/watch?v=Pkaz4q9UV94
Concluding Words
A Custom Activity Component not only enhances visibility into your team’s interactions but also empowers users with a more tailored and efficient Salesforce experience. By following the steps outlined above, you can create a dynamic, filterable activity timeline that aligns with your business needs.
We hope the tutorial was helpful to you!
For more proven techniques and best practices to thrive & stay ahead in the market, check out our informative Salesforce tutorials.