




Territory management in Salesforce is a Sales team’s reliable tool for revenue generation. It helps them achieve targets, increase sales and reduce costs with enhanced coverage and aligned territories.
Proper mapping of territories also delivers optimized routing capabilities that reduce travel costs and boost sales & customer satisfaction within a particular territory.
So, in this week’s issue, we will explore how you can set up territory on an account in Salesforce according to the billing address.
So, without further ado, Let’s dive straight into the steps!
Stepwise Setting up of territory in Salesforce
Territory Management is not activated by default in Salesforce. To enable the Territory Management feature, follow these steps:
Step 1: Enable Territory Management
- Go to Setup.
- In the Quick Find box, enter territories then select Territory Settings.
- Click Enable Enterprise Territory Management.
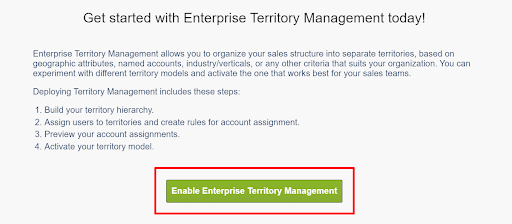
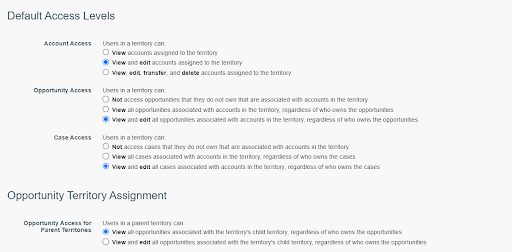
Now the Territory Management feature is on and the user access levels are set.
Step 2: Create a Territory Model Record
- Go to Setup.
- In the Quick Find box, enter Territory then select Territory Models.
- Click on New Territory Models.
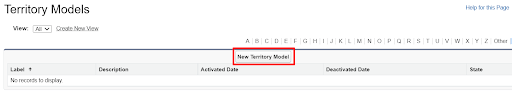
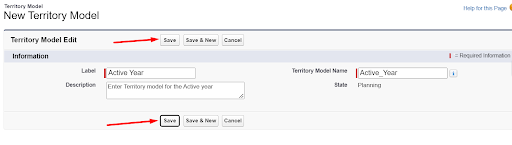
4. Define the label and description fields.
5. Click Save.
Step 3: Create a Territory
- Go to Setup.
- In the Quick Find box, enter Territory then select Territory Models.
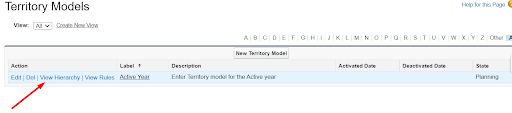
- Click View Hierarchy.
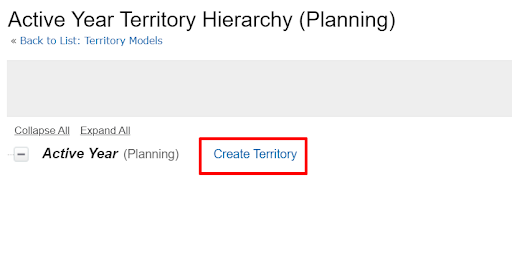
4. Next to Active Year, click Create Territory.
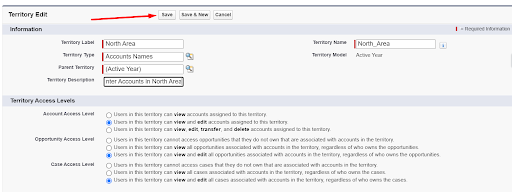
5. On the New Territory page, for the label, enter North Area and select the Accounts Names territory type.
6. For the description, Enter Accounts in North Area.
7. Click Save.
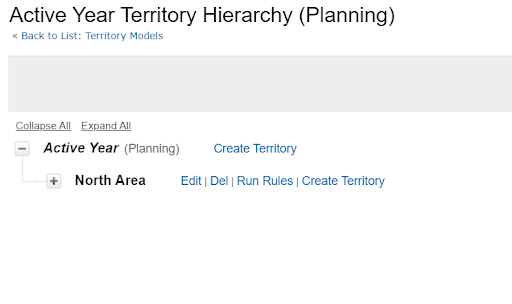
Now, Again in View Hierarchy, You can see the Territory Hierarchy of your territory.
Step 4: Create an Assignment Rule for assigning an account according to billing address:
- Go to Setup.
- In the Quick Find box, enter Territory then select Territory Models.
- Click View Hierarchy.
- Click on North Area.
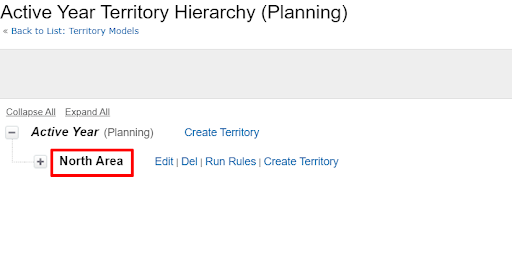
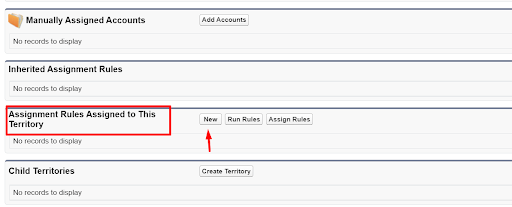
5. Under the related list of North Area, Go to Assignment Rules Assigned to This Territory and create New Rule.
6. On the new rule page,
- Enter the name of this rule, Define the rule name.
- Enter the selection criteria for Account, enter Account: Billing Zip/Postal Code, greater or equal, and 110000.
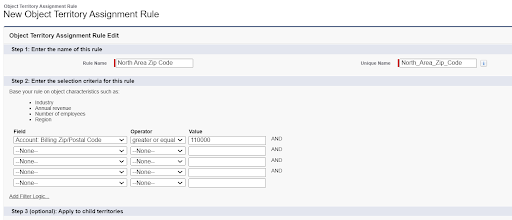
7. Click Save.
8. In the Assignment Rules Assigned to This Territory-related list, click Run Rules.
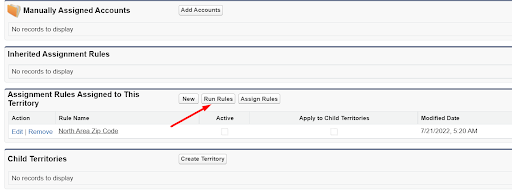
You can see a message appears stating that the rule is running and will receive an email when the process is completed.
For now, the territory model isn’t activated, so running rules is just a test. This provides us with a chance to make Changes.
Step 5: Assign an Account to a Territory Manually
- Go to the North Area territory.
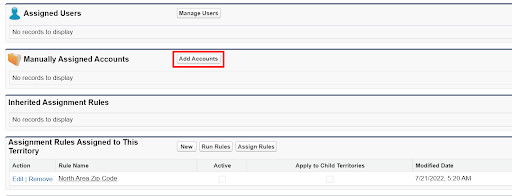
- Under the related list of North Area, Go to Manually Assigned Accounts and Click on Add Account.
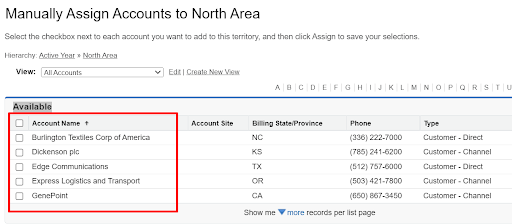
3. In the Manually Assign Accounts to North Area page, you can select account from Available Account.
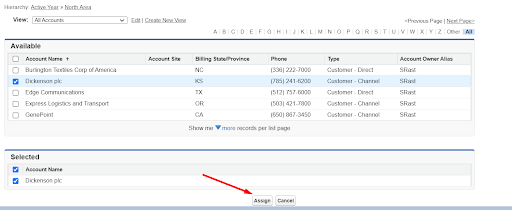
4. Click Assign.
5. Click View Accounts to check the accounts that were assigned.
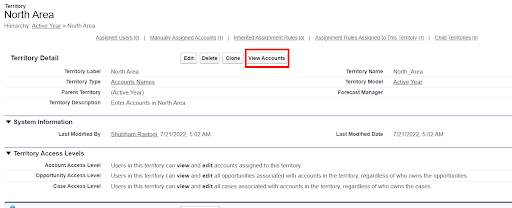
Now, You can see a List of assigned accounts.

Step 6: From the Territory, you can also assign a User to a Territory
- Go to the North Area territory.
- Under the related list of North Area, Go to Assigned Users and Click on Manage Users.
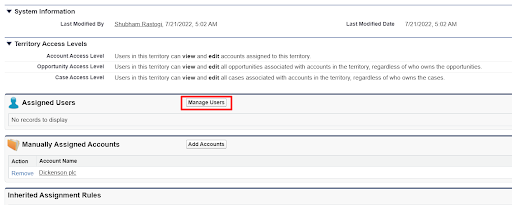
3. In the List of Available Users, you can select users who can also access the accounts which are attached with that territory.
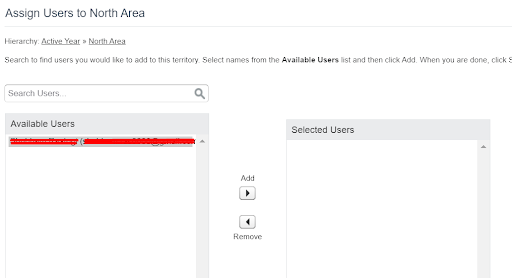
4. Click Save.
Step 7: Activate a Territory
- Go to Setup.
- In the Quick Find box, enter Territory then select Territory Models.
- Click on Active Year.
- Click on the Activate button.
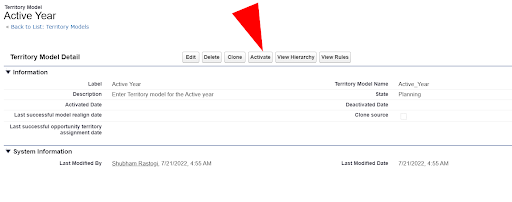
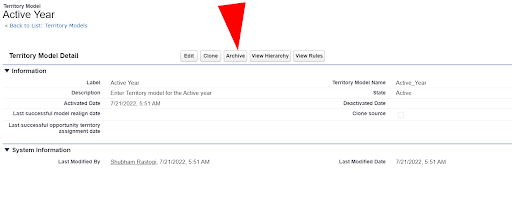
Again, it will show a messaging stating that Territory Model Activation is in progress, we will get an email when it’s done. if you don’t need to use a territory model anymore, you can archive or delete it.
Wrap Up
So, if you ever need to assign and set up territory in Salesforce for any Sales team, you may try our solution for guidance.
Also, if you want to hear more from us, follow our blogs and get in touch with us at HIC Global Solutions to share your valuable experiences. Catch you on the next one, till then, Keep learning!





