




How to renew/delete an expiring certificate in Salesforce: Step by Step Guide
Today, with this innovative solution, you’re going to know how to renew or delete an expiring certificate in Salesforce. So, without much ado, let’s just jump right into the solution.
Steps to create a new certificate and update the app in your Salesforce org
Admins should understand this checklist to learn from where the certificate needs to be replaced. You need to go to the Setup, use Quick Find for the following:
- Single Sign-On: You can use this as the “Request Signing Certificate” for an SSO setting.
- Connected apps: You can use the expiring certificate in an app configuration.
- Identity Provider: This feature allows the automatic creation of a self-signed certificate. Also, you can deactivate it to avoid the need to keep an up-to-date certificate if you’re not using the Single Sign-on feature.
Now, let’s see how to create a certificate!
Step 1: Find and Create a New Certificate
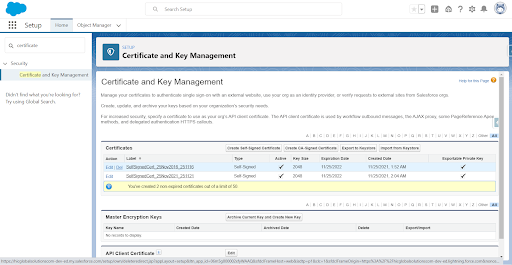
Click on ‘Setup.’ Then, find the ‘Certificate and Key Management’ option. Or, simply, you can search ‘certificate’ in the Quick Find box. When you click on the ‘Certificate and Key Management.’ Then, duplicate this tap in your browser. From here, click on the Label name to open the details of the Certificate and Key. We are looking at the type: ‘Self-Signed.’
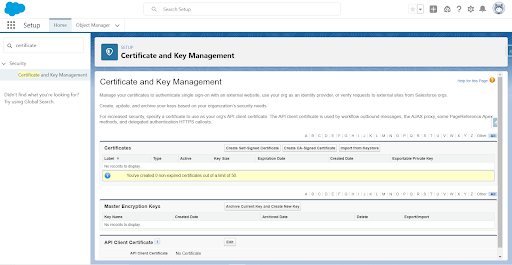
Now, you need to copy the Label information from your Certificate and Key Detail screen to the Self-Signed Certificate you will be creating. On the original tab, click ‘Create Self-Signed Certification.’ Paste your old Label name and update the name using a similar naming convention to the expiring Certificate label. Click save and double-check between the two tabs that the detailed information is the same.
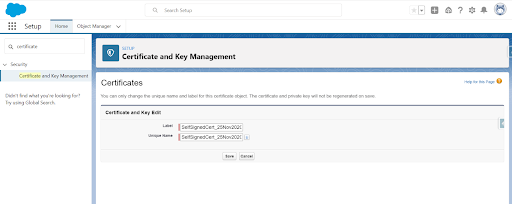

Step 2: Update the Appropriate App with the new Certification Key
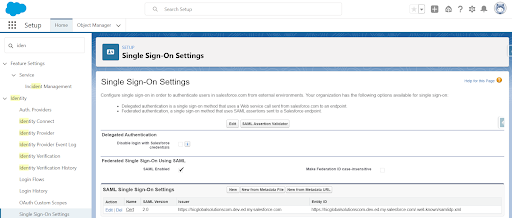
Now, click on ‘Setup.’ Find ‘Identity’ in the Quick Find box. You are going to update ‘Identity Provider’ and ‘Single Sign-On Settings.’
Click on ‘Identity Provider.’ Select ‘Edit’ and update the Label to the Certificate name you just made. Then, Save.
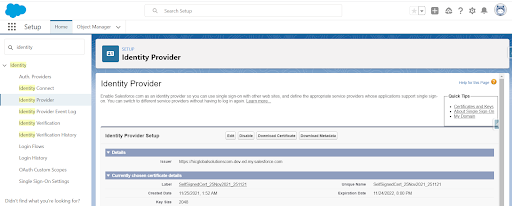
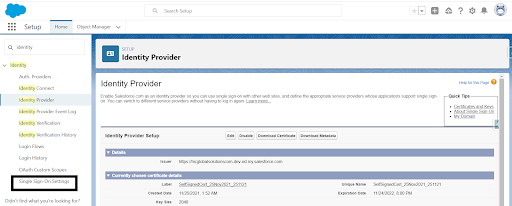
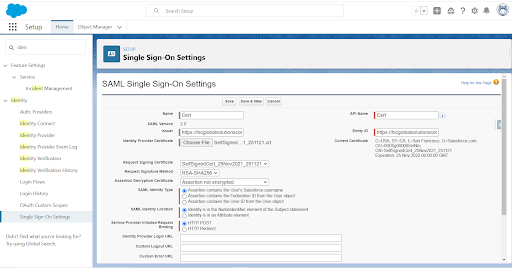
Then, click on ‘Single Sign-On Settings.’ Select ‘Edit’ next to the name of the SAML (Security Assertion Markup Language) Single Sign-On Settings.
How to delete an expiring certificate in Salesforce?
Step 1: Find the Expired Self-Signed Certificate.
Go to ‘Setup.’ Select the ‘Certificate and Key Management’ option. Or, search ‘Certificate’ in the Quick Find box.
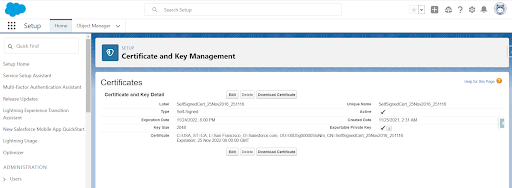
Click on ‘Certificate and Key Management.’ Find the Self-Signed certificate you want to delete. If there is no ‘Del’ option, click on the certificate label name.
Now, when you hover the mouse over the Delete button. You will see a message box saying this certificate is in use in your Identity Provider.
Step 2: Find the Identity Provider
Click on ‘Setup.’
In the Quick Find box type ‘Identity.’ Click on ‘Identity Provider’.
Double-check the ‘Identity Provider Label’ name that matches your Certificate name.
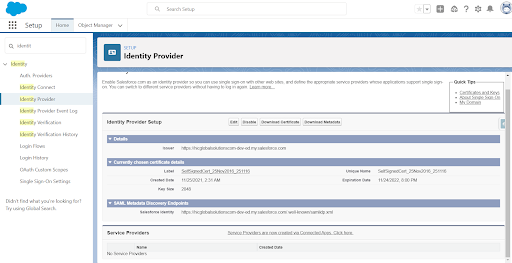
Check if any Service Providers are using the certification by scrolling to the bottom. It should say ‘No Service Providers,’ as this indicates you are not using the Single Sign-On certificate feature.

Disable the Identity Provider. Note: if users are logging into a provider via Salesforce and you disable an Identity Provider, the users will need their username and password to log into those providers.
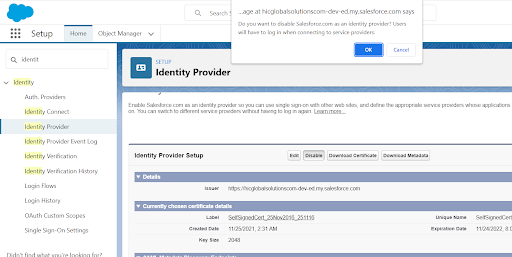
Step 3: Delete the Certificate
Go back to the certificate. Click ‘Setup’ and in the Quick find box lookup ‘Certificate’. Click on the self-signed certificate you want to delete, and the button will now be available to use.

Now, your certificate is deleted and you will not receive any email notifications.
Conclusion
We hope that you liked this solution, and got to learn about how to renew or delete certificates in Salesforce. If you try out this solution, then do share your experiences with us. We will be back with another solution really soon! Till then, happy learning! 🙂





