
The objective after completing a quote is usually to produce a precise and expert quote document for clients. However, without the proper procedures in place, quoting can be difficult, error-prone, and time-consuming.
Salesforce CPQ (Configure, Price, Quote) streamlines the process and improves quote accuracy by assisting with the setup and administration of quotation papers. By assisting in the creation of customized quotes, Dynamic quotation Templates go beyond a typical quotation sheet and offer even more customization and flexibility.
This blog presents a comprehensive, step-by-step guide for the professional customization of quote templates within your organization.
What Are Quote Templates?
A quote template is a premade document that may be used as a model to create custom quotes for customers. Usually, it has placeholders for important details like:
- Company information
- Client details
- Descriptions of products
- services Terms and conditions of pricing
By using templates, you can assure uniformity across all quotes that your firm generates while also saving time.
Steps to create a customized Quote Template
Step1: Click App Launcher → Search “Quote Template” → New 👇

Step2: Fill the details 👇
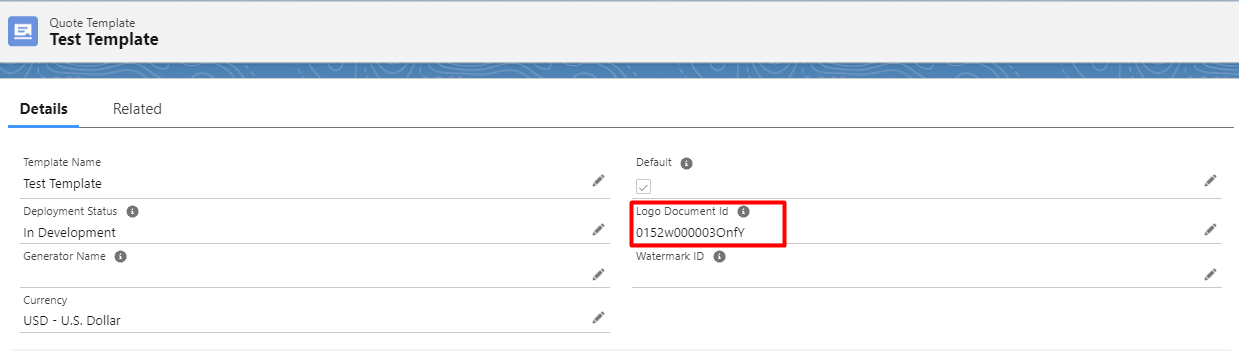
Note: Here I have added a Logo Document ID This is the ID of the document that I want to use in my template logo and I have saved that logo in my document record (switch to classic for adding)
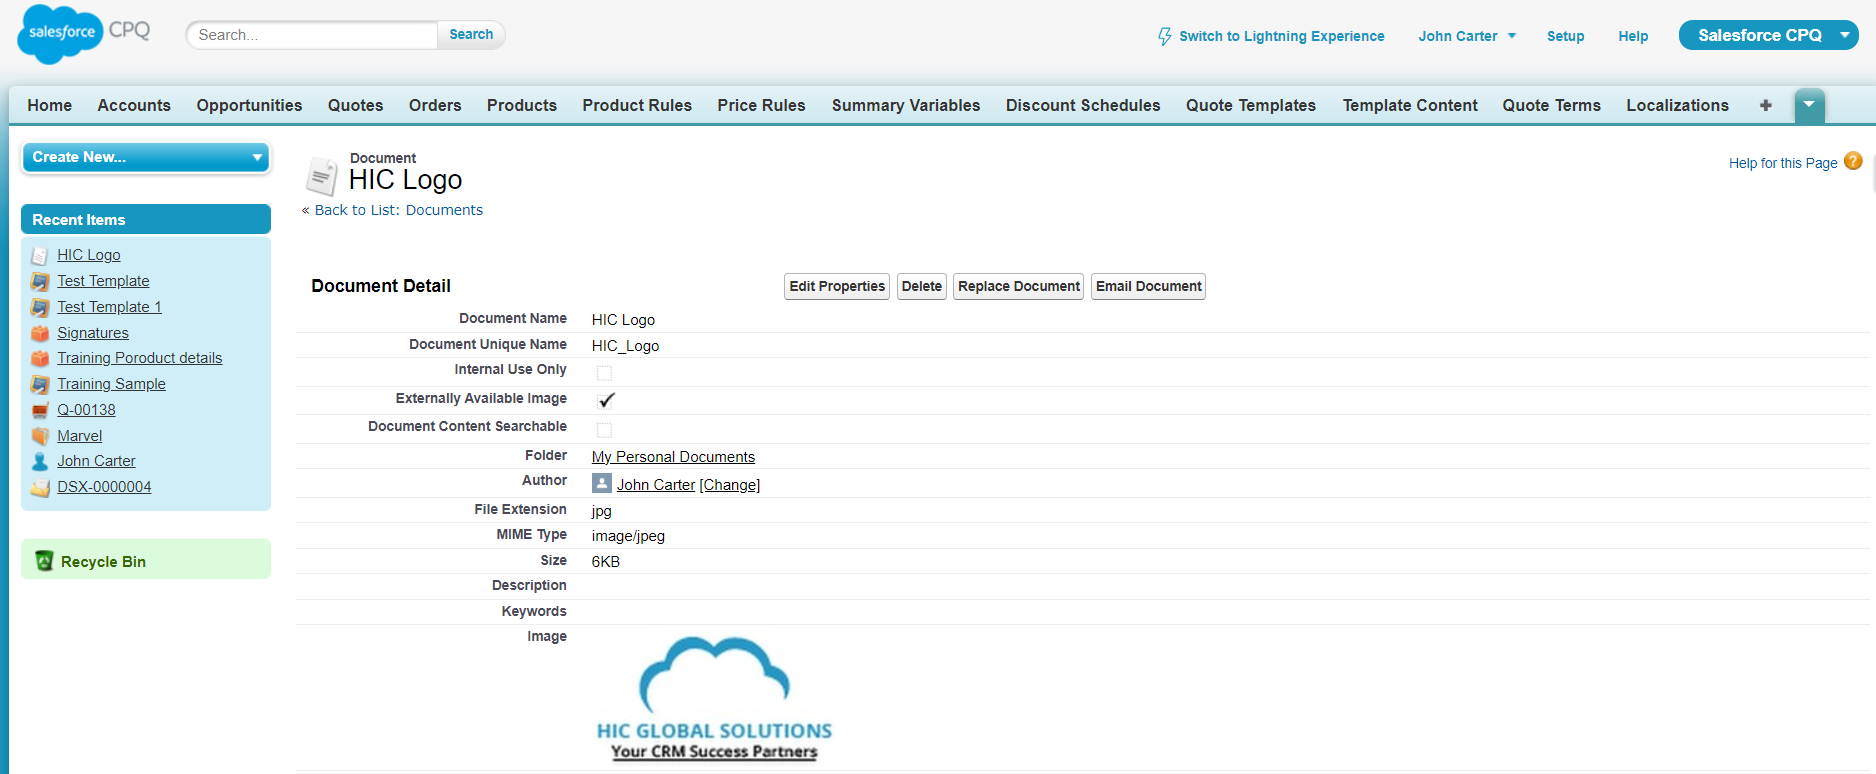
Template design, you can adjust several components as per your requirement:
- Page Layout – Modify dimensions and margins
- Top/Bottom Text – Insert header/footer content
- Business Details – Edit company info (auto-populated from settings)
- Document Aesthetics – Change font and color scheme
- Subsection Formatting – Adjust appearance of grouped items
- Category Headers – Define labels for different parts
- Output Settings – Configure display and printing preferences <
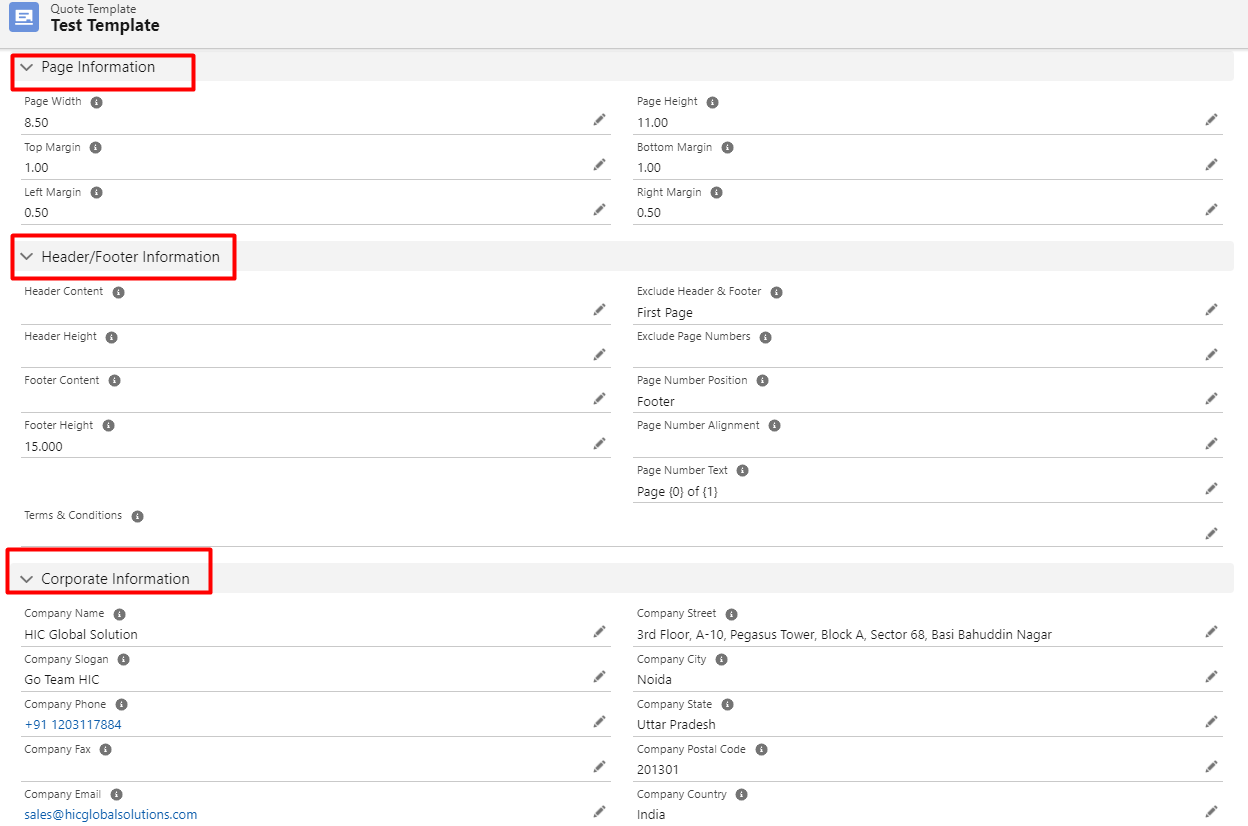
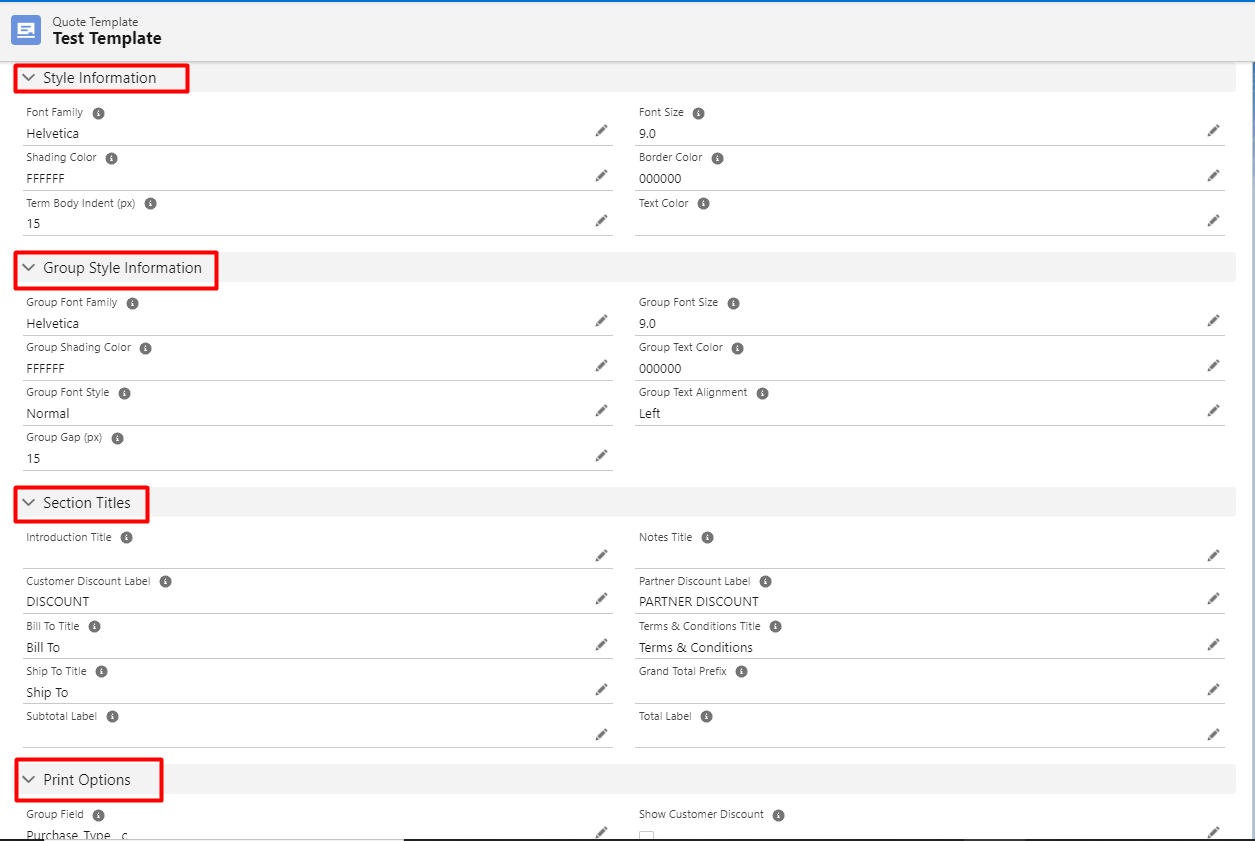
Now it’s time to add sections and content for those sections in your quote template. Before moving ahead first, have a rough picture of how you want your template to look, and in how many sections you want to divide your template. Furthermore, focus on what content you want to display in those sections.
Step 3: First, create content for various sections. Click App Launcher → Search “Template Content” → New 👇

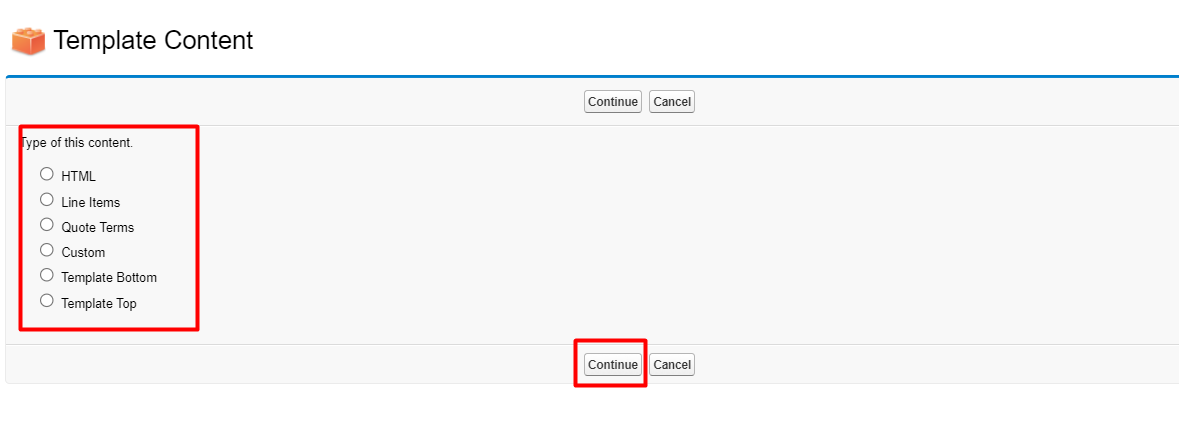
Step4: Select the type of content → Continue → Fill other detail
💡 Content-Type:
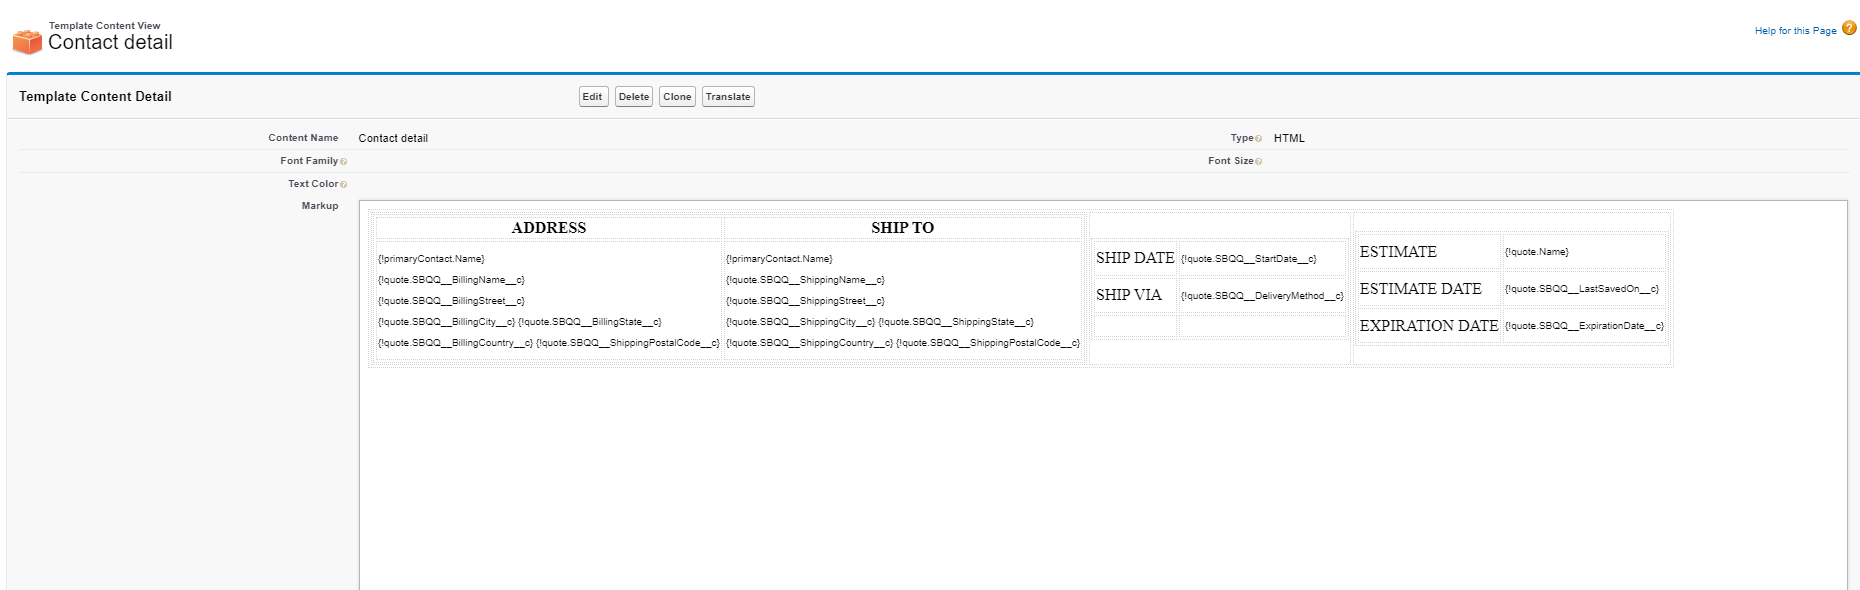
- HTML: This is the format where text can be added in various formats, such as bullet points or bold. Without knowing complex programming, you can manipulate the text with a unique tool to make it look the way you want.
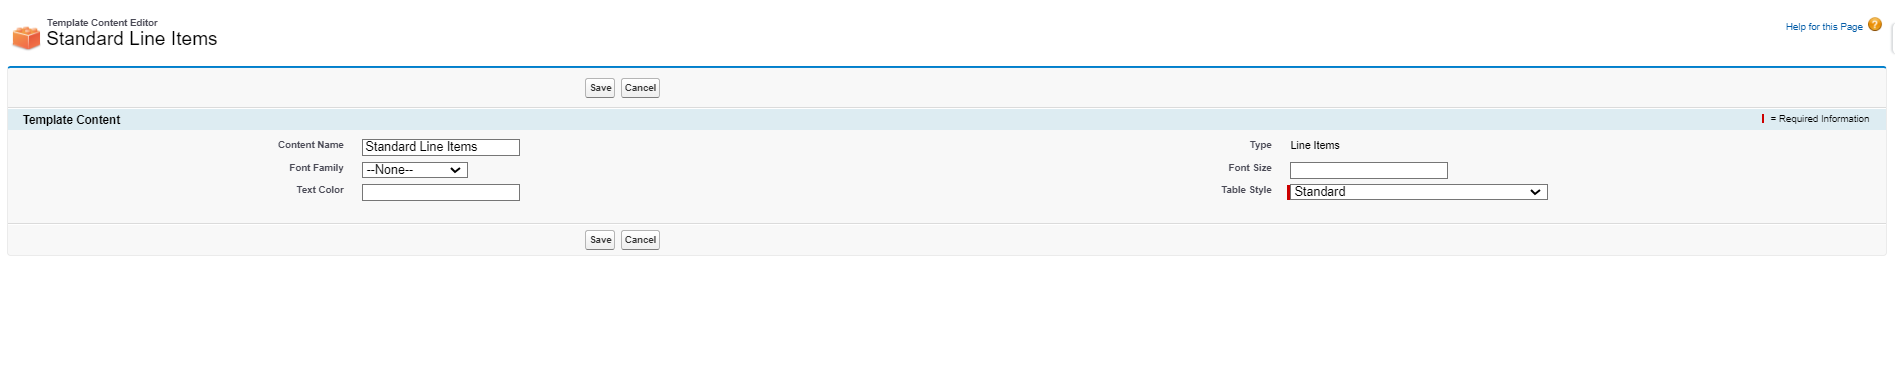
- Line Items: This lets you add empty rows to your quote table. The information shown in each column depends on what you set up earlier.
- Custom: Here you can display a unique page that you have created. Type its name like this to utilize it: /apex/c__YourPageName. Verify that it is compatible with Salesforce CPQ’s document creation process.
- Template Bottom: This appends typical information, such as dates, notes, and a place to sign, to the conclusion of your quote.
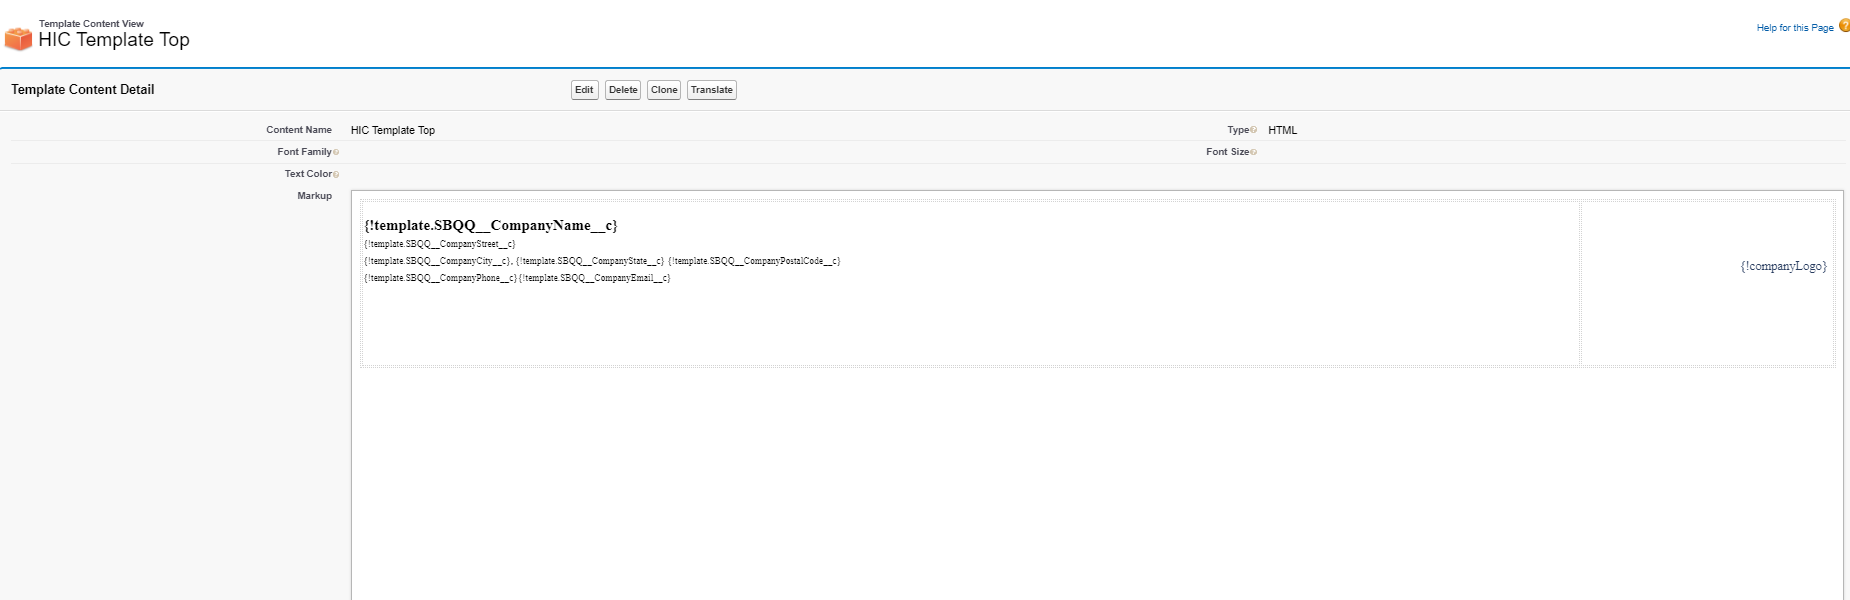
- Template Top: This begins your quote with conventional information such as your address and logo. You must first upload the image to your Documents folder before using its web link to add it. Images cannot be uploaded directly to this site.

Step 5: Time to create sections on your template for that click on Quote Template record → Related Tab → Sections → New → Fill detail and customize accordingly each sections. 👇
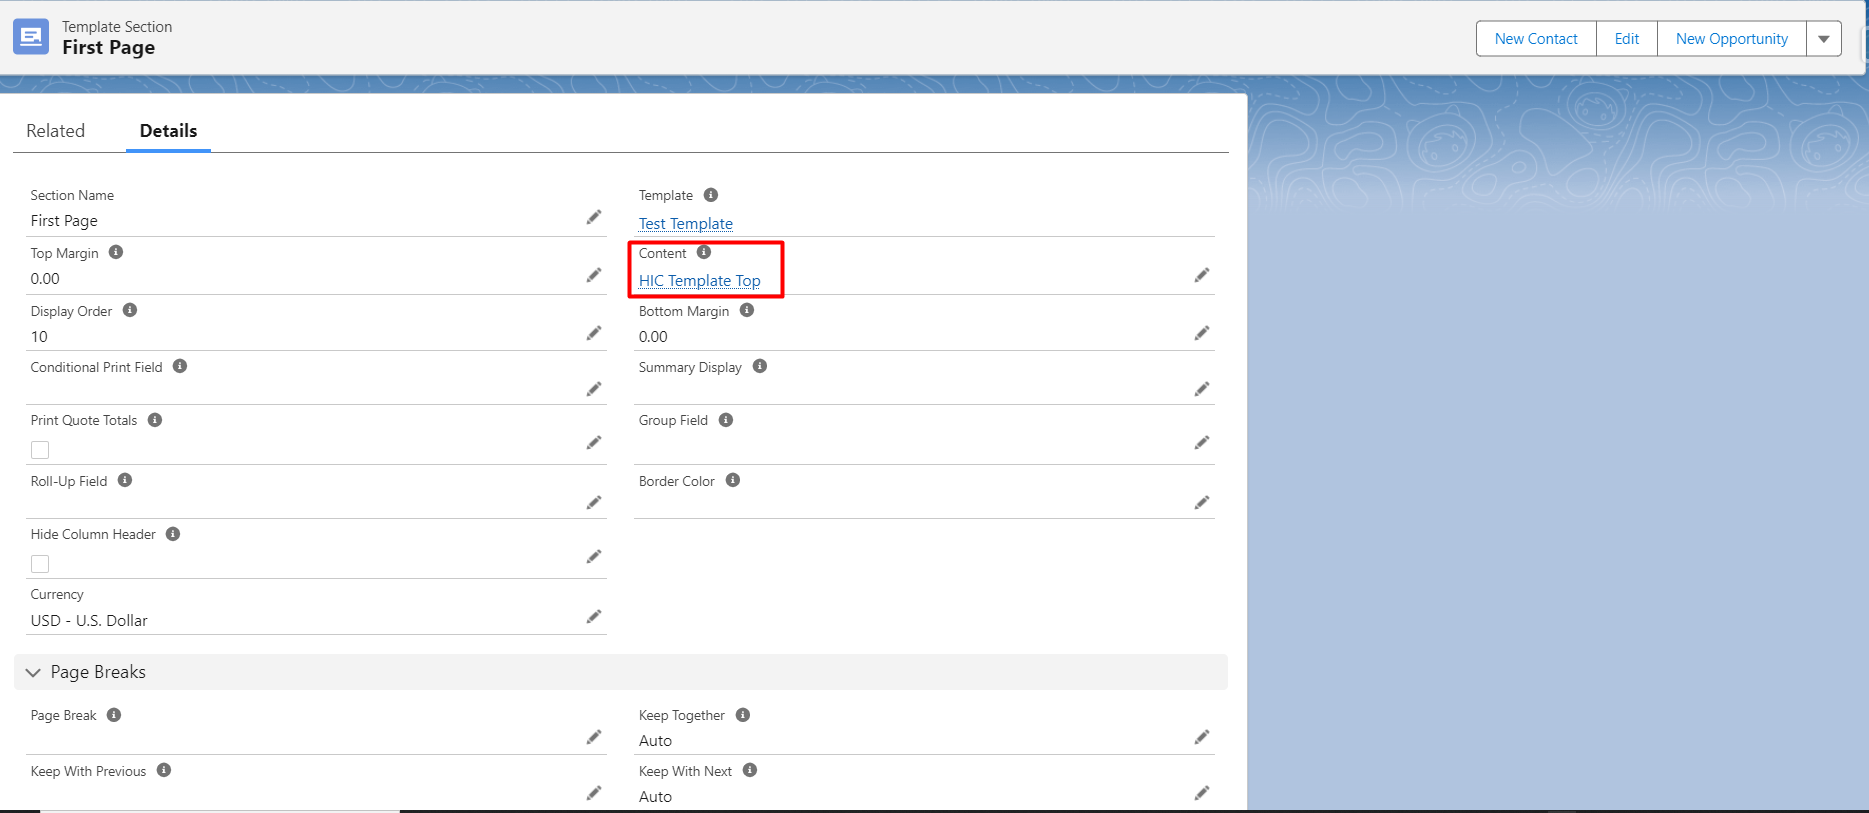
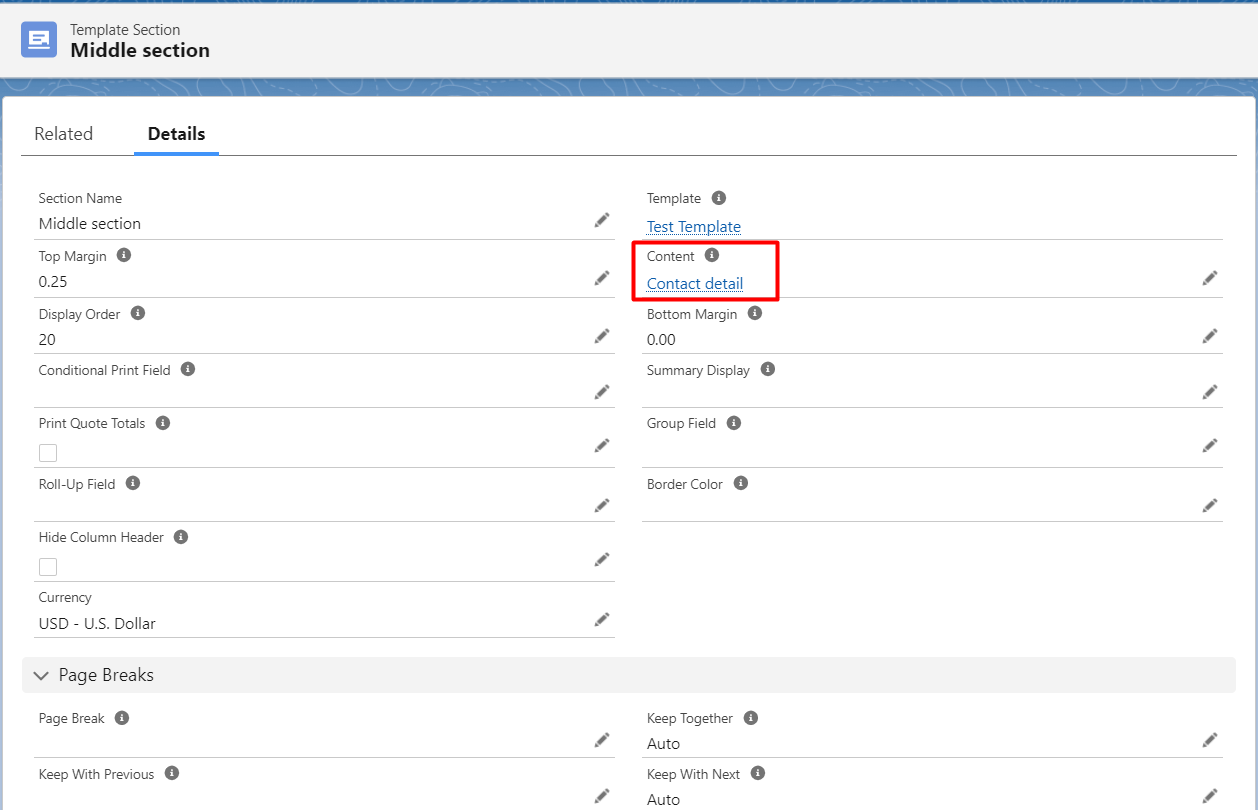
I have added the previously created content in each section accordingly and assign display order for each section. You can move sections by changing the display order of sections.
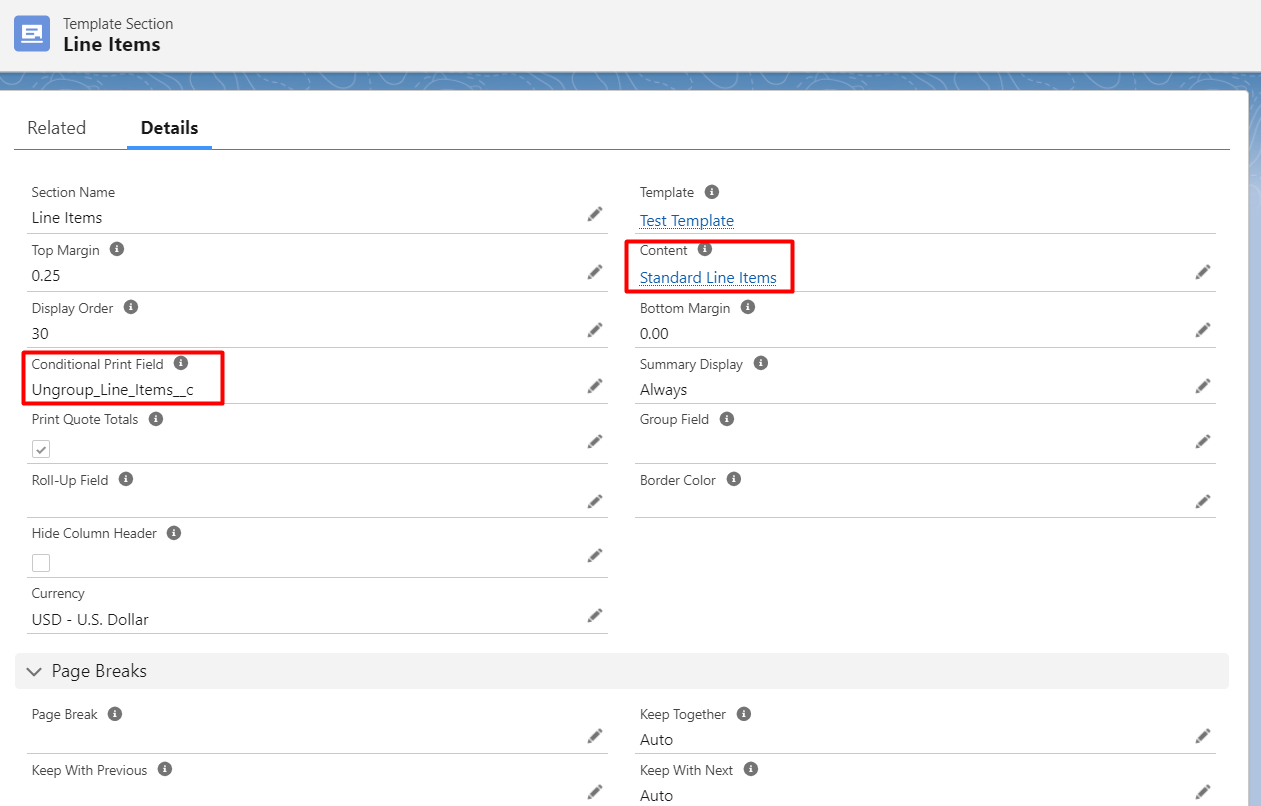
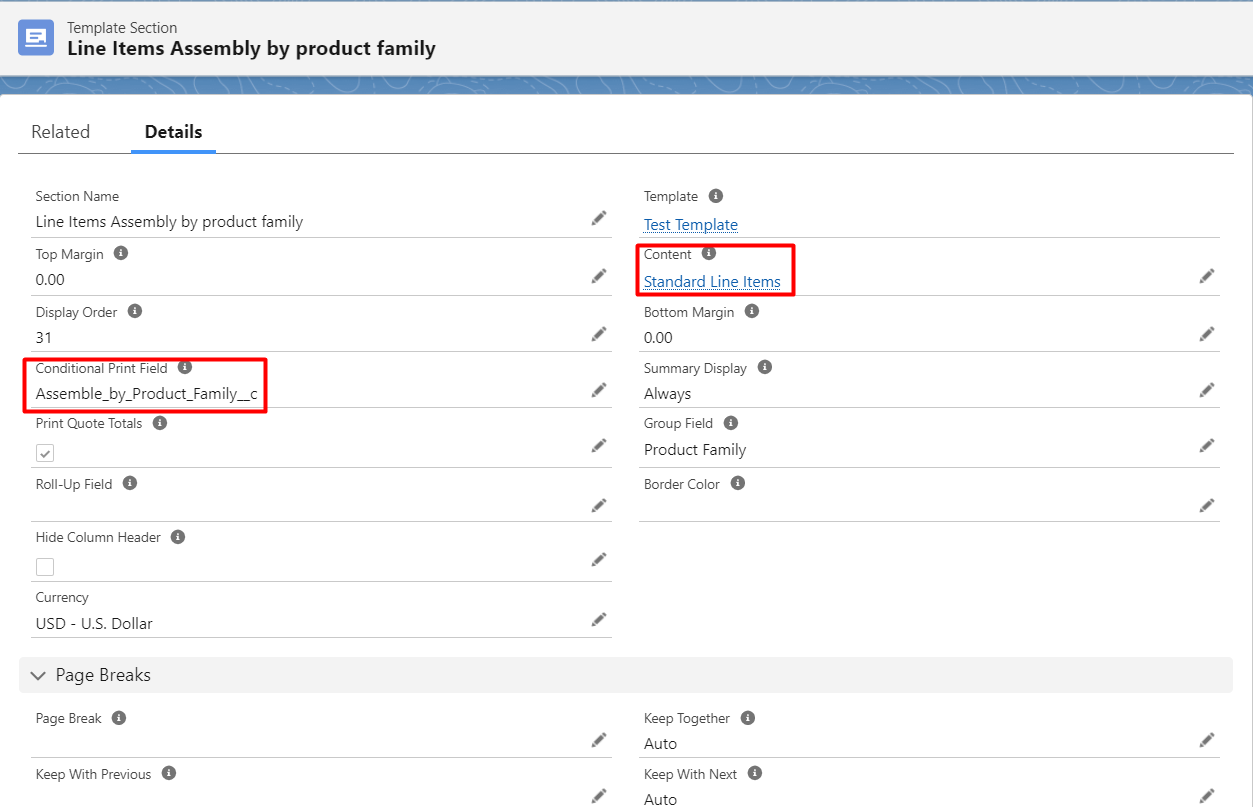
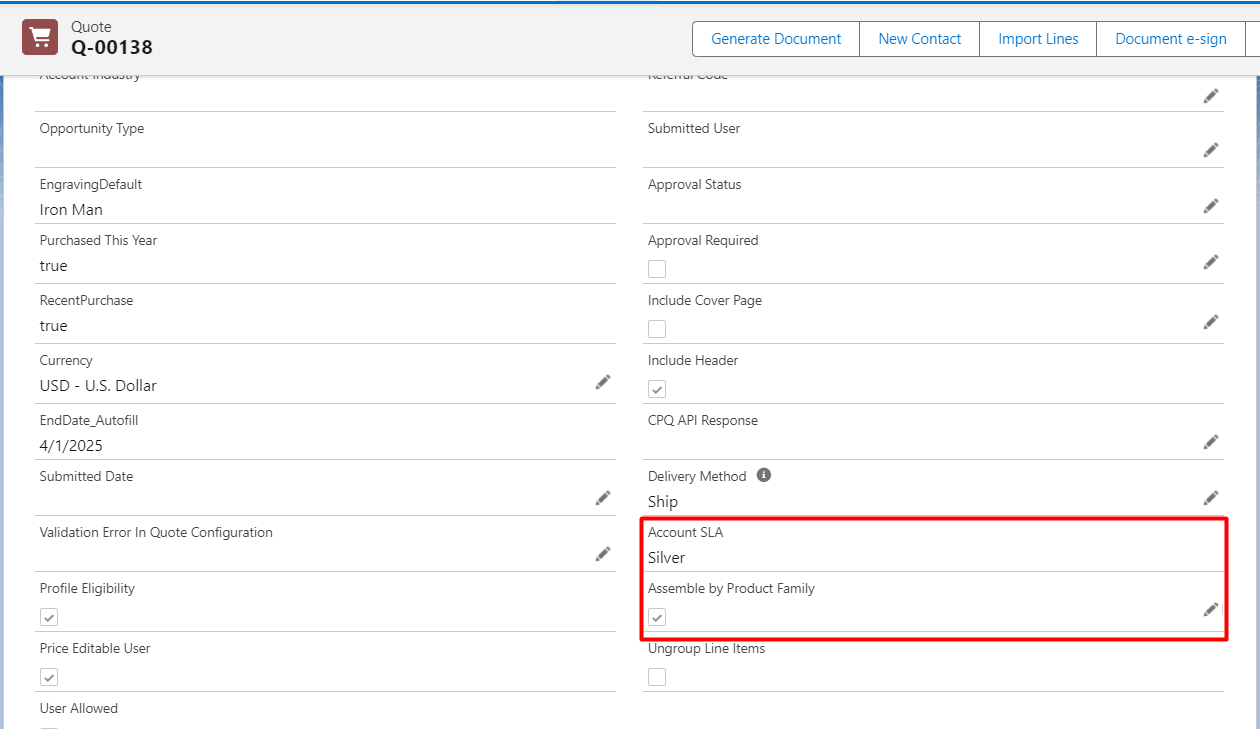
In below sections I have used “Conditional Print Field” of section to display the product details conditionally on basis of the quote field under this. I have two custom checkbox fields under my quote object which I am going to use conditional rendering of my line items while generating the document.
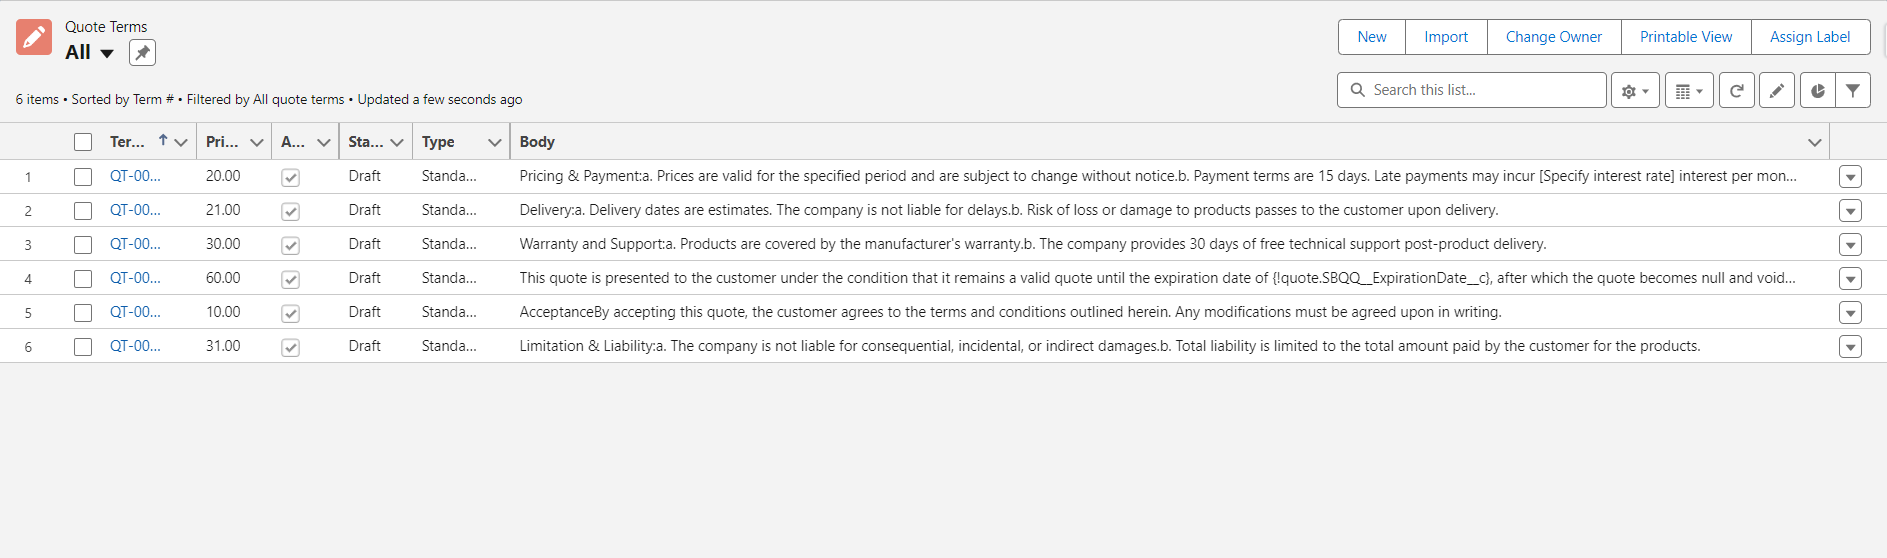
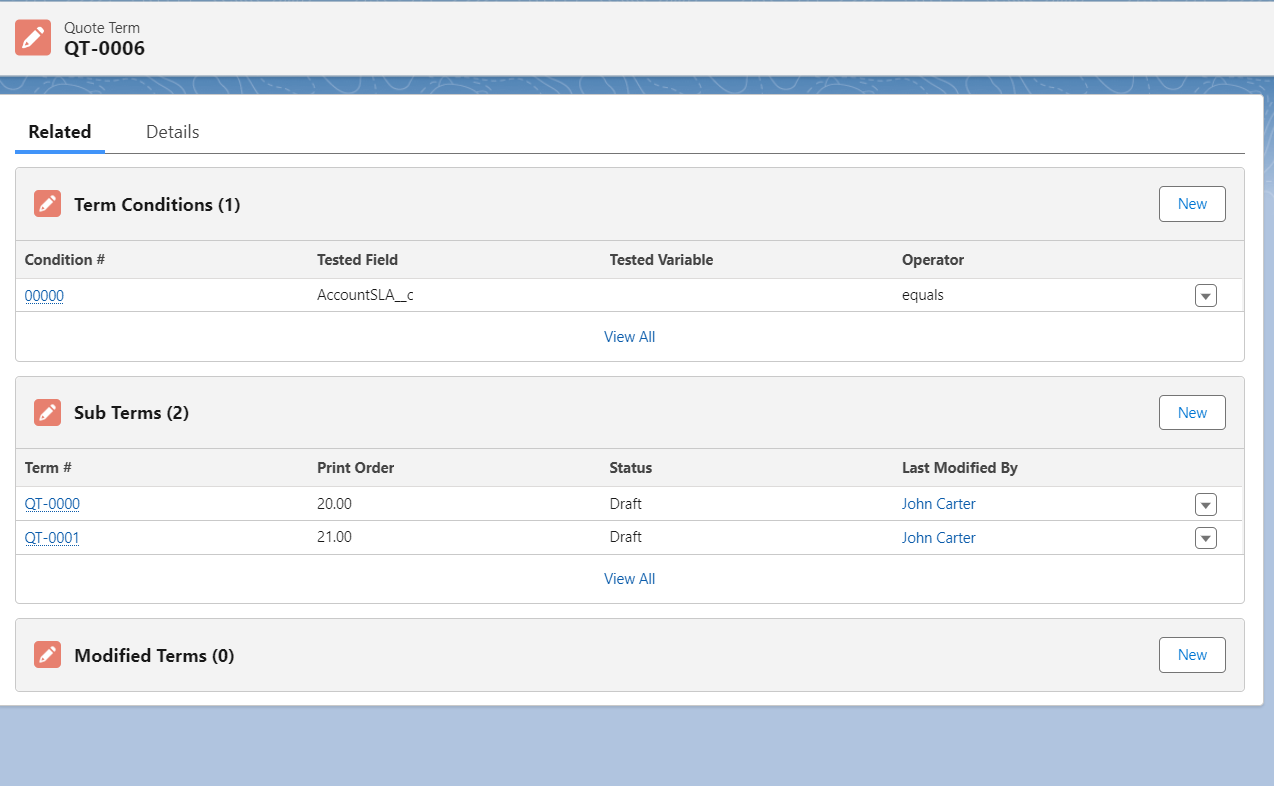
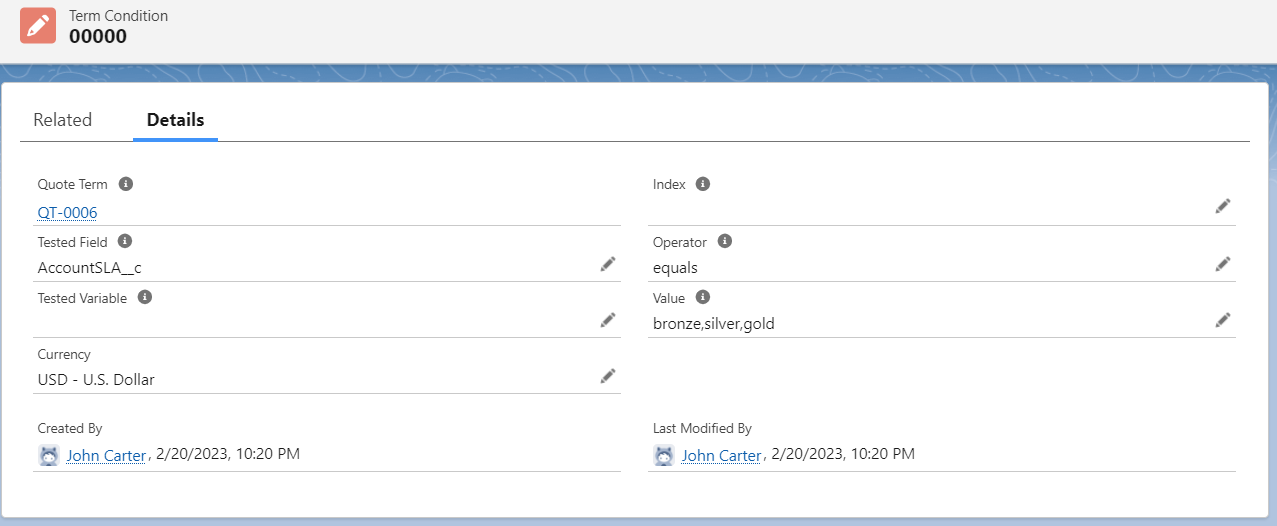
In below section I have my terms which I already have under Quote Term object. You can have your custom terms and conditions and also you can render them conditionally. For e.g. You can show/hide terms on basis of parent term or term condition mention under term records. Like in below image I have mention term condition and when this condition will meet then only these sub terms will be appear on template.
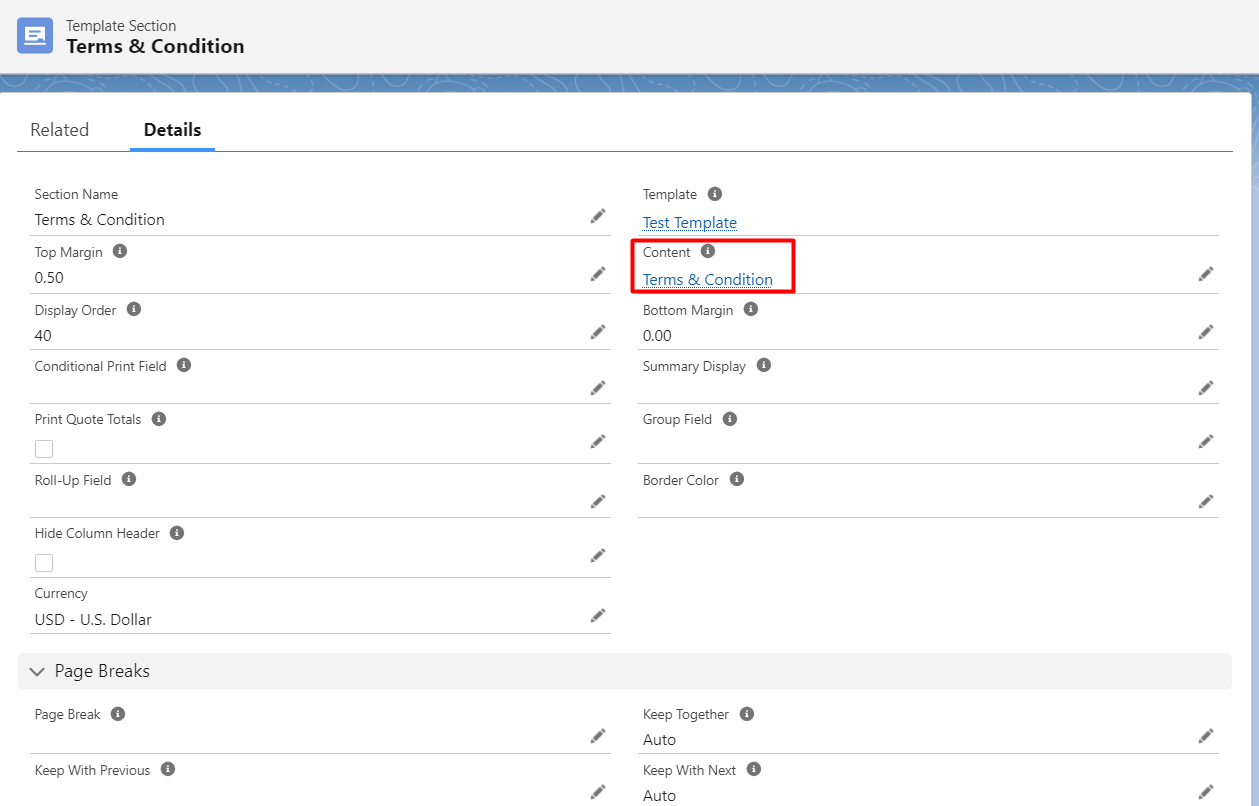
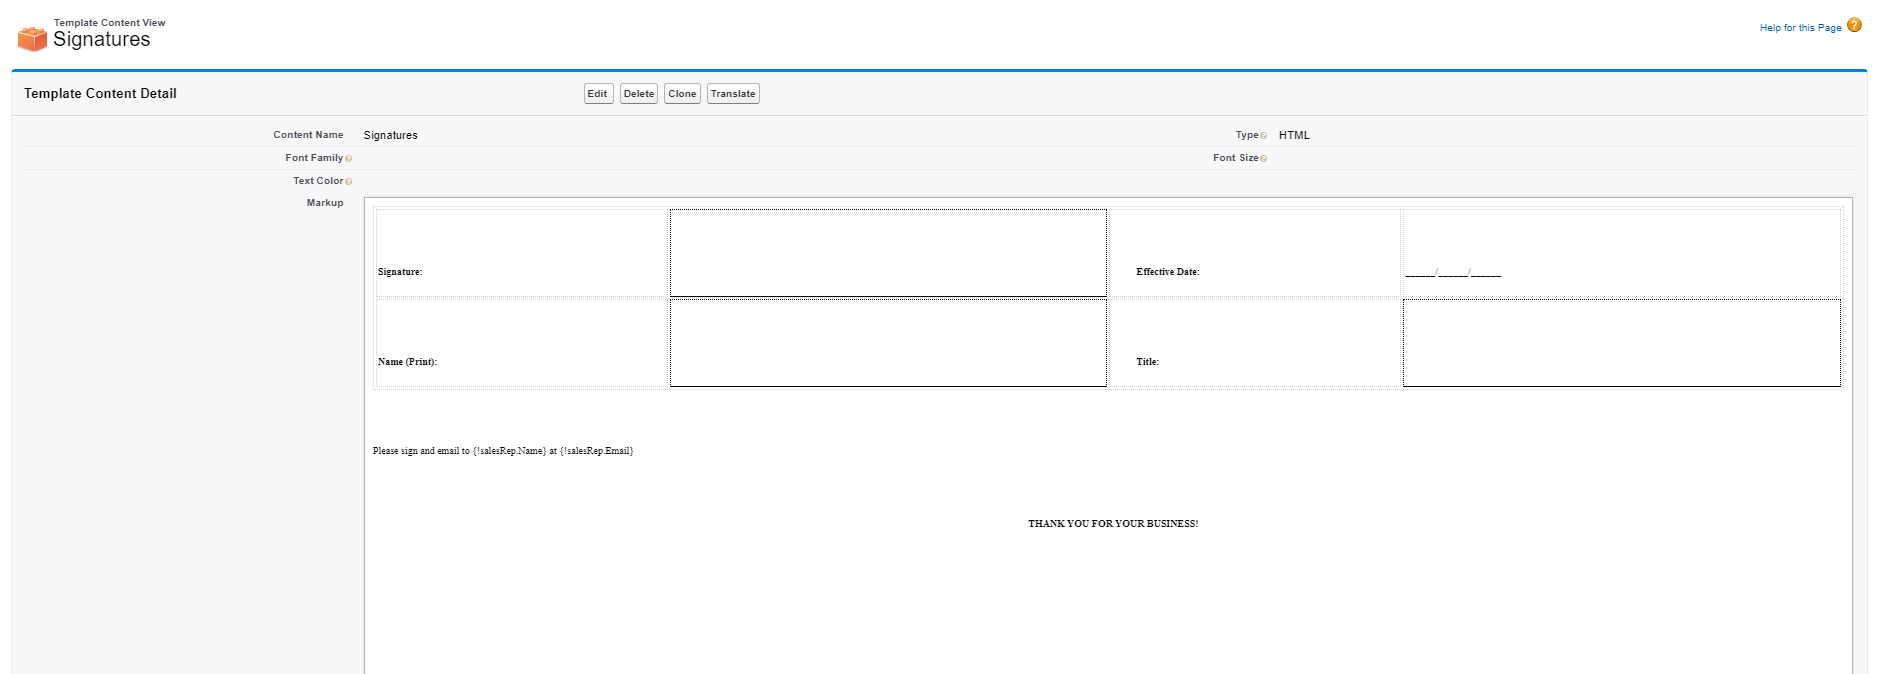
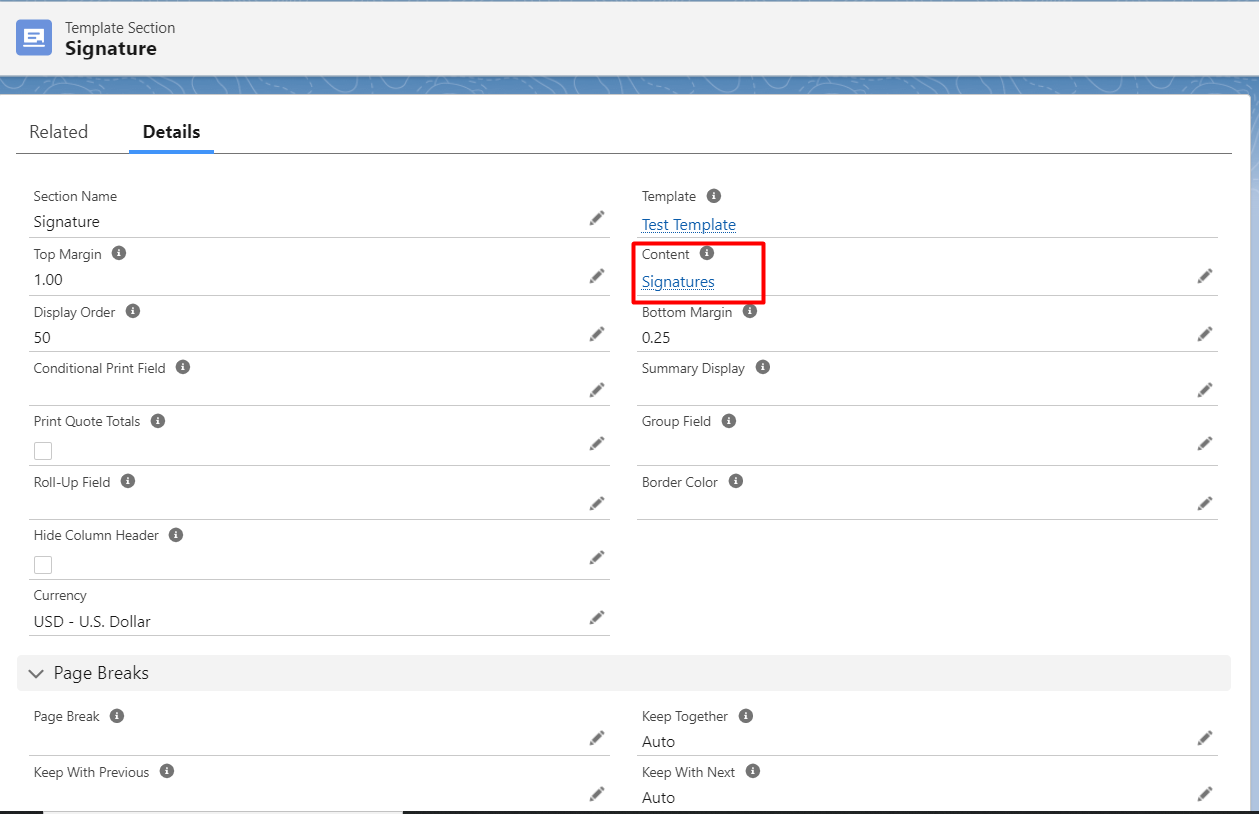
In the Bottom of the template, I want to add signature part so I have created a section for signature and add customize signature content in that section.
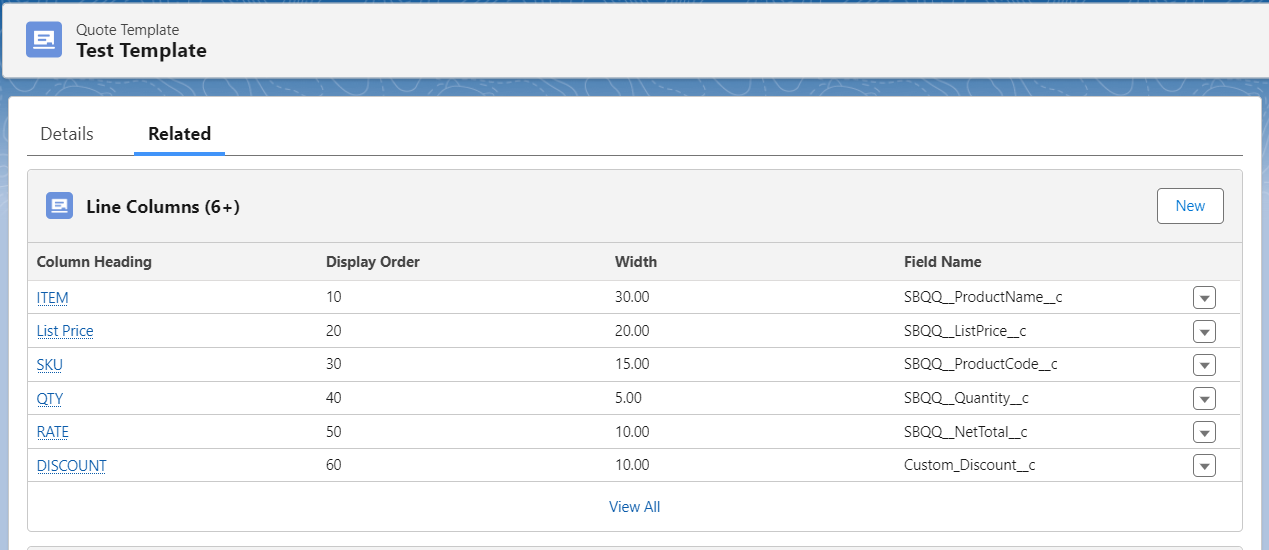
You can also customize the line items columns fields, width (sum of all columns width max to 100 only) under Line Columns under related tab of Quote template.
Recommendation: Try to preview the document from button on Quote to get clear figure that adding of each section and changes appearing in document as you needed.
Now the template creation is completed it’s time to generate the document using this template.
Click on Quote Record → Generate Document → Select Template name → Preview/Save and Send
Note: Currently In my Quote record the ‘AccountSLA’ field is empty for which I have added conditionally rendering term condition. Also, I have ‘the Ungroup line Item’ checkbox true which I used under the line Item section conditionally rendering earlier.
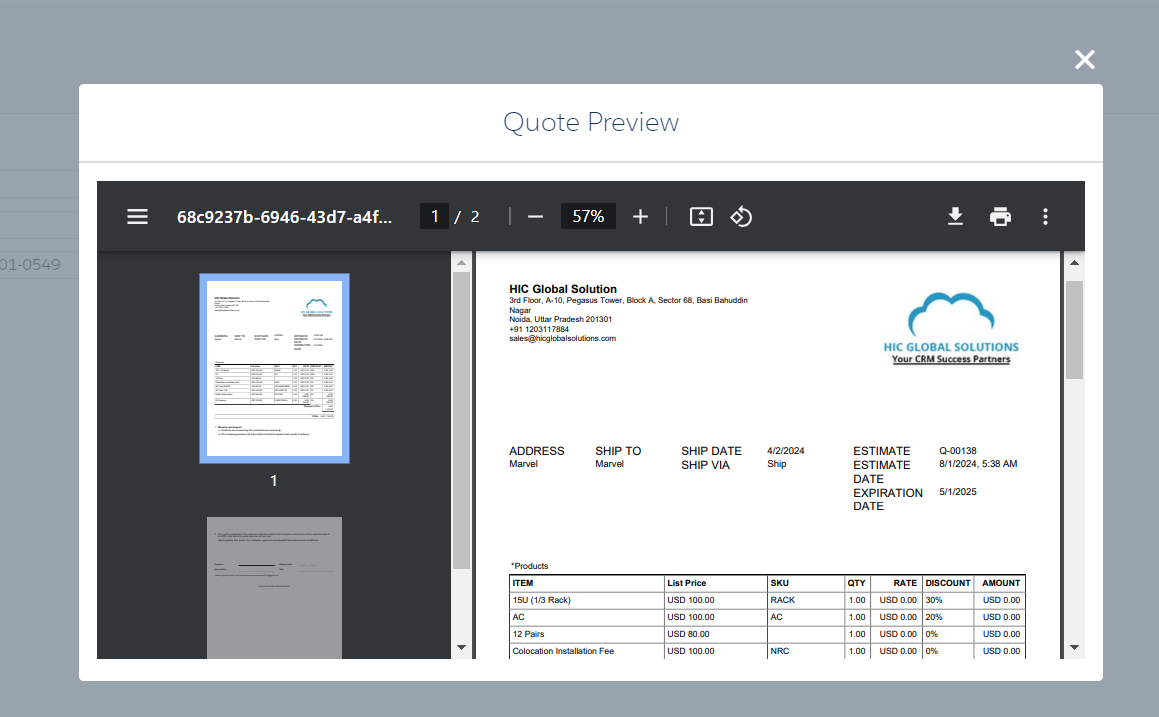
Let’s check how well our document looks in this condition. 👇
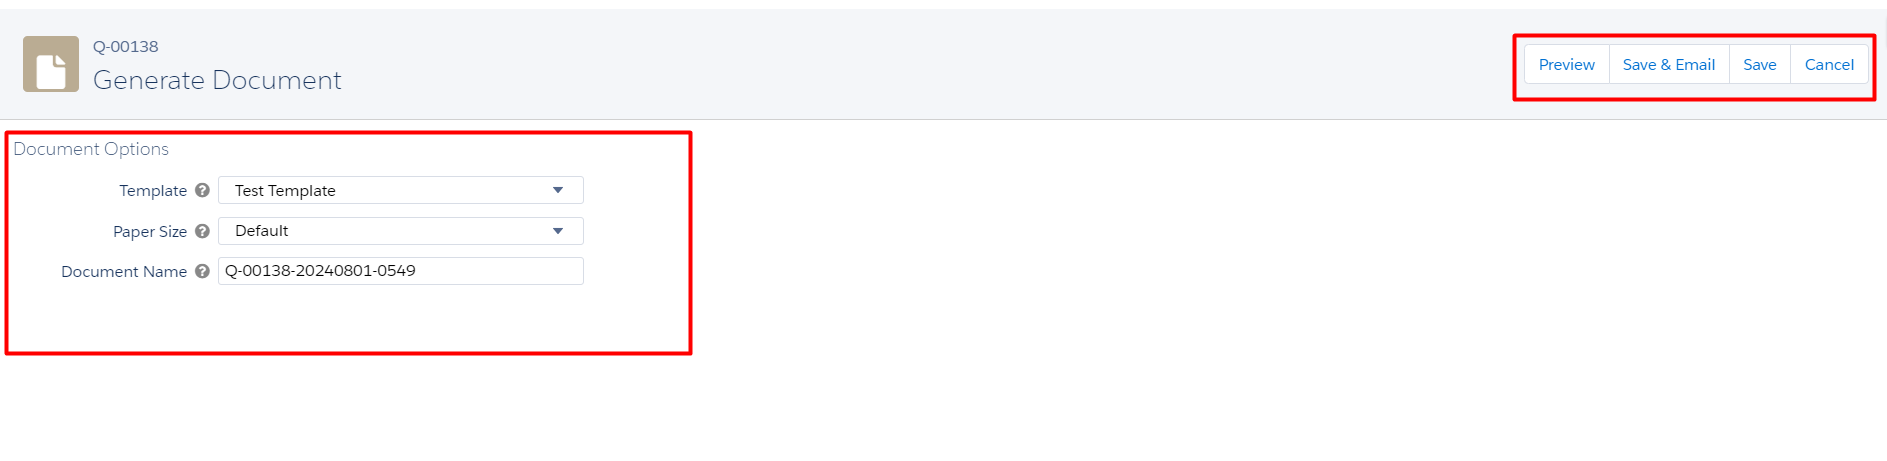
On Preview
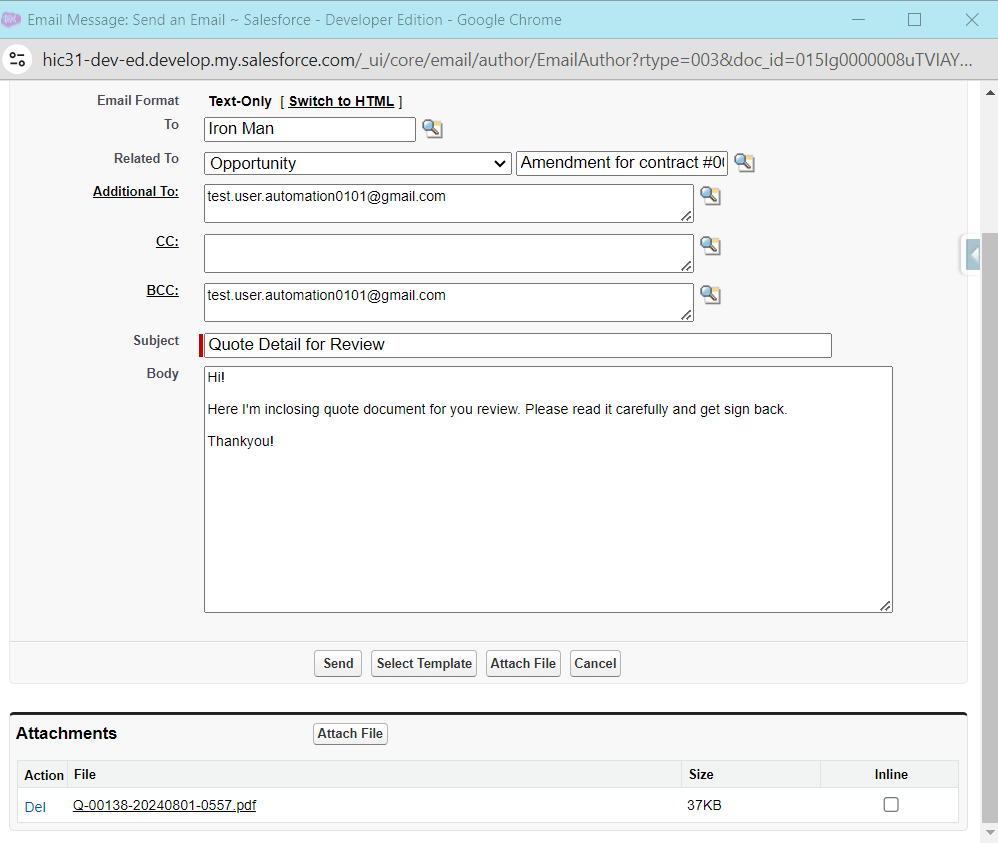
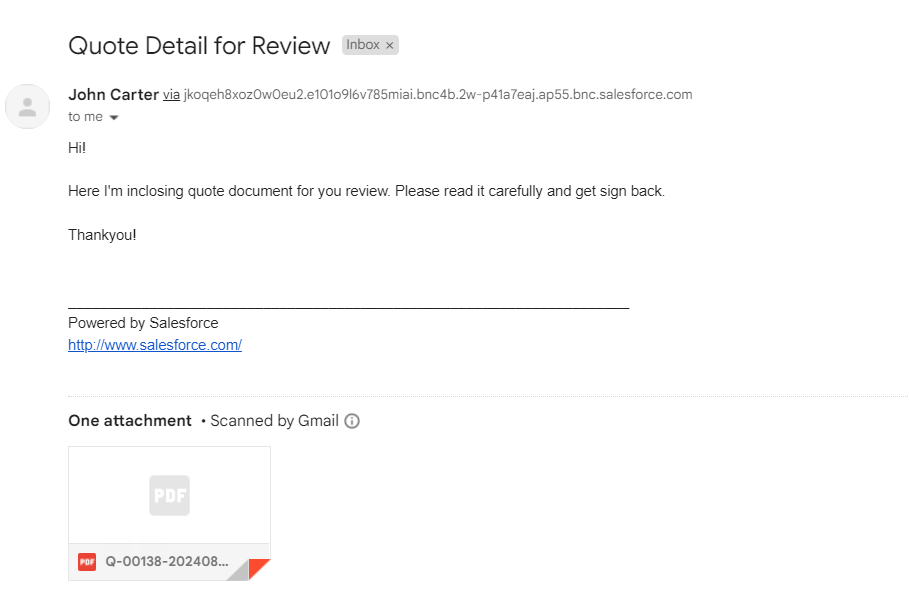
On Save and Send
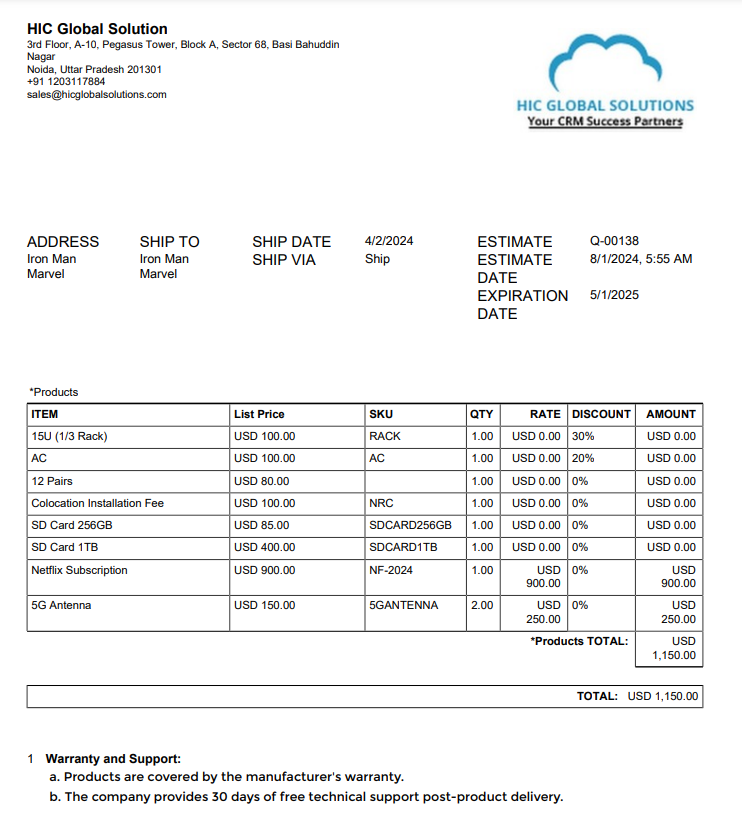
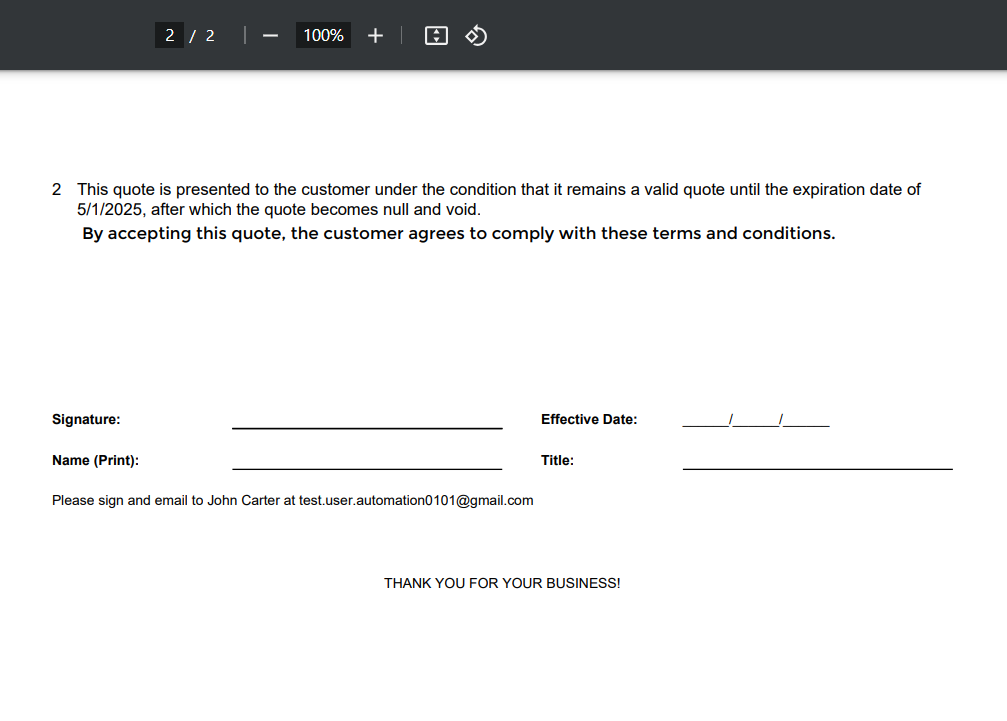
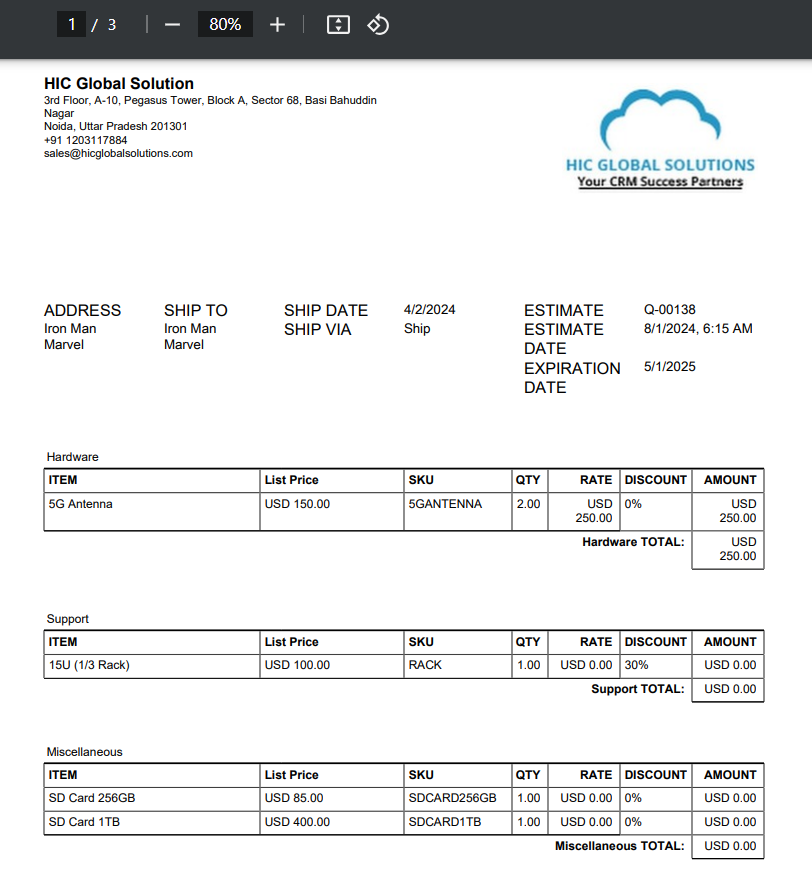
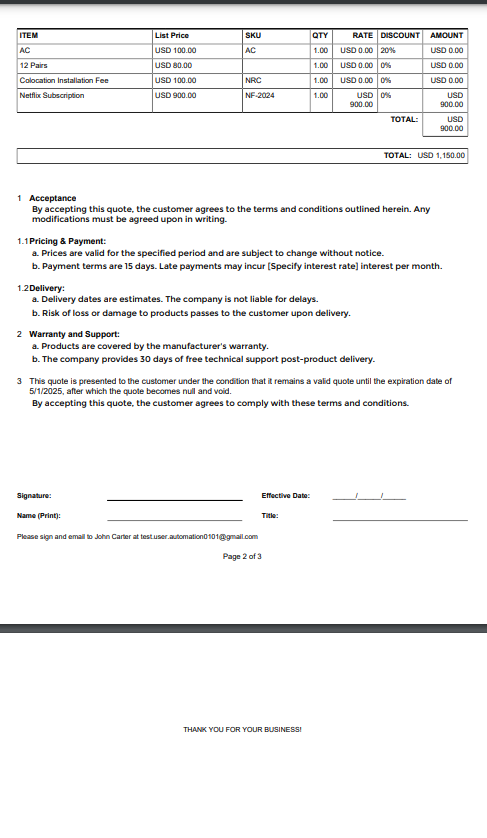
Now let’s check how the document changes on the range of field values that we have earlier set on the creation of a section for line item and Term. 👇
Conclusion
Gaining proficiency with customization methods and quote templates will greatly improve your sales process. You are ready to make the most of this effective tool once you have set up your Quote Templates.
By using Salesforce CPQ Dynamic Quote templates, you can reduce human error and help automate the quote generation process. Time savings are another benefit of developing an improved Quote Template. And the outcome will be a precise, expert quote for your group and your clients.
Stay tuned for more latest updates and step-by-step guide!